यह आर्टिकल अभी हिंदी में नहीं है, इसलिए इसे अंग्रेज़ी में दिखाया जा रहा है।
कैसे करें
Customer segments
Group customers by behaviour or details for targeted campaigns.
You can sort your customers into groups, like new customers or customers from the last 30 days, and then send an offer to just those customers. This helps you reward regular customers or bring back the ones you choose.
Before you start
- You need at least one customer in your store. You can also add one yourself with Add customer on the Customers page.
Find a group of customers
- Open nadi.ordrio.com (your Ordrio admin panel) and log in.
- In the left menu, click Customers. You see every customer with their Email, number of Orders, how much they have Spent and their Type.
- Click Any type and choose a type: Registered or New. The list now shows only customers of that type, and the count under Customers changes to match.
- Click the date filter (it shows All time at first) and choose Today, Last 7 days, Last 30 days or Custom range.
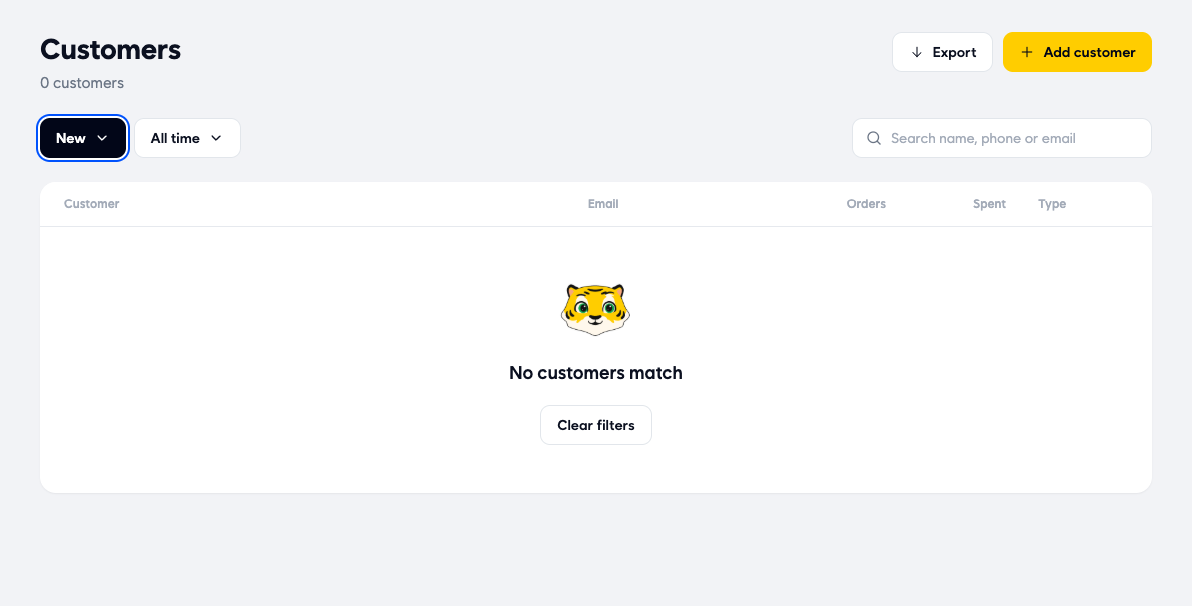
- To find one person, type their name, phone or email in Search name, phone or email.
- If nobody matches, you see No customers match. Click Clear filters to see everyone again.
Give an offer to a group of customers
- Click Settings at the top of the page, then click Offers & coupons under Payments.
- Click Create offer. The New offer page opens.
- Under What kind of offer?, choose Amount off (a flat amount, like ₹50) or % off (a share of the order).
- Under Discount and code, fill in:
- Discount: how much to take off. This is required.
- Given as: Money off the bill or Cashback.
- Code customers type: the code customers enter at checkout. Click Make a code for me if you want Ordrio to make one.
- Short line customers see: a short message that tells customers about the offer.
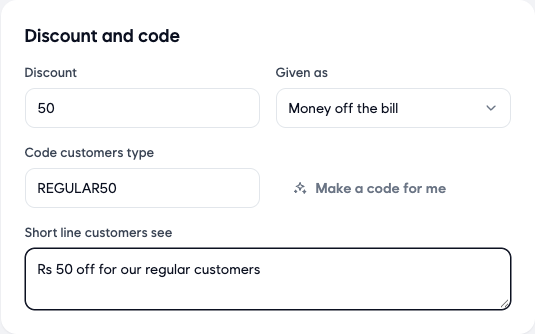
- Under Who and where, set Who can use it to Specific customers. The line Customers · 0 picked appears.
- Click Choose. In Choose customers, search by name, phone or email, tick each customer you want, then click Done. The line now shows how many you picked, for example Customers · 1 picked. Click Change to edit the list later.
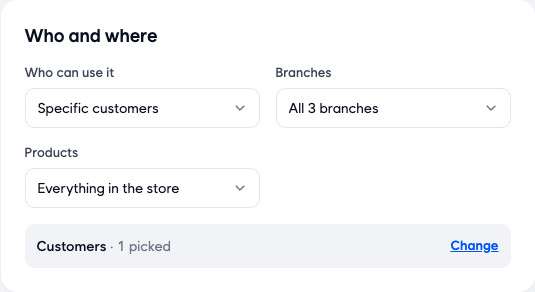
- Still under Who and where, choose Branches (all branches or Specific branches) and Products (Everything in the store, Specific categories or Specific products).
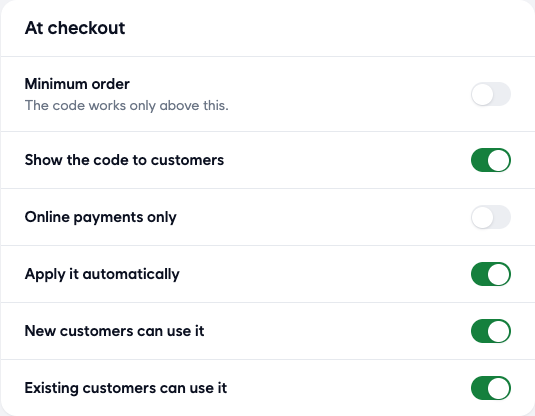
- Under At checkout, turn on or off:
- Minimum order: the code works only above the amount you set.
- Show the code to customers
- Online payments only
- Apply it automatically
- New customers can use it
- Existing customers can use it
Use the last two switches to keep the offer for only new or only existing customers.
- Under Limits and dates, turn on Limit total uses if you want a limit (off means no limit). Pick Starts on and Start time, and turn on Set an end date if the offer should stop on a date. If it stays off, the offer runs until you stop it.
- Click Save offer. Your offer appears in the Offers & coupons list, which counts offers as Running, Scheduled and Ended. The list shows who can use each offer, for example Everyone or the number of customers you picked.
The discount, code and message in the screenshots are examples. Use your own.
Good to know
- If you choose Specific customers and pick nobody, you see Pick at least one customer. Click Choose and pick at least one.
- Customers type the code at checkout.
- Your customers' names, phone numbers and emails are private. Pick customers in Choose customers and don't share your offer list outside your team.
Related
- Marketing notifications
- Creating and managing coupons
- Abandoned cart recovery
क्या यह आर्टिकल काम का था?