यह आर्टिकल अभी हिंदी में नहीं है, इसलिए इसे अंग्रेज़ी में दिखाया जा रहा है।
कैसे करें
Delivery zones and geo mapping
Set where each branch delivers on a map, by distance or a custom shape, with a delivery charge per area.
Delivery areas tell Ordrio where each branch delivers. You mark each area on a map, either as a distance around a point or as a custom shape you draw, and give it a delivery charge. Customers outside your areas cannot get local delivery from that branch.
Before you start
- Make sure your branch is set up in Settings > Branches. Each branch has its own delivery areas.
- To draw areas in any shape, you need the free Polygon add-on. Distance areas work without it.
Open your delivery areas
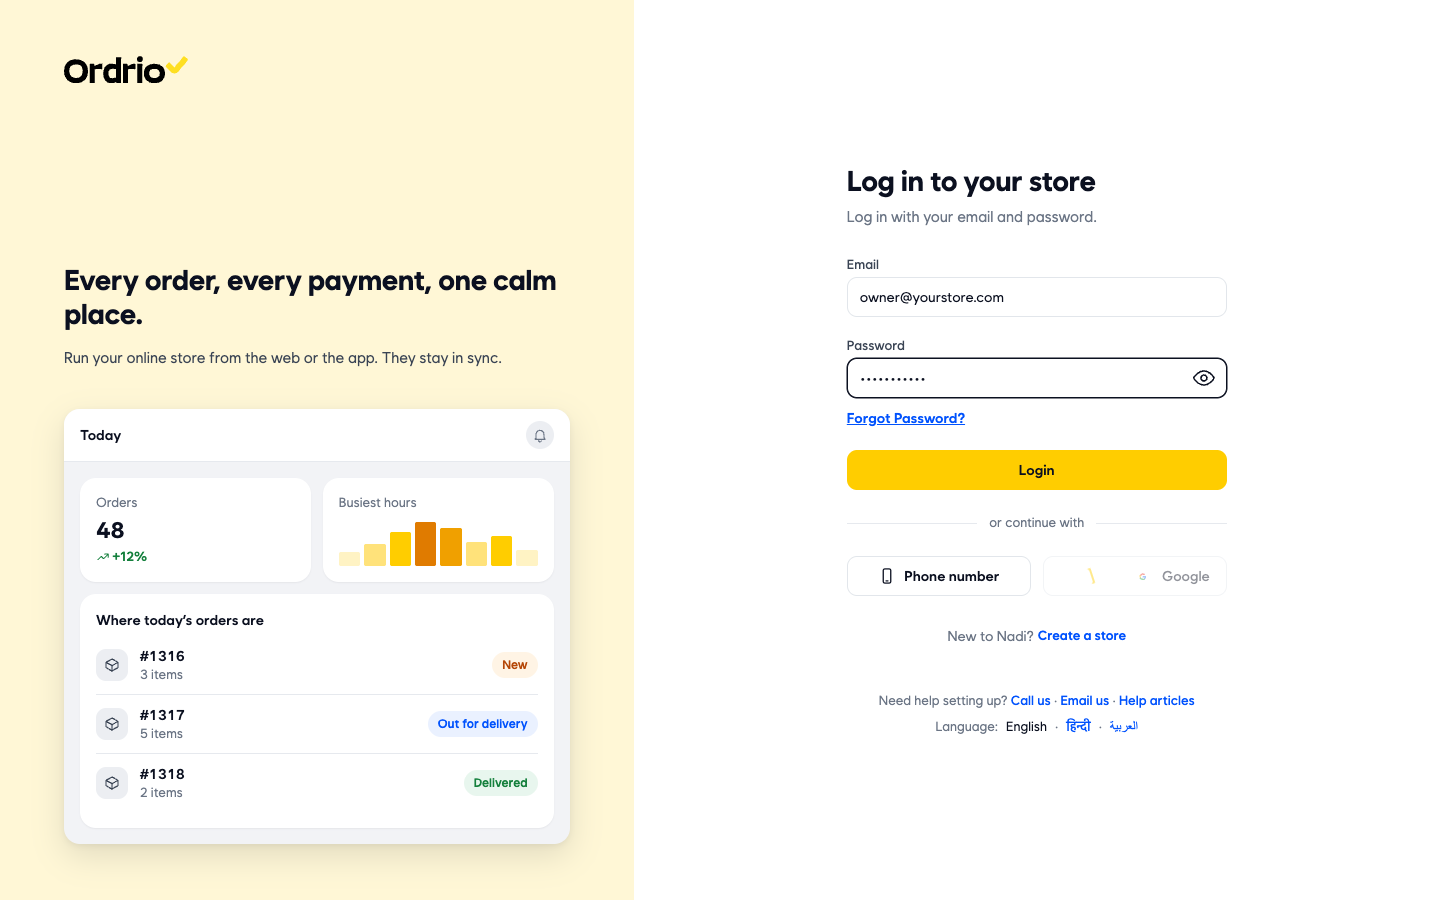
- Open nadi.ordrio.com (your Ordrio admin panel) and log in with your registered email and password. The screenshot shows example values. Use your own.
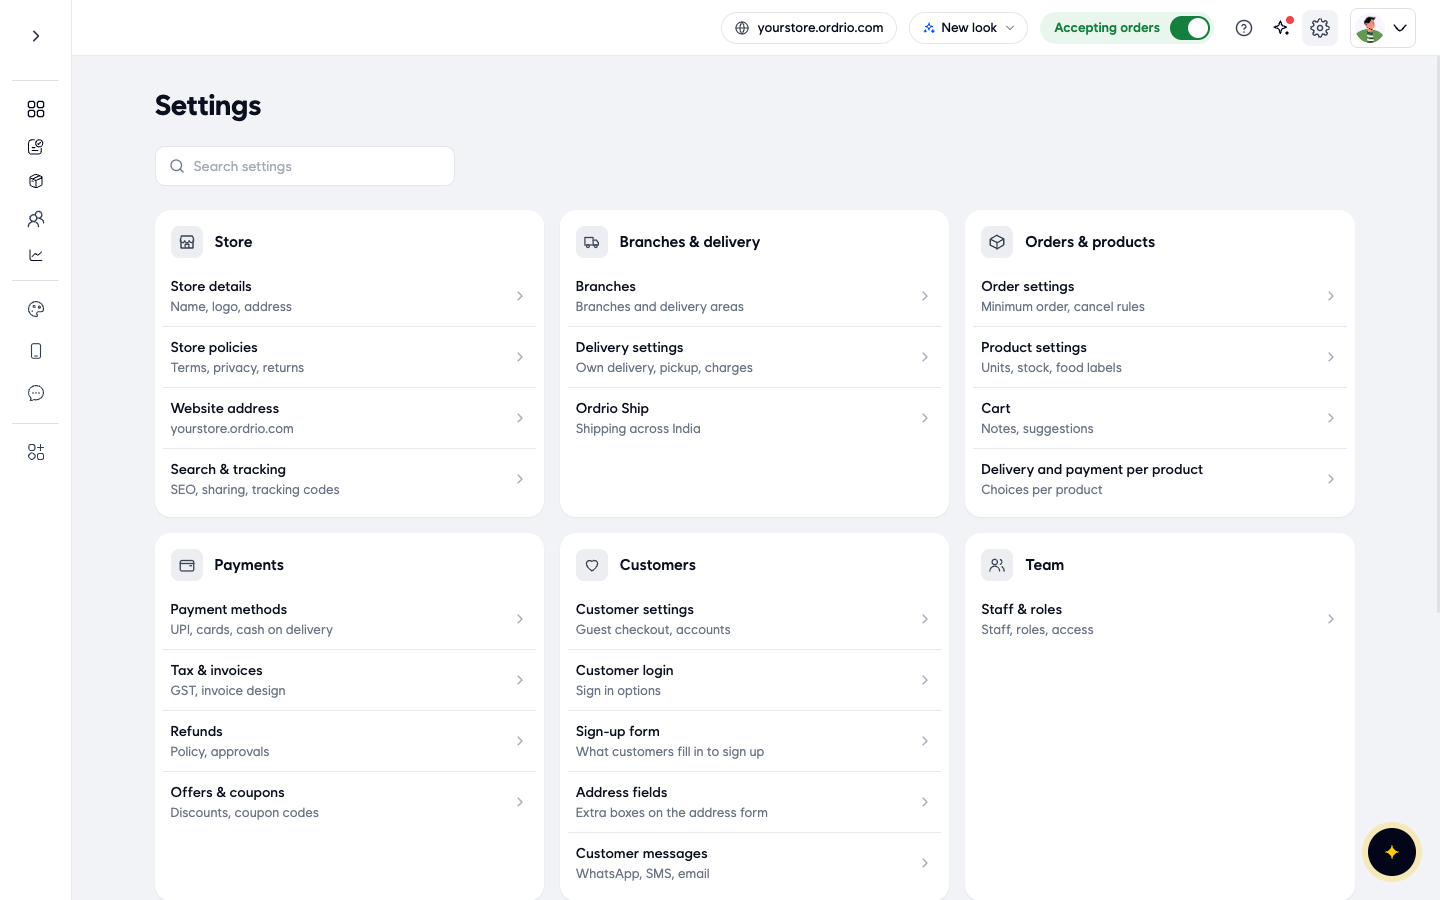
- Click the gear icon at the top right to open Settings. Under Branches & delivery, click Branches (Branches and delivery areas).
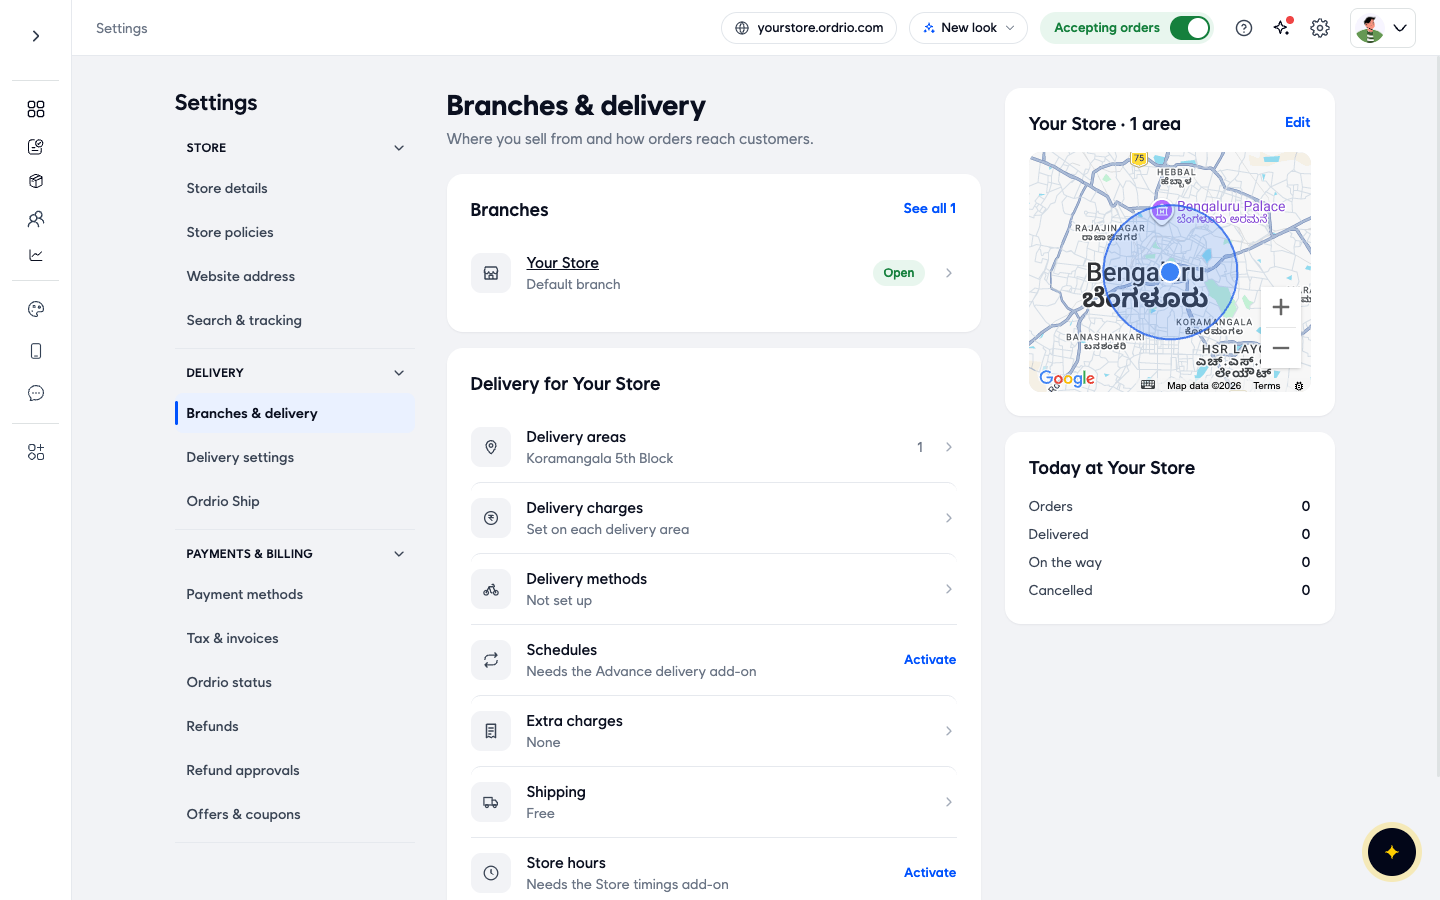
- The Branches & delivery page shows your branches and, under Delivery for your branch, rows for Delivery areas, Delivery charges, Delivery methods, Extra charges and Shipping. The map on the right shows the areas you already have. Click Delivery areas.
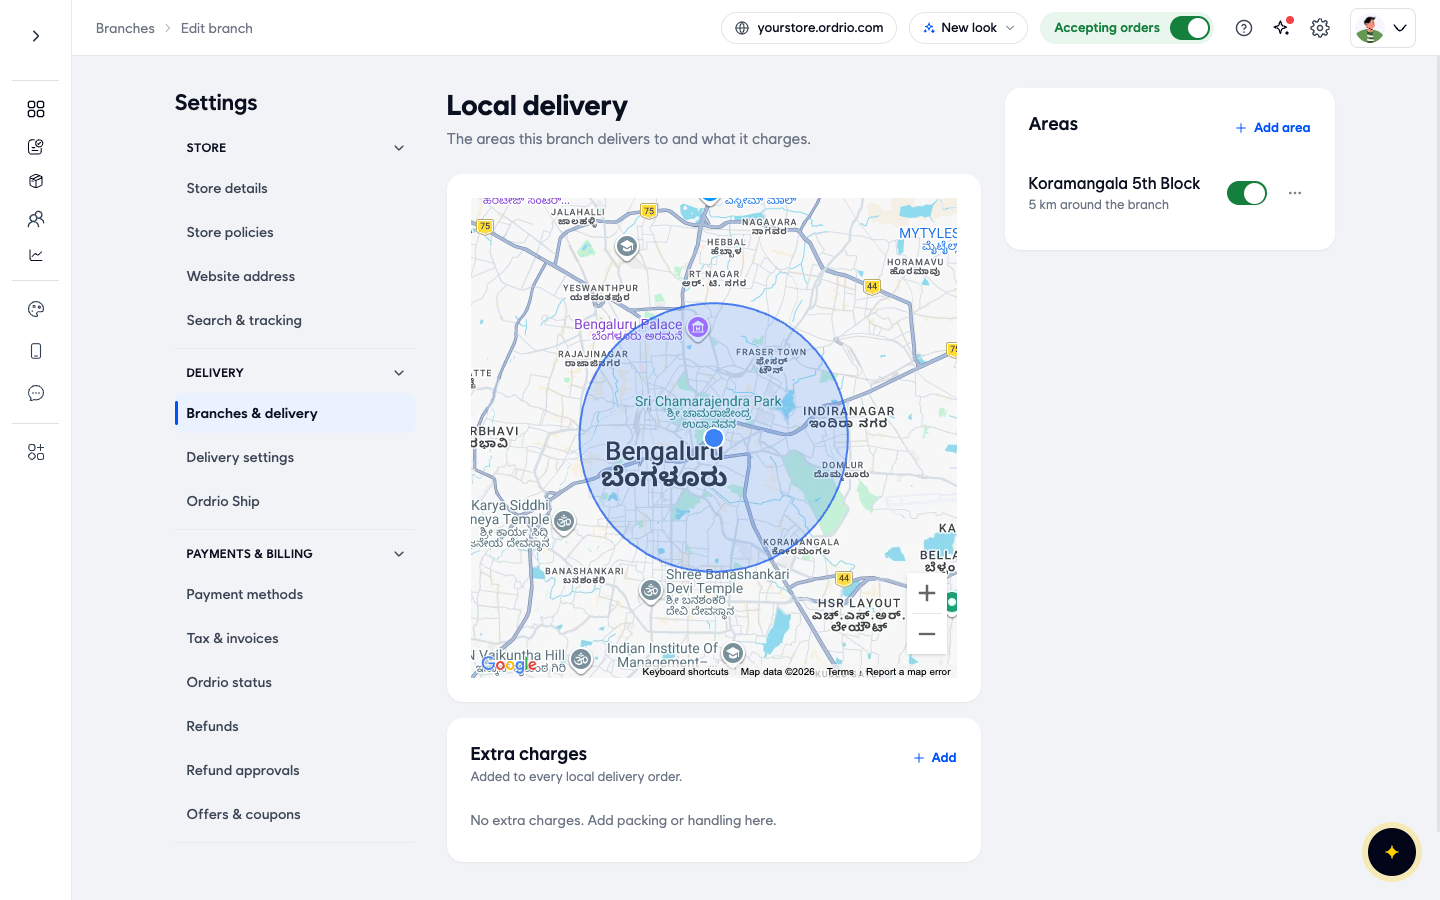
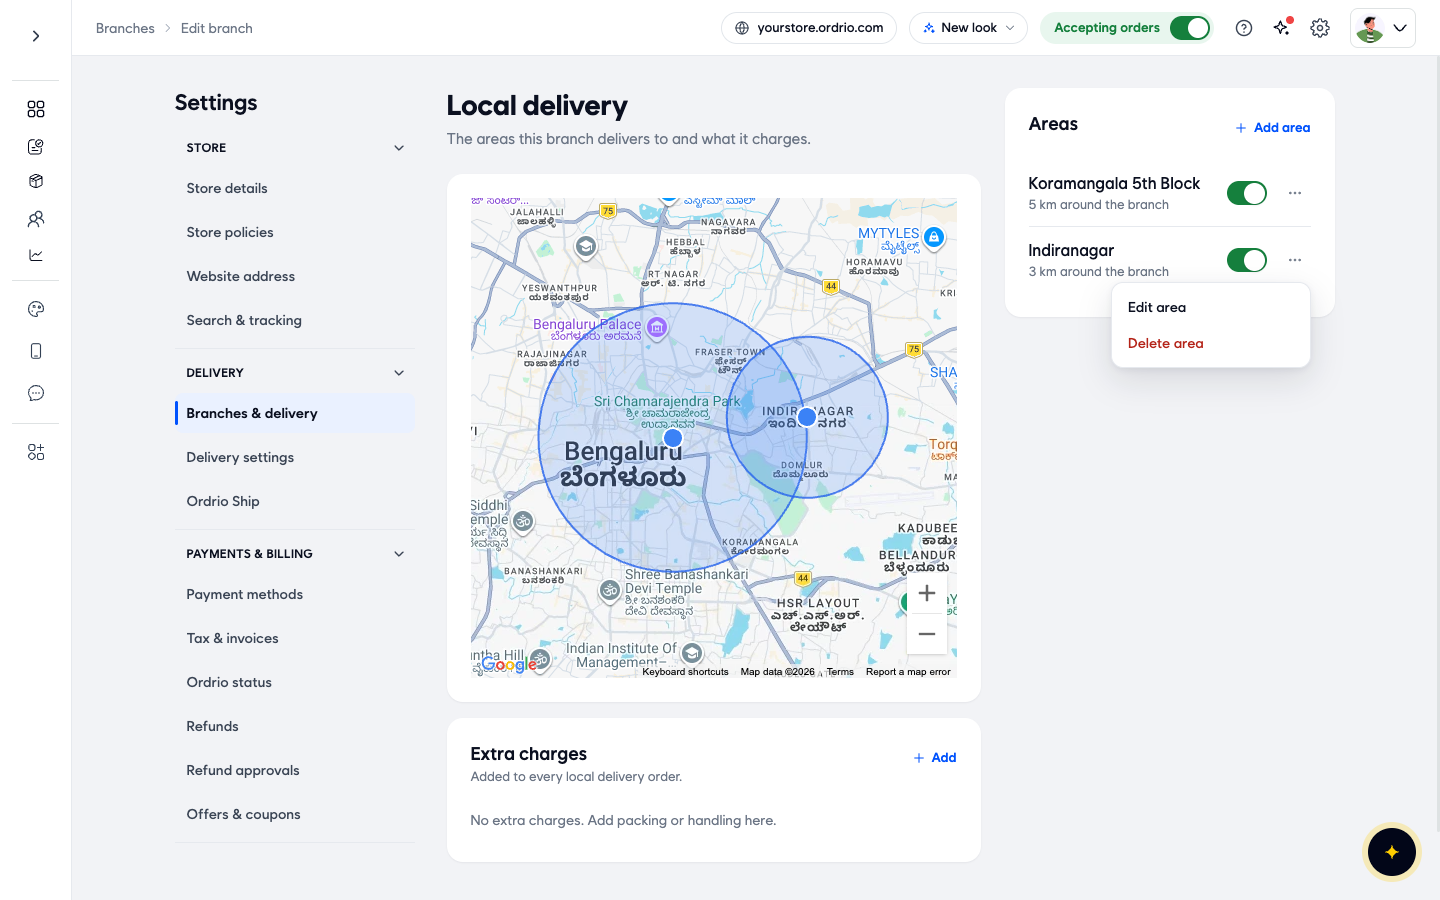
- The Local delivery page opens. The map shows every area of this branch, and the Areas list on the right shows each area's name and size. Click Add area.
Add an area by distance
Use Distance when you deliver to everyone within a set distance of a point, for example 3 km around your shop.
- On the New area page, keep the Distance tab selected.
- In Search a place, type the place you want the area to centre on and pick it from the list. You can also click the location button next to the search box to use your current location. The pin moves to that place.
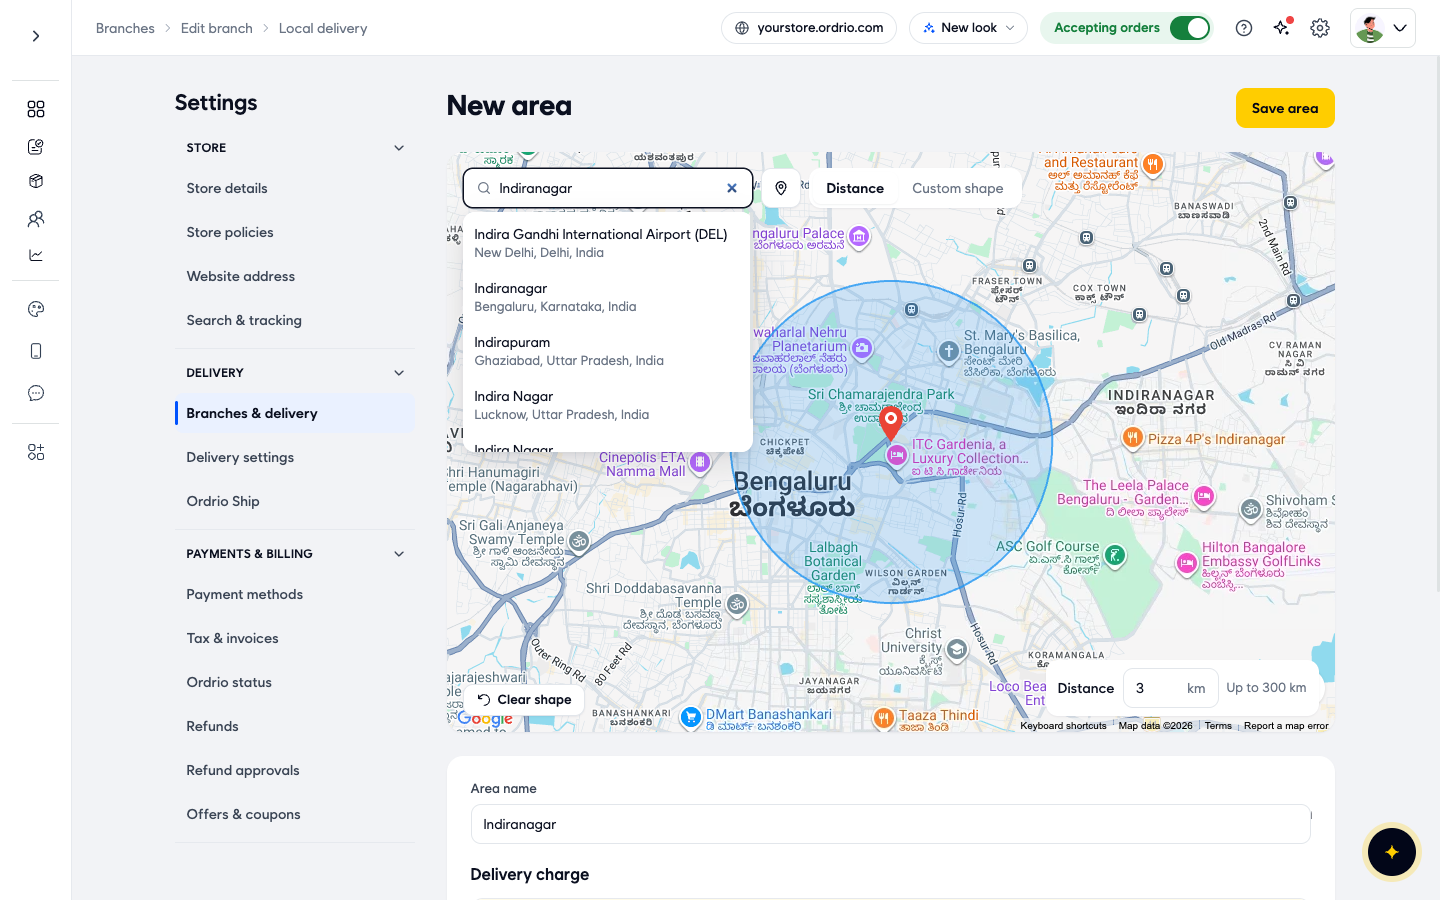
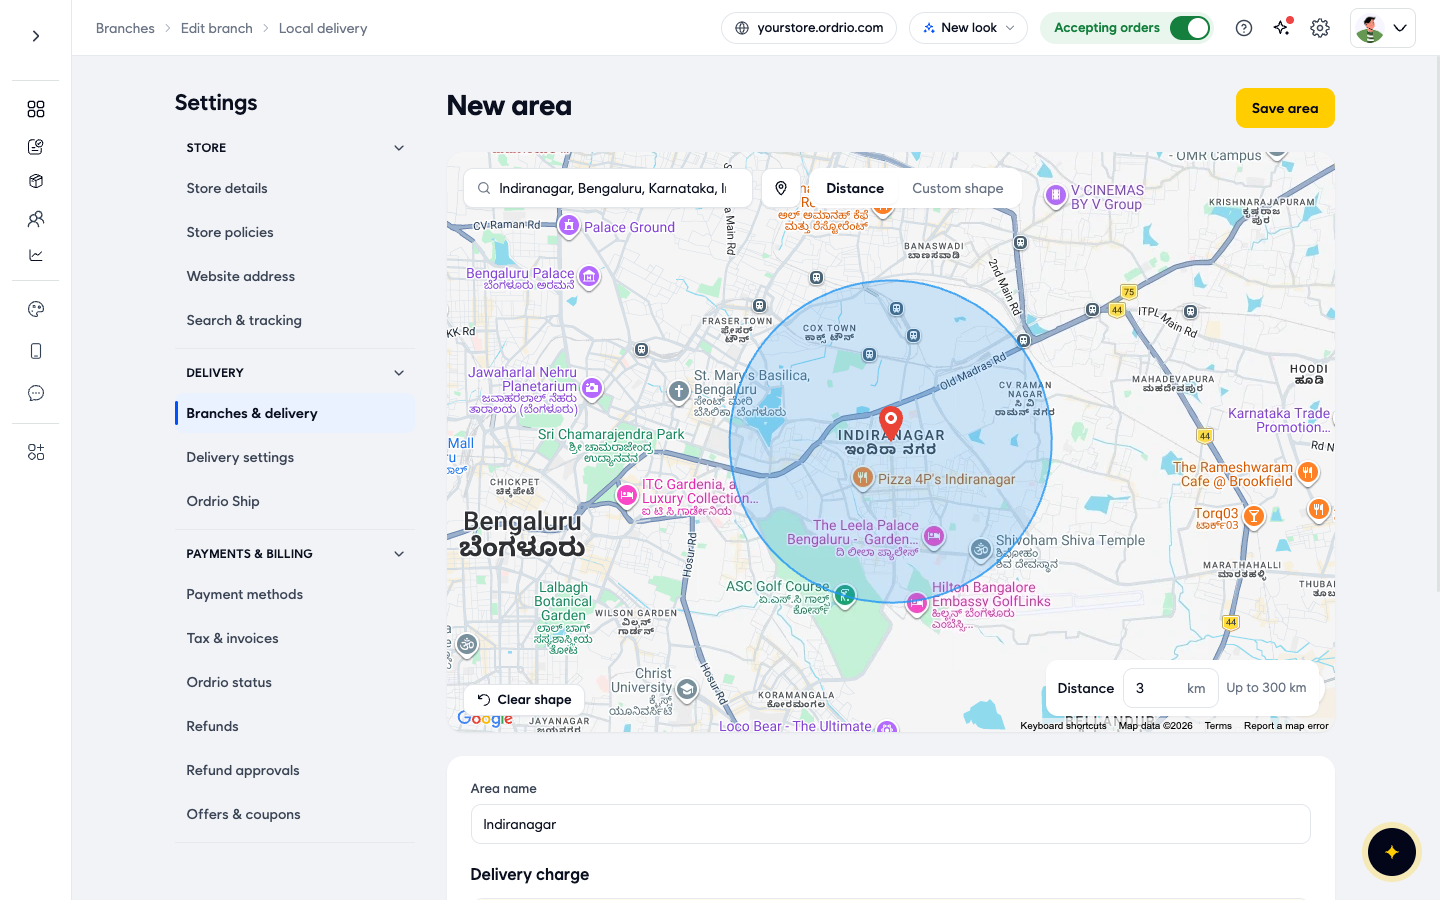
- In Distance (bottom right of the map), type how far you deliver, in km. You can enter up to 300 km. The blue circle on the map shows the area. Click Clear shape to start again.
- In Area name, type a name your team will recognise, for example the neighbourhood name. Ordrio fills in the address of the pin, and you can change it.
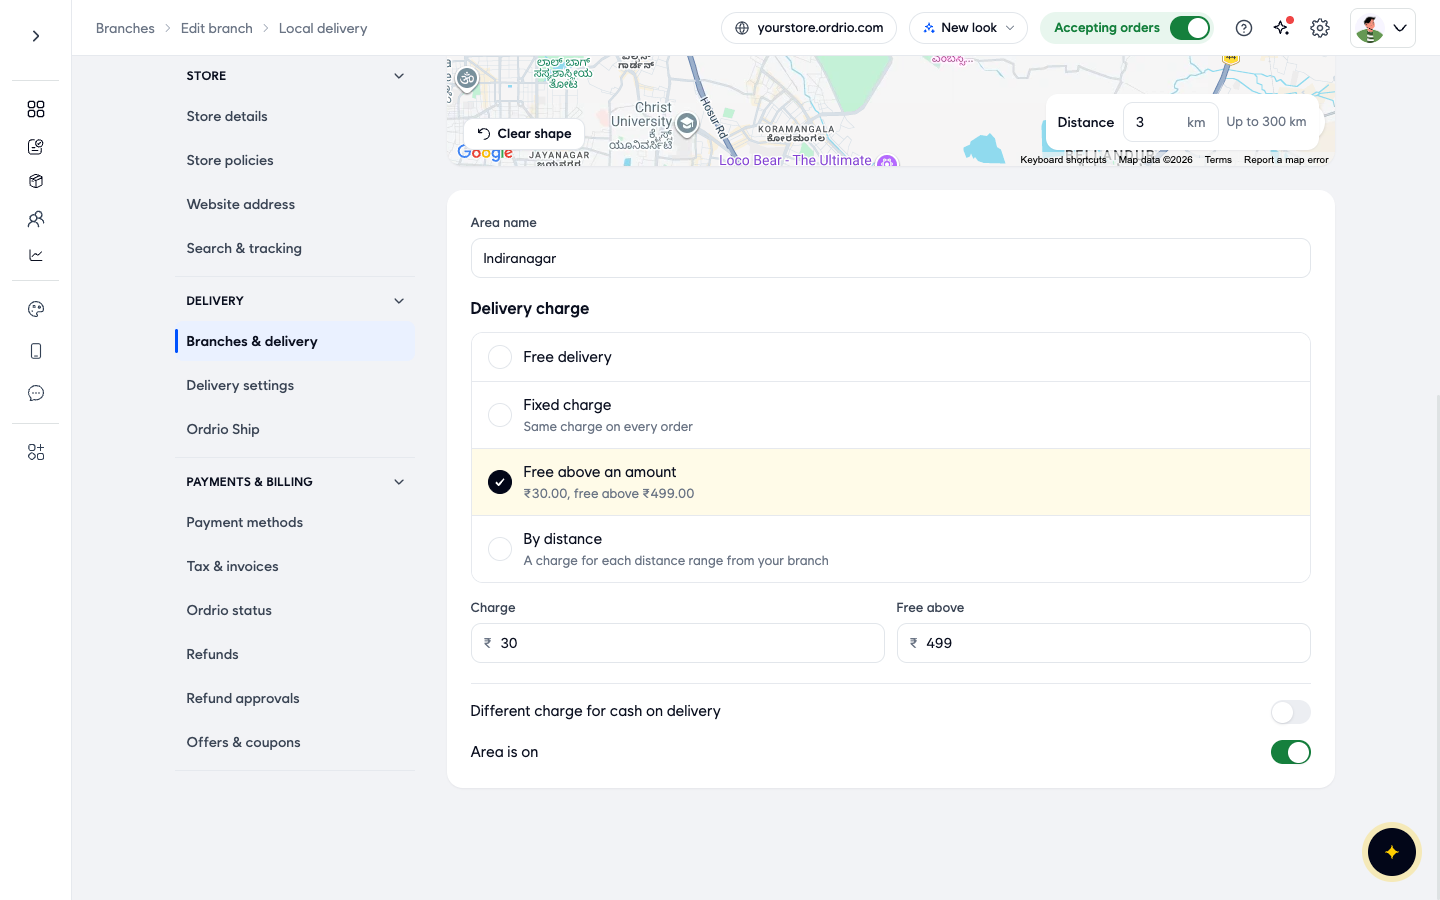
- Under Delivery charge, choose what customers in this area pay for delivery:
- Free delivery: no delivery charge.
- Fixed charge: the same Charge (in ₹) on every order.
- Free above an amount: a Charge on small orders, and free delivery when the order is more than the Free above amount.
- By distance: a different charge for each distance range. Each range has From (km), Up to (km) and Charge. Click Add range to add another range. Free above (optional) makes delivery free above an order amount. Distance is measured in a straight line from your branch to the customer's address.
- Turn on Different charge for cash on delivery if cash on delivery orders should pay a different delivery charge. A Cash on delivery charge window opens, where you choose Fixed charge, Free above an amount or By distance, type the Charge, and click Save.
- Leave Area is on switched on so customers can order for delivery in this area straight away.
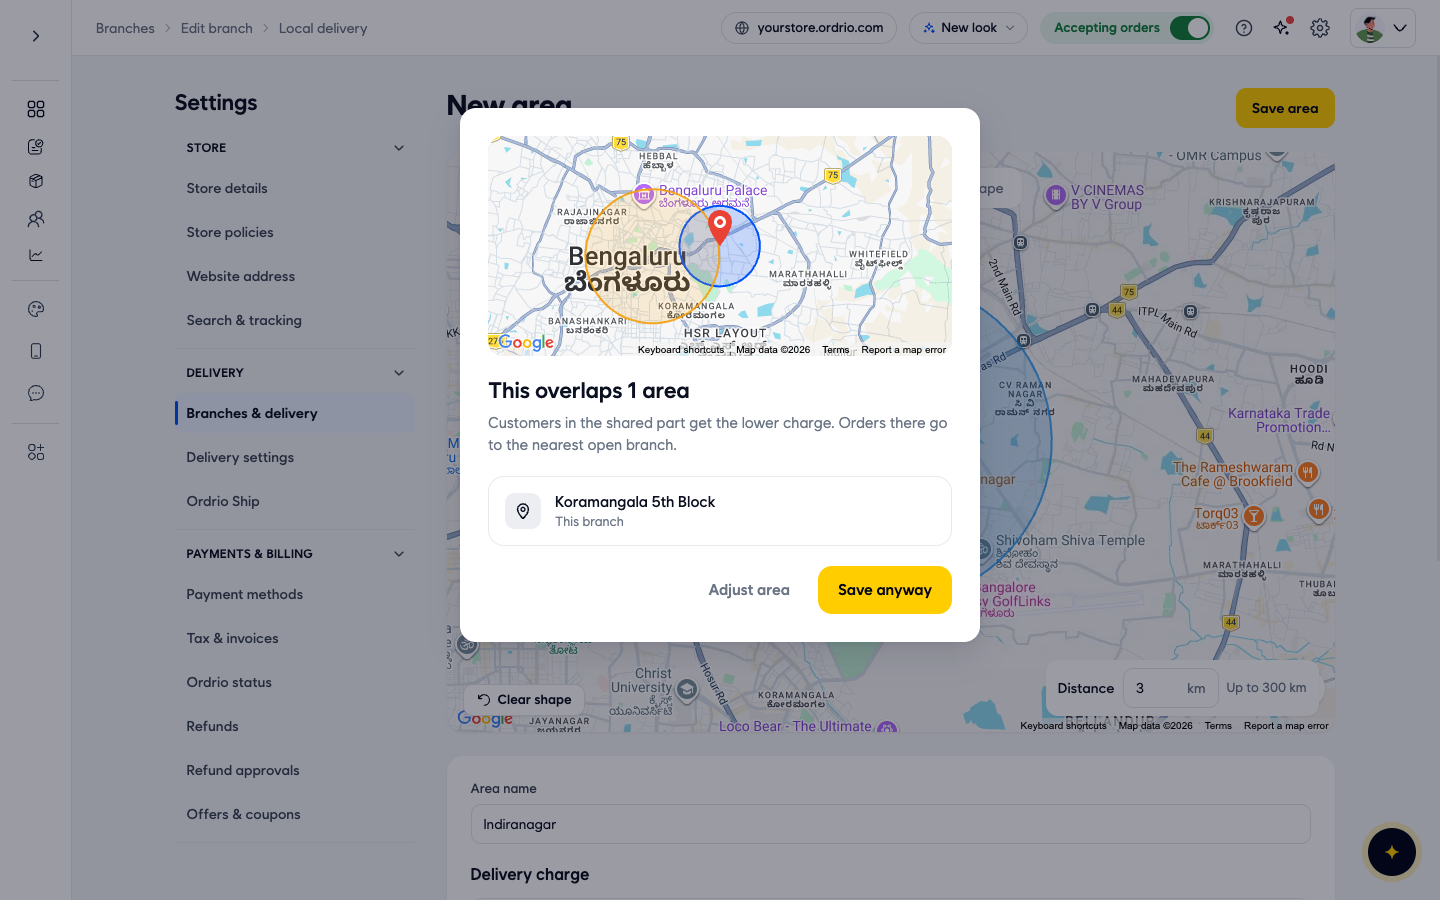
- Click Save area at the top right.
- If the new area covers part of another area, Ordrio shows This overlaps 1 area (or more), with a map and the list of areas it overlaps. Customers in the shared part get the lower charge, and their orders go to the nearest open branch. Click Save anyway to keep it, or Adjust area to go back and change it.
- You are back on Local delivery. The new area is in the Areas list with its size (for example "3 km around the branch") and is drawn on the map. Click the ... button next to an area to Edit area or Delete area.
The example values in the screenshots (place, distance, charges) are only examples. Use your own.
Draw an area on the map (custom shape)
Use Custom shape when your delivery area is not a circle, for example along a main road or up to a river.
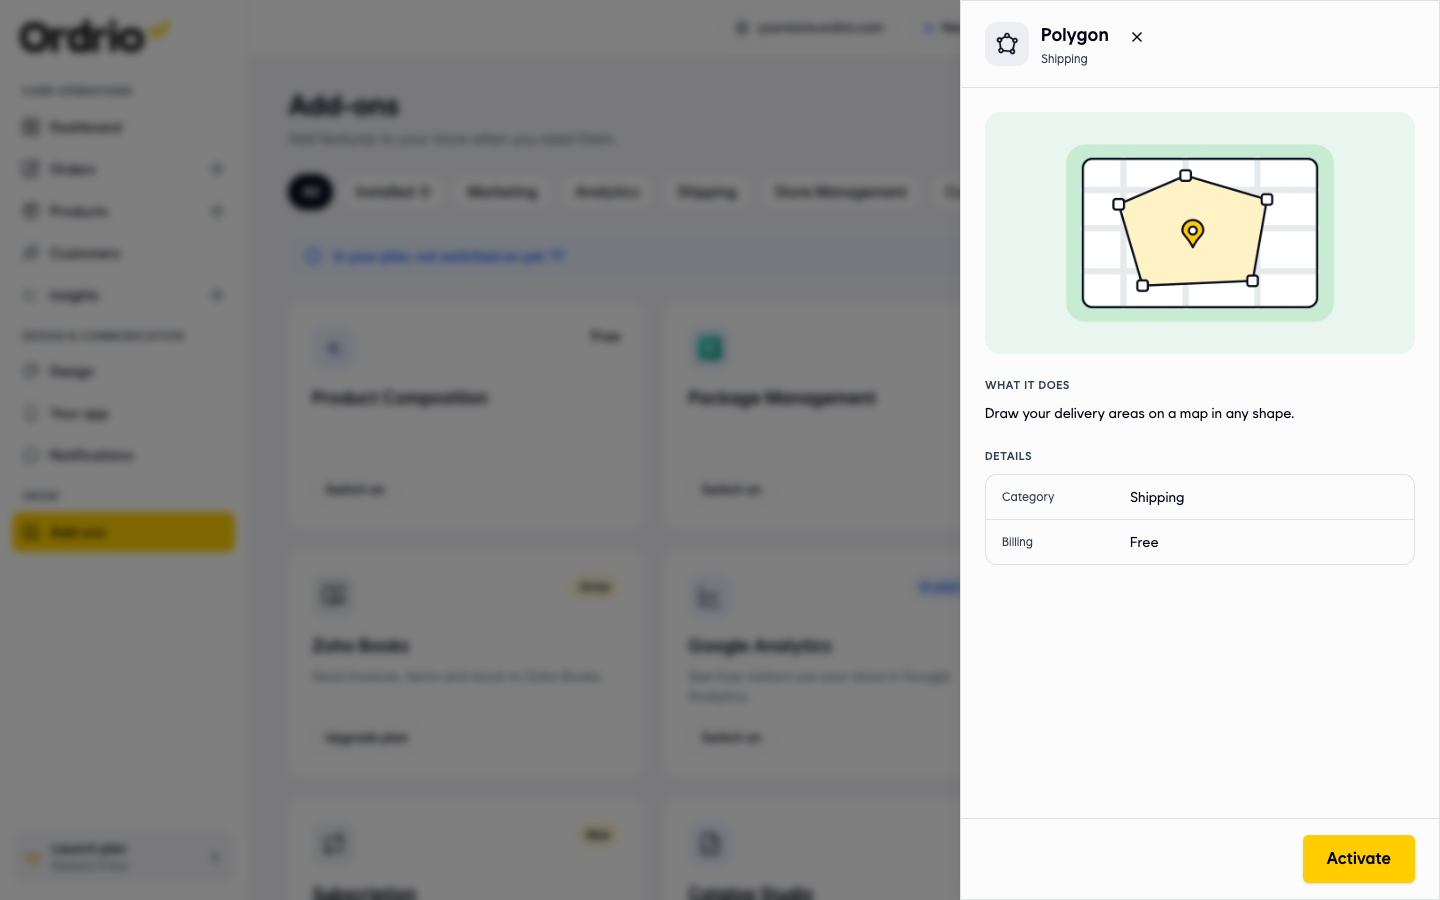
- On the New area page, click the Custom shape tab. If the Polygon add-on is not switched on yet, Ordrio opens Add-ons with Polygon ("Draw your delivery areas on a map in any shape."). It is free. Click Activate, then go back to Settings > Branches > Delivery areas > Add area and click Custom shape again.
- Click on the map to add the corners of your area, one point at a time. Join the last point to the first to finish the shape. Use Search a place to move the map to your area first. Click Clear shape to start again.
- Type an Area name, and set the Delivery charge, Different charge for cash on delivery and Area is on the same way as for a distance area.
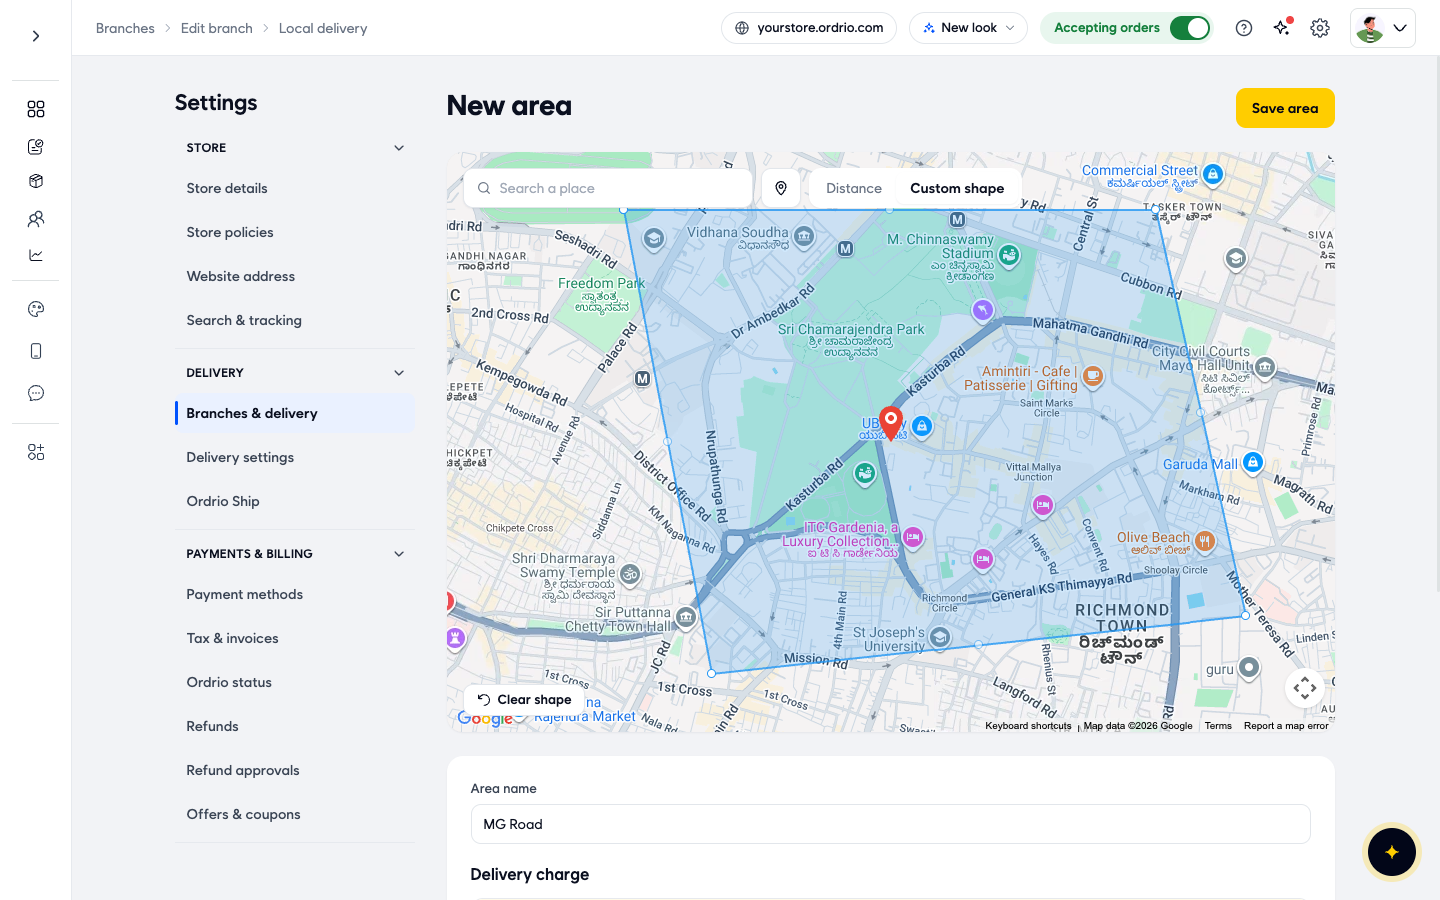
- Click Save area. If you see This overlaps 1 area, click Save anyway or Adjust area.
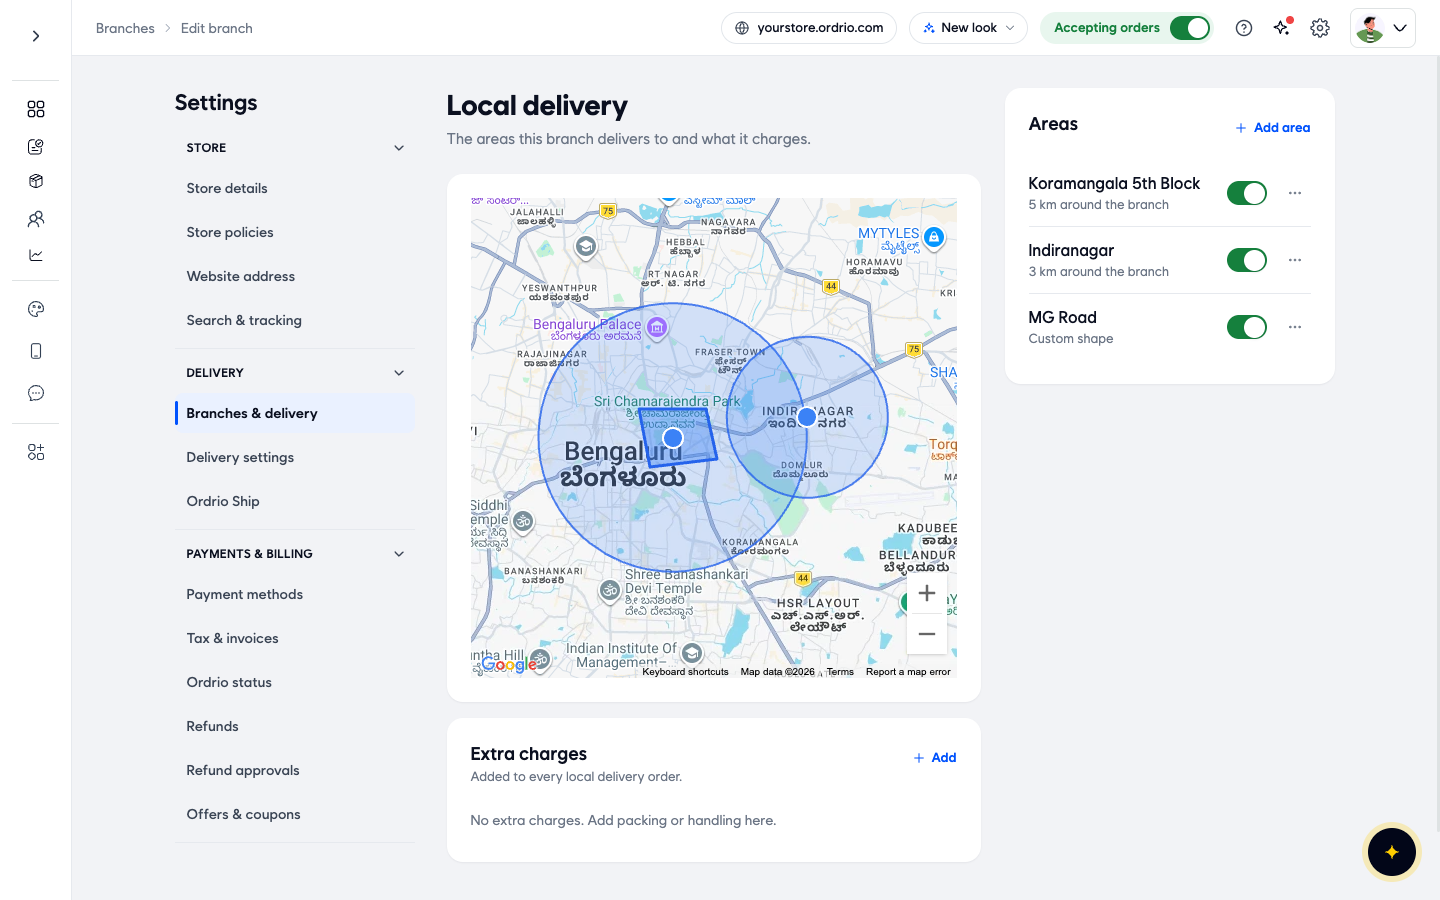
- The area appears in the Areas list with "Custom shape" under its name.
Check your areas in Delivery settings
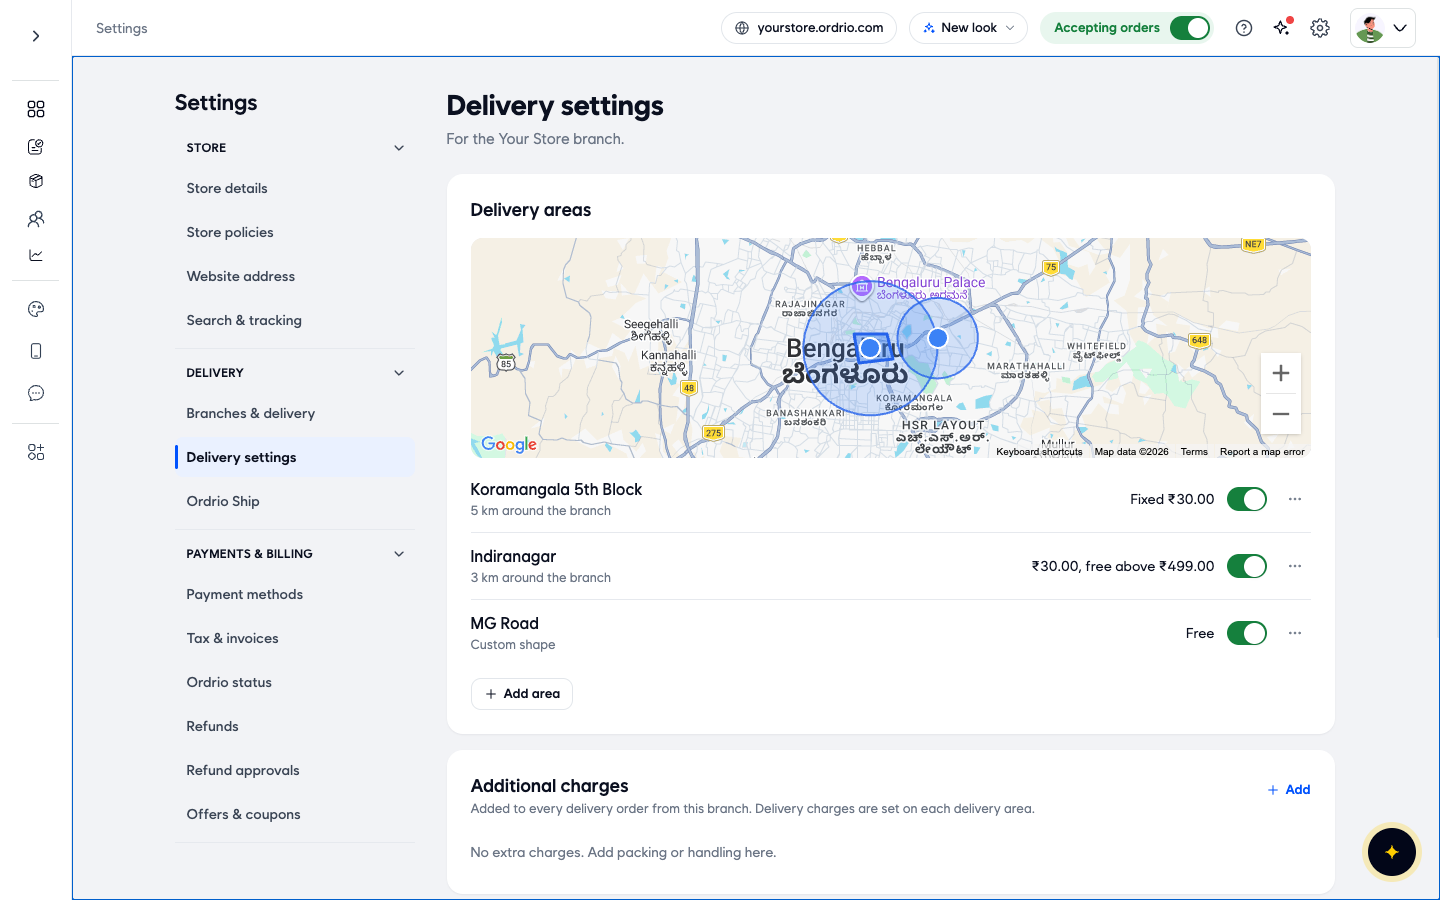
- Go to Settings and click Delivery settings (Own delivery, pickup, charges).
- Under Delivery areas, you see every area on the map, with its size and its delivery charge (for example Free, Fixed ₹30.00 or ₹30.00, free above ₹499.00). Use the switch to turn an area on or off, the ... button for more actions, and Add area to add another.
- Under Additional charges, click Add to add a charge to every delivery order from this branch, such as packing. On the Local delivery page, the same charges are under Extra charges: each one has a name, an amount, and Flat or % of bill.
- Under Ways to deliver, check that Your own delivery is on. Turn on Customer pickup if customers can also collect orders from your store.
Good to know
- Delivery areas are set on the map, by distance or by custom shape. There is no list of pin codes on this screen.
- Each branch has its own areas. Open the branch on Branches & delivery to see or change its areas.
- Turning off an area's switch stops delivery there without deleting it. Turn it on again when you start delivering there again.
- Where two areas overlap, customers get the lower charge and orders go to the nearest open branch.
- The delivery charge you choose is set on each area. Extra charges (or Additional charges) are added on top for every delivery order from the branch.
- Schedules and Store hours on the Branches & delivery page need separate add-ons.
Related
- Delivery charges
- Delivery blocks and time slots
- Delivery models explained
- Cash on delivery