यह आर्टिकल अभी हिंदी में नहीं है, इसलिए इसे अंग्रेज़ी में दिखाया जा रहा है।
कैसे करें
Analytics and tracking pixels
Connect Google Analytics, Meta Pixel and similar tools.
Connect Google Tag Manager, Google Analytics or Meta Pixel to your Ordrio store to see where your customers come from, what they look at and what they buy. You switch each one on in Add-ons, paste one ID from Google or Meta, and save.
Before you start
- Have the ID from your Google or Meta account ready. Each tool needs a different ID:
- Google Tag Manager: a Container ID that starts with GTM-, for example GTM-AB12CD3.
- Google Analytics: a GA4 measurement ID that starts with G-, for example G-AB12CD34EF.
- Meta Pixel: a Pixel ID made of numbers only, for example 123456789012345.
- The IDs in this article and in the screenshots are examples. Always use your own ID from your own Google or Meta account.
- Each tool is an add-on. On the add-on card you can see if it is In your plan.
Find your ID in Google or Meta
- Google Tag Manager: open your container in Google Tag Manager. The Container ID (GTM-...) is shown at the top of the workspace, next to the container name.
- Google Analytics: in Google Analytics, open Admin, then Data streams, and click your website's stream. Copy the Measurement ID (G-...).
- Meta Pixel: in Meta Events Manager, open Data sources and click your pixel. Copy the Pixel ID, the long number shown with the pixel's name.
Use a GA4 measurement ID. Old Google Analytics IDs that start with UA- will not work in this field.
Where tracking lives in your Ordrio admin
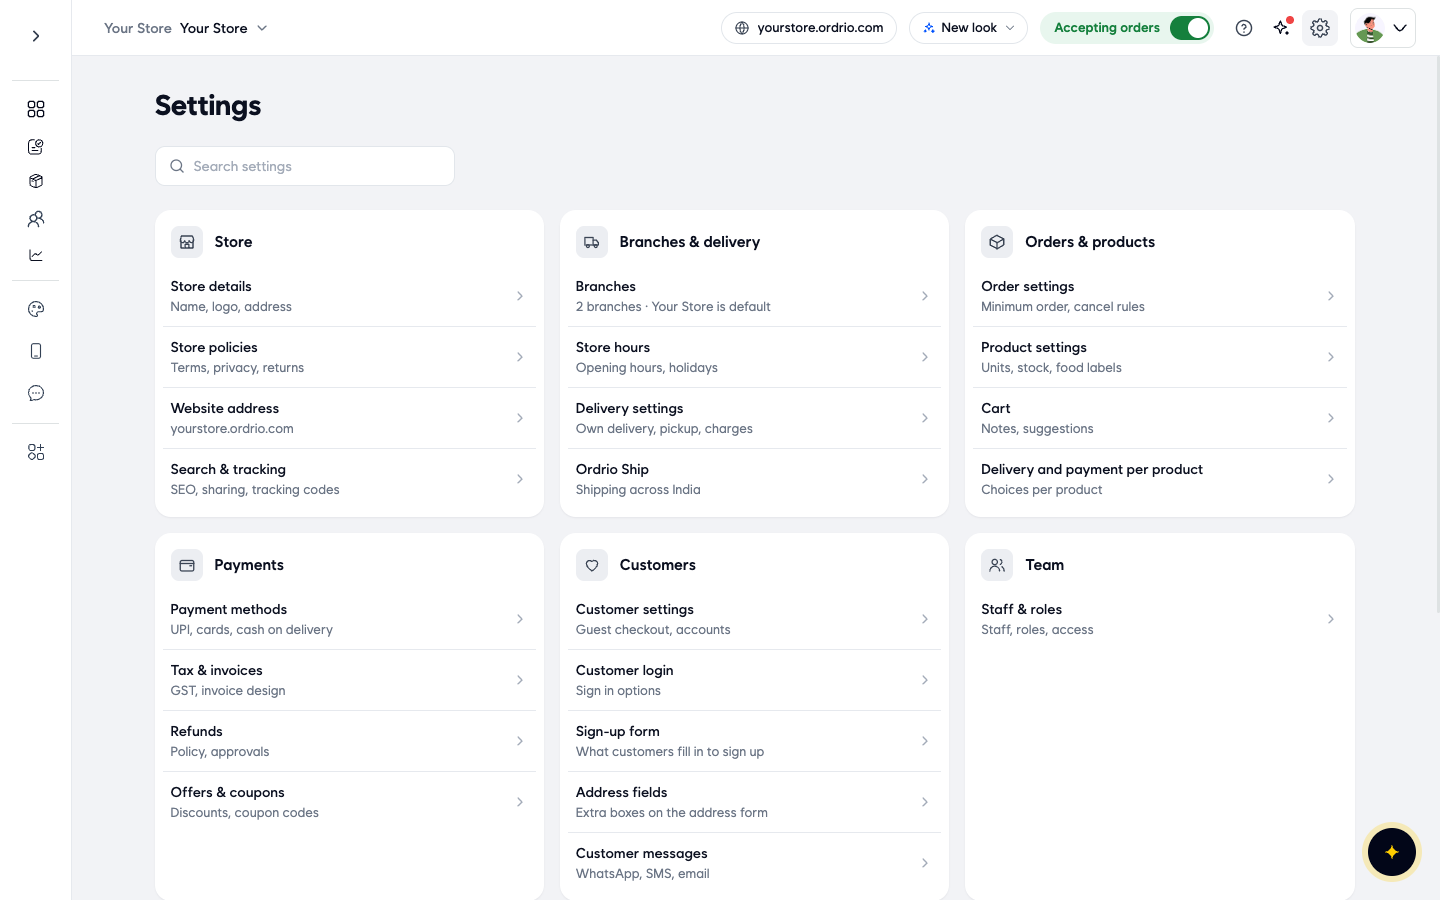
Open nadi.ordrio.com (your Ordrio admin panel) and log in. Click Settings (the gear icon at the top right) and click Search & tracking. Its description reads "SEO, sharing, tracking codes".
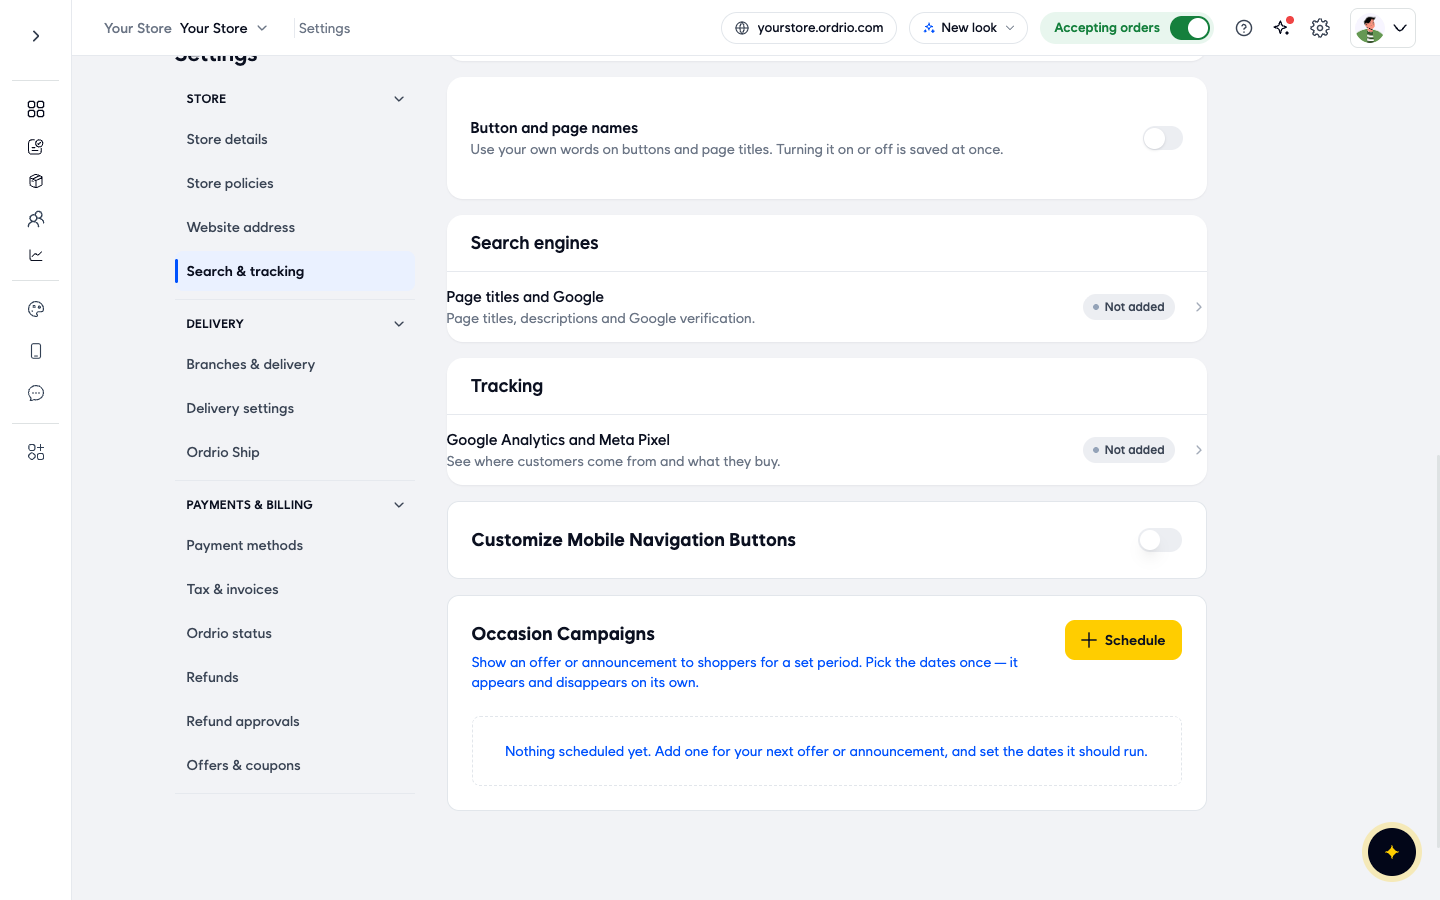
Scroll down to Tracking. The row Google Analytics and Meta Pixel shows Not added until you switch on at least one tracking add-on, and Added after that. You add and change the IDs themselves in Add-ons, as shown below.
Connect Google Analytics
- In your Ordrio admin panel, click Add-ons in the left menu, under Grow. Click the Analytics filter, or type Google Analytics in Search add-ons, to find the Google Analytics card ("See how visitors use your store in Google Analytics").
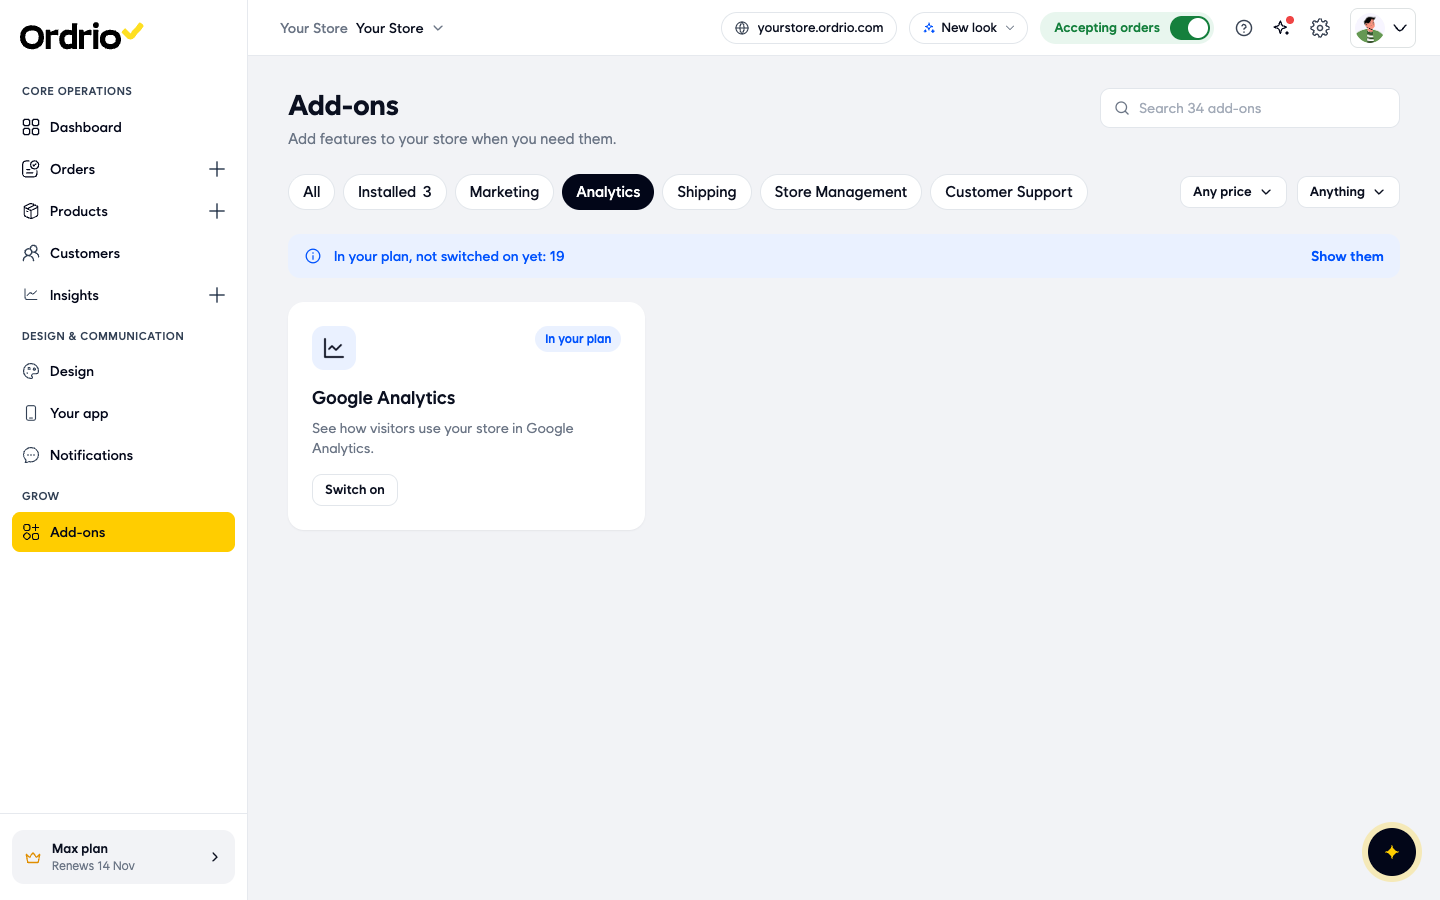
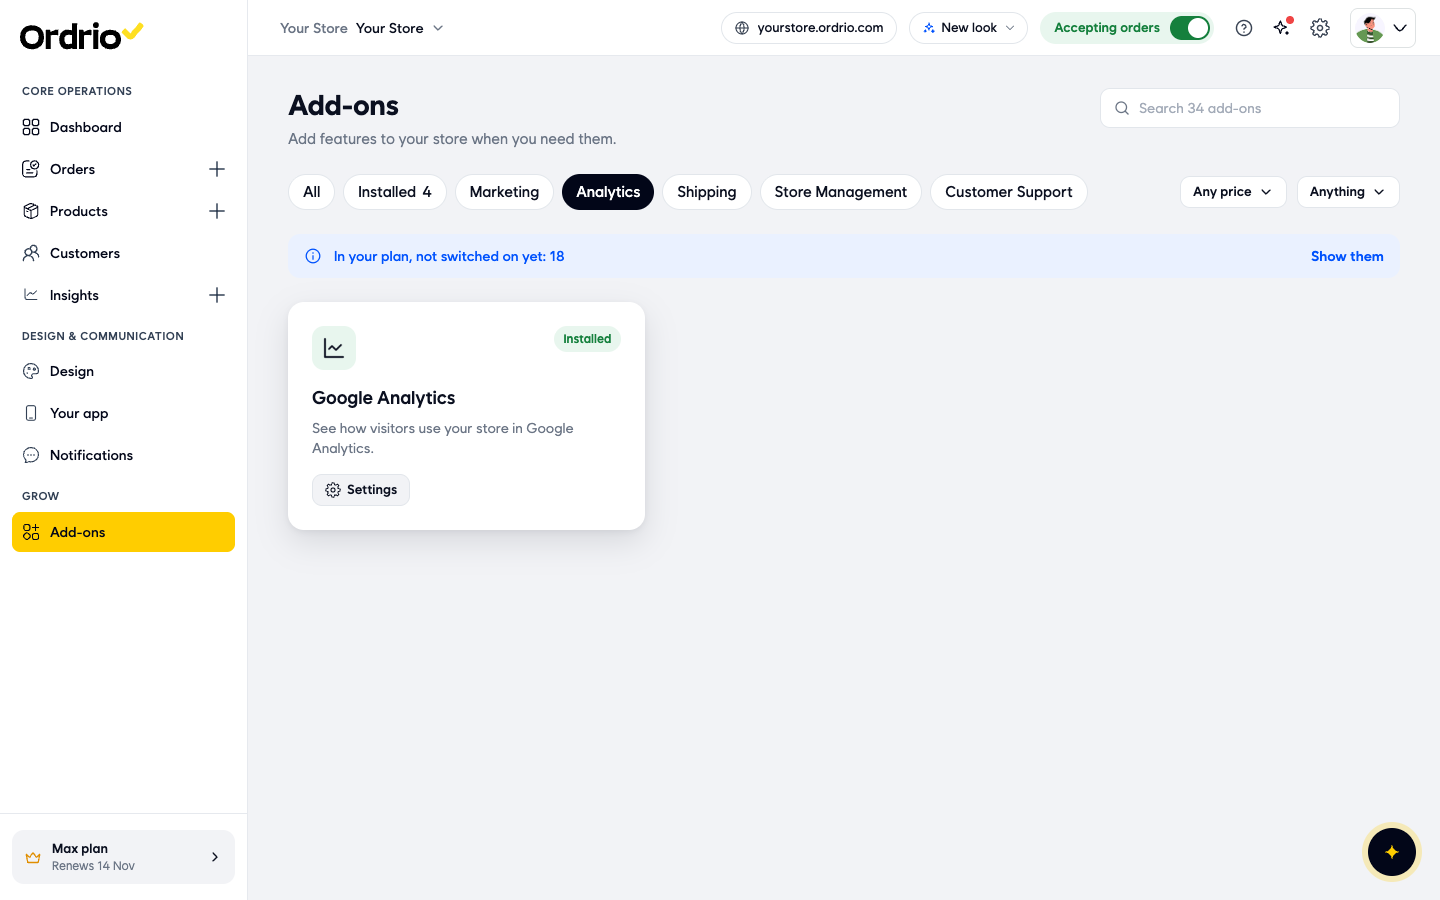
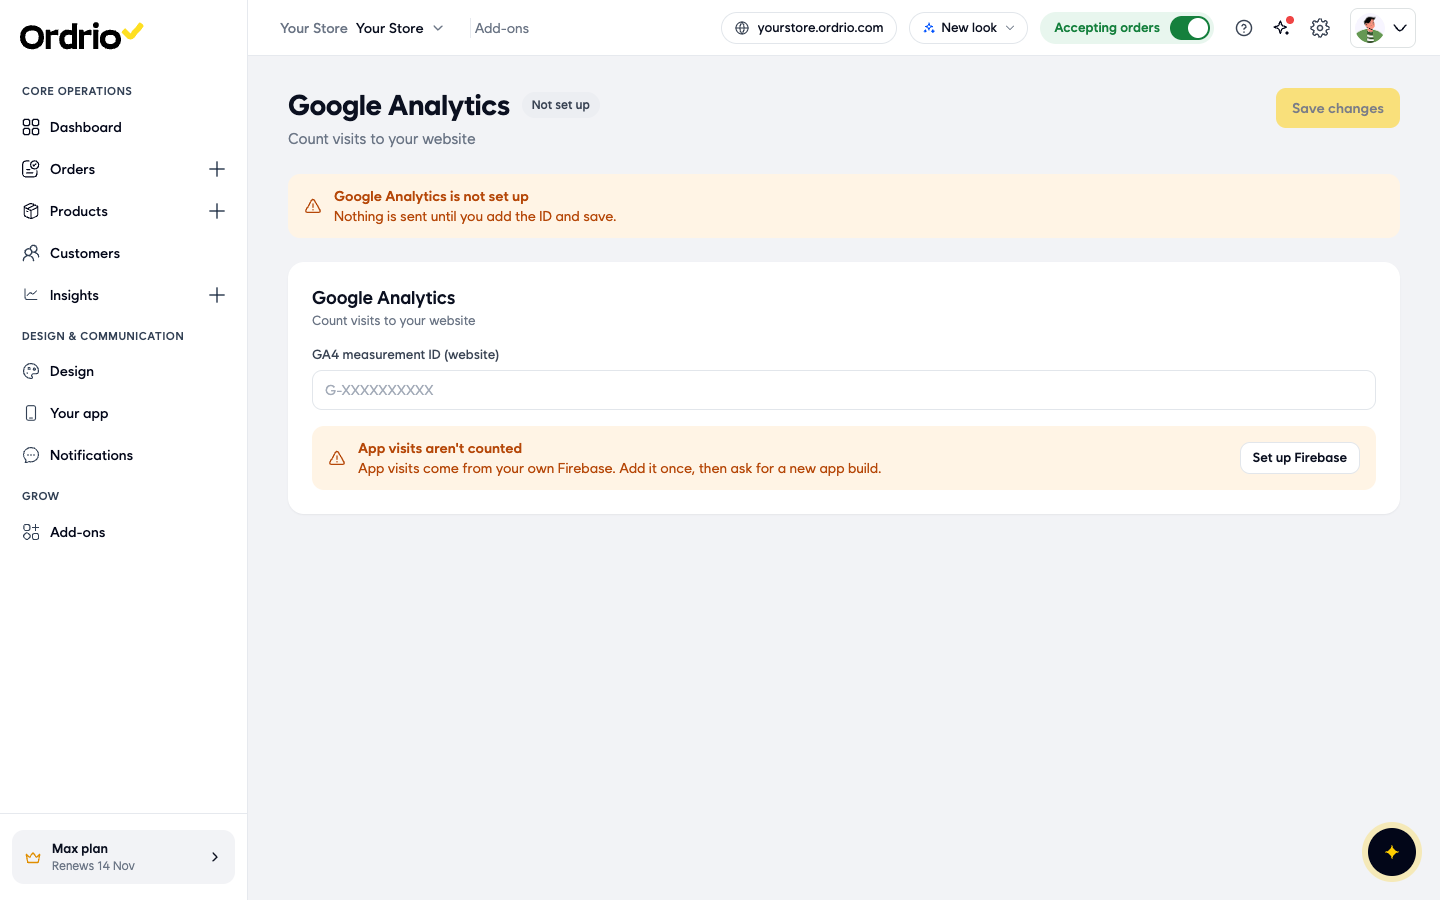
- Click Switch on on the card. The card shows Installed and a Settings button. Click Settings. The Google Analytics page opens with the badge Not set up. In GA4 measurement ID (website), type your own measurement ID. It starts with G-, like the example G-AB12CD34EF, then click Save changes. The badge changes to Set up.
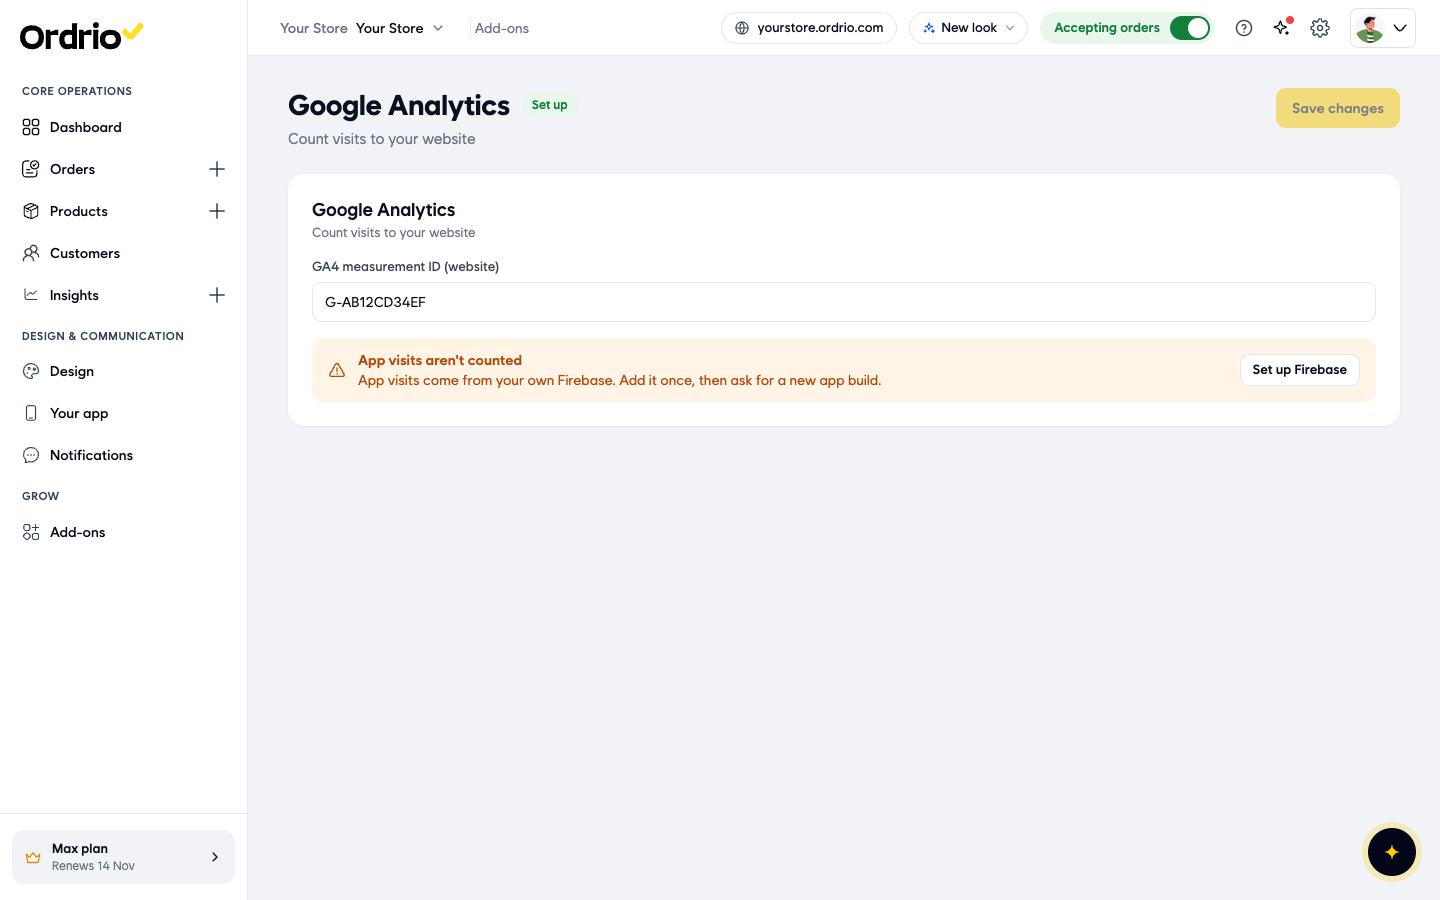
The fields on this page:
- GA4 measurement ID (website): your Google Analytics ID. It counts visits to your website.
- App visits aren't counted. Google Analytics here counts your website only. Visits in your app come from your own Firebase project: click Set up Firebase to add it, then ask for a new app build.
Connect Google Tag Manager
- In Add-ons, find the Google Tag Manager card. Its description reads "Run the tags from your Google Tag Manager container on your store." You can type the name in Search add-ons to find it.
- Click Switch on on the card. The card shows Installed and a Settings button.
- Click Settings. The Google Tag Manager page opens with the badge Not set up.
- In Container ID, type your own container ID. It starts with GTM-, like the example GTM-AB12CD3.
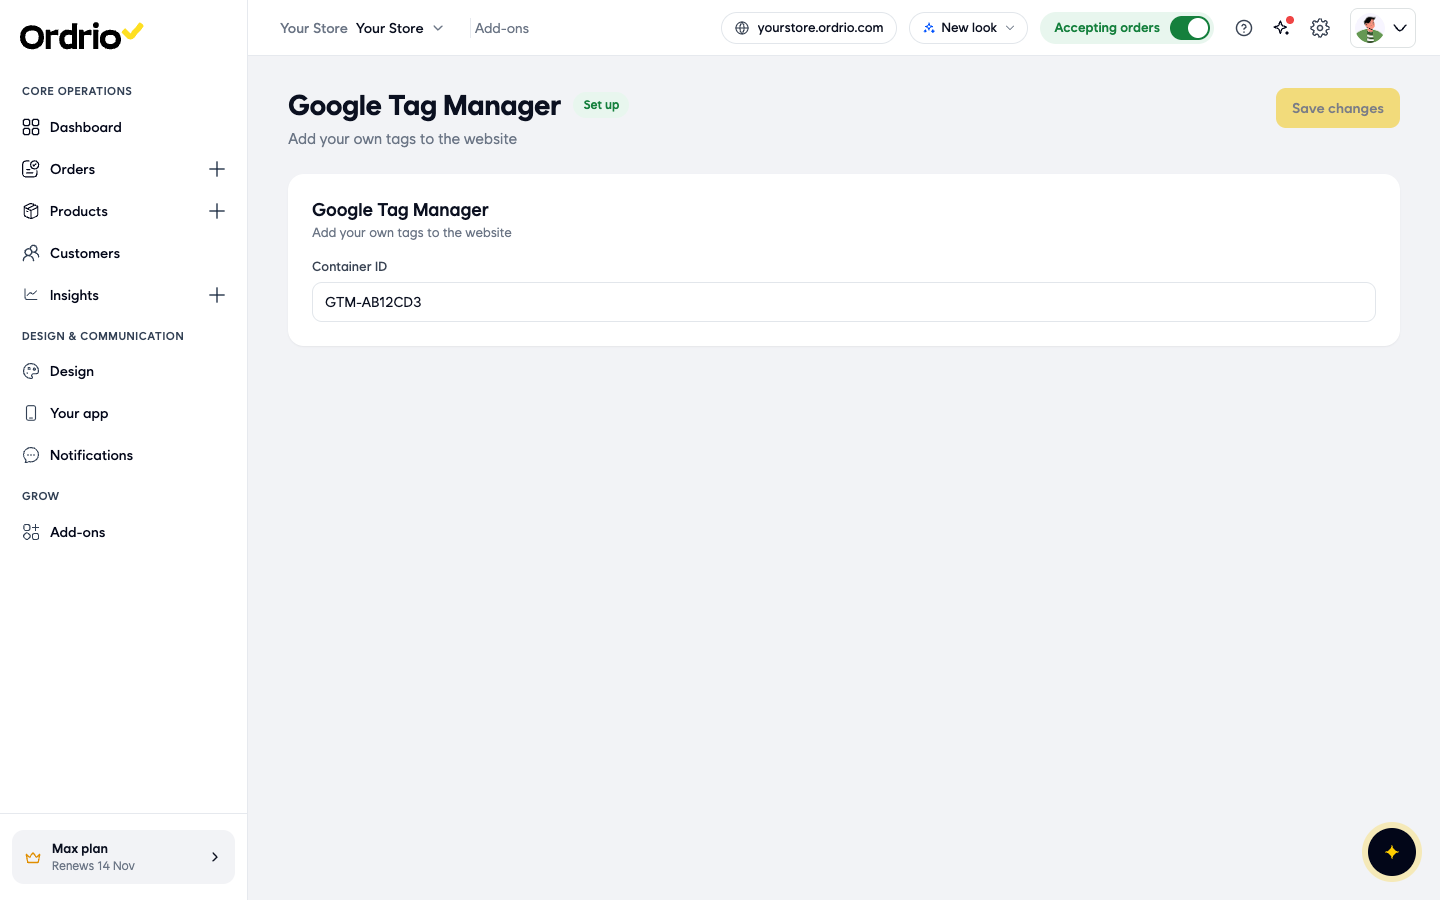
The only field on this page is Container ID. The page is described as "Add your own tags to the website".
Connect Meta Pixel
- In Add-ons, find the Meta Pixel card. Its description reads "Send store visits and purchases to Meta to measure your Facebook and Instagram ads."
- Click Switch on on the card. The card shows Installed and a Settings button.
- Click Settings. The Meta Pixel page opens with the badge Not set up.
- In Pixel ID, type your own Pixel ID. It is numbers only, like the example 123456789012345.
- If you have an Ordrio app and want better app tracking, fill in Facebook app ID (optional) and Client token (optional) under App tracking. You can leave both empty.
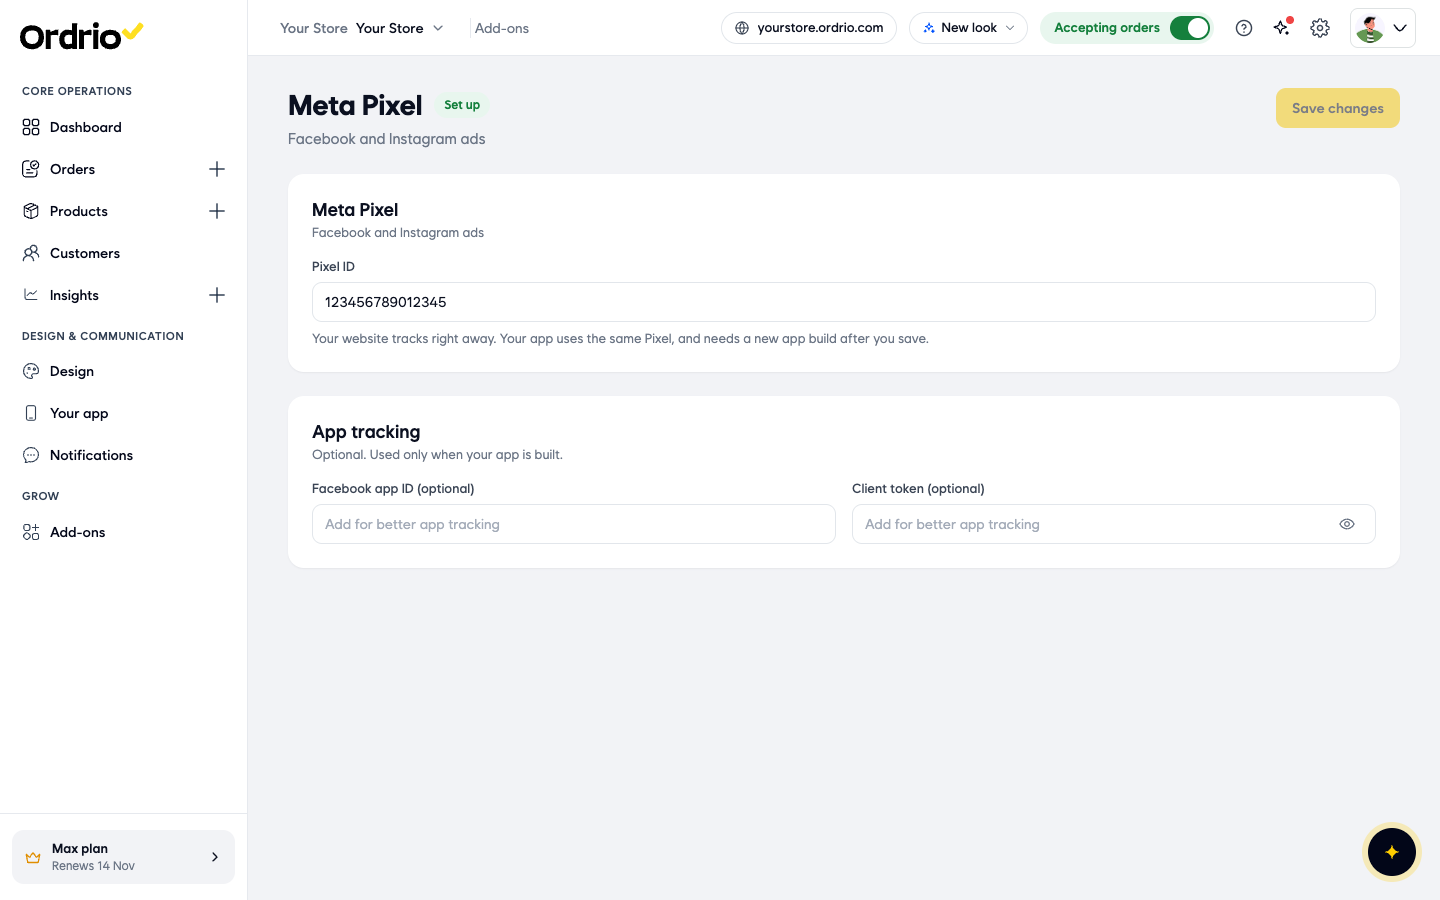
The fields on this page:
- Pixel ID: your Meta Pixel. Your website tracks right away after you save. Your app uses the same Pixel, and needs a new app build after you save.
- Facebook app ID (optional): from your app in Meta for Developers. Used only when your app is built.
- Client token (optional): the token for that Facebook app. Click the eye icon to show what you typed. Used only when your app is built.
Check that it works
- In your Ordrio admin panel, open each add-on's Settings page and check the badge next to the name says Set up, not Not set up.
- Open your store website in a new browser tab and visit a few pages.
- Check in the tool itself:
- Google Analytics: open the Realtime report. Your visit should show within a few minutes.
- Google Tag Manager: use Preview in Google Tag Manager and enter your store address. Tag Assistant shows your container loading on the page.
- Meta Pixel: in Meta Events Manager, open your pixel and use Test events, or install the Meta Pixel Helper browser extension and open your store.
If nothing shows, work through this list: (1) You saved: the add-on page must show Set up, not Not set up. (2) The ID has no extra spaces and the right start (GTM-, G- or numbers only). (3) Consent: if your store sells in the EU, UK or Switzerland, Google Analytics and Tag Manager only start after the visitor accepts the cookie banner, so test again and click Accept. (4) Wait a few minutes: reports such as Google Analytics Realtime can take a few minutes to show your visit. (5) Ad blockers: browser extensions that block ads can also block tracking. Test in a private window with extensions off. (6) Tag Manager: a container only runs the tags you have published in Google Tag Manager, so check that your tags are in a published version. (7) Double counting: if the same tag is set up in both Tag Manager and an Ordrio add-on, visits are counted twice.
Good to know
- Nothing is sent to Google or Meta until you add the ID and click Save changes.
- Tracking on your website starts right after you save. Your app needs a new app build before it sends anything.
- Google Analytics counts website visits only. App visits need your own Firebase, set up with Set up Firebase.
- If you use Google Tag Manager and also add Google Analytics inside your GTM container, do not also fill in the Google Analytics add-on. Your visits would be counted twice. The same goes for a Meta Pixel added inside GTM.
- To change an ID, open the add-on's Settings in Add-ons, type the new ID and click Save changes.
- If you leave a page after typing without saving, your change is lost. An Unsaved changes bar at the bottom reminds you, with Reset and Save changes.
Related
- Customising store branding
- Product attributes and search tags
- Publishing on Play Store and App Store
- Marketing notifications