यह आर्टिकल अभी हिंदी में नहीं है, इसलिए इसे अंग्रेज़ी में दिखाया जा रहा है।
कैसे करें
Viewing and managing orders
View, filter and manage orders from the orders page.
Every order from your website, your app and your team comes into one list in your Ordrio admin panel. This article shows you how to find orders there, narrow the list down with tabs, search, dates and filters, and open an order to see everything about it.
Before you start
You need at least one order in your store to see the list filled in. If you have no orders yet, the list shows "No orders here".
Open the orders list
- Open nadi.ordrio.com (your Ordrio admin panel) and log in.
- In the left menu, click Orders, then click Orders under it.
The Orders page opens. It says "Accept new orders and follow each one to delivery." Each row shows one order:
- Order: the order number, the customer's name (or Guest) and when it was placed.
- Delivery: how the order is fulfilled (for example In-store) and the delivery date and time.
- Payment: the payment method (for example Cash on delivery) and whether it is Paid.
- Amount: the order total and the number of items.
- Status: where the order is right now (for example Delivered).
- The arrow at the end of the row opens the order.
At the bottom you see how many orders are shown (for example "Showing 1–1 of 1"), and a box to choose how many rows to show on each page: 5, 10, 20, 50 or 100.
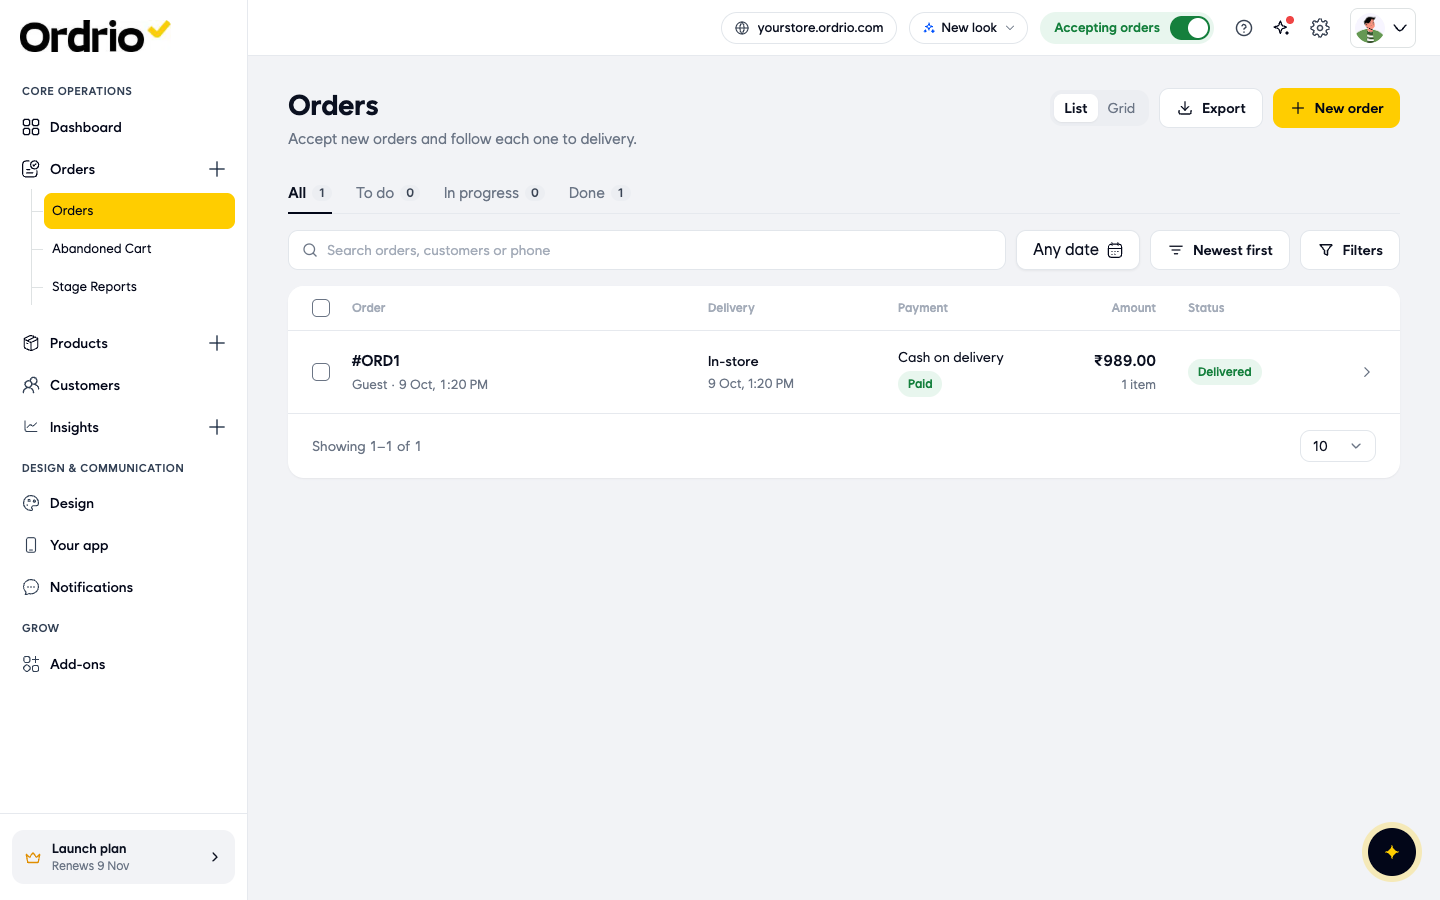
The store link at the top of the screenshots (yourstore.ordrio.com) is an example. You will see your own store link.
View orders by stage
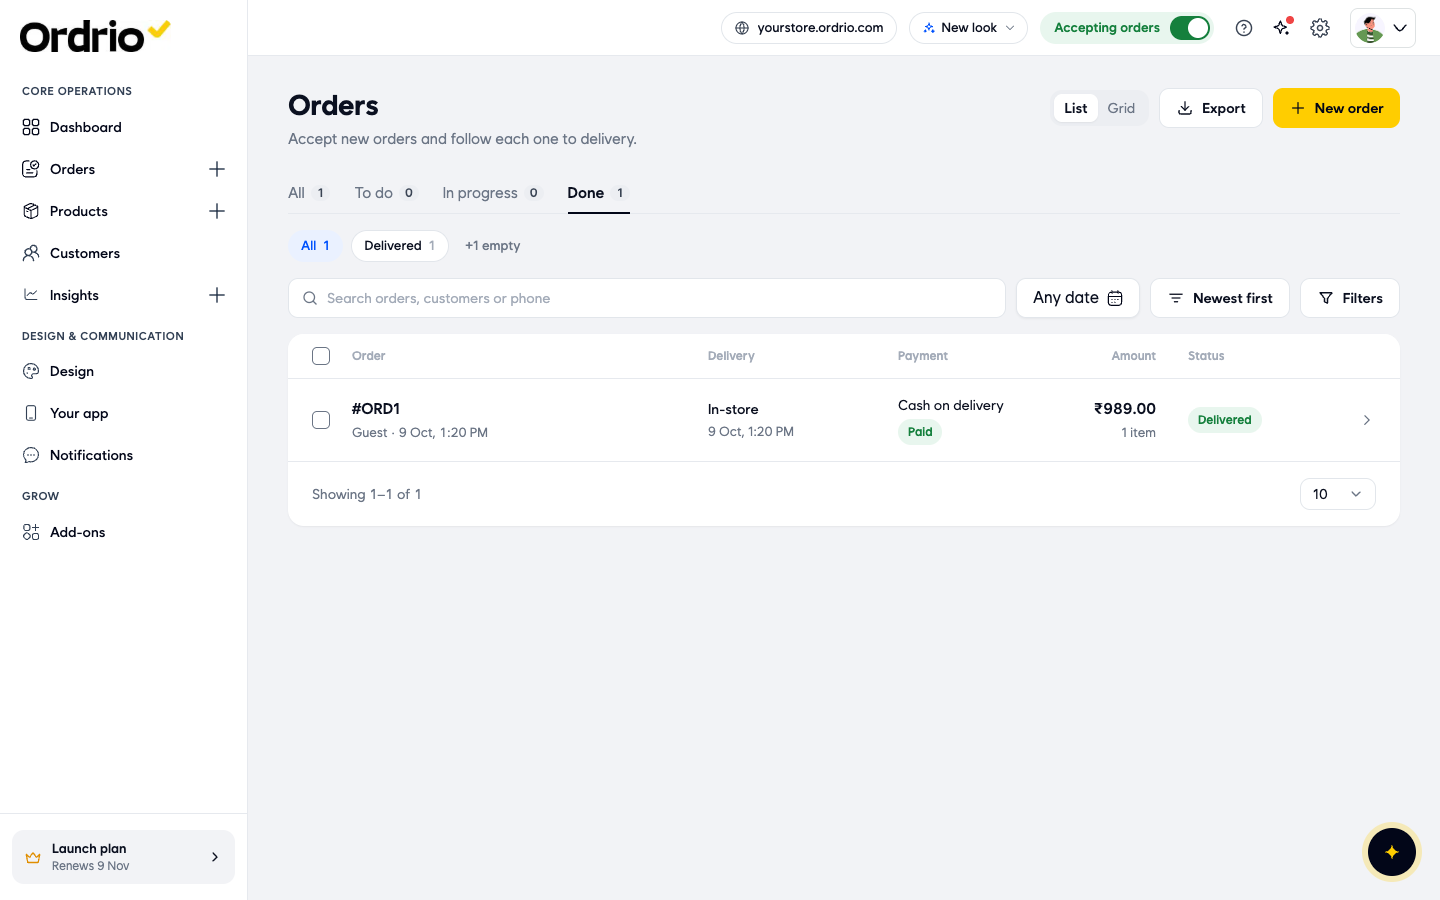
- Click one of the stage tabs above the list. The number next to each tab shows how many orders are in it.
- All: every order.
- To do: orders waiting for you to act on them.
- In progress: orders you are working on.
- Done: finished orders.
- Inside a stage tab, click a status chip to narrow the list further. For example, Done has Delivered and Cancelled. Statuses with no orders are hidden. Click +1 empty (the number changes) to show them, and Hide empty to hide them again.
Find a specific order
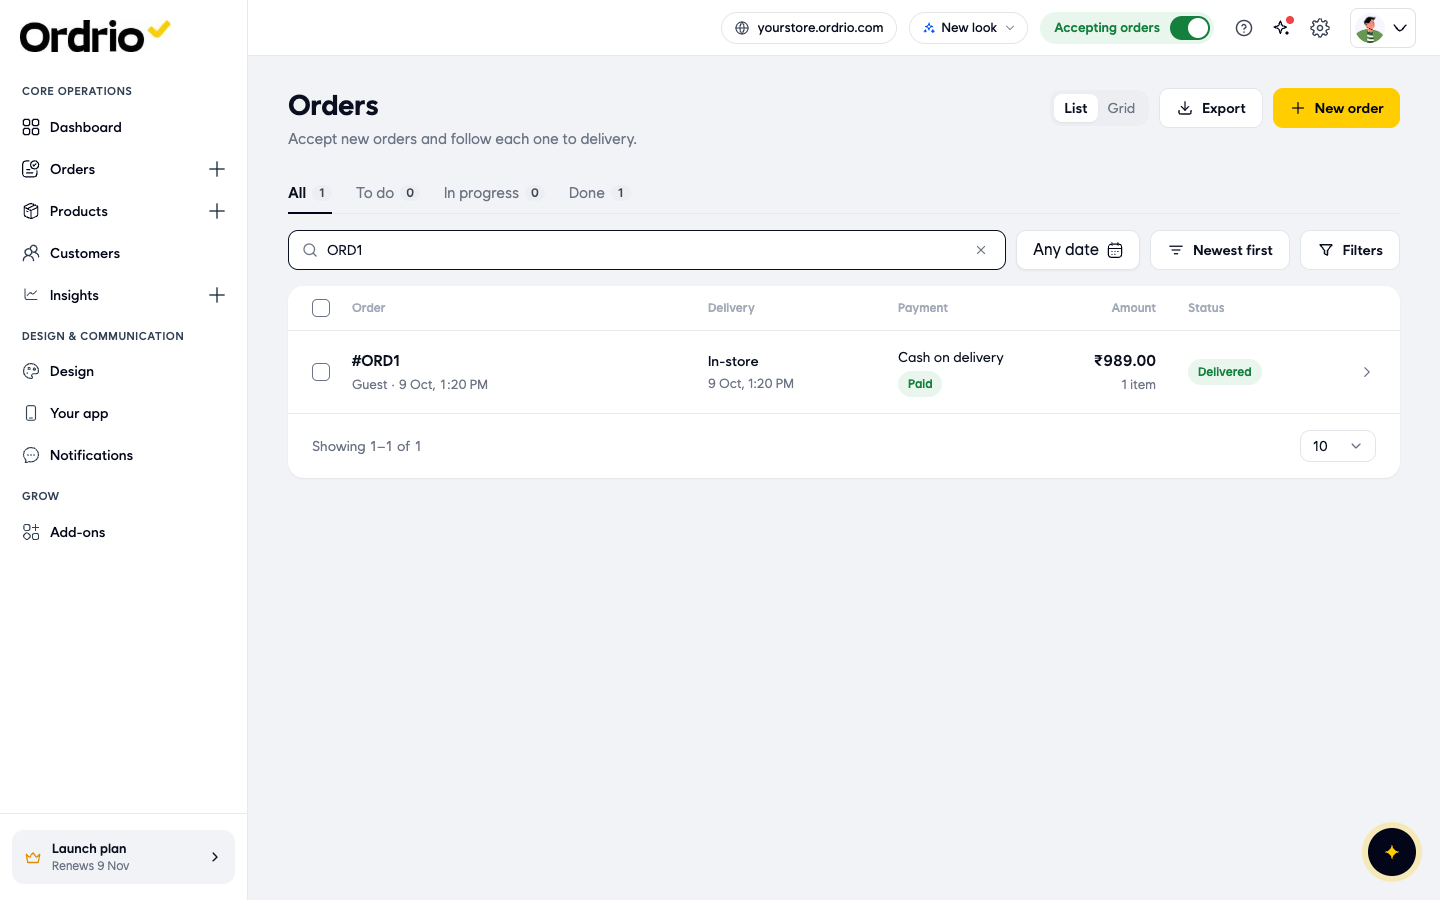
- Click the search box Search orders, customers or phone and type an order number, a customer's name or a phone number. The list updates as you type. Click the x in the box to clear it.
Show orders from certain dates
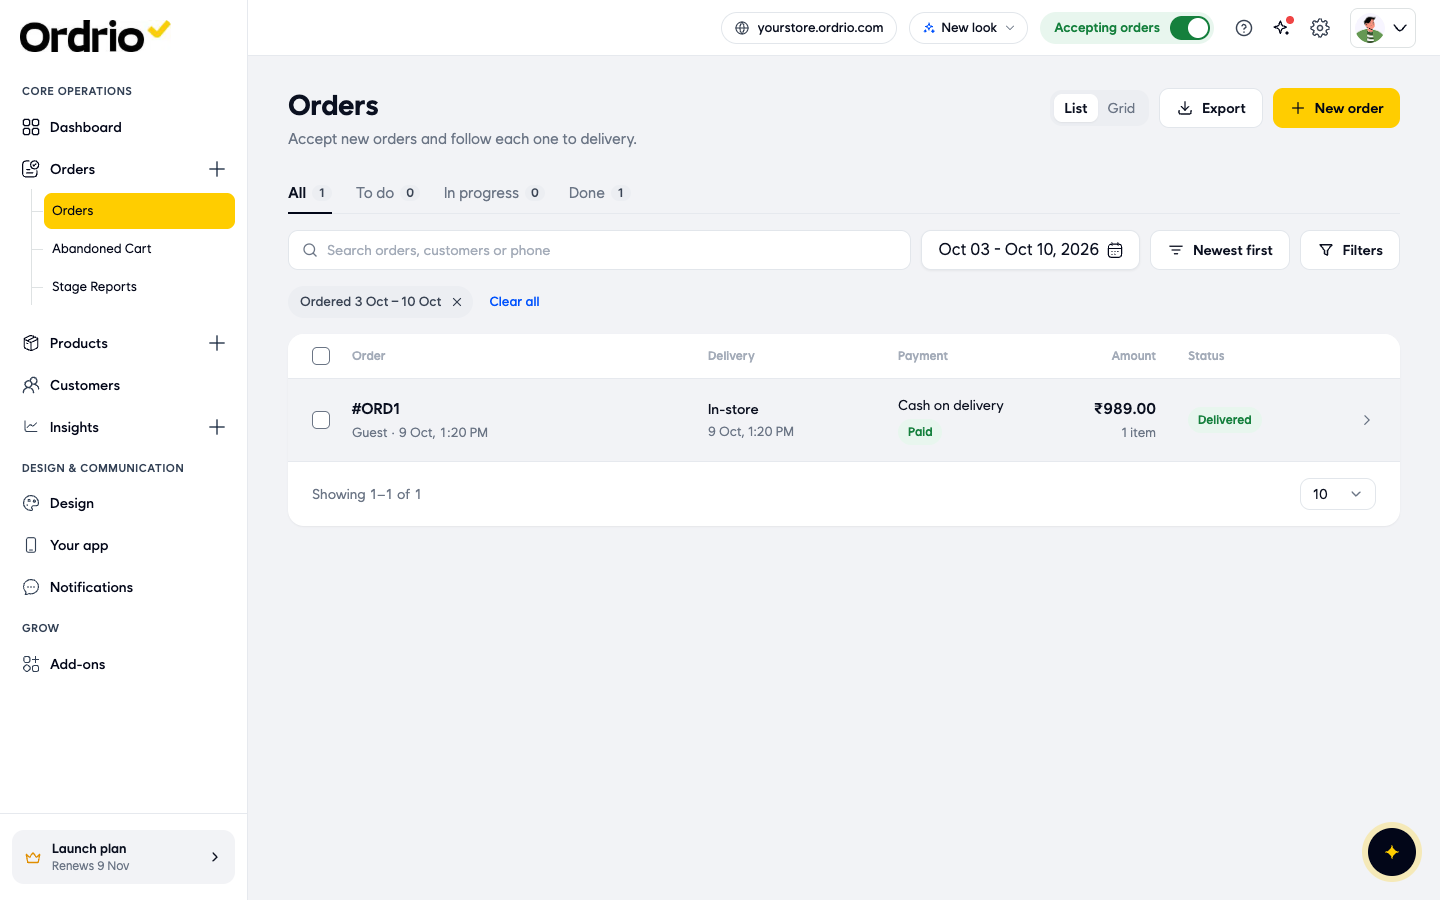
- Click Any date. A calendar opens.
- Choose Order Date to use the day the order was placed, or Delivery Date to use the day it is due.
- Click a quick range: Today, Last 7 days, This Month or Last Month. Or pick a start and end day in the calendar and click Apply. Clear All removes the dates.
The date range now shows on the button, and a chip such as "Ordered 3 Oct – 10 Oct" appears above the list. Click the x on the chip, or Clear all, to remove it.
Change the order of the list
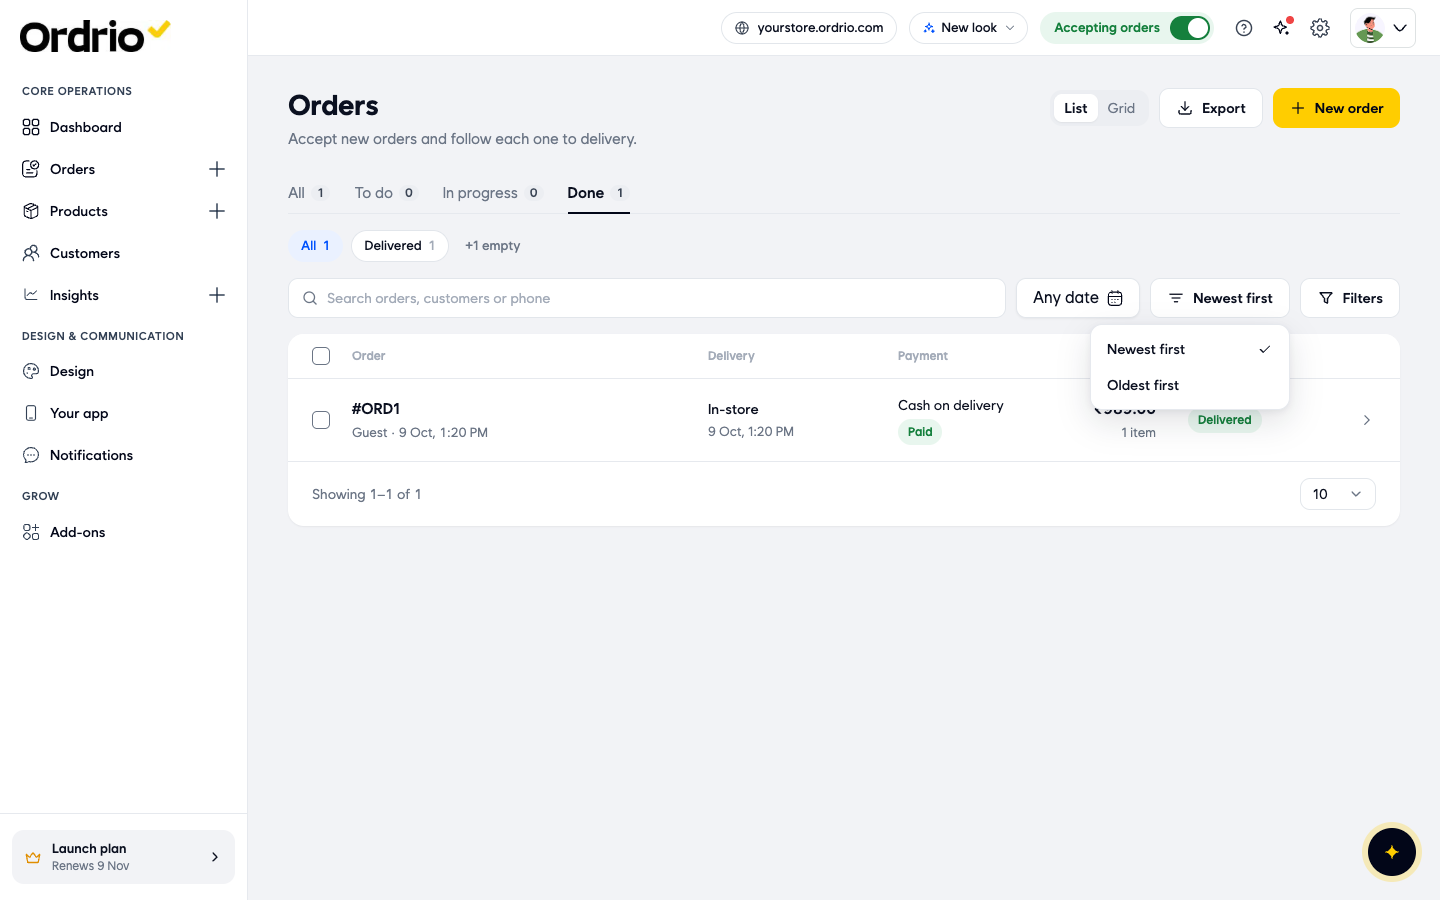
- Click the sort button (it shows Newest first at the start) and choose Newest first or Oldest first.
Filter orders
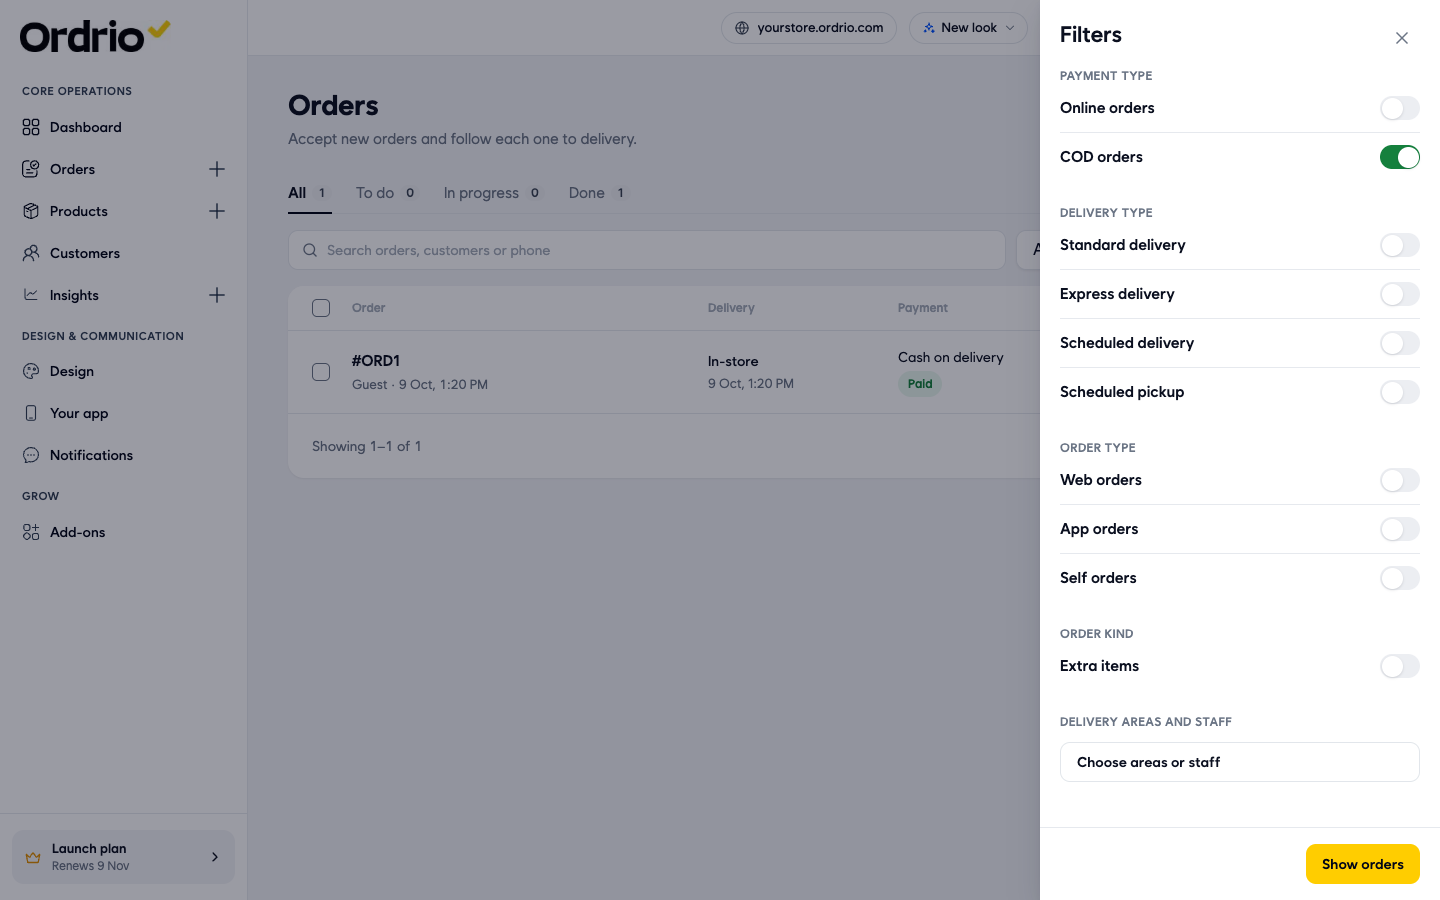
- Click Filters. A panel opens on the right. Turn on the switches for the orders you want to see:
- Payment Type: Online orders or COD orders (cash on delivery).
- Delivery Type: Standard delivery, Express delivery, Scheduled delivery or Scheduled pickup.
- Order Type: Web orders (from your website), App orders (from your customer app) or Self orders (orders your team placed).
- Order kind: Extra items.
- Delivery areas and staff: click Choose areas or staff, tick the delivery areas you want under Delivery Blocks (you can search them), then click Confirm.
- Click Show orders.
The list now shows only the matching orders. The Filters button shows how many filters are on, and each filter appears as a chip above the list. Click the x on a chip to remove that filter, or Clear all to remove them all. If you close the panel without clicking Show orders, your changes are not applied.
Switch between list and grid
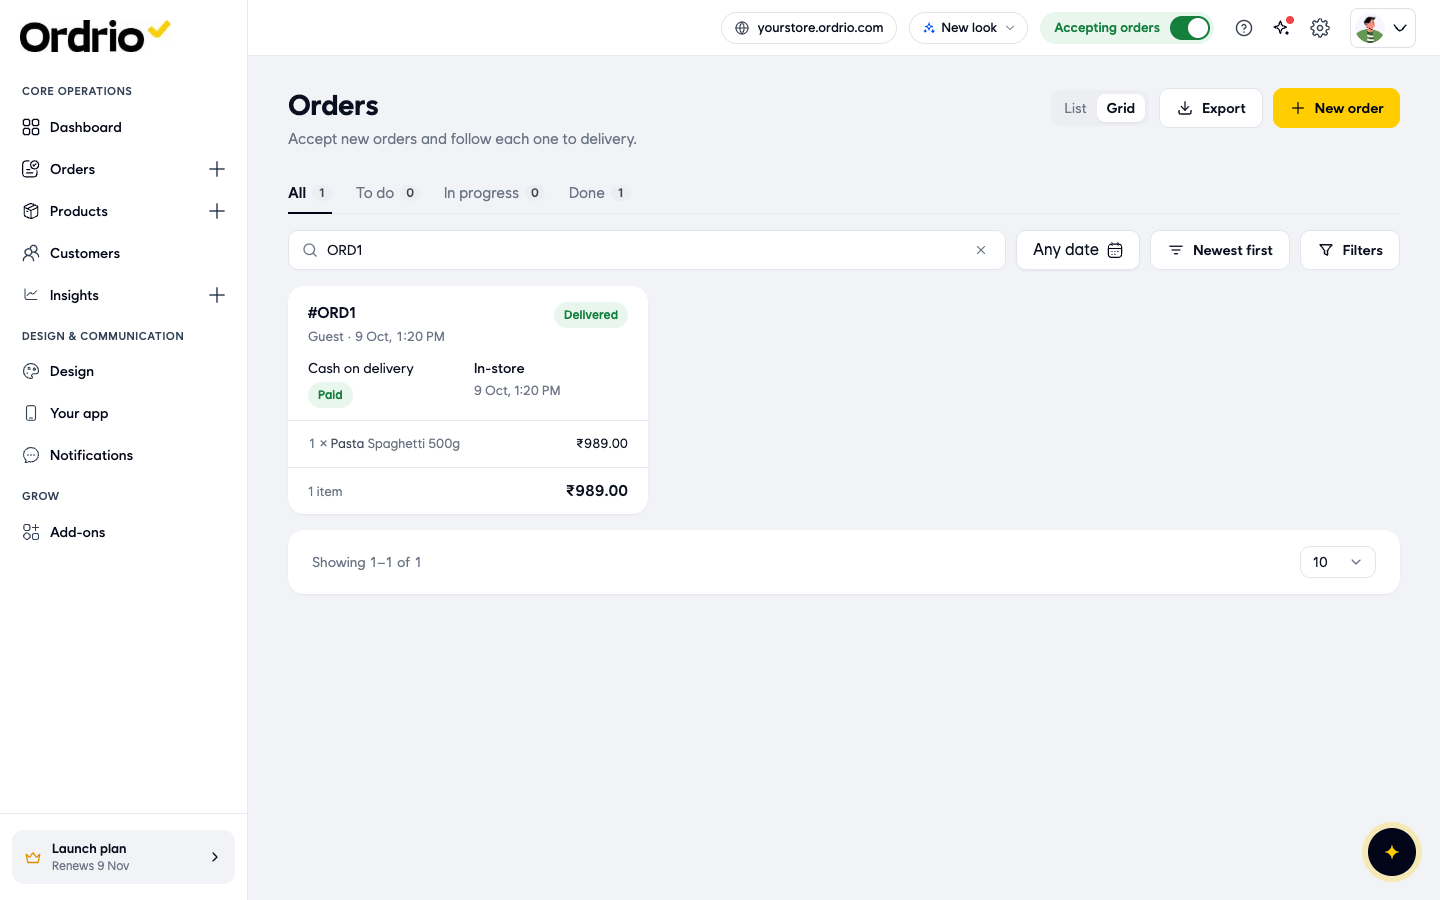
- Click Grid at the top of the page to see each order as a card. Cards also show the items in the order. Click List to go back to rows.
Act on several orders at once
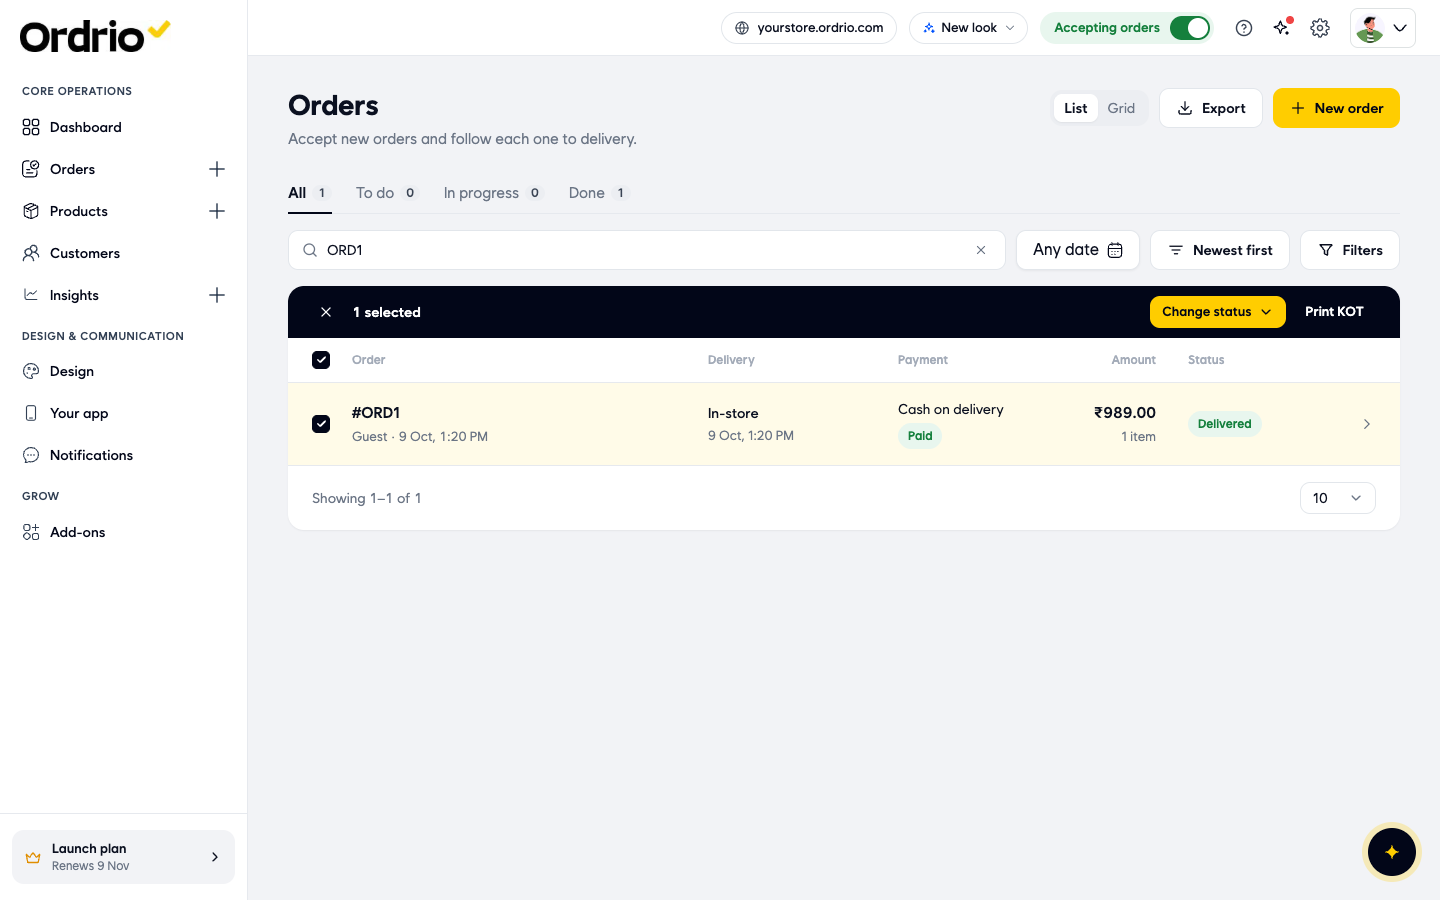
- Tick the box at the start of one or more rows. Tick the box in the header row to select every order on the page.
- Use the dark bar that appears above the list:
- Change status: move all the selected orders to a new status. Only the statuses the orders can move to are shown. If none are possible (for example, the orders are already delivered), you see "No valid transitions available".
- Print KOT: print the kitchen order tickets for the selected orders.
- Click the x at the left of the bar to clear your selection.
Open an order
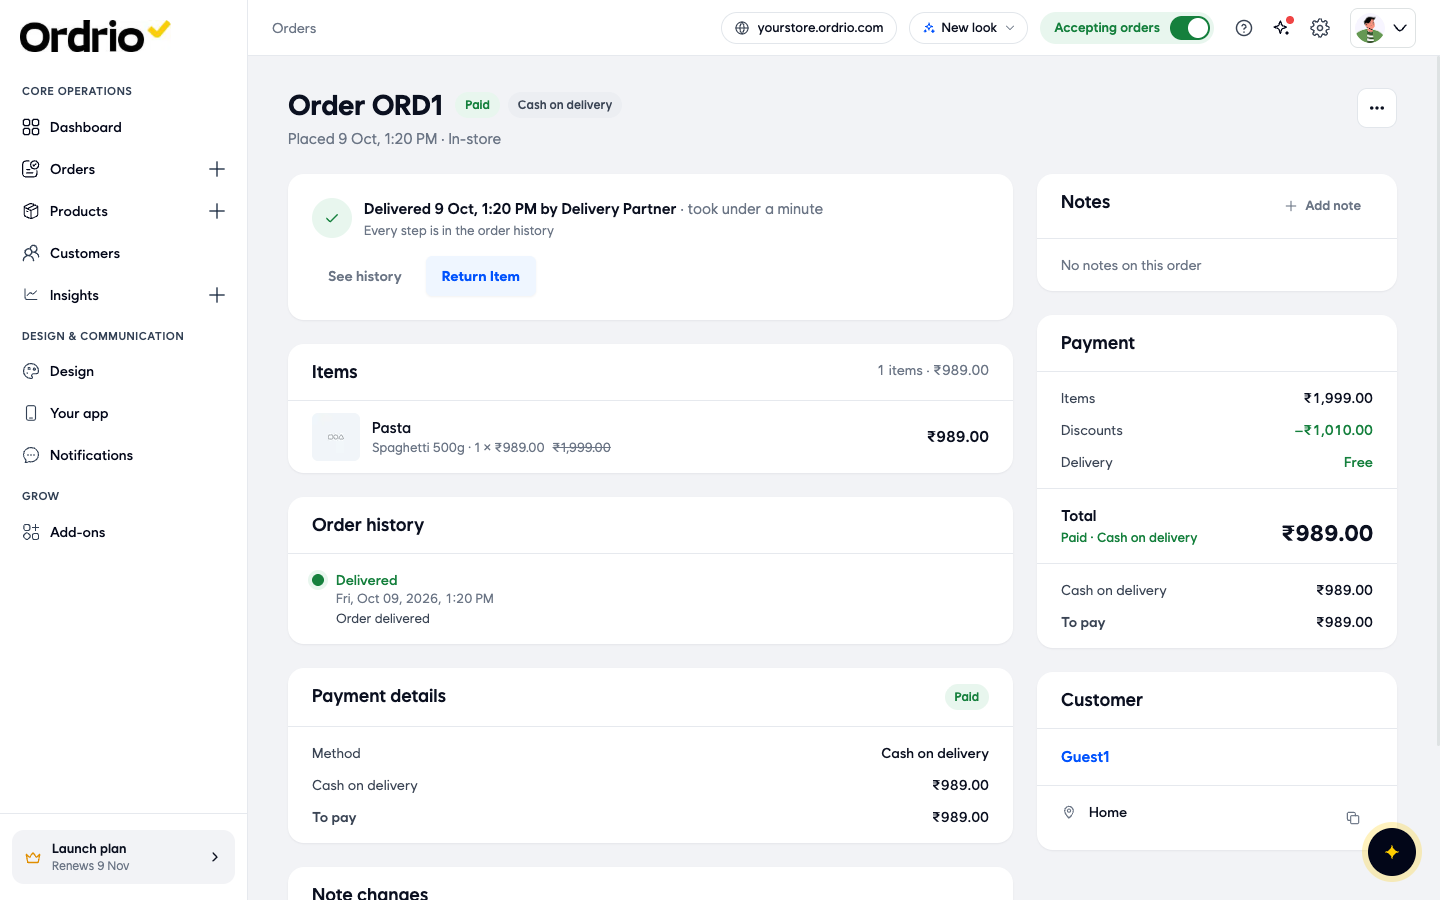
- Click an order row (or its arrow) to open the order page. You see:
- The order number, payment status and payment method at the top, and when and how it was placed.
- A status card (for example "Delivered 9 Oct, 1:20 PM by Delivery Partner") with See history and the actions for the order's current stage, such as Return Item on a delivered order.
- Items: each product, its variant, quantity and price.
- Order history: every status change with its date and time.
- Payment details: the method and the amount to pay.
- Note changes: a log of every note added, edited or deleted.
- Notes: click Add note and choose Order, From the customer or Delivery to add a note for your team.
- Payment: items total, discounts, delivery charge and the order total.
- Customer: the customer's name and delivery address. Click the name to open the customer.
- To print the kitchen order ticket for this order, click the ... button at the top right and choose Print KOT.
- Click Orders at the top of the page to go back to the list.
Download your orders
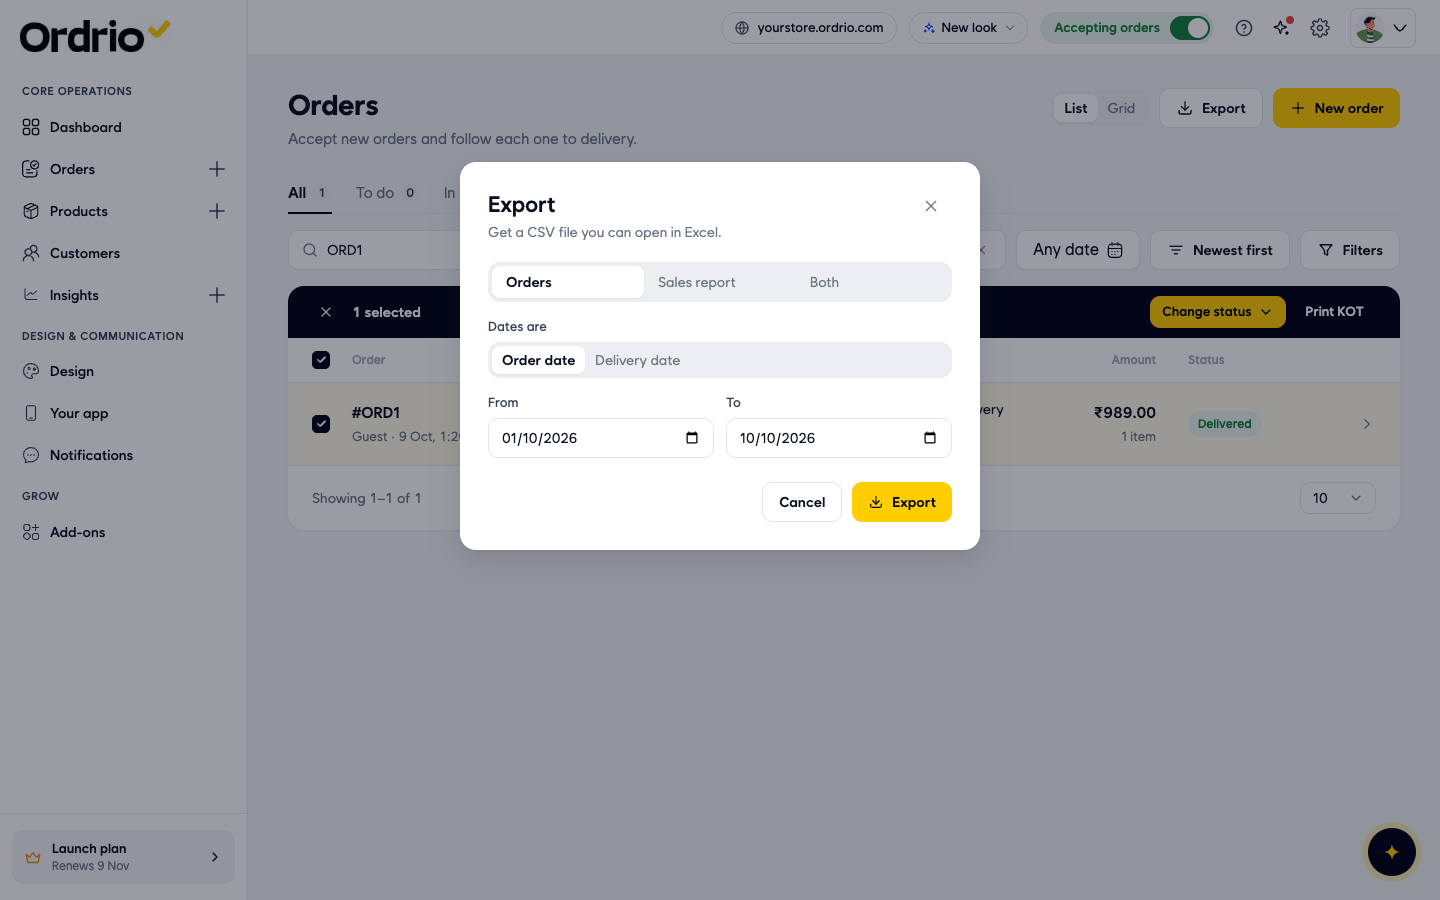
- Click Export at the top of the Orders page.
- Choose what to download: Orders, Sales report or Both.
- Next to Dates are, choose Order date or Delivery date.
- Set the From and To dates.
- Click Export. You get a CSV file you can open in Excel. Click Cancel to close without downloading.
Good to know
- Search, date, sort and filters work together. If you see "No orders here", try another status, date, search or filter, or click Clear all.
- To add an order yourself for a customer who calls or walks in, click New order.
- The screenshots show example orders. Your list shows your own orders and customers.
- Abandoned Cart and Stage Reports, under Orders in the left menu, are separate pages and are not part of this list.
Related
- Creating an order for a customer
- Accepting and updating order status
- Printing KOTs and invoices
- Viewing abandoned carts