यह आर्टिकल अभी हिंदी में नहीं है, इसलिए इसे अंग्रेज़ी में दिखाया जा रहा है।
कैसे करें
Tax setup (GST / VAT)
Set tax rules for compliant billing.
Set up GST in Ordrio so every order is charged the right tax and every invoice shows your GSTIN and the tax on each item. You set one standard rate for your store and add other rates for products that pay a different rate.
Before you start
- Keep your GSTIN (GST number) ready.
- Add your products first, so you can put them in rate groups. Products you do not put in a group pay the standard rate.
Set up GST
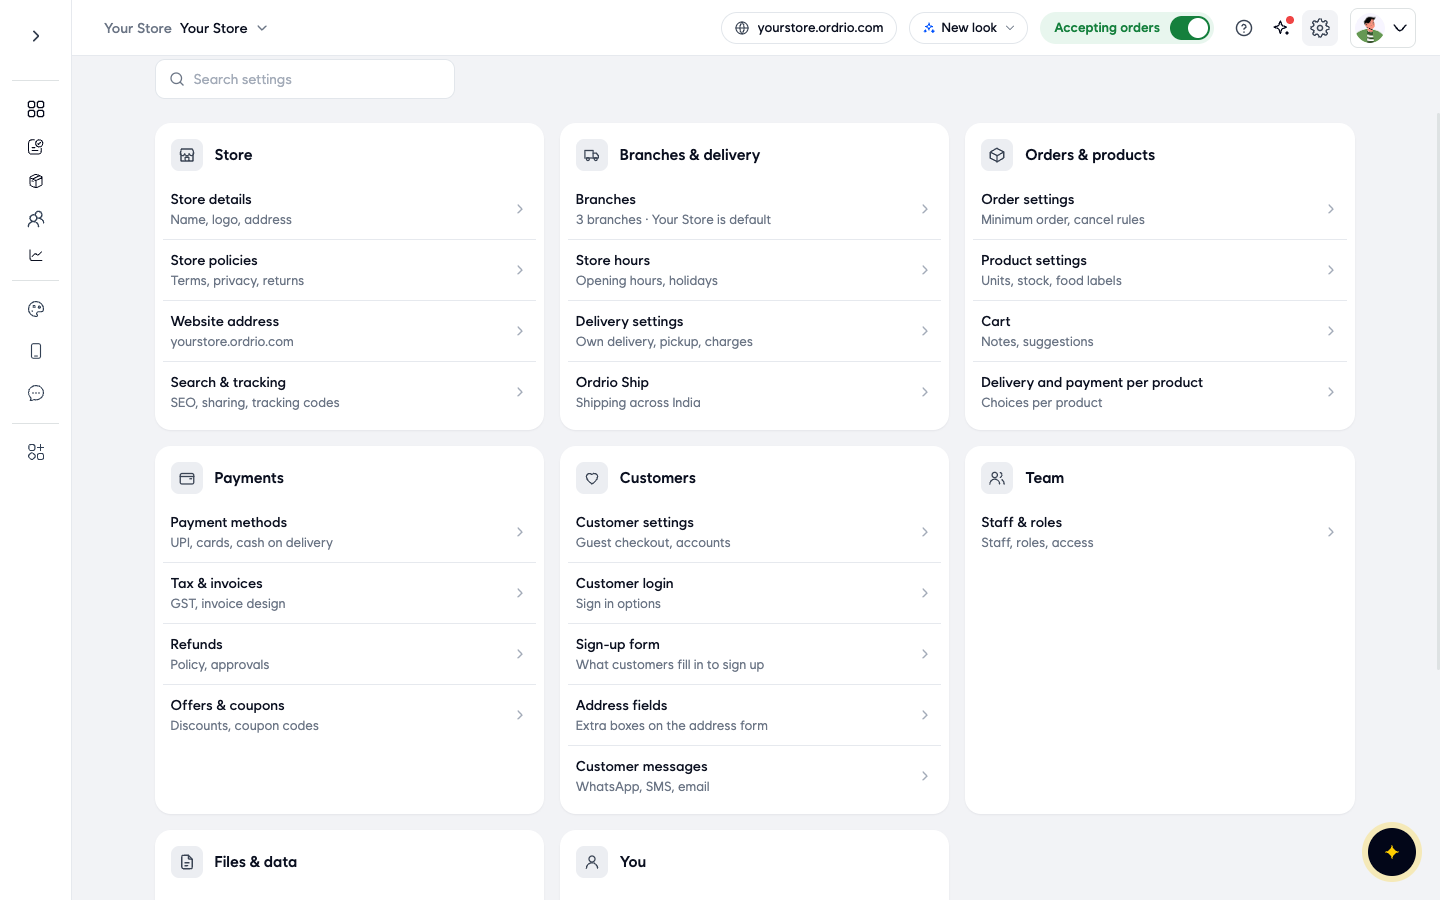
- Open nadi.ordrio.com (your Ordrio admin panel) and log in. Click the Settings icon (the gear) at the top right. Under Payments, click Tax & invoices. Next to Tax, click Set up. The Set up GST page opens.
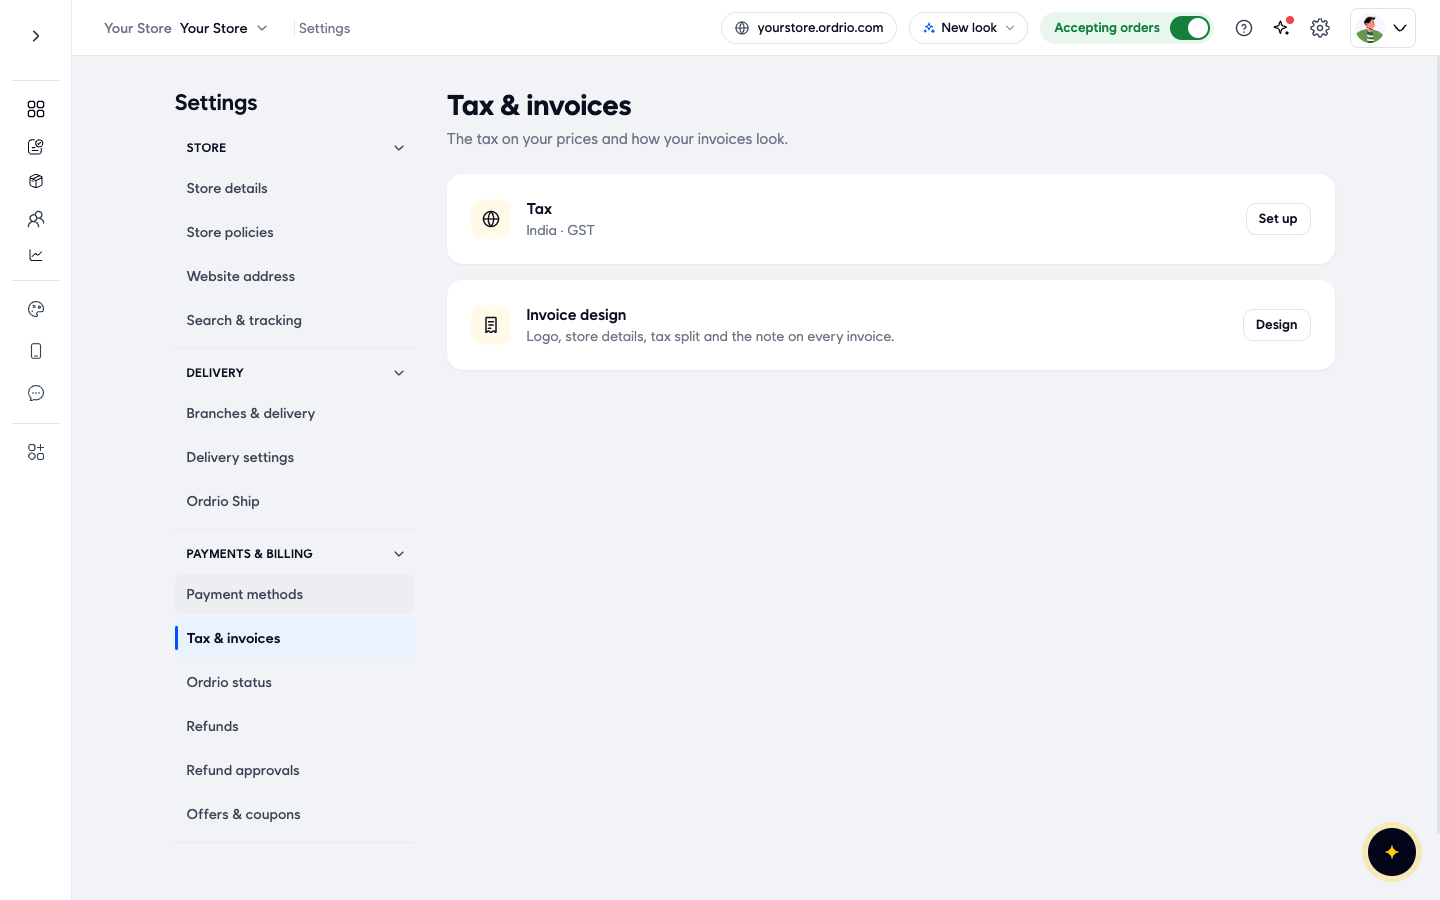
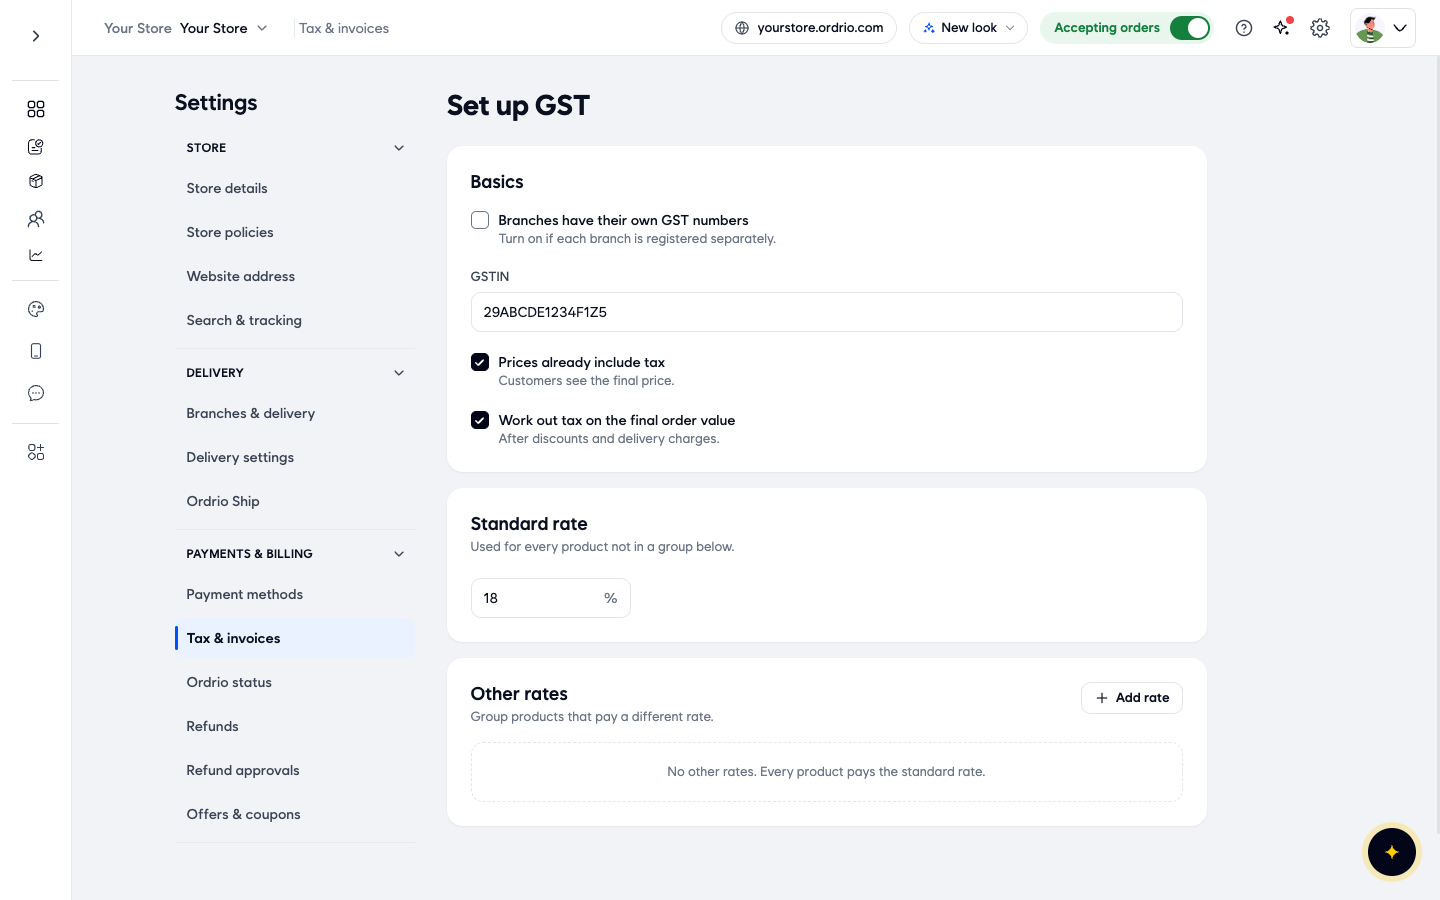
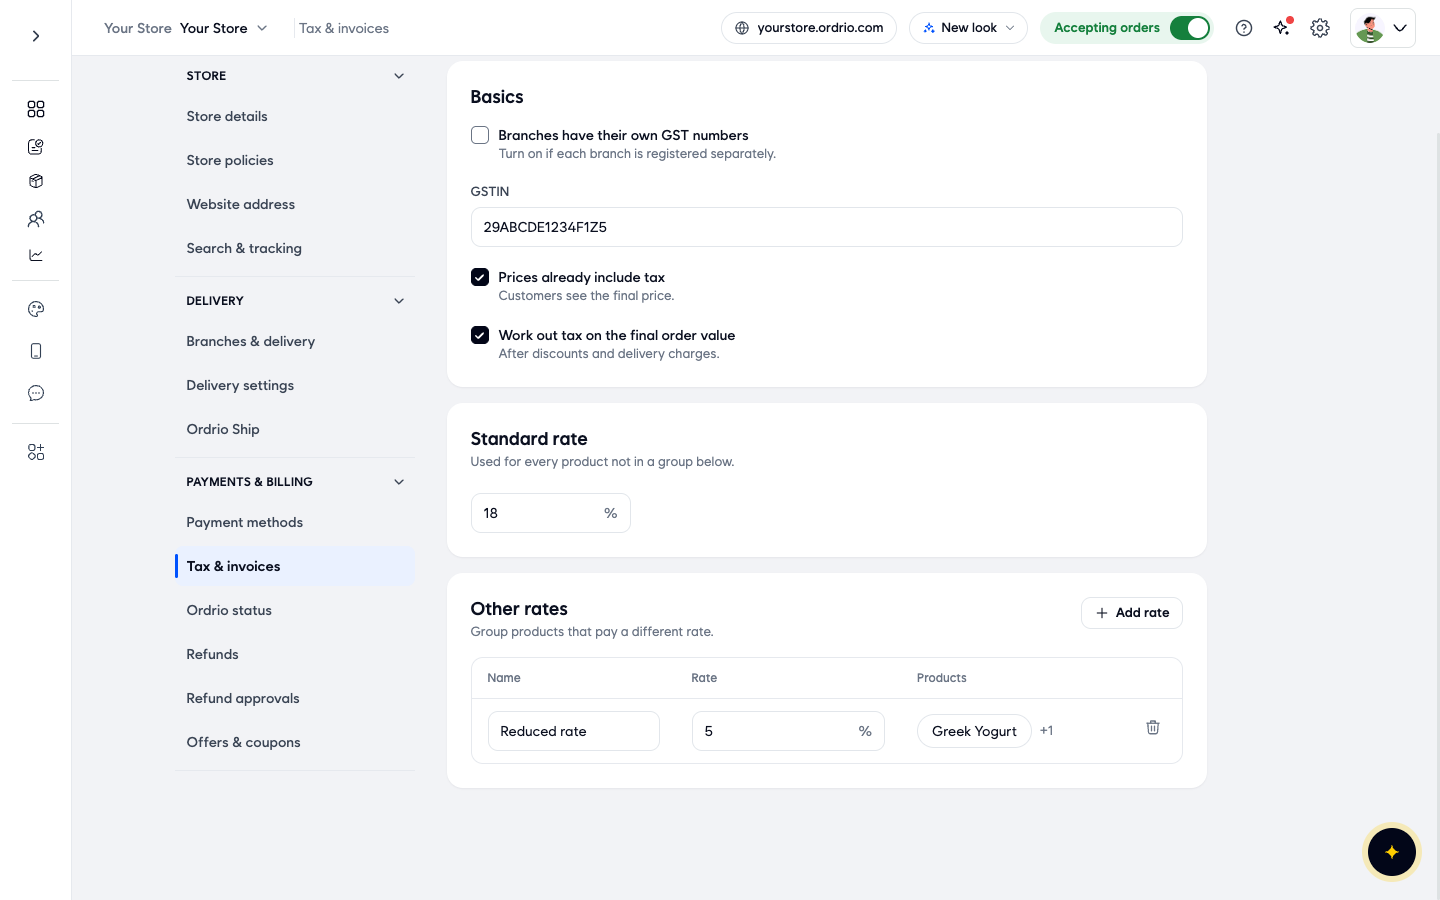
- In Basics, leave Branches have their own GST numbers off if your whole business uses one GSTIN. Turn it on only if each branch is registered separately.
- In GSTIN, type your own GSTIN. The screenshots show an example number (29ABCDE1234F1Z5). Do not copy it.
- Leave Prices already include tax ticked if the prices you entered for your products already include GST. Customers then see the final price. Untick it only if your product prices do not include tax.
- Leave Work out tax on the final order value ticked if tax should be worked out after discounts and delivery charges. Untick it if you do not want this.
- In Standard rate, type the GST rate in percent that most of your products pay, for example 18. This rate is used for every product that is not in a group under Other rates.
- Under Other rates, click Add rate to make a group for products that pay a different rate. A new row appears with Name, Rate and Products.
- In Name, type a name for the group, for example Reduced rate. Use letters, digits, spaces and hyphens only, with at least one letter. Symbols like % are not allowed.
- In Rate, type the rate in percent for this group, for example 5.
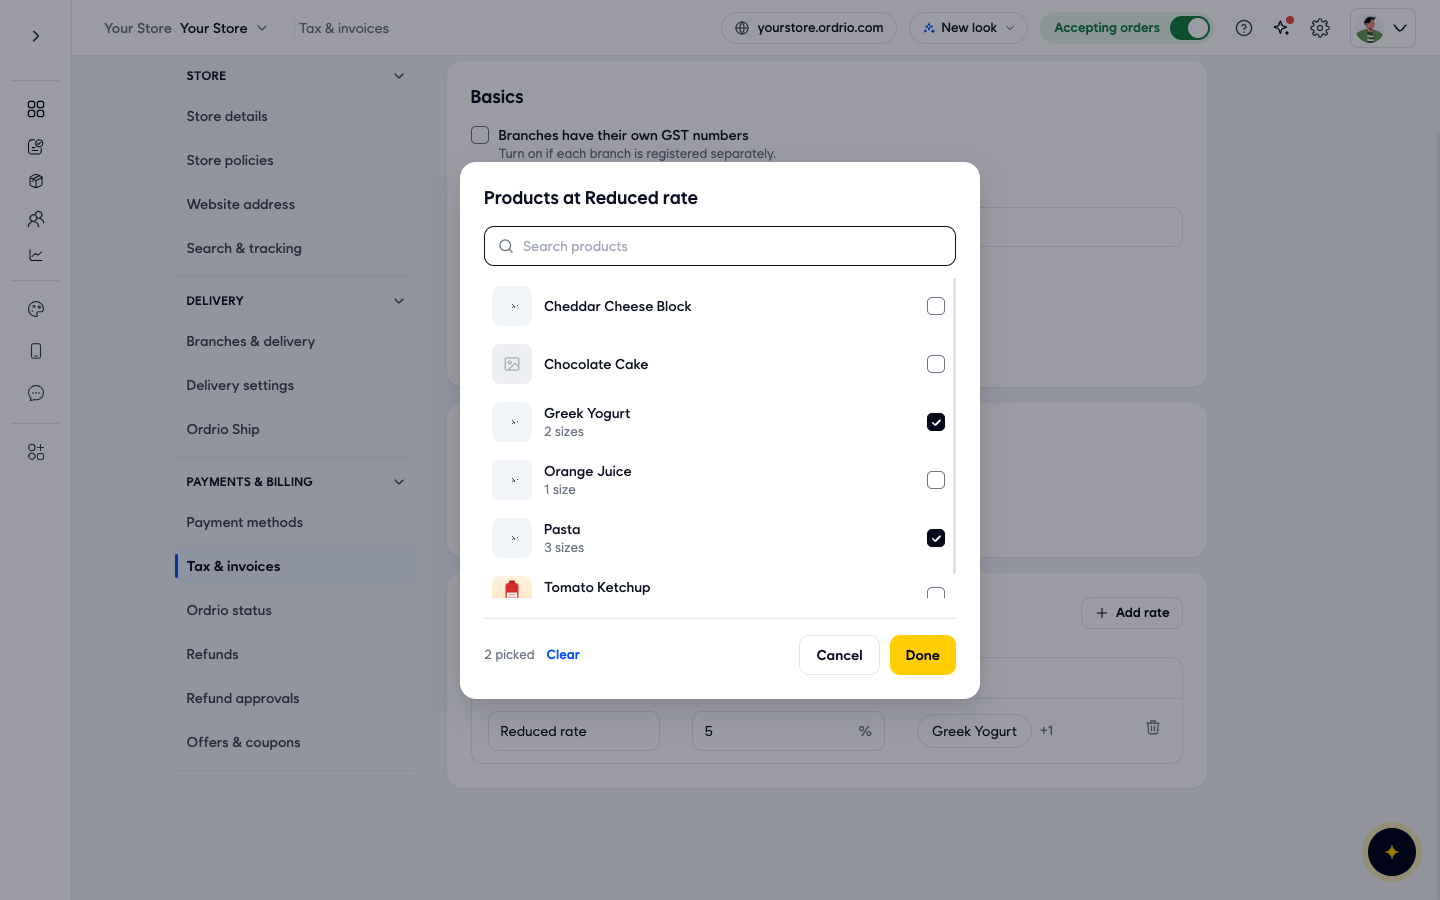
- Click Done. The products you picked now show in the Products column of the row.
- Repeat the steps for adding a rate for each other rate you need, for example a group for products with no tax. When you are done, click Save in the You have unsaved changes bar.
Show GST on your invoices
- Go back to Tax & invoices and, next to Invoice design, click Design. The Invoice design page opens, with a live preview of your invoice on the right.
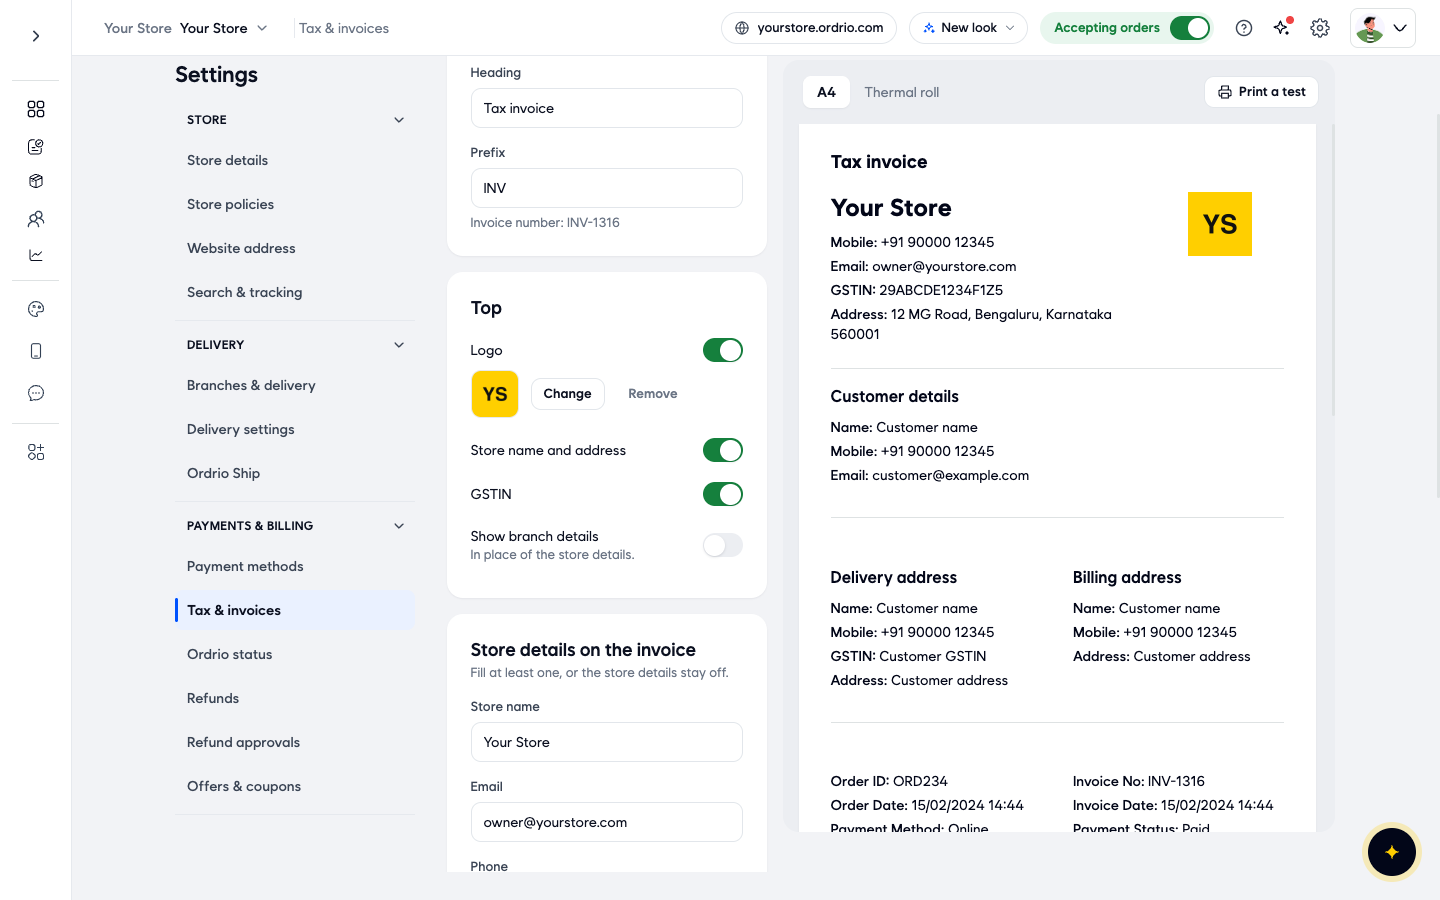
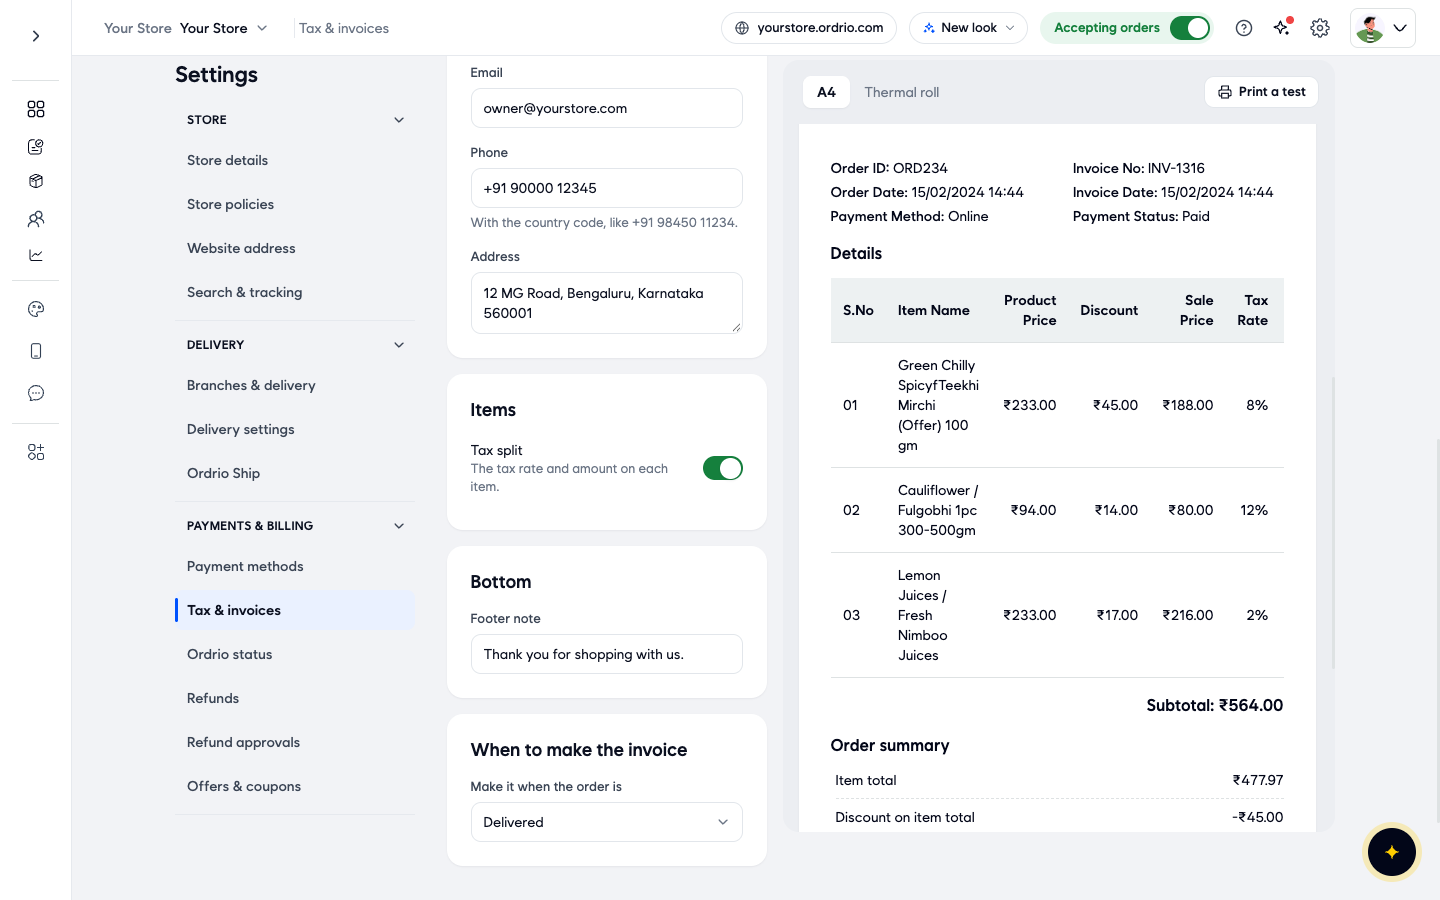
- If you changed anything, click Save in the You have unsaved changes bar.
Good to know
- Example values. The screenshots use example values (a sample GSTIN, phone and email). Always type your own GSTIN and details.
- Every rate group needs products. If a group under Other rates has no products, you cannot save and the row shows Choose at least one product. Choose products or remove the group.
- Removing a group. Click the bin icon at the end of the row, then click Save. Products in that group go back to the standard rate.
- No other rates. If you remove every group, the page shows No other rates. Every product pays the standard rate.
- Changing your mind. Before you save, click Discard in the bar to undo your changes.
- Changing tax later. Go to Settings > Tax & invoices and click Set up next to Tax again. Your saved settings are filled in, ready to edit.
- Check the result. On the Invoice design page, switch the preview between A4 and Thermal roll, and use Print a test to print a test invoice.
Related
- Recommended setup order for new stores
- What you need before getting started
क्या यह आर्टिकल काम का था?