यह आर्टिकल अभी हिंदी में नहीं है, इसलिए इसे अंग्रेज़ी में दिखाया जा रहा है।
कैसे करें
Adding your first product
Create a product with price, images and visibility.
Every product you sell needs a name, a price and a photo before customers can order it. This guide shows you how to add your first product in your Ordrio admin panel, set its price and photos, and choose where customers can see it.
The screenshots show an example product, "Fresh Paneer". Type your own product's name, prices and photos.
Before you start
- Have at least one photo of the product ready on your computer or phone. You can use JPG, PNG or GIF pictures, or an MP4 video, up to 5 MB each.
- If you want to put the product in a category or under a brand, create the category in Products > Categories and the brand in Products > Brands first. You can also add them later.
Add your product
- Open nadi.ordrio.com (your Ordrio admin panel) and log in with your registered email or mobile number.
- In the left menu, click Products, then click Products under it. You see the list of products in your store.
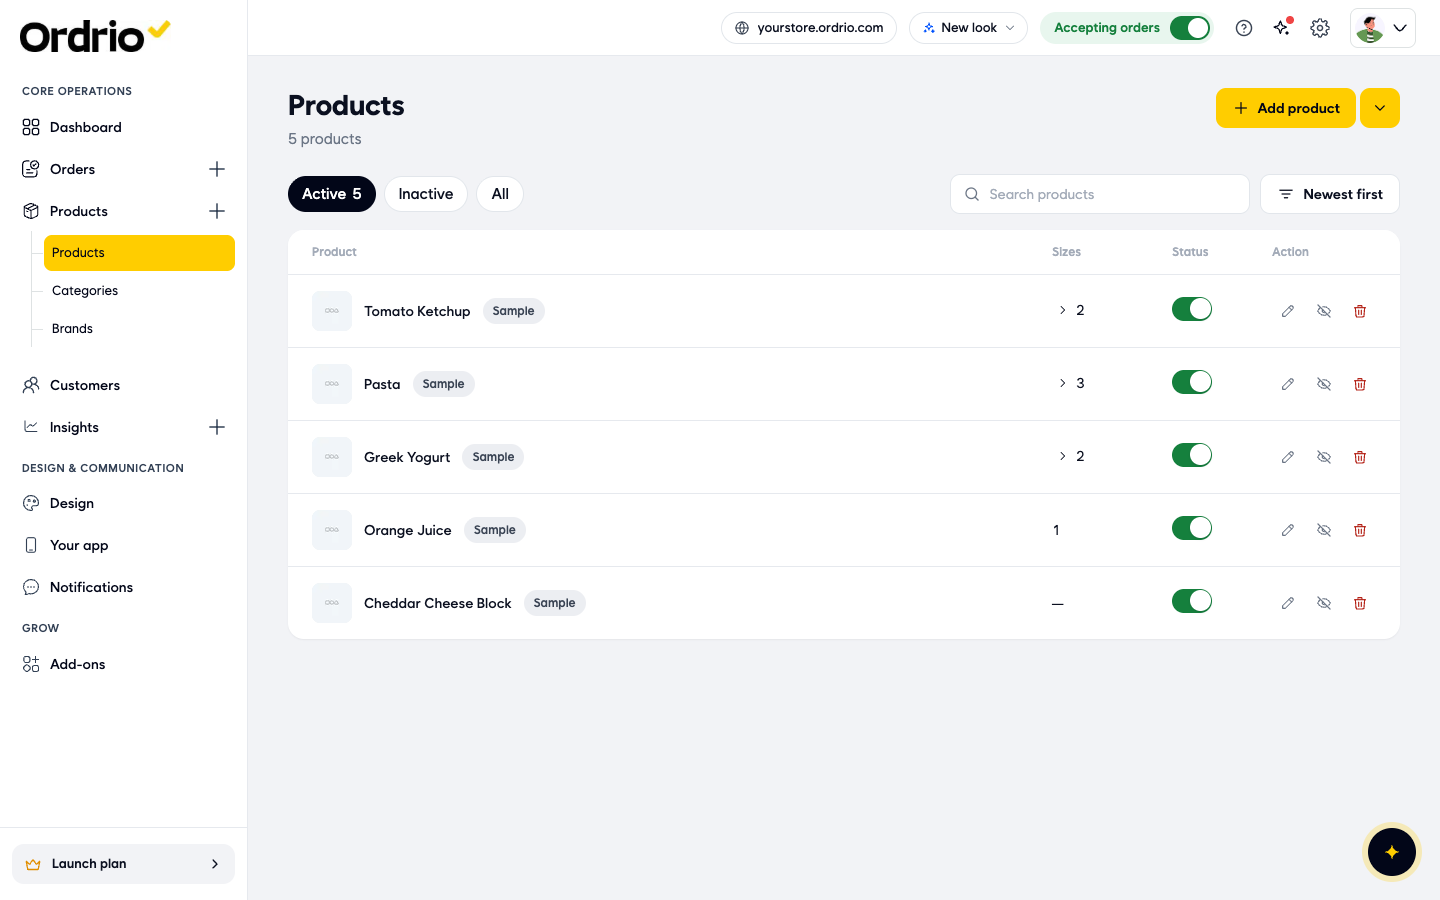
- Click Add product. The Add product screen opens.
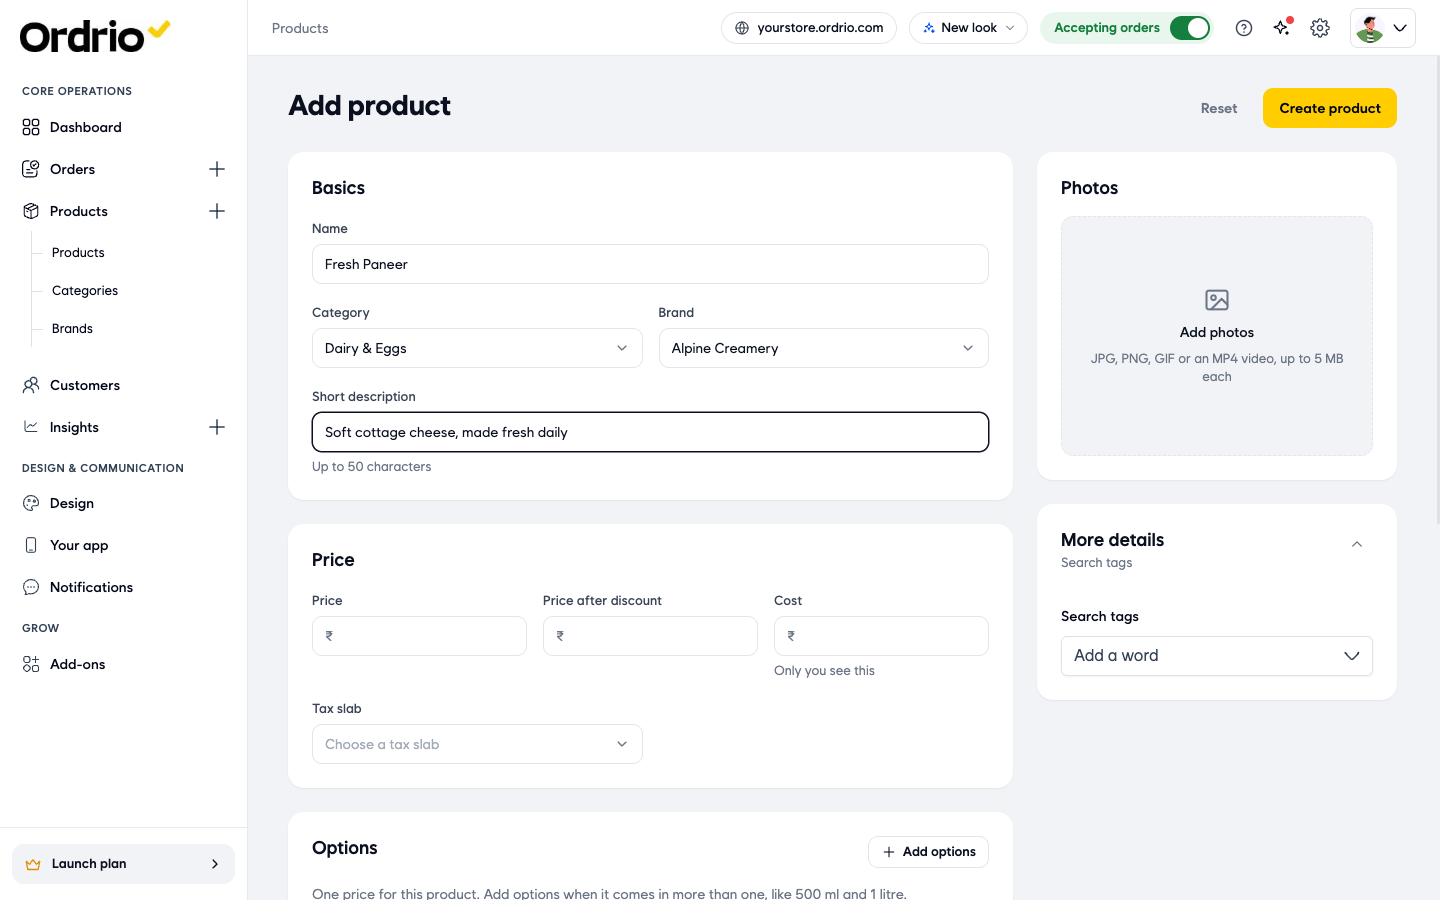
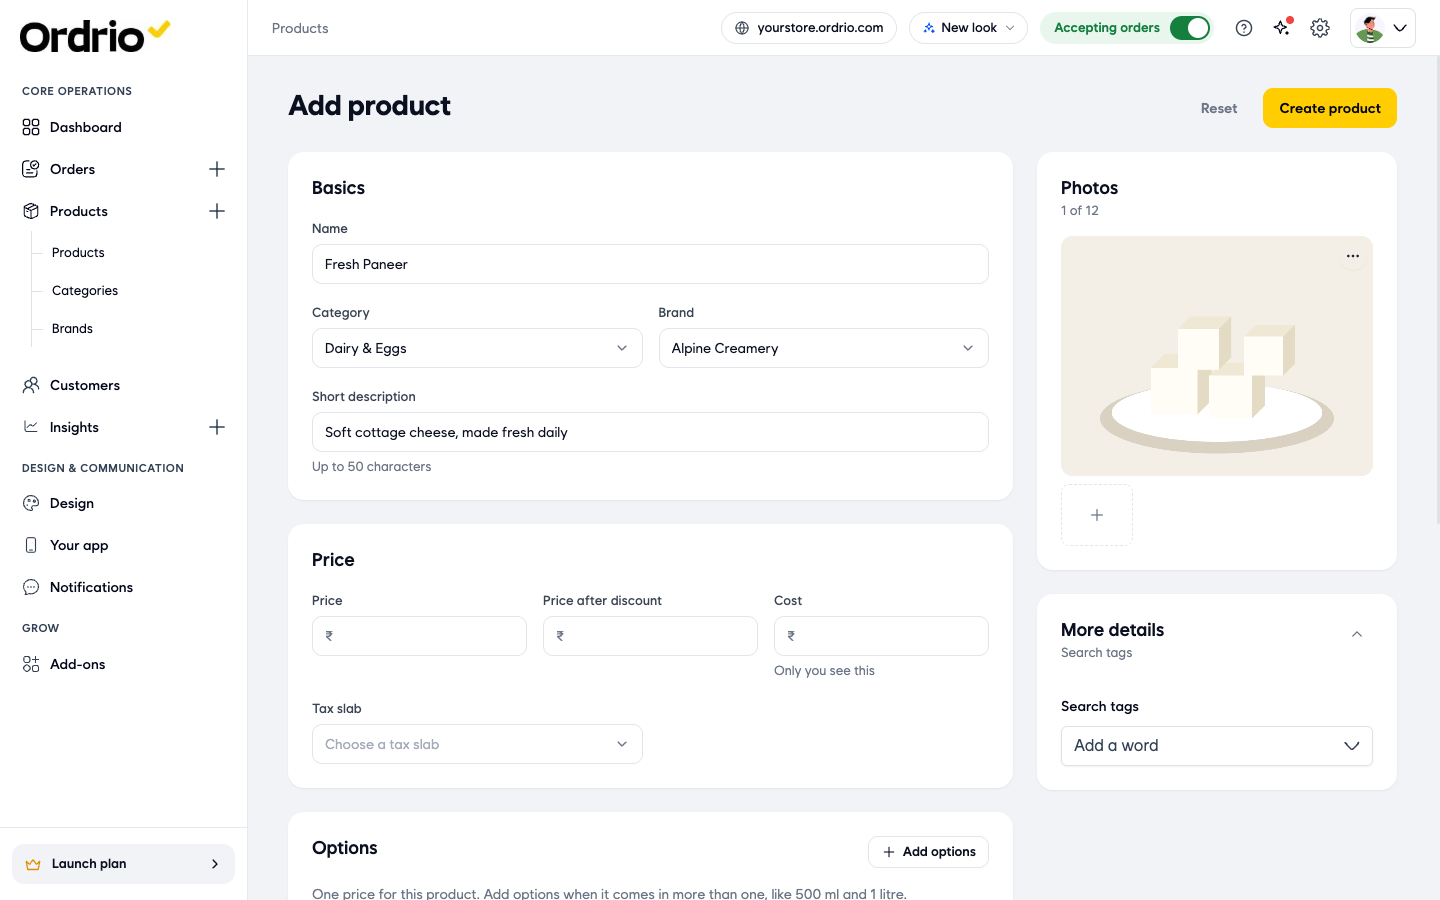
- In Basics, type the product name in Name. This is the name customers see in your store.
- Click Category and pick one or more categories for the product. You can type in Find a category to search the list.
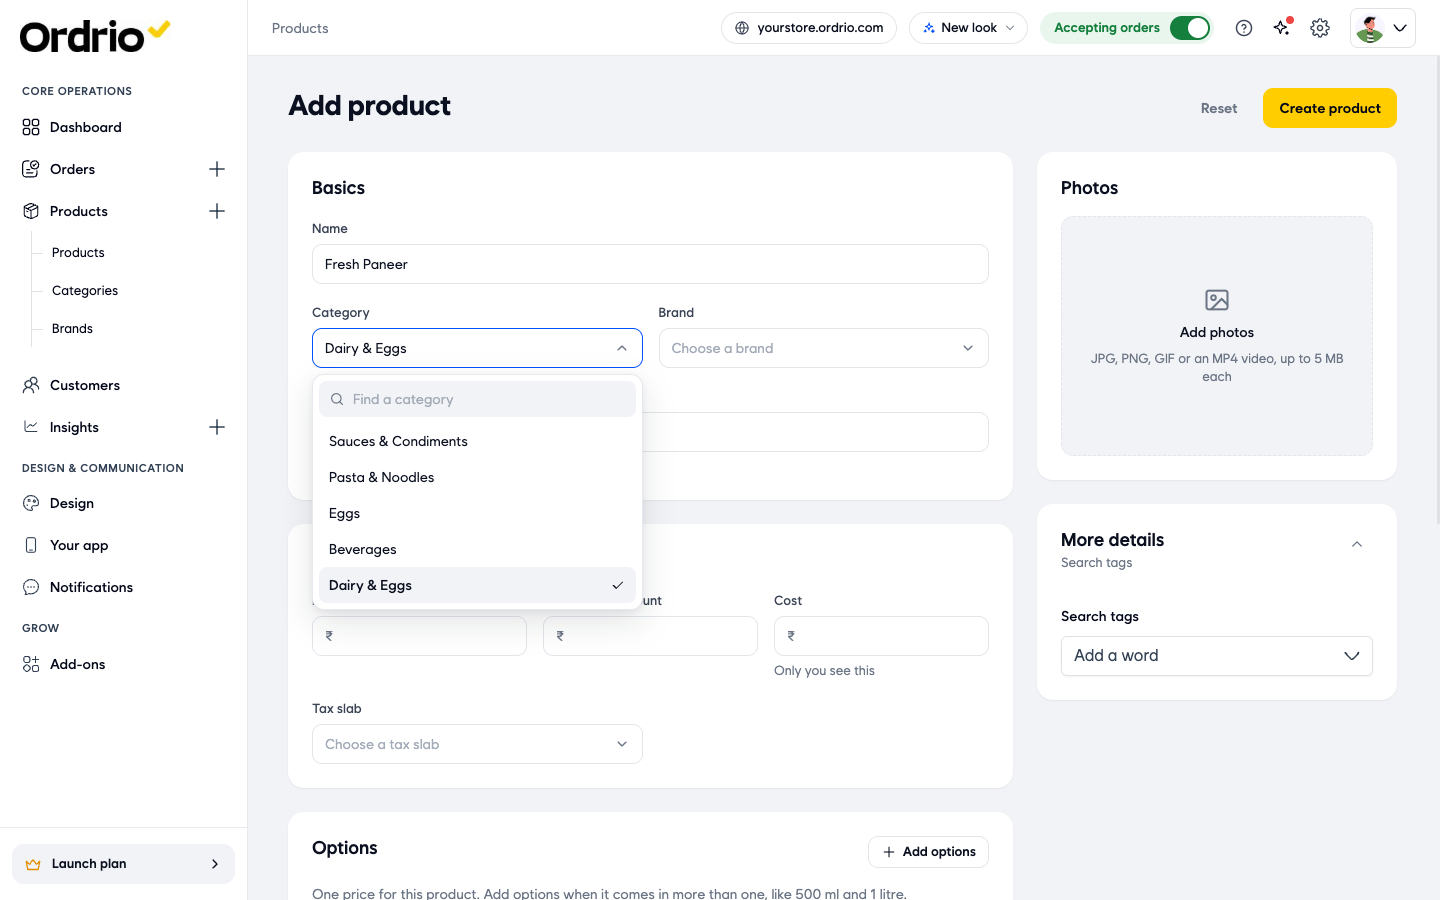
- Click Brand and pick the product's brand. You can skip this if the product has no brand.
- In Short description, type one line about the product. It shows under the product name and can be up to 50 characters.
- In Photos, click Add photos. The Choose photos window opens. Click Upload to add a new photo from your device, or tick photos you uploaded before in your media library and click Add.
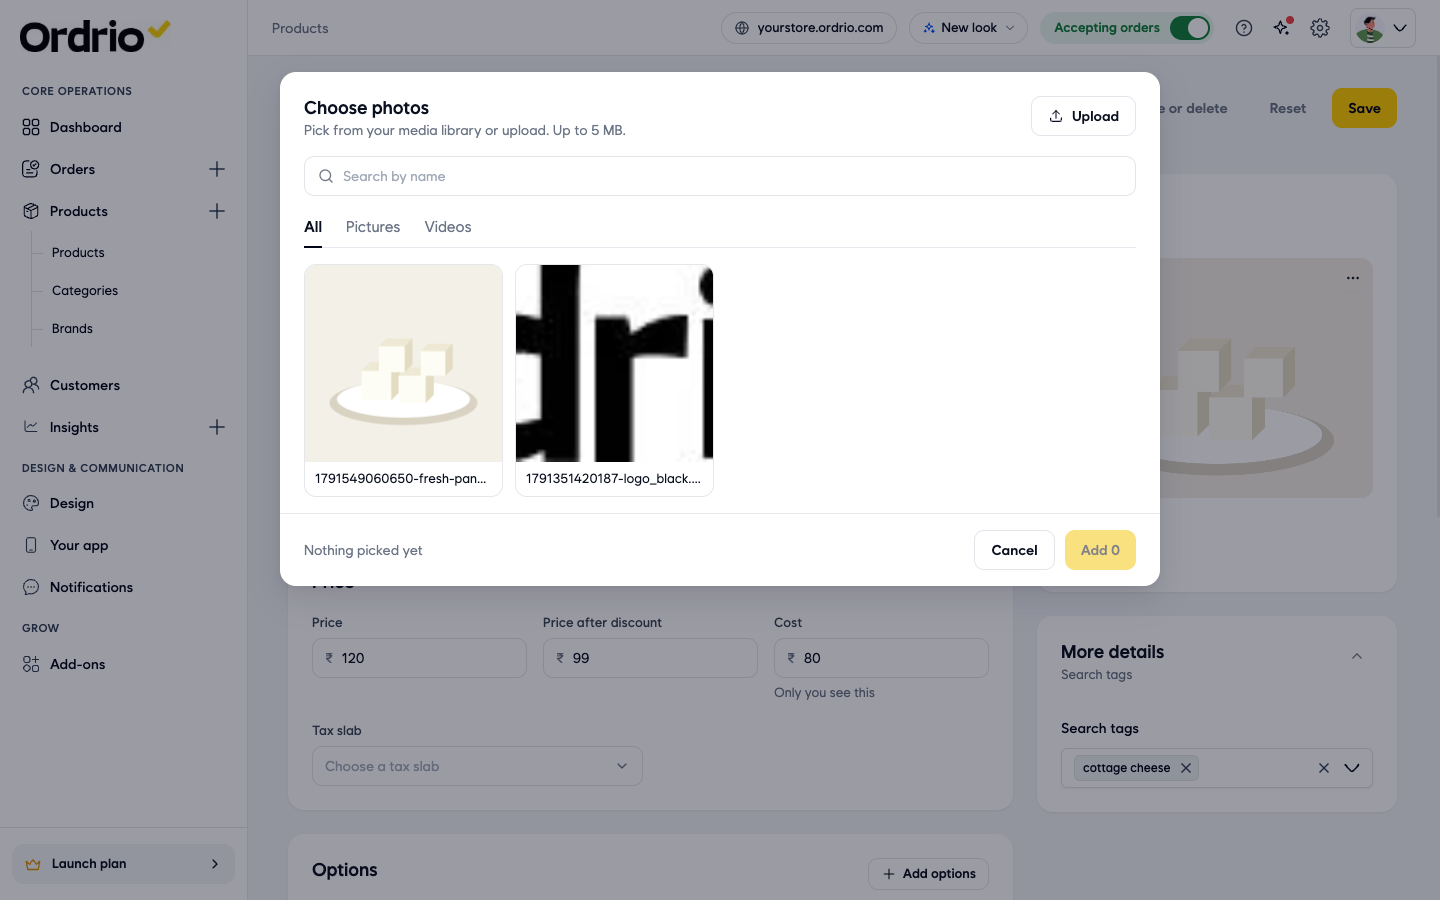
- Check the photo in Photos. The first photo is the cover photo customers see first. To add more, click + below it. To take a photo off, click ... on it and choose Remove.
- In More details, click Search tags and type a word customers might search for, like "cottage cheese". Press Enter after each word. Search tags help customers find the product when they search your store.
- In Price, type the selling price in Price.
- If the product is on offer, type the lower price in Price after discount. Leave it empty if there is no discount.
- In Cost, type what the product costs you. This is for your own records. Only you see it, and customers never do.
- Click Tax slab and pick the tax rate that applies to this product. If the rate you need is not in the list, click Create tax slab.
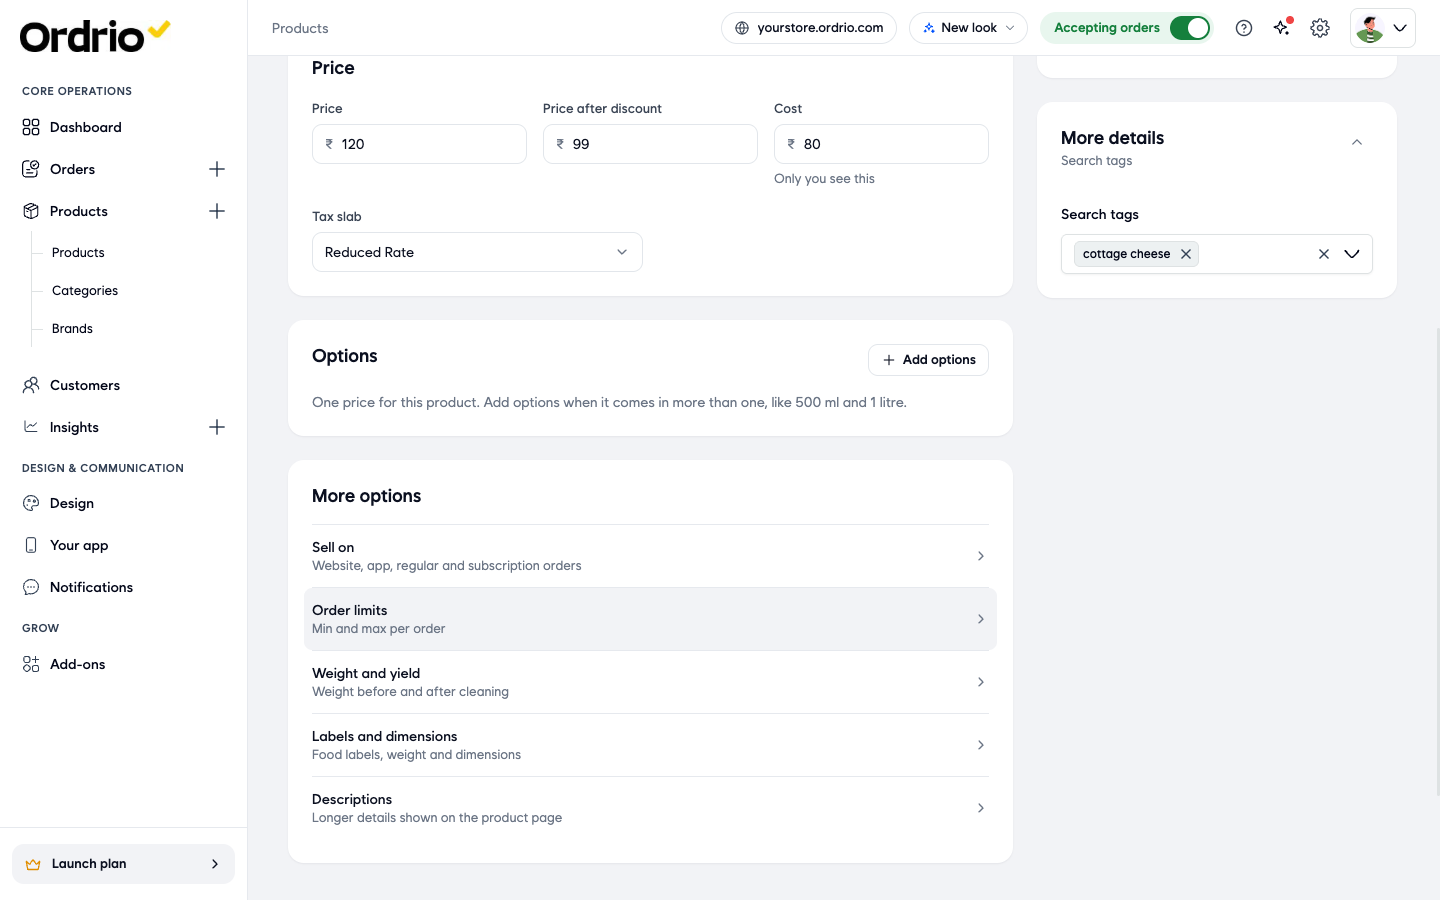
- Look at Options. If the product comes in one size at one price, leave it as it is. If it comes in more than one size, like 500 ml and 1 litre, click Add options.
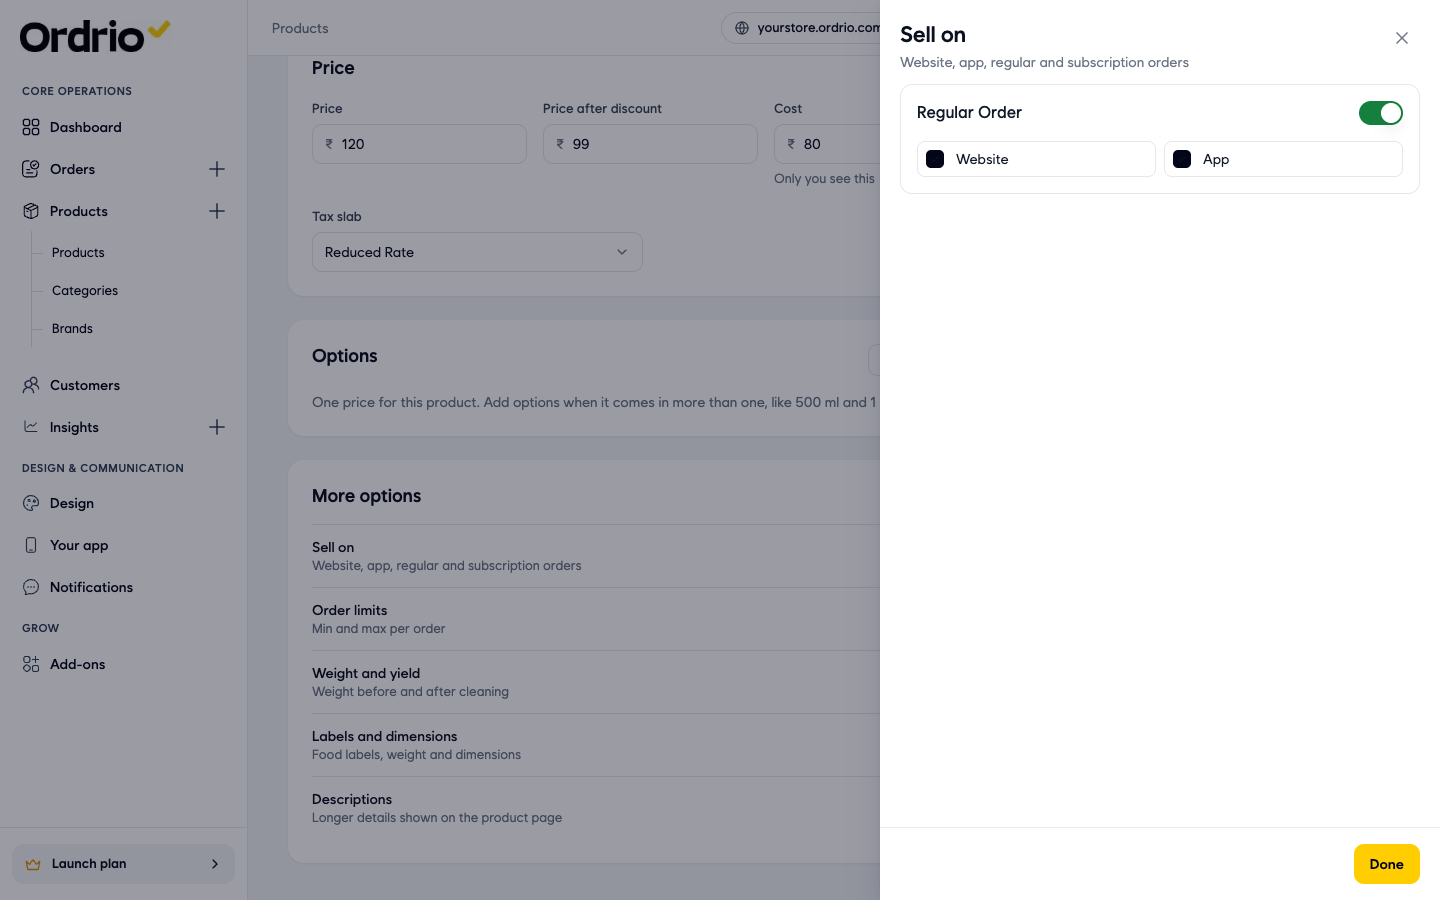
- Under More options, click Sell on to choose where customers can order the product. Keep the Regular Order switch on, and tick Website, App or both. Click Done.
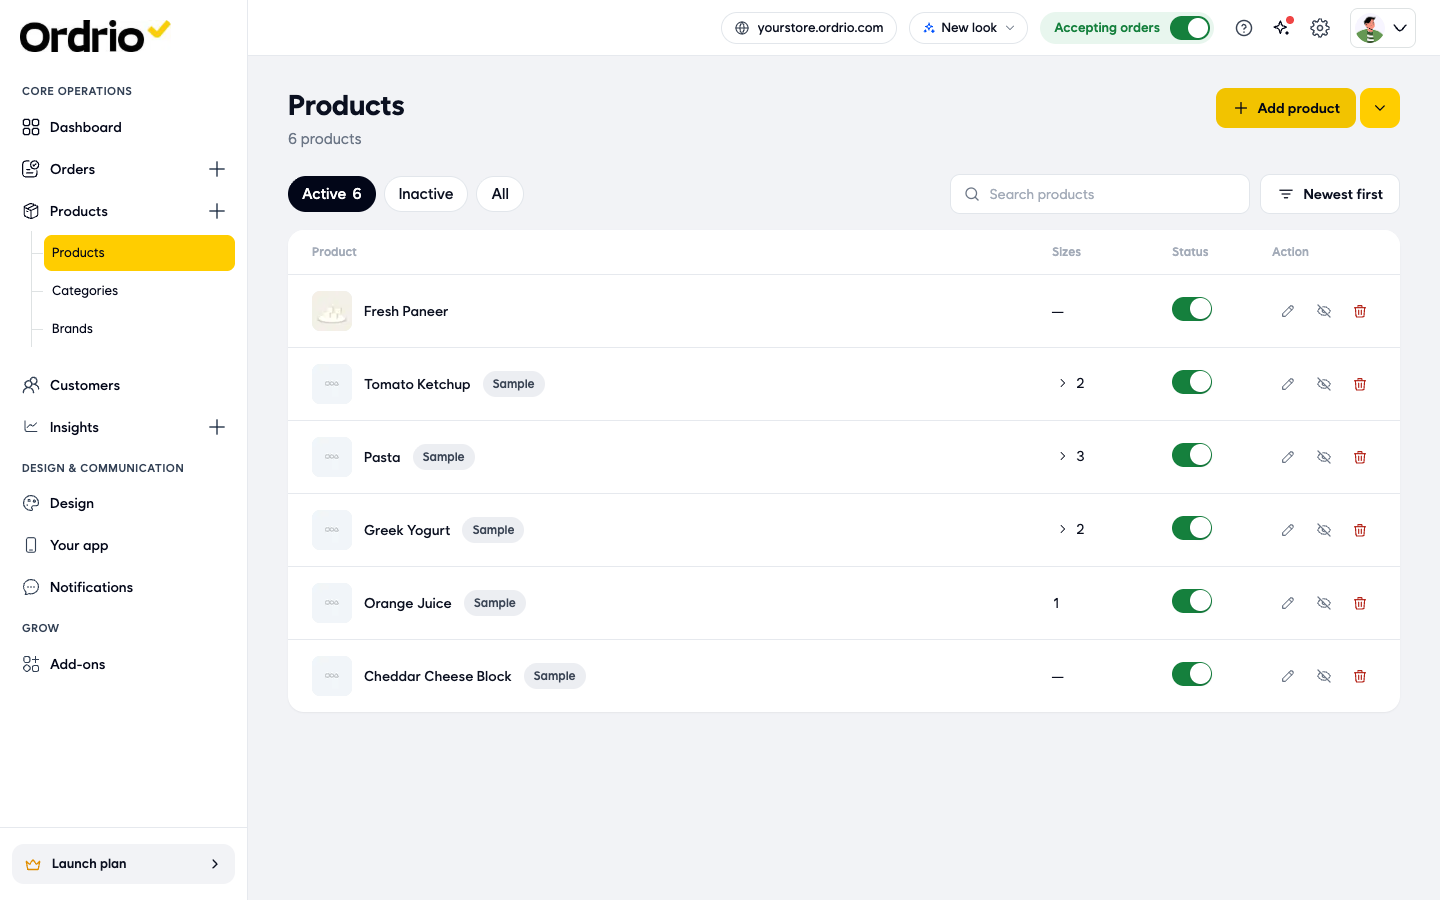
- Click Create product at the top right. You go back to the Products list, and your new product is at the top with its Status switch on. Customers can now see and order it.
Hide or show a product
You can hide a product without deleting it, for example when it is out of season.
- In the Products list, turn off the Status switch next to the product. You can also click the eye icon under Action.
- The product shows the label Deactivated, and a message says it is hidden. Click Undo in the message if you hid it by mistake.
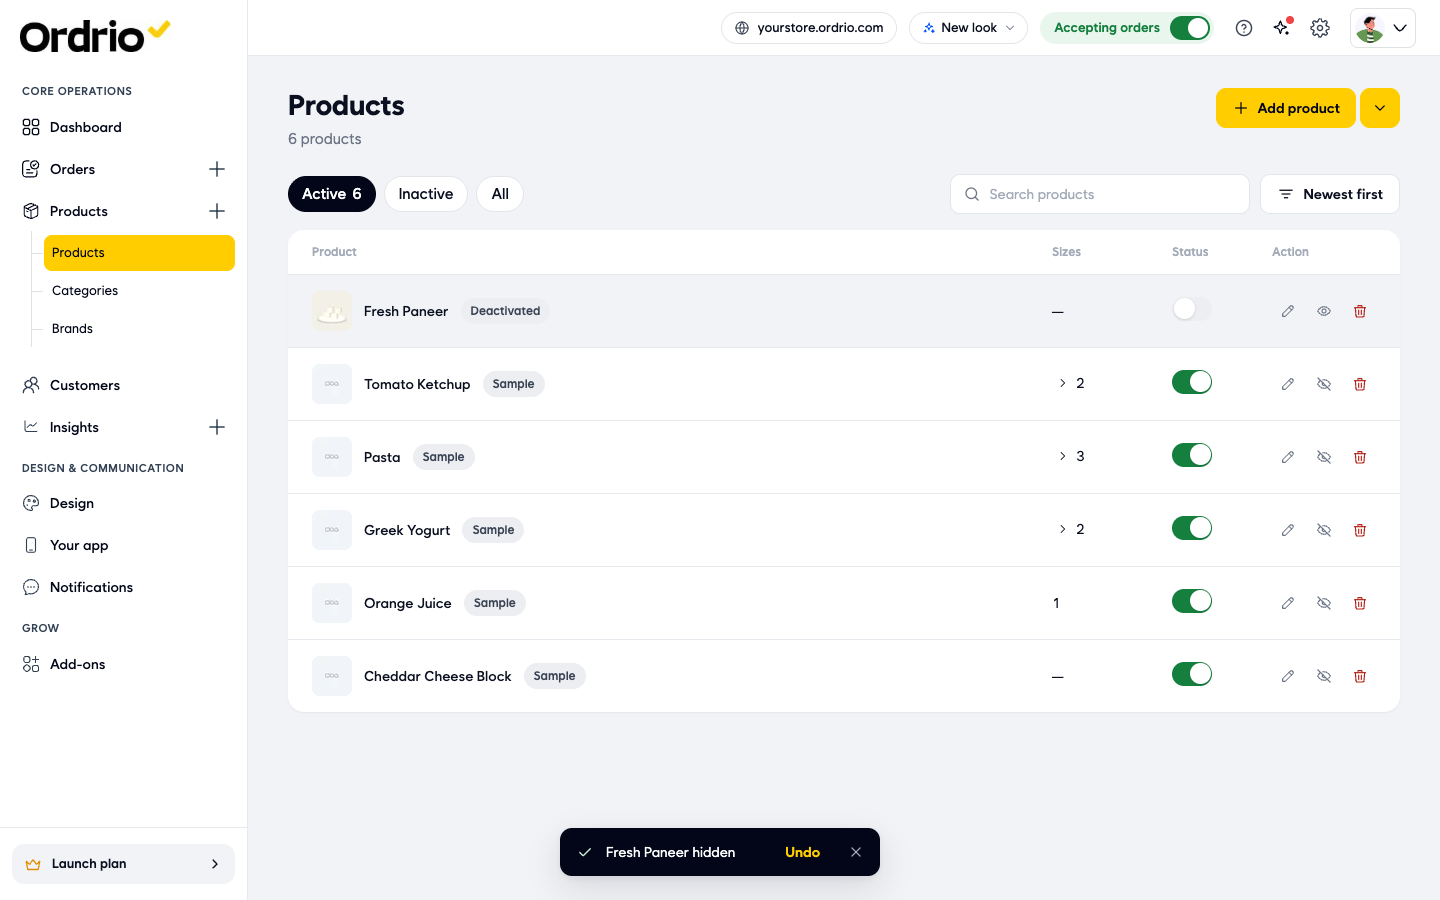
- To show it again, turn the Status switch back on. A message tells you the product is in your store again.
Good to know
- Name and Price are what customers see first, so check them before you click Create product.
- You can add up to 12 photos or videos for each product.
- Under More options you can also set Order limits (the minimum and maximum a customer can buy in one order), Weight and yield (weight before and after cleaning), Labels and dimensions (food labels, weight and dimensions) and Descriptions (longer details shown on the product page).
- To change a product later, click the pencil icon under Action in the Products list, make your changes and click Save.
- New stores come with sample products marked Sample. They show how your store looks. When your own products are ready, you can delete the samples with the bin icon under Action, or click Remove samples on your Dashboard.
- Have many products? Click the arrow next to Add product and choose Bulk upload to add them all at once, or Bulk update to change many at once.
Related
- Adding sizes and options to a product
- Creating product categories
- Adding products in bulk
क्या यह आर्टिकल काम का था?