यह आर्टिकल अभी हिंदी में नहीं है, इसलिए इसे अंग्रेज़ी में दिखाया जा रहा है।
कैसे करें
Branch-level inventory
Link products to branches and set stock per location.
If you sell from more than one branch, Ordrio can keep a separate stock count for each one. You choose which branches sell each product, set how many each branch has, and stock at a branch goes down when that branch gets an order.
Before you start
- Multi Branch lets you run more than one branch from one store. It is not part of the Free plan. On the Free plan, Add-ons marks it Scale and shows an Upgrade Plan button. On the Max plan it is marked In your plan and you can switch it on.
- Inventory Management keeps the stock count. It is a free add-on. Switch it on in Add-ons and turn on Track stock in its settings (see the first section below).
- Every store starts with one branch, its Default branch.
Switch on stock tracking
- Open nadi.ordrio.com (your Ordrio admin panel) and log in.
- In the menu on the left, click Add-ons. Type "Inventory" in Search add-ons to find Inventory Management.
- Click the name Inventory Management to open it, then click Activate. The card now shows Installed and a Settings button.
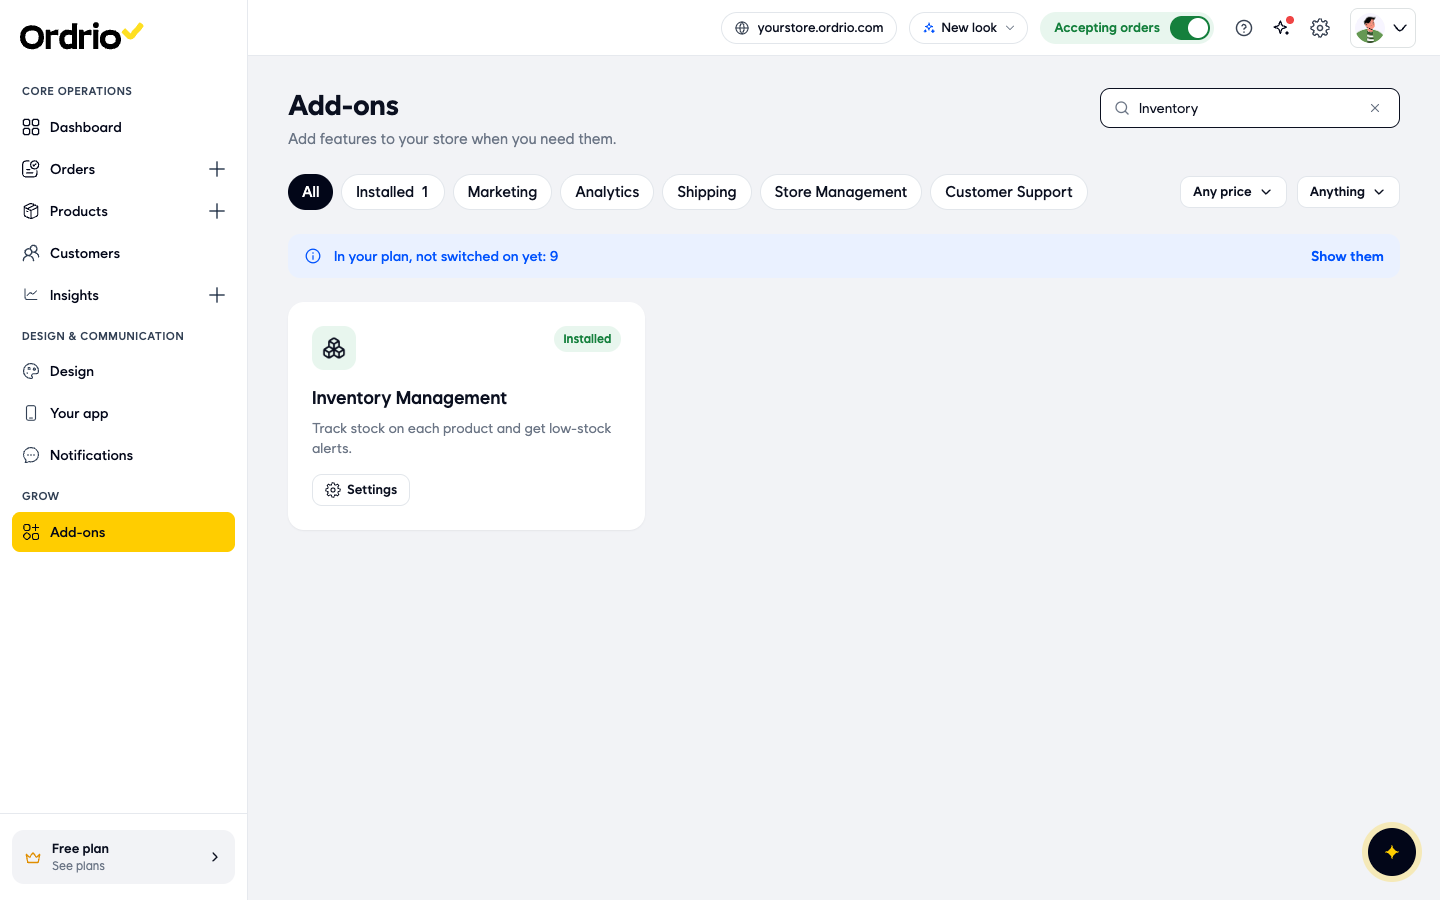
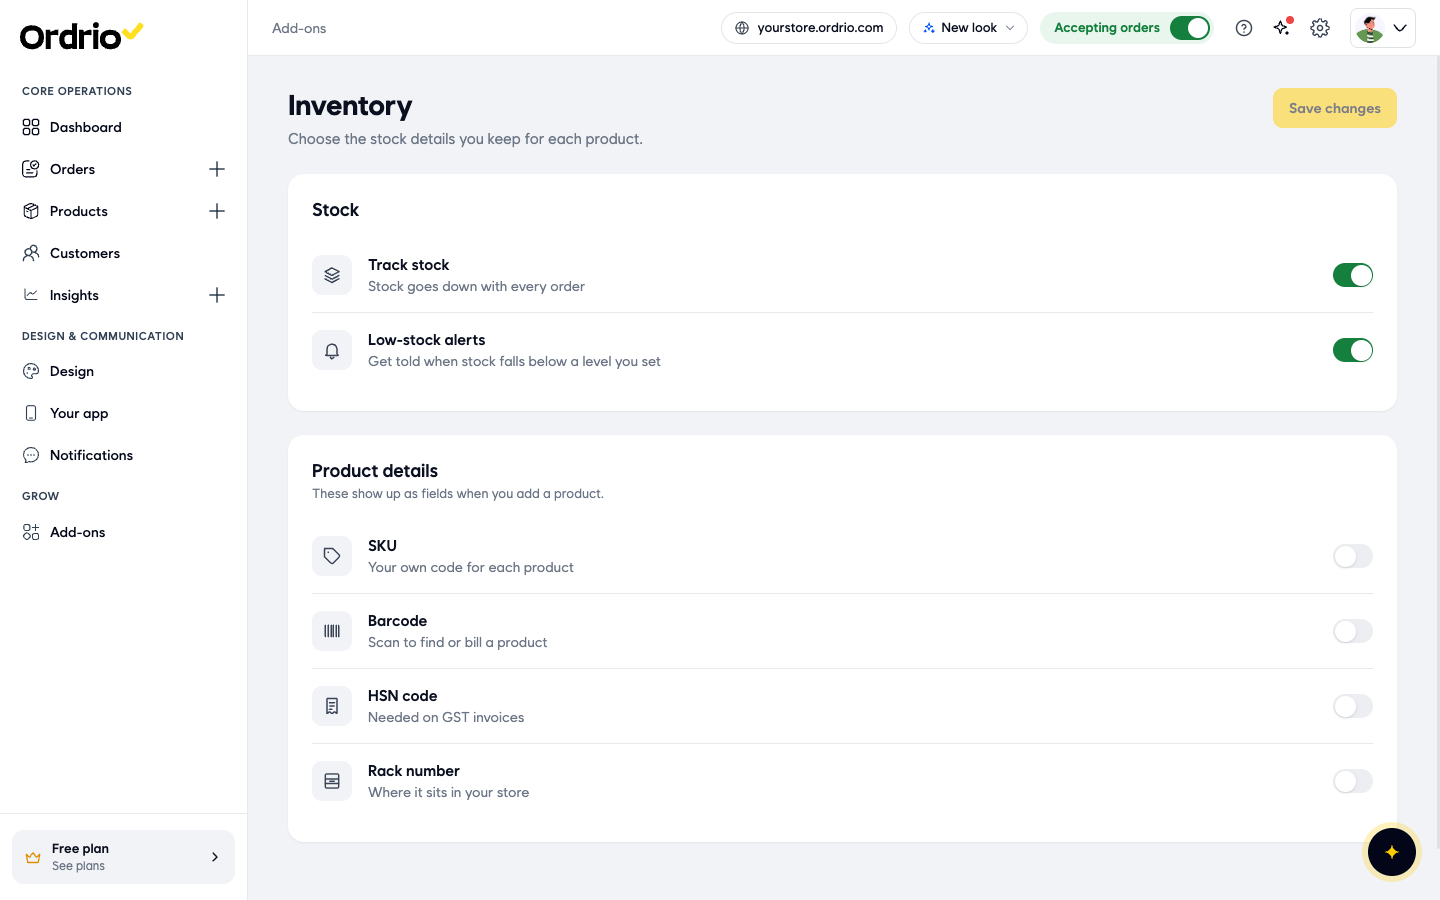
- Click Settings on the card. The Inventory screen opens.
- Under Stock, turn on the switches you want:
- Track stock: stock goes down with every order.
- Low-stock alerts: you are told when stock falls below a level you set.
- Under Product details, turn on any extra fields you want to fill in for each product:
- SKU: your own code for each product.
- Barcode: scan to find or bill a product.
- HSN code: needed on GST invoices.
- Rack number: where the product sits in your store.
- Click Save changes.
Switch on Multi Branch
- In the menu on the left, click Add-ons. Type "Multi Branch" in Search add-ons. The card says "Run more than one branch from one store."
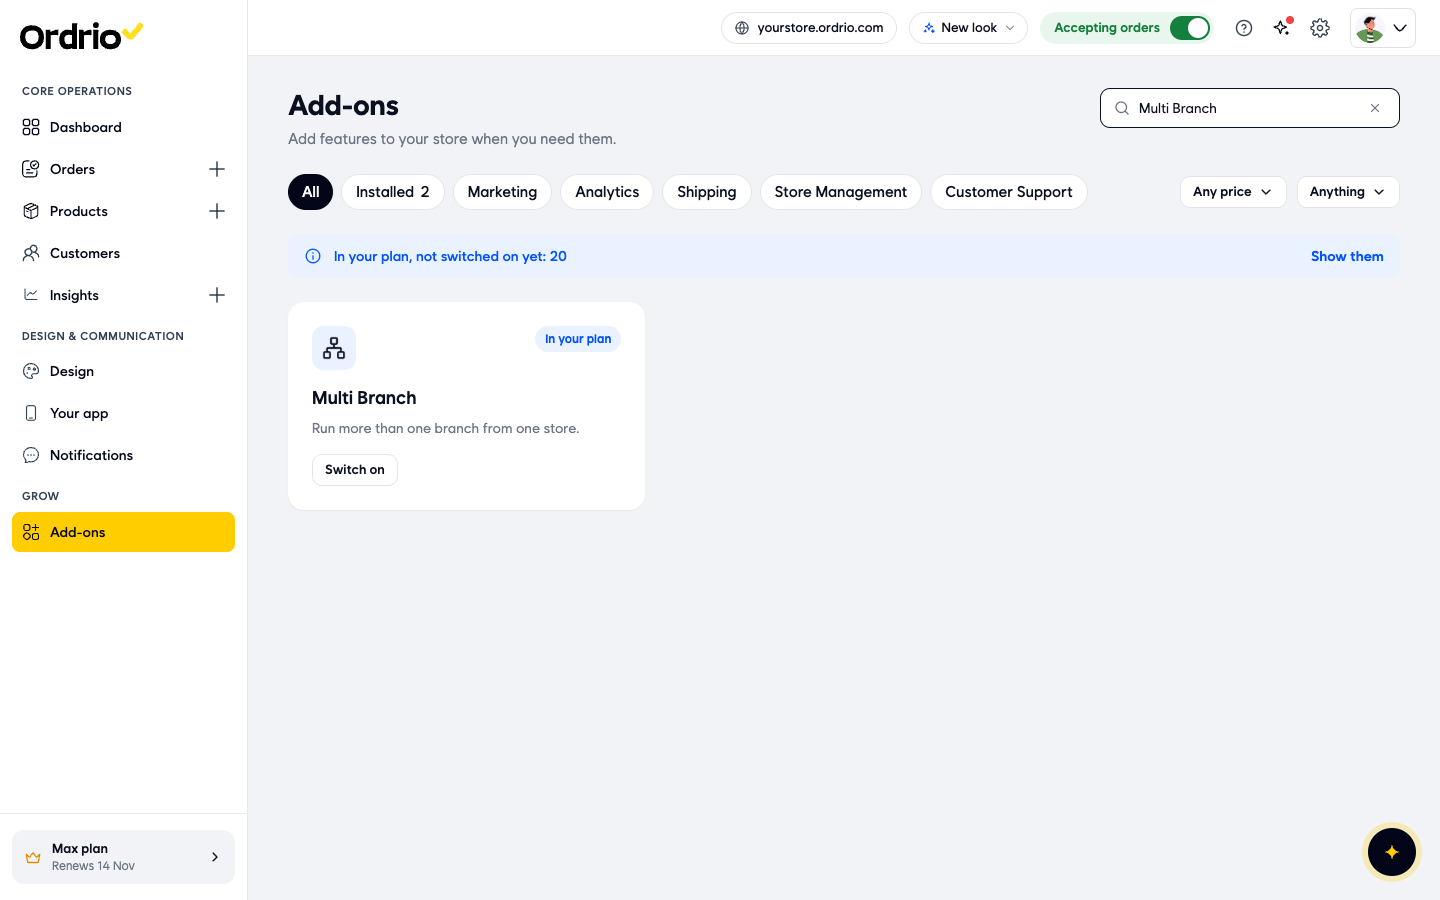
- Click the name Multi Branch. A panel opens with What it does and Details. Click Activate.
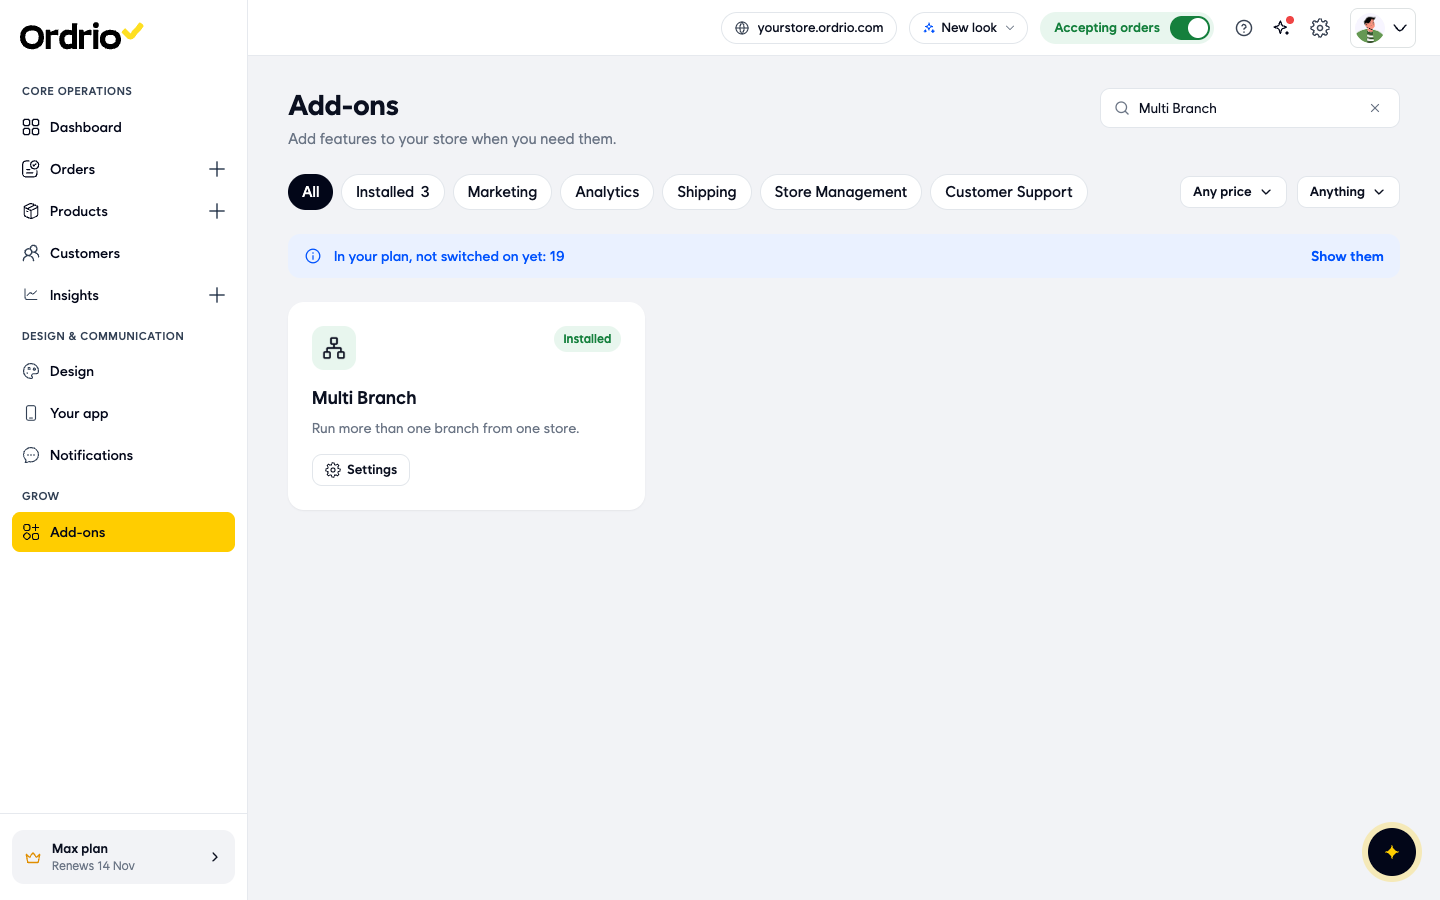
- The card now shows Installed and a Settings button.
Add a second branch
- Click Settings on the Multi Branch card. The Branches & delivery screen opens. You can also get here from the gear button at the top right: Settings > Branches & delivery.
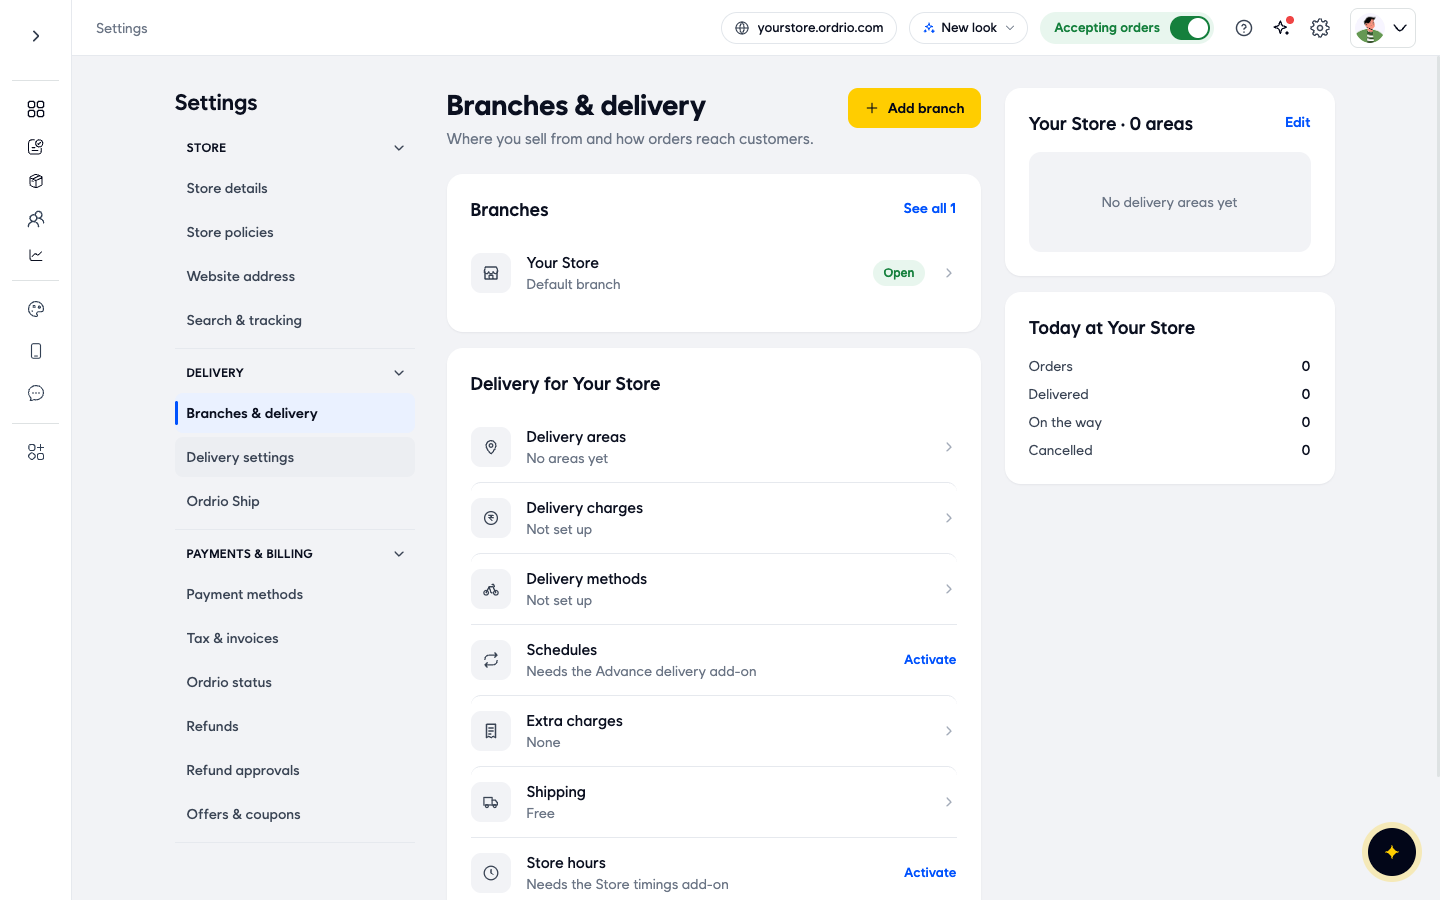
- Click Add branch. The Add branch screen opens.
- Fill in the branch details. The screenshot shows example values. Use your own branch's details.
- Branch name: the name you and your team see, for example "Your Store Indiranagar".
- Contact number: the branch's phone number.
- Email: the branch's email address.
- Branch code: filled in for you. You can change it to 3 to 25 letters or numbers. It shows on bills.
Under Optional:
- City, State and Country.
- Enter Branch GSTIN: the branch's GST number, if it has its own.
- Group: put the branch in a group. You can only choose one after you create a group with Add group on the Branches screen.
On the right:
- Address line 1, Address line 2, PIN code, Locality or area and Landmark: the branch's address.
- Search for the branch on the map: type the address and pick it from the list, or click Use my current location. A pin marks the branch on the map.
- Check Branch name and Address line 1 after you pick a place on the map. Picking a place can fill in address fields for you, so make sure they still say what you want.
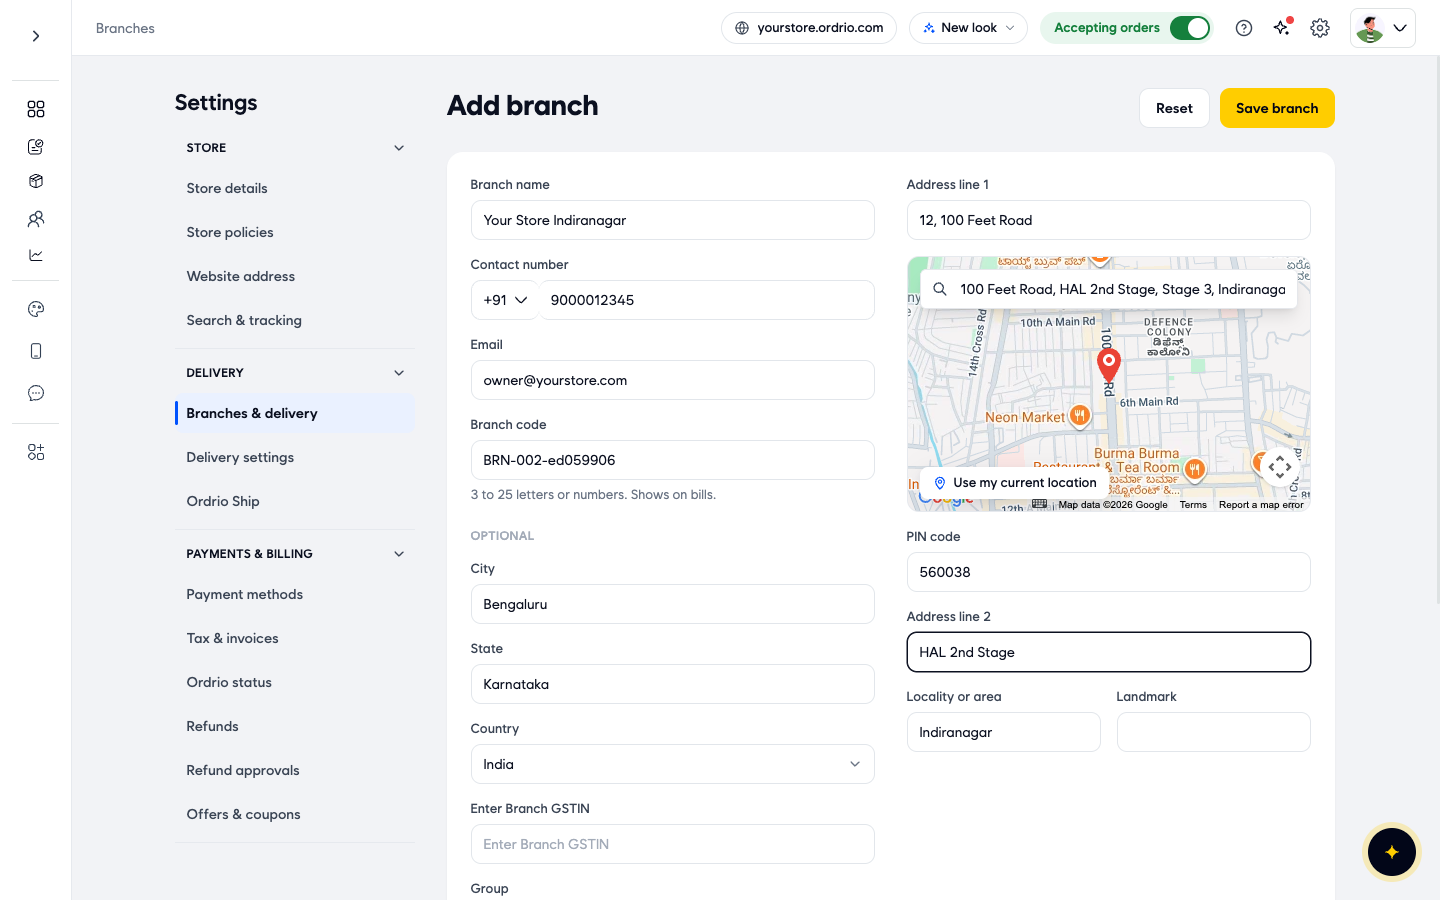
- Click Save branch. Ordrio saves the branch and the screen changes to Edit branch. Here you also get Make this the default branch, and under Hours & delivery you can set up Local delivery and Shipping for this branch. Only one branch can offer shipping.
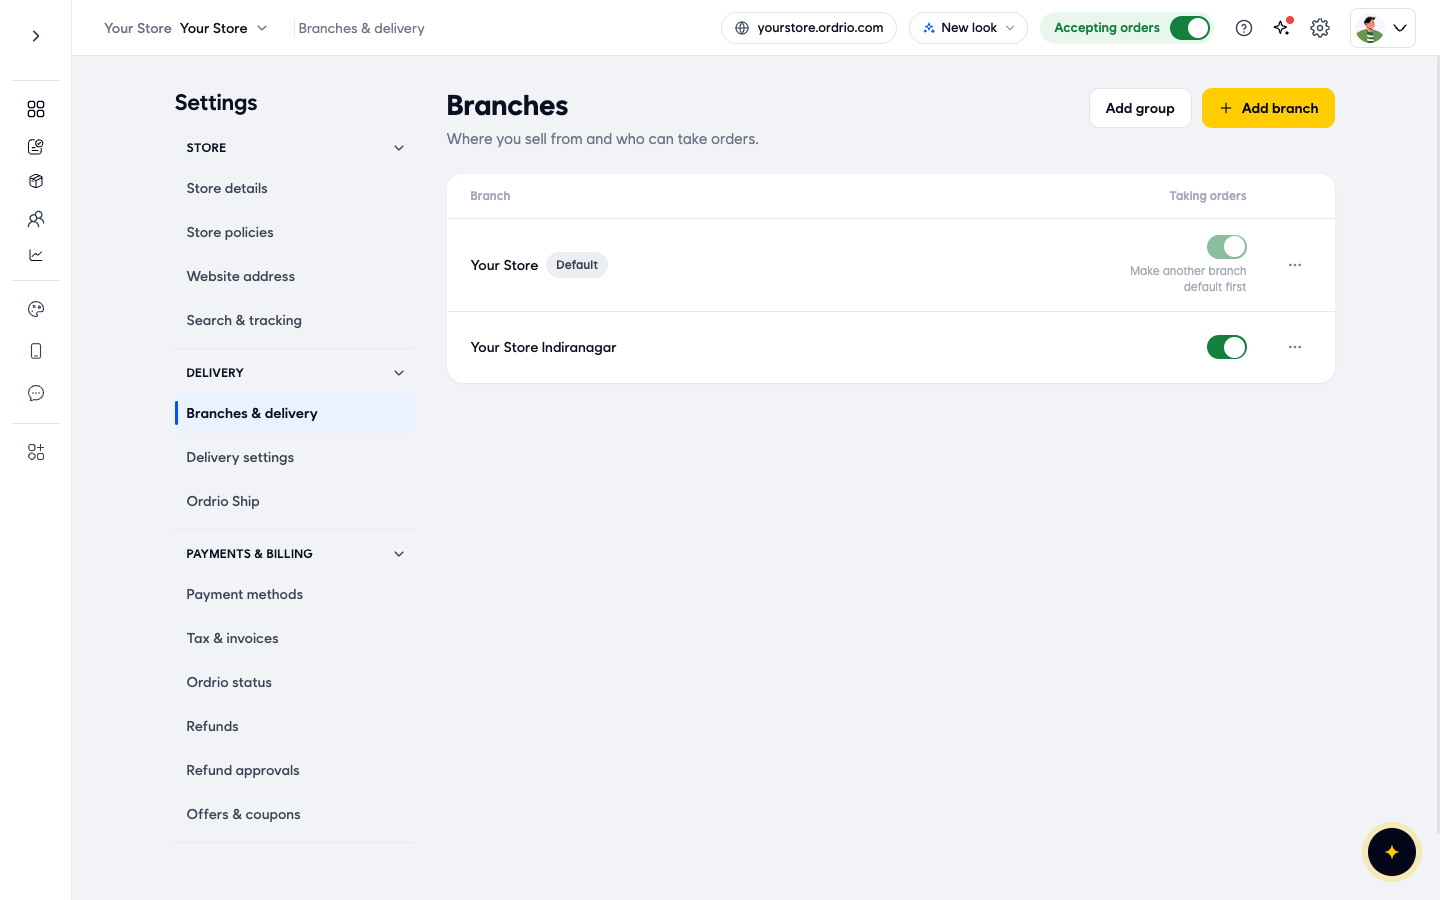
- To see all your branches, open Settings > Branches & delivery and click See all. The Branches list shows each branch and its Taking orders switch.
Choose which branches sell a product
When you add a branch, your products are added to it. You choose where each product is sold on the product page.
- In the menu on the left, click Products, then Products.
- Click the edit button next to the product in the Action column. The product page opens.
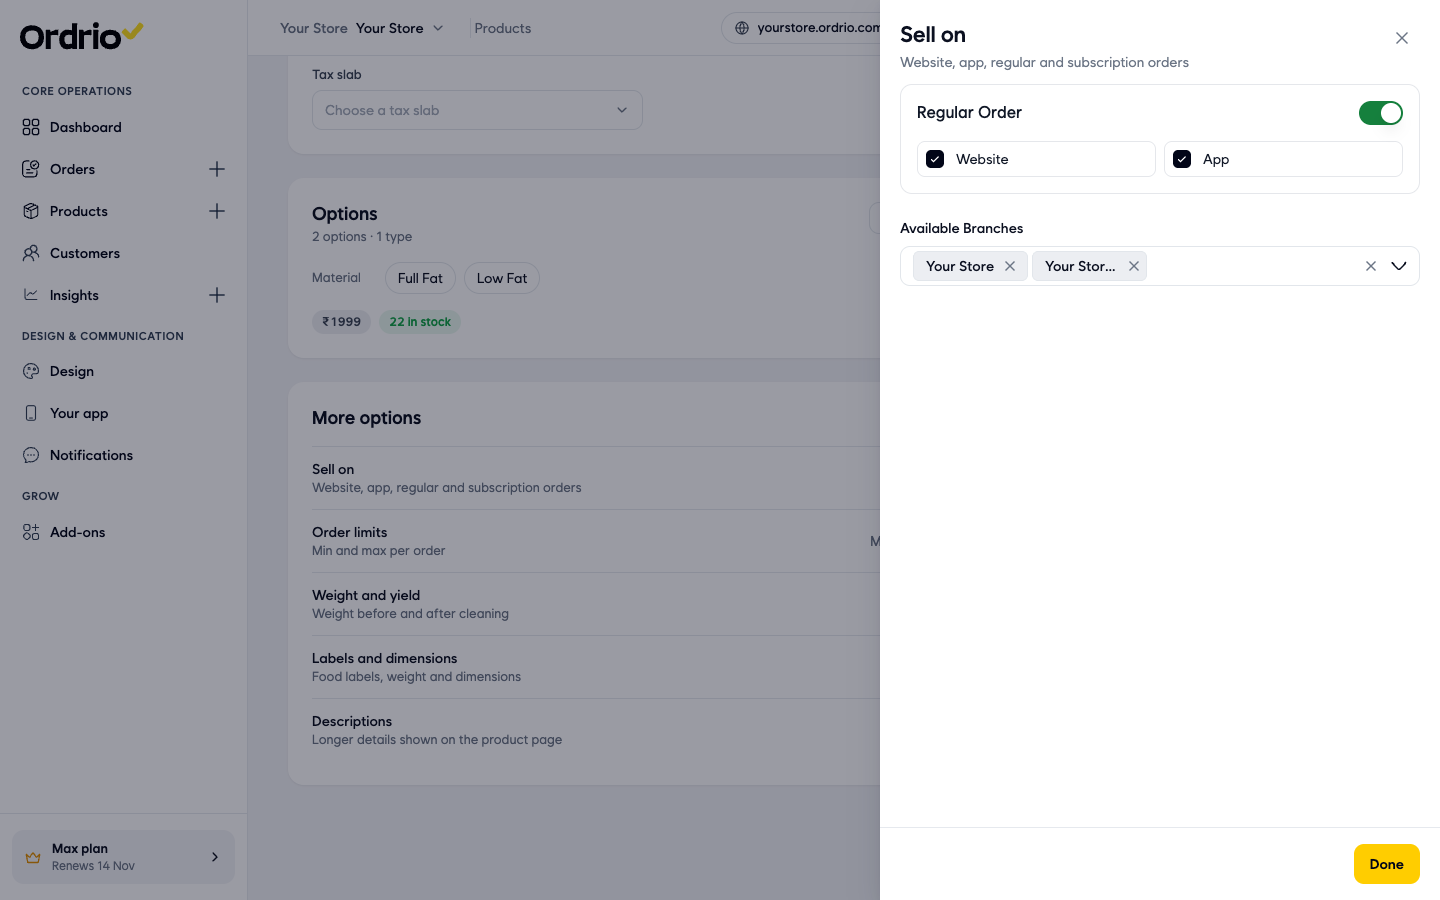
- Under More options, click Sell on. A panel opens.
- Under Available Branches, keep the branches that should sell this product. Click the x on a branch to remove it, or click the field and tick a branch to add it.
- Click Done, then click Save product at the bottom.
Set stock for each branch
The product page shows stock for one branch at a time: the branch shown at the top left of the admin.
- At the top left of the admin, click the branch name (the Switch branch button) and choose the branch you want to set stock for.
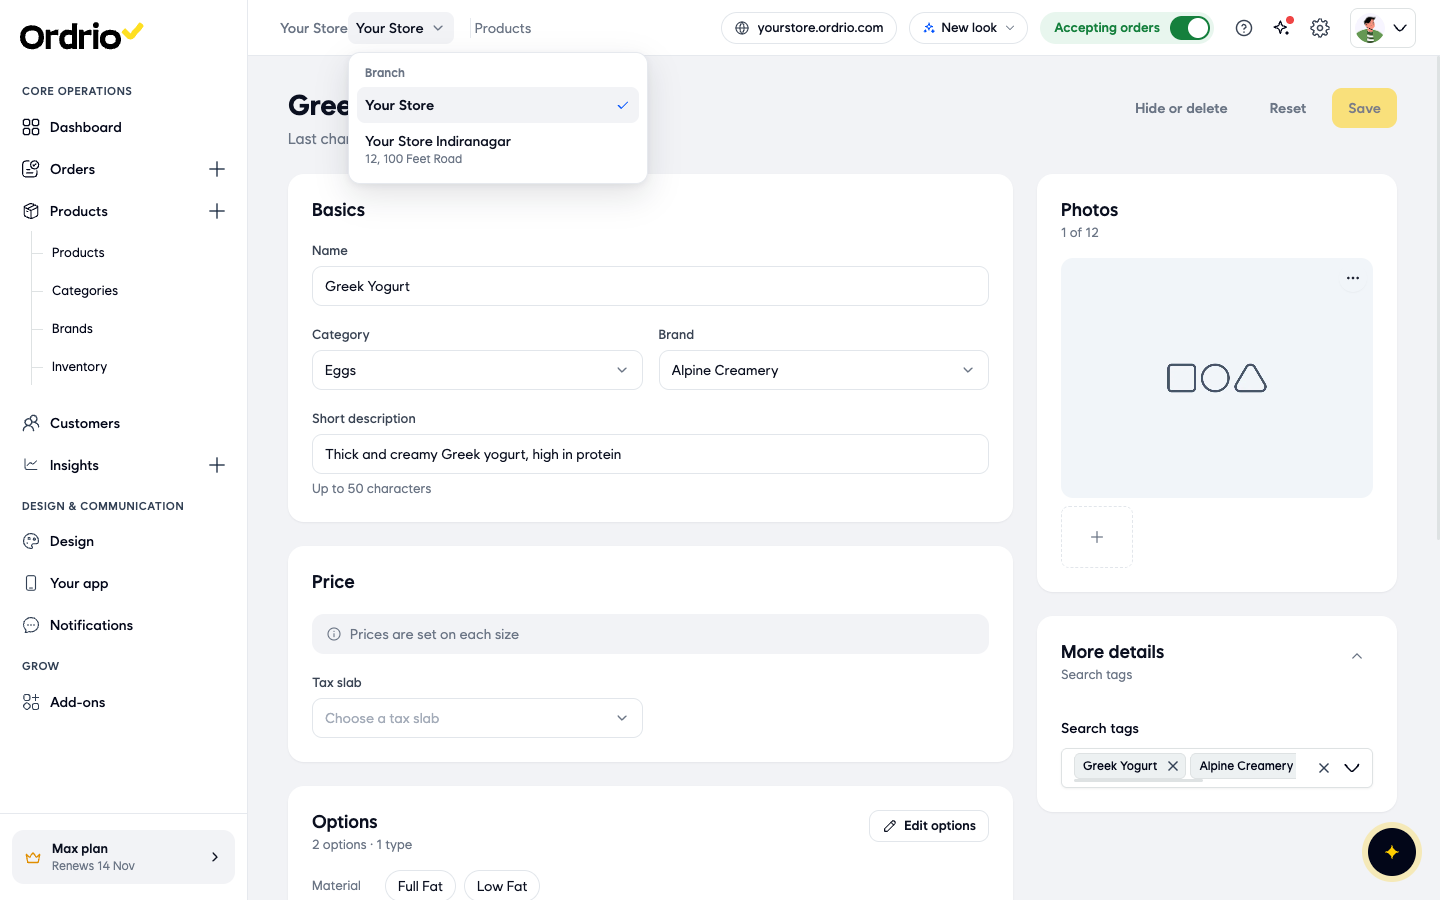
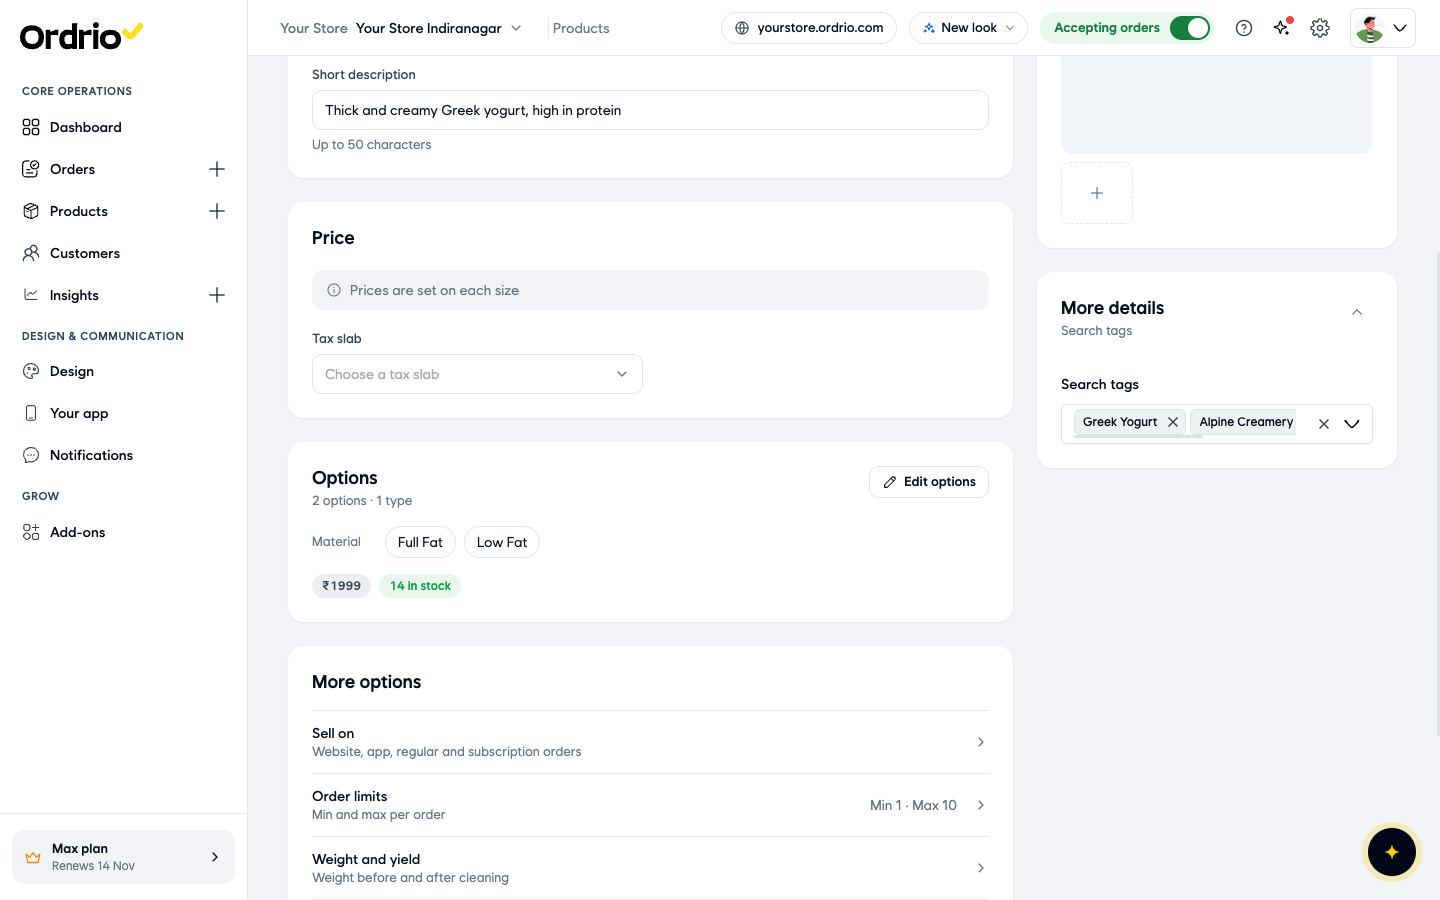
- Open the product (Products > Products, then its edit button). Under Options, the stock shown is for the branch you chose. For a new branch it starts at 0.
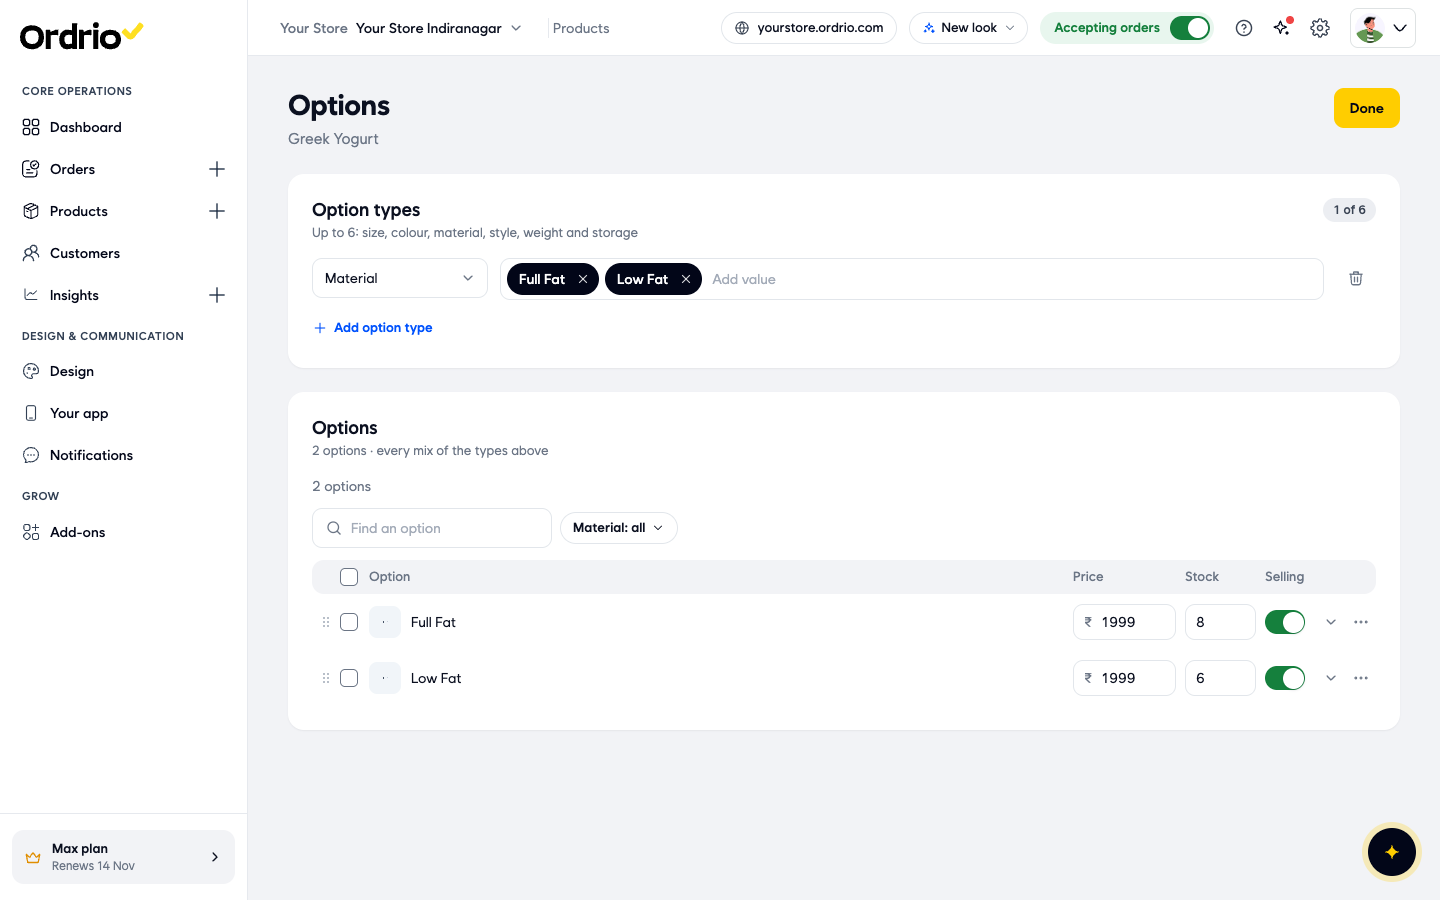
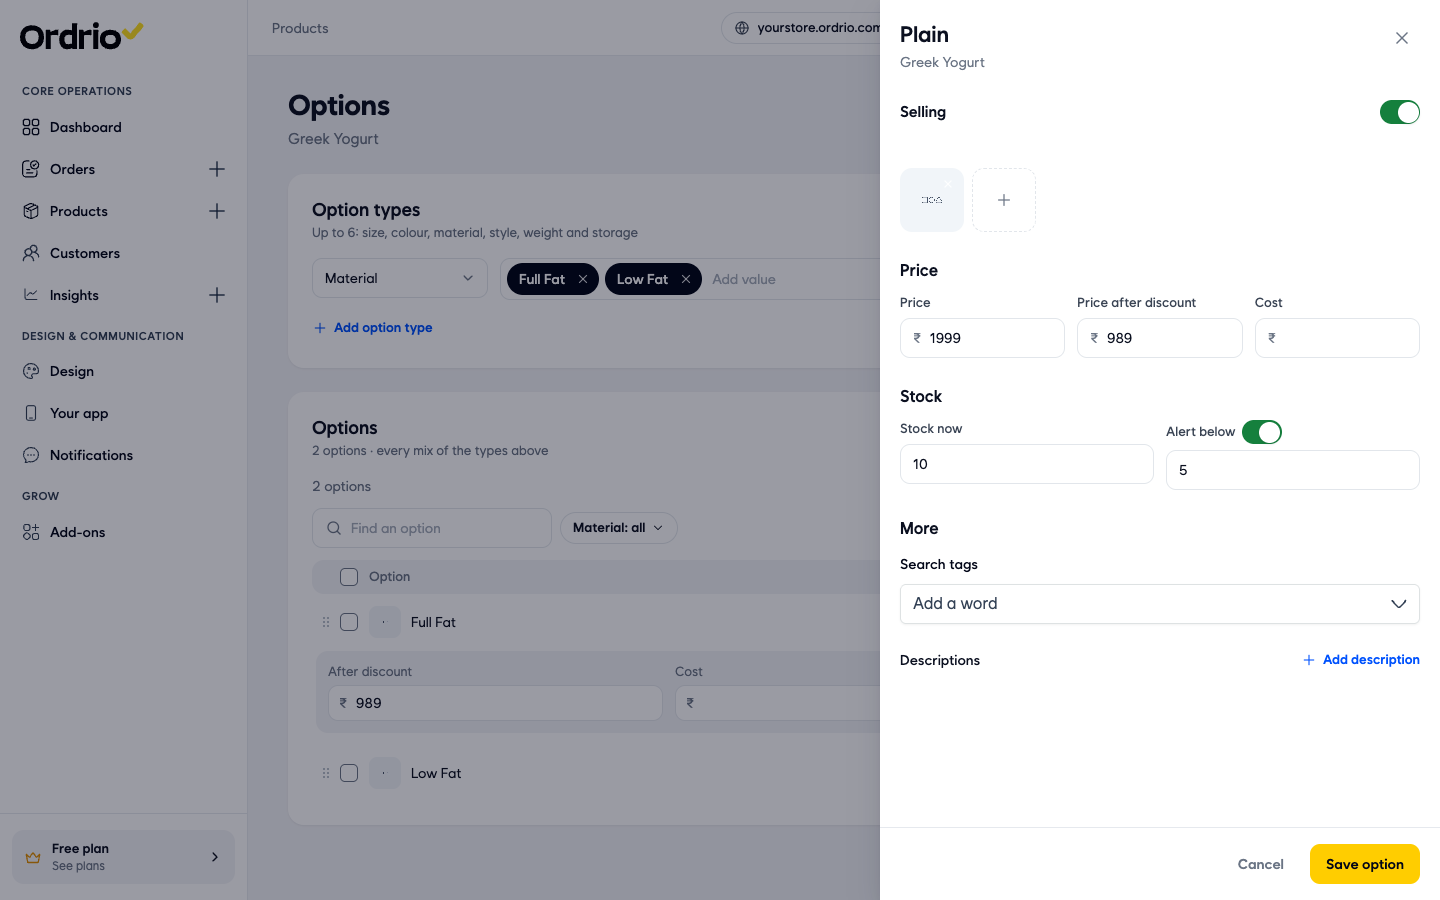
- Click Edit options. In the Options list, type how many this branch has of each option in the Stock column. The example shows 8 and 6. Type your own numbers.
- Click Save product in the Unsaved changes bar at the bottom. Ordrio saves the stock for this branch and takes you back to Products.
- Repeat for each branch: switch branch, open the product and type that branch's stock.
See and change stock for all branches at once
- In the menu on the left, click Products, then Inventory. The Inventory screen lists each product option once for every branch. The line Branch: under the name tells you which branch the row is for.
- Type in the search box to find a product. The example shows Greek Yogurt with different stock at each branch.
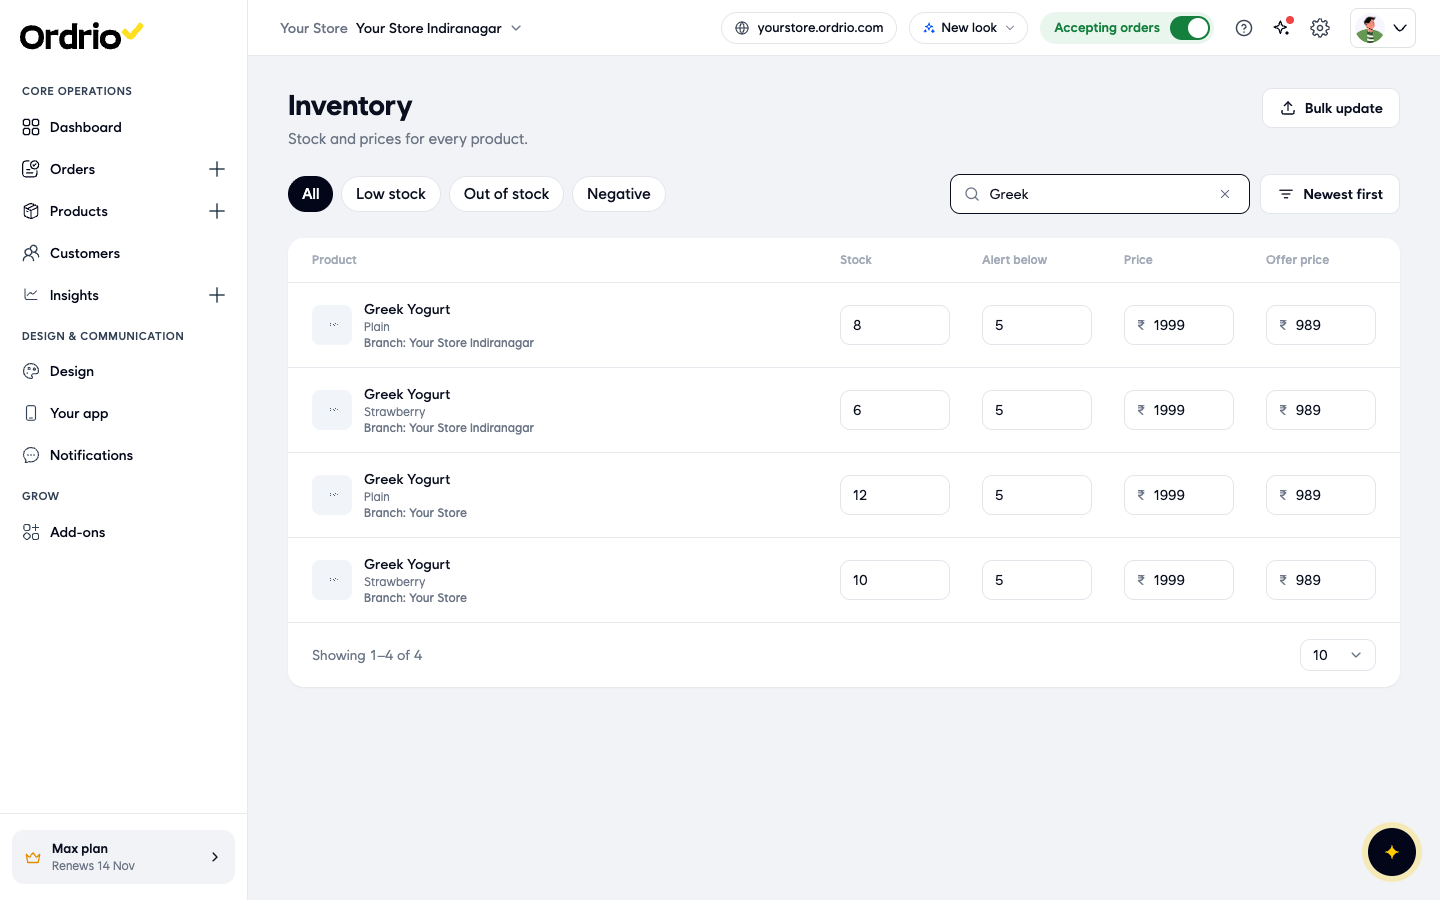
- Change any of these in a row:
- Stock: how many that branch has.
- Alert below: the low-stock level for that branch.
- Price and Offer price: the option's prices.
- Click Update in the bar at the bottom to save, or Discard to undo.
- Use the buttons above the list to filter it: All, Low stock, Out of stock and Negative.
To set a low-stock level from the product page instead, open Edit options, click the ... button on an option's row and choose All details. Under Stock, turn on Alert below, type the level and click Save option.
Update stock from a file
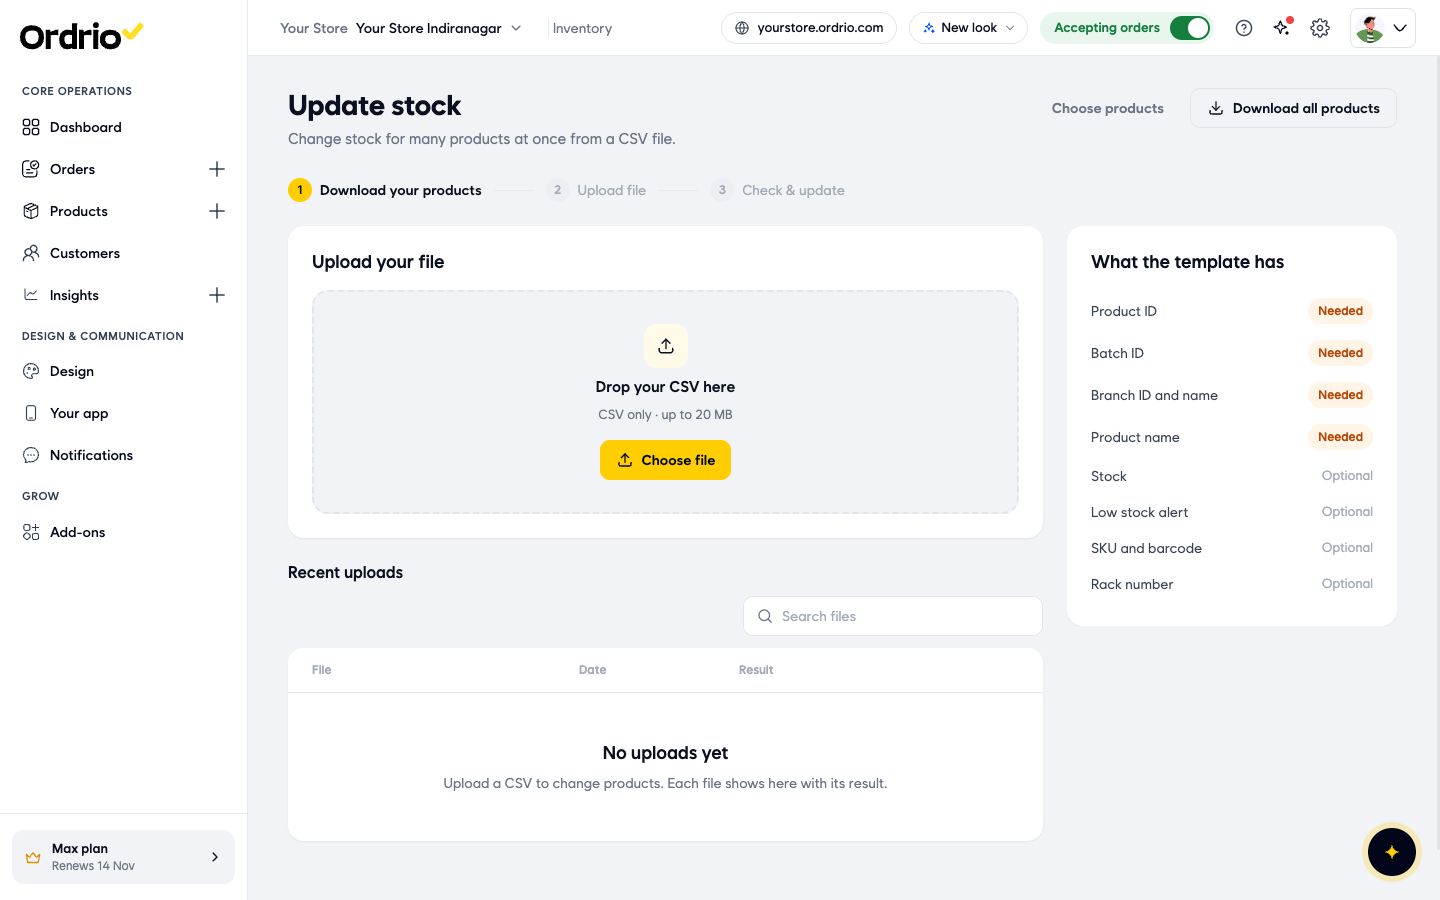
- On the Inventory screen, click Bulk update. The Update stock screen opens.
- Click Download all products, or Choose products to download only some.
- In the file, change Stock and, if you want, Low stock alert, SKU and barcode and Rack number. These columns are optional. Product ID, Batch ID, Branch ID and name and Product name are marked Needed, so leave them in the file. They tell Ordrio which product and which branch each row is for.
- Back on Update stock, click Choose file (or drop the file in the box) and pick your CSV file. Only CSV files work, up to 20 MB.
- The steps at the top show where you are: Download your products, Upload file, then Check & update. Each file you upload shows under Recent uploads with its result.
Good to know
- Stock is kept for each option at each branch. The number under Options on the product page is the total for the branch chosen at the top left.
- With Track stock on, stock goes down by itself with every order. You do not need to change it by hand after each sale.
- The Selling switch next to an option in Edit options applies to every branch. To stop selling a product at one branch, remove that branch under Sell on > Available Branches.
- A new branch starts with 0 stock for every product. Set its stock before it starts taking orders.
- Your Default branch is always taking orders. To turn it off, make another branch the default first.
- In Settings > Product settings, Show sold-out products at the end puts products that are out of stock after the ones in stock.
Related
- Adding your first product
- Product variations and options
- Delivery zones and geo mapping
- Low stock alerts