यह आर्टिकल अभी हिंदी में नहीं है, इसलिए इसे अंग्रेज़ी में दिखाया जा रहा है।
कैसे करें
Product availability and visibility
Control where and when products appear across branches and channels.
You decide where each product is sold and when customers can see it. Use this to sell a product only on your website, take a product off your store for a while, or stop one size from being picked when it runs out.
Before you start
- Open nadi.ordrio.com (your Ordrio admin panel) and log in.
- You need at least one product in Products. The products in the pictures (Pasta, Cheddar Cheese Block) are samples. Use your own products.
Choose where a product is sold
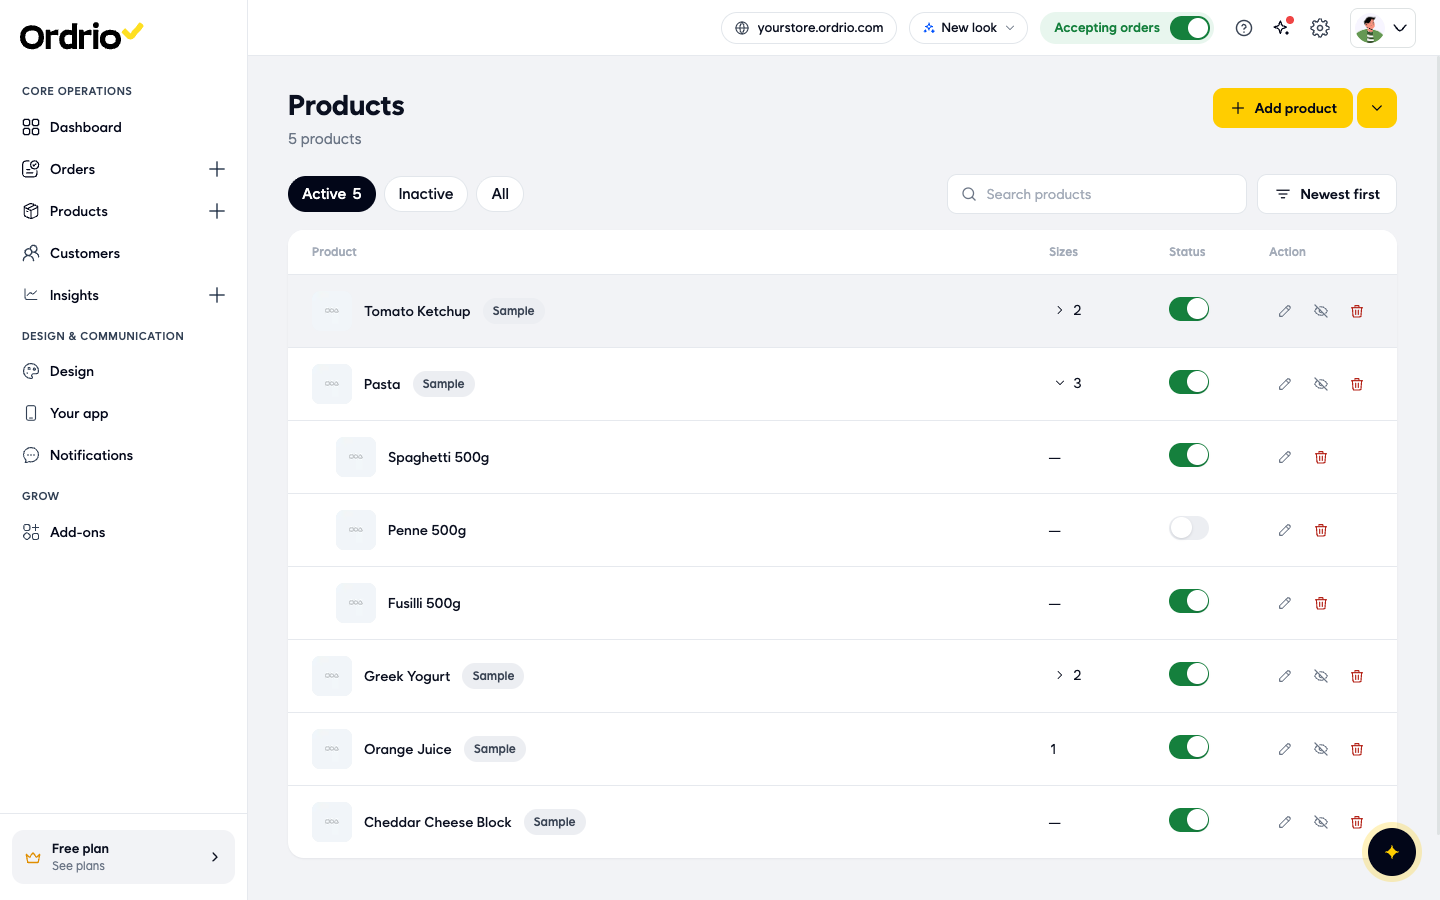
- In the menu on the left, click Products, then Products. You see the list of your products with Sizes, Status and Action columns.
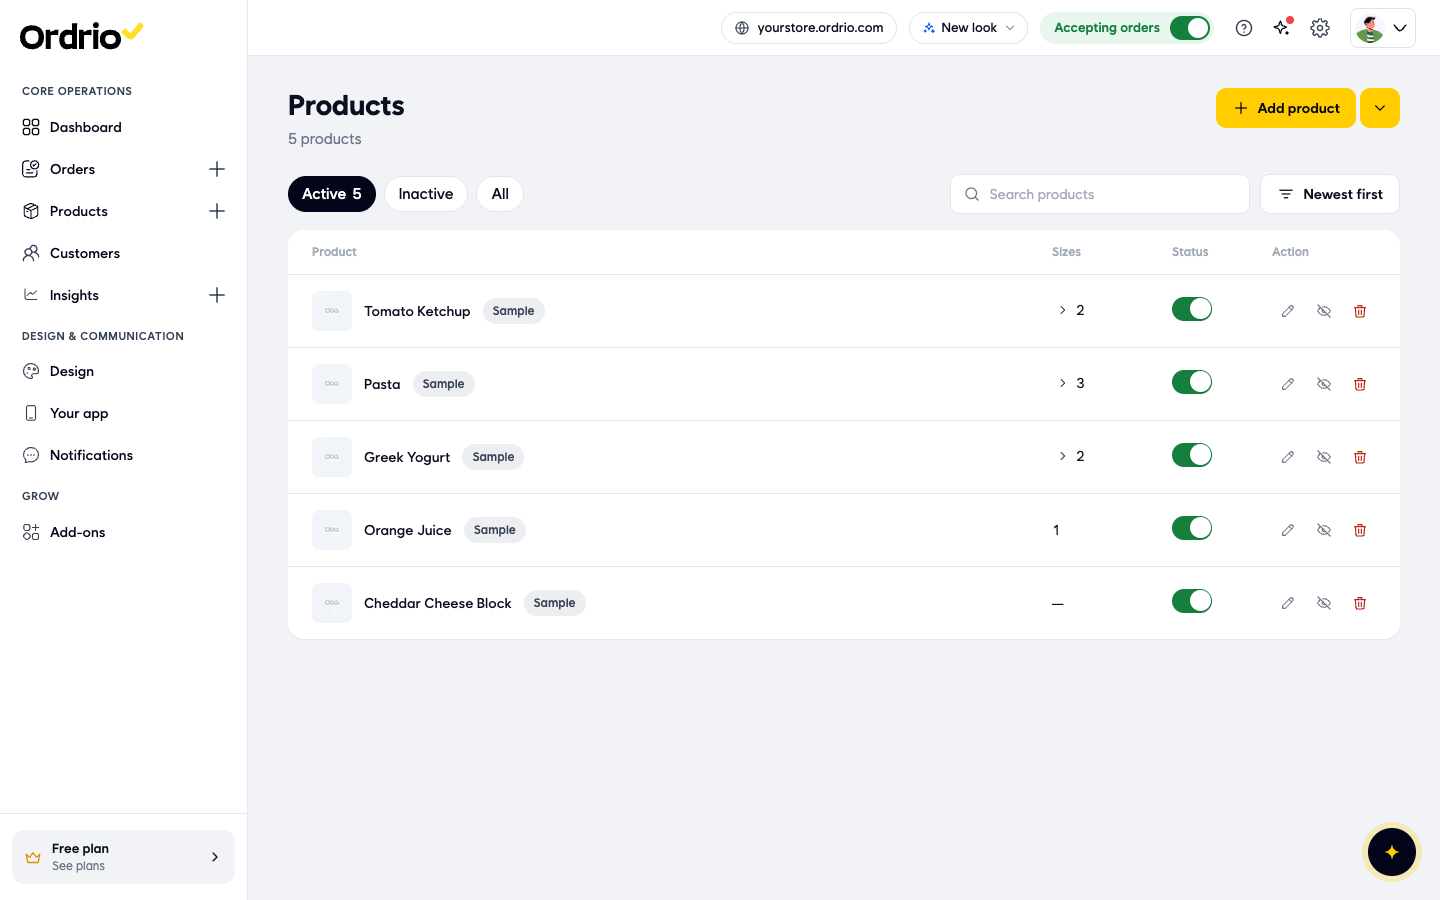
- Click the pencil icon (Edit) next to the product you want to change. The product page opens.
- Scroll down to More options and click Sell on.
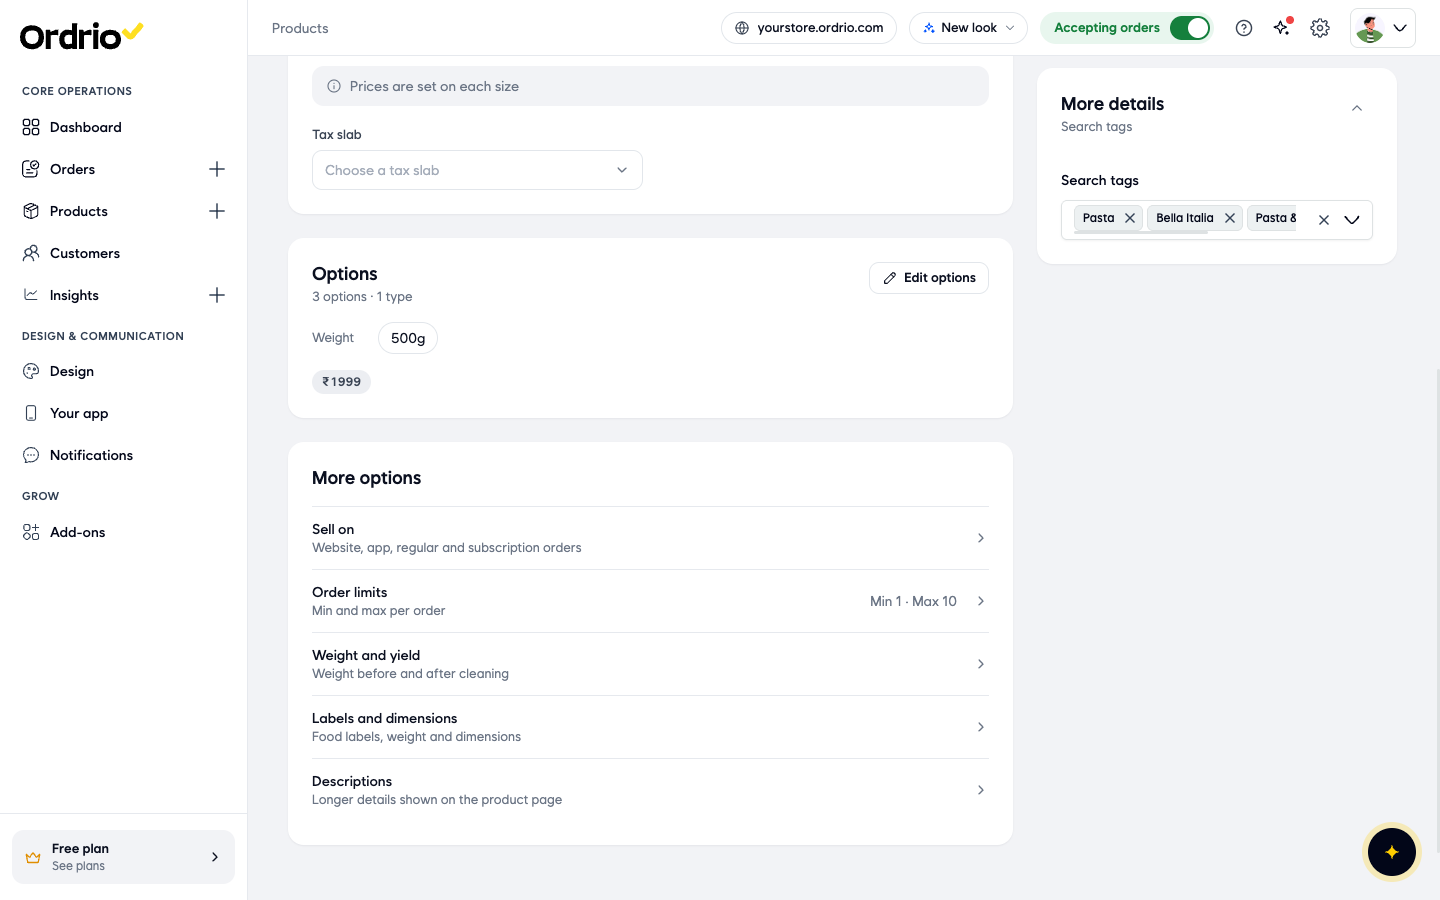
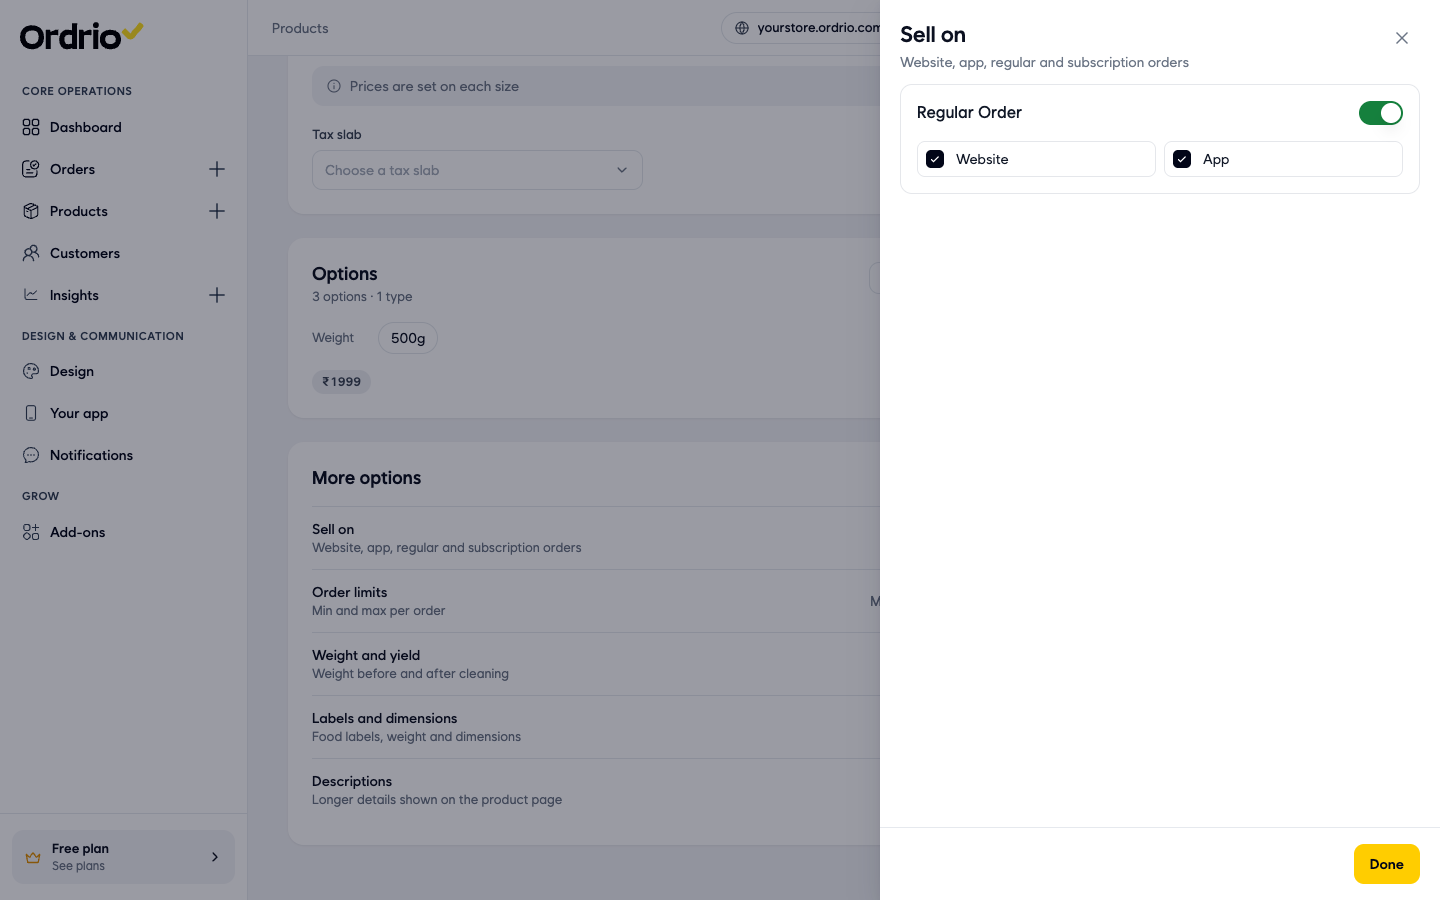
- The Sell on panel opens. Here is what each part does:
- Regular Order: the switch for normal orders. When it is on, you choose the places below. When you turn it off, the Website and App choices go away.
- Website: tick it to sell the product on your website.
- App: tick it to sell the product in your customer app.
- Tick or untick Website and App. For example, untick App to sell the product only on your website.
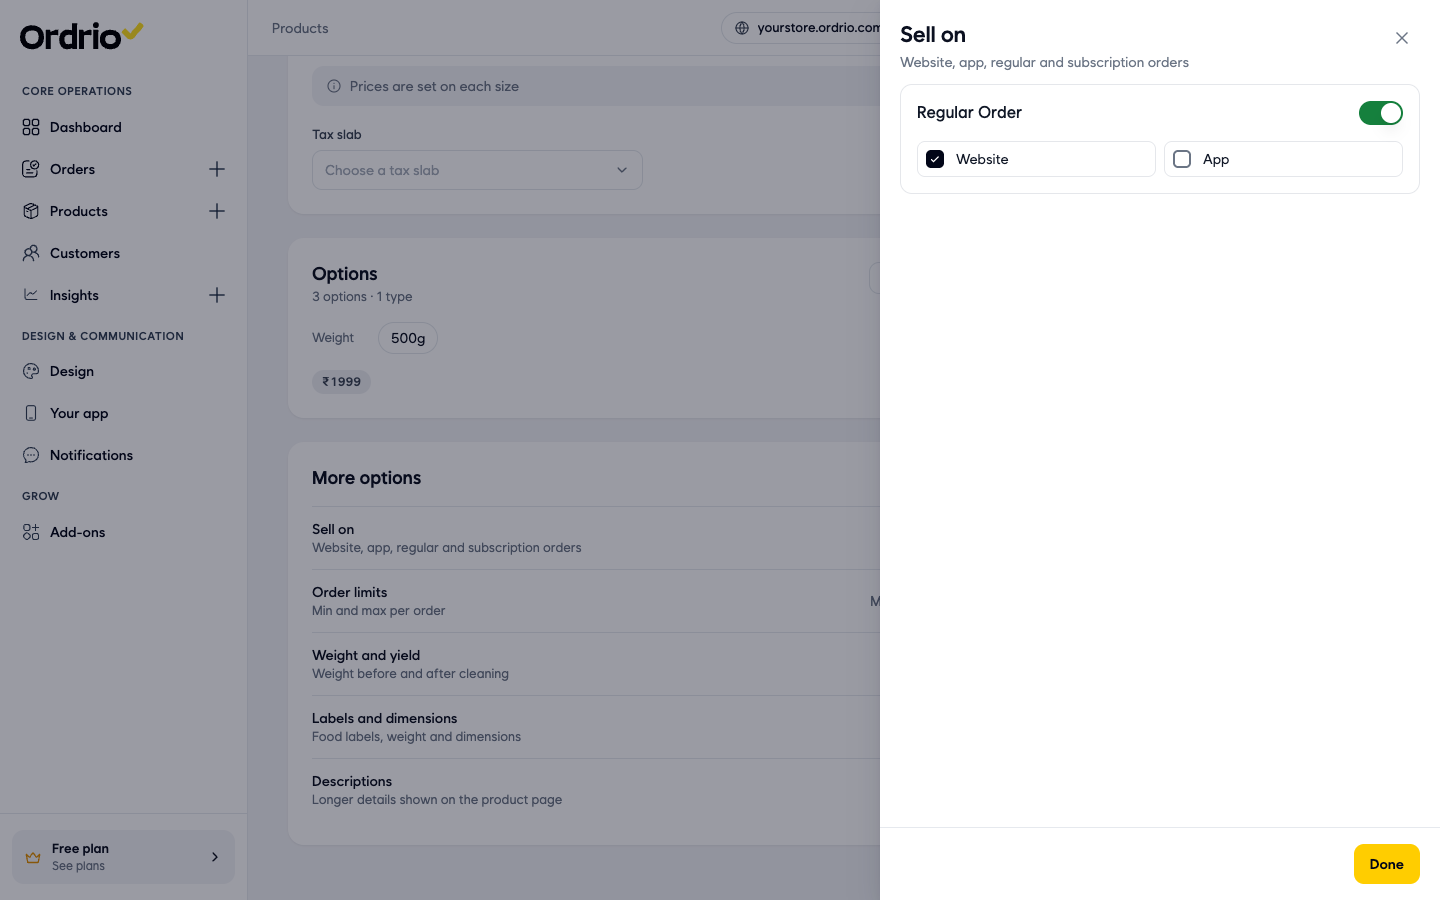
- Click Done to close the panel.
- Click Save at the top of the page (or Save product in the bar at the bottom). Ordrio saves the change and takes you back to the Products list.
Hide a product for now
Hide a product when you do not want customers to see it for a while, for example when it is out of season. You can bring it back any time.
- In Products > Products, find the product.
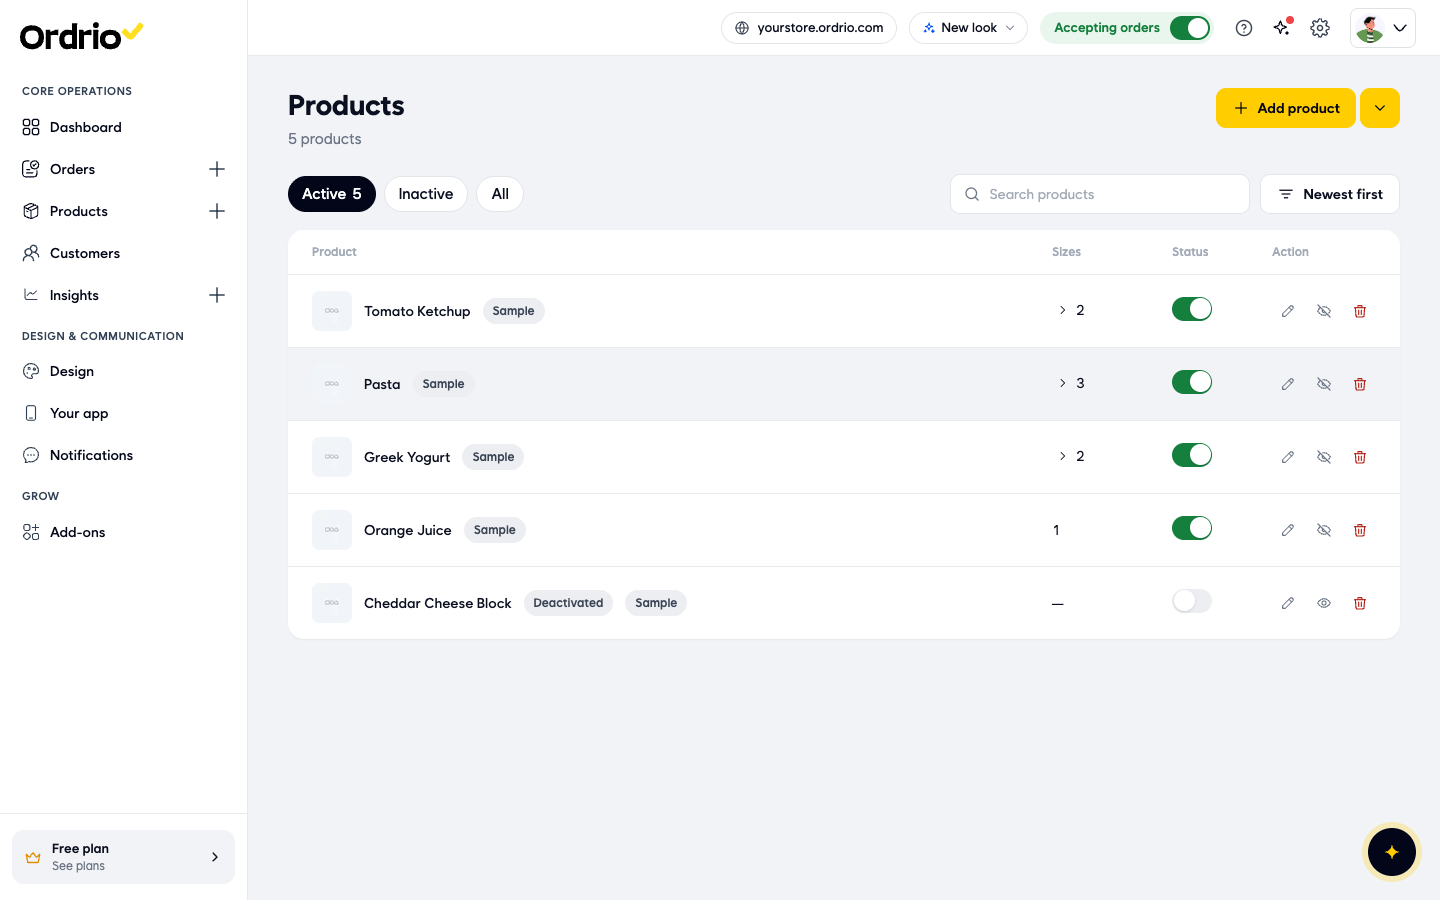
- In the Action column, click the eye icon with a line through it (Hide). You can also open the product and click Hide or delete at the top.
- The window Remove <product name>? opens with two choices:
- Hide it for now: takes the product off your store. You can bring it back any time.
- Delete it: removes the product for good. Past orders keep their details.
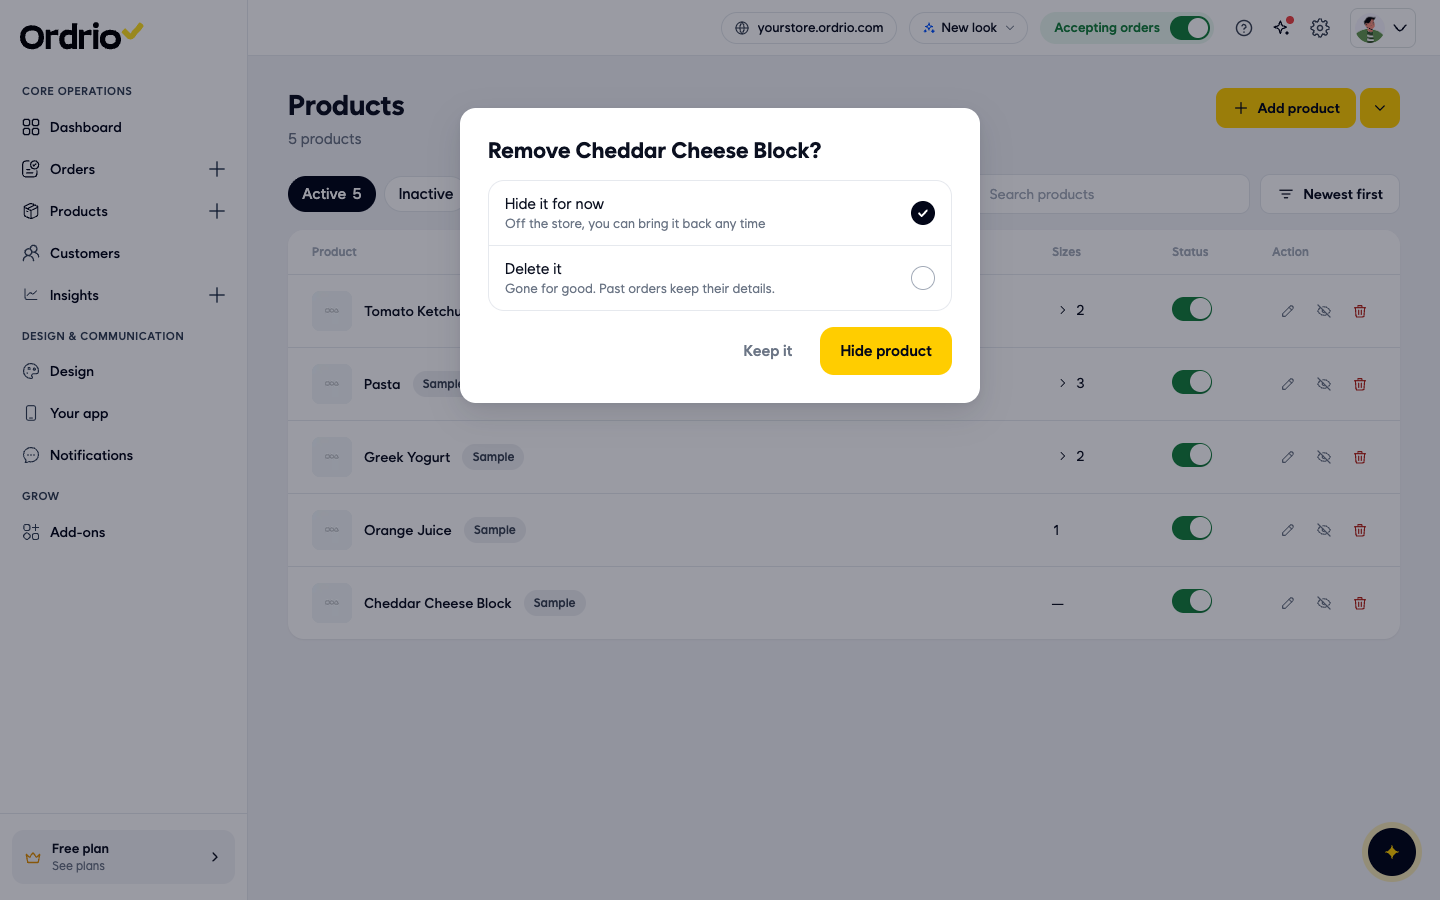
- Keep Hide it for now selected and click Hide product. To close the window without changes, click Keep it.
- A message shows "<product name> hidden", with an Undo button if you clicked by mistake. The product leaves the Active list.
Bring a hidden product back
- In Products > Products, click Inactive above the list. Hidden products show the Deactivated label.
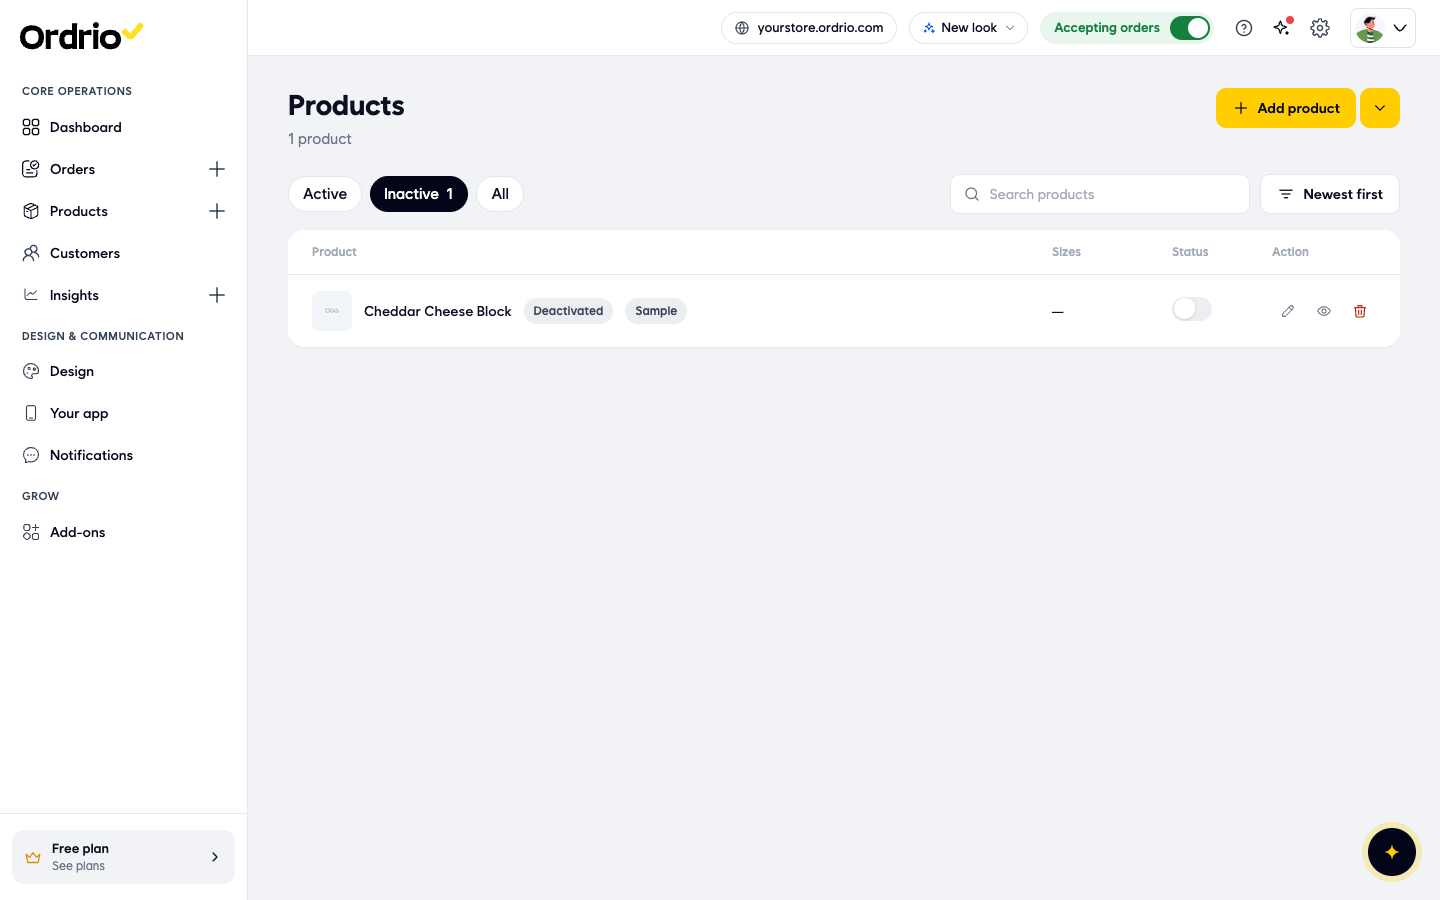
- In the Action column, click the eye icon (Reactivate).
- A message shows "<product name> is in your store again". The product moves back to the Active list.
Turn off one size of a product
If a product has sizes, you can stop customers from picking one size and keep the others on sale.
- In Products > Products, click the number in the Sizes column next to the product. The sizes open under it.
- Click the Status switch next to the size you want to turn off.
- The window Change this size? says "Customers will not be able to pick <size name>." Click Change to confirm, or Cancel to keep it on sale.
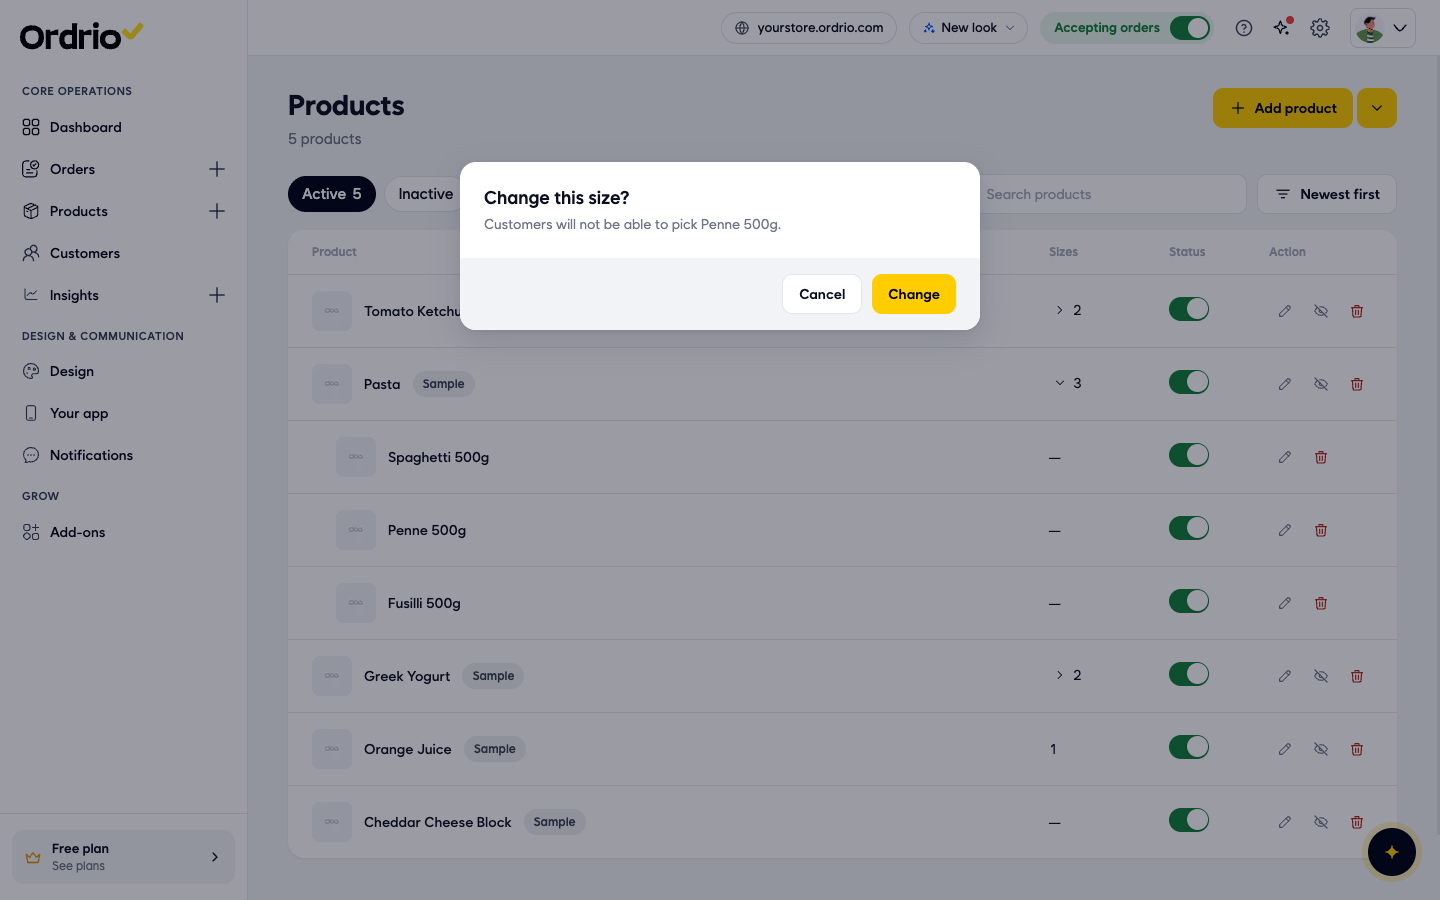
- The switch for that size turns grey. To sell it again, click the switch again and click Change. The window then says "Customers will be able to pick <size name>."
Branches and opening hours
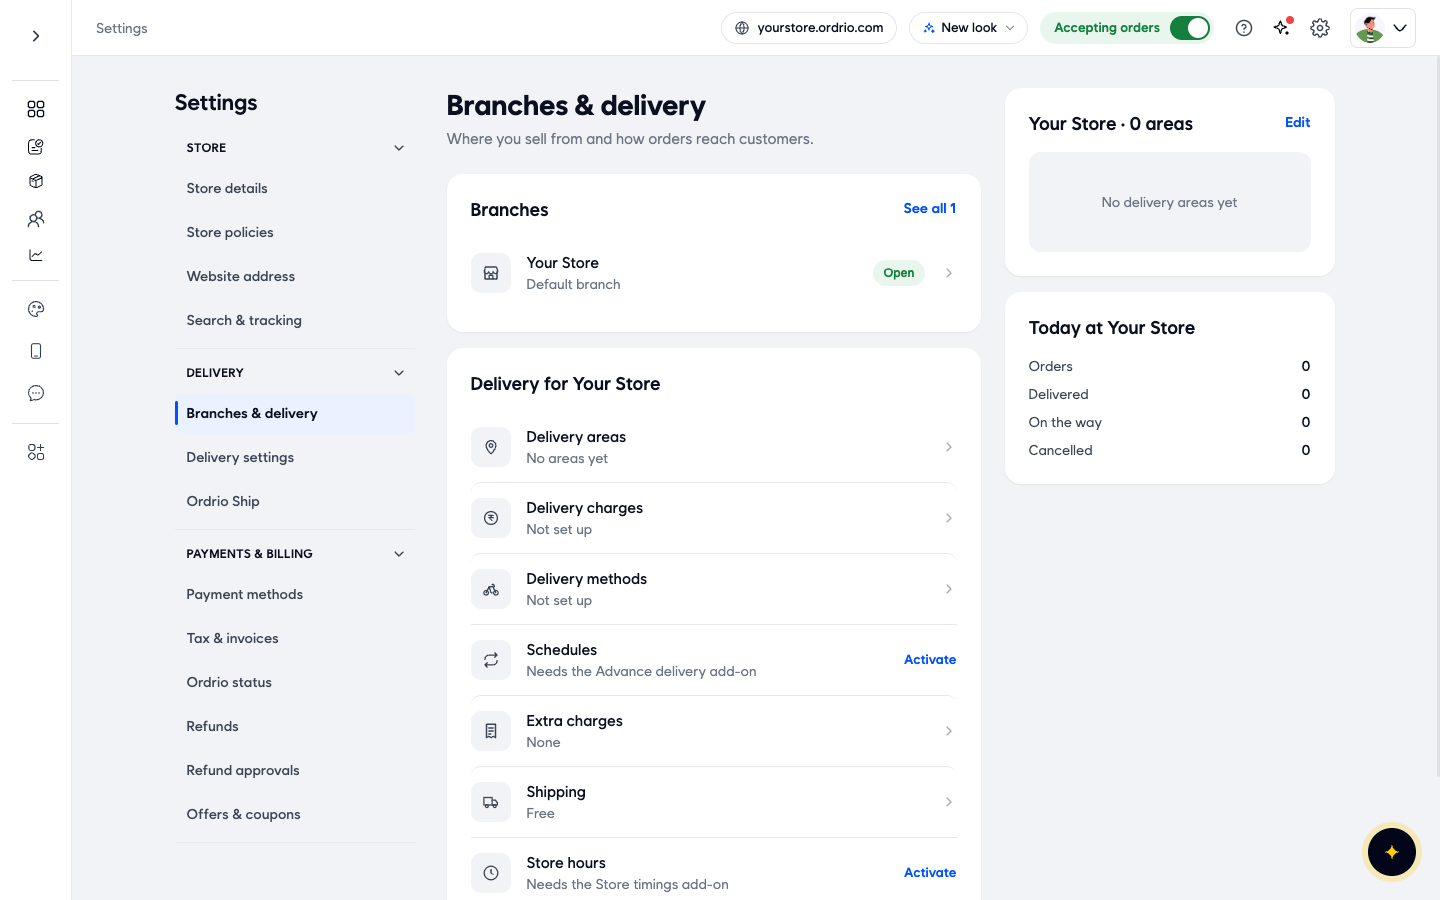
Your branches are in Settings (the gear icon at the top) > Branches & delivery. Each branch has its own delivery areas, delivery charges and delivery methods.
- Store hours are set per branch and need the Store timings add-on. Click Activate next to it to turn it on in Add-ons.
- Schedules need the Advance delivery add-on.
Show sold-out products at the end
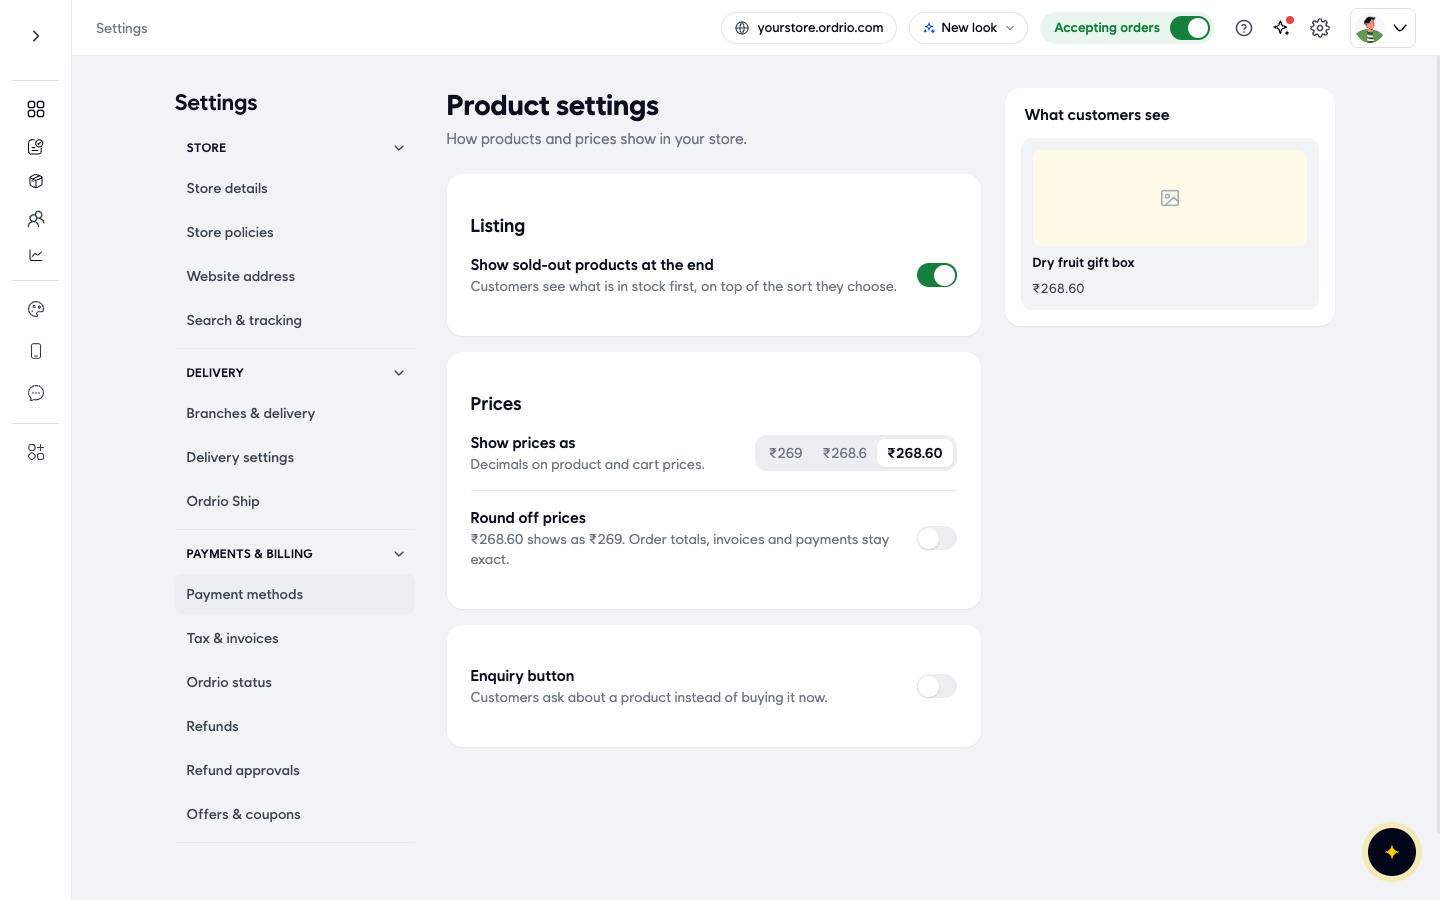
- Click Settings (the gear icon at the top), then Product settings.
- Under Listing, turn on Show sold-out products at the end. Customers then see what is in stock first, on top of the sort they choose. If the switch is already green, it is on.
Good to know
- The grey line under Sell on always reads "Website, app, regular and subscription orders". It does not change when you untick a place, so open Sell on to check what is ticked.
- Your Sell on changes are only kept after you click Save. Until you save, a bar at the bottom shows Unsaved changes with Reset (undo your changes) and Save product.
- Hiding is safe: the product and its details stay in your admin. Deleting cannot be undone.
- Inactive shows hidden products, Active shows the ones customers can see, and All shows both.
- The Accepting orders switch at the top of every page is for your whole store, not for single products.
Related
- Adding your first product
- Product variations and options
- Delivery zones and geo mapping
- Product attributes and search tags