यह आर्टिकल अभी हिंदी में नहीं है, इसलिए इसे अंग्रेज़ी में दिखाया जा रहा है।
कैसे करें
Product forms and custom input
Collect extra details from customers when they pick a product.
A product form asks customers for extra details when they buy a certain product. For example, the message to write on a cake, egg or eggless, and the date they need it. You set up the form once, link it to your products, and customers fill it in on the product page.
Before you start
- Product forms are an add-on called Product Form. You switch it on in Add-ons. The steps below show how.
- Add the products you want to use the form with. Only your own products can be linked to a form. The sample products Ordrio adds to a new store do not show in the list.
The names and values in the screenshots are examples. Use your own form name, products and questions.
Switch on Product Form
- Open nadi.ordrio.com (your Ordrio admin panel) and log in.
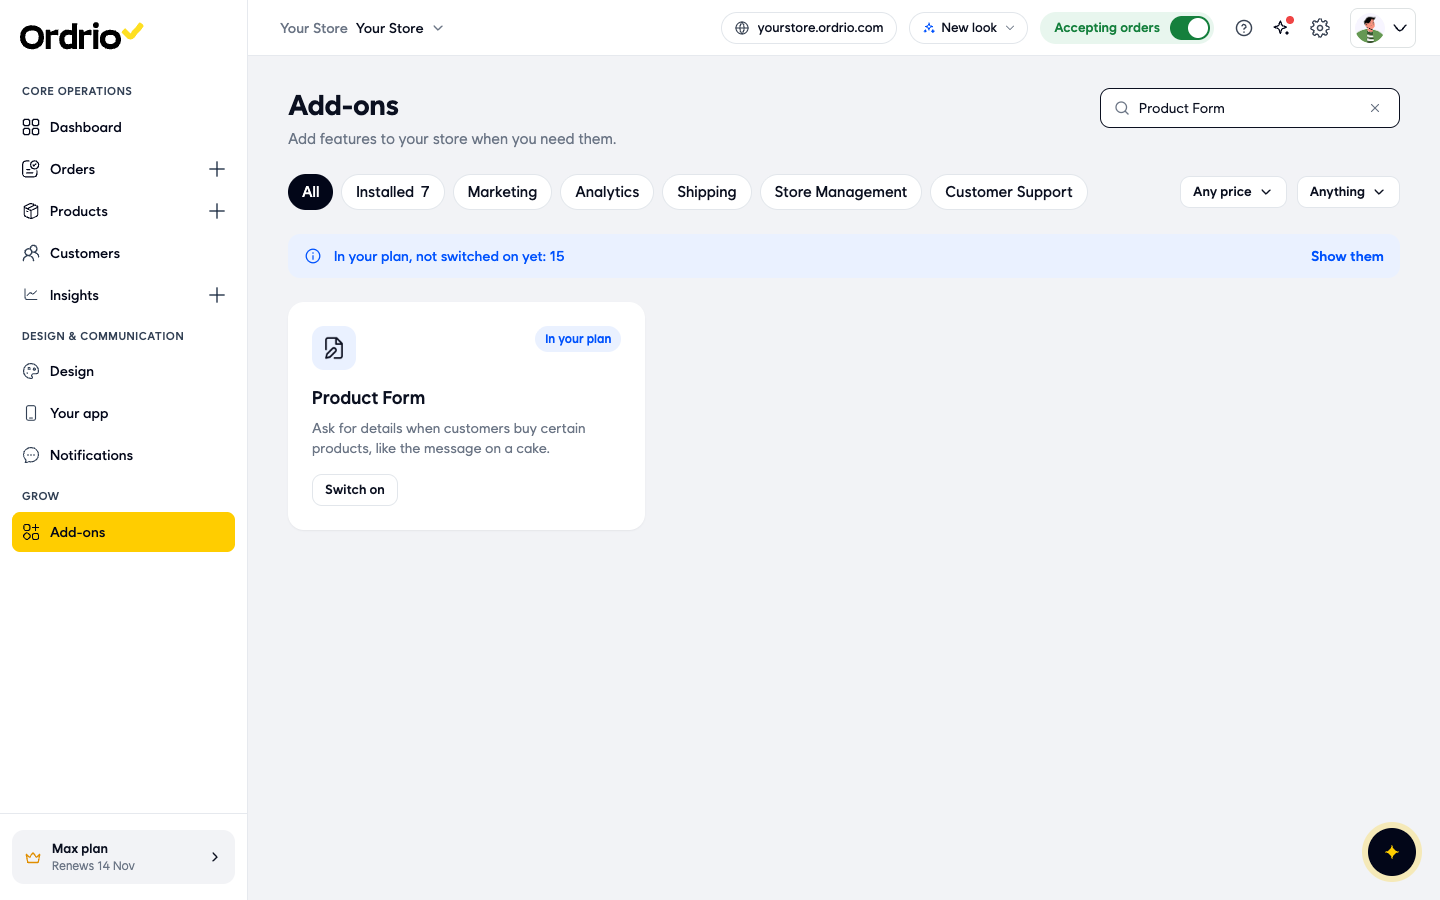
- In the left menu, under Grow, click Add-ons.
- Type Product Form in Search add-ons. The Product Form card shows "Ask for details when customers buy certain products, like the message on a cake."
- Click the name Product Form to see what it does. The panel shows the category (Store management) and the billing for your plan.
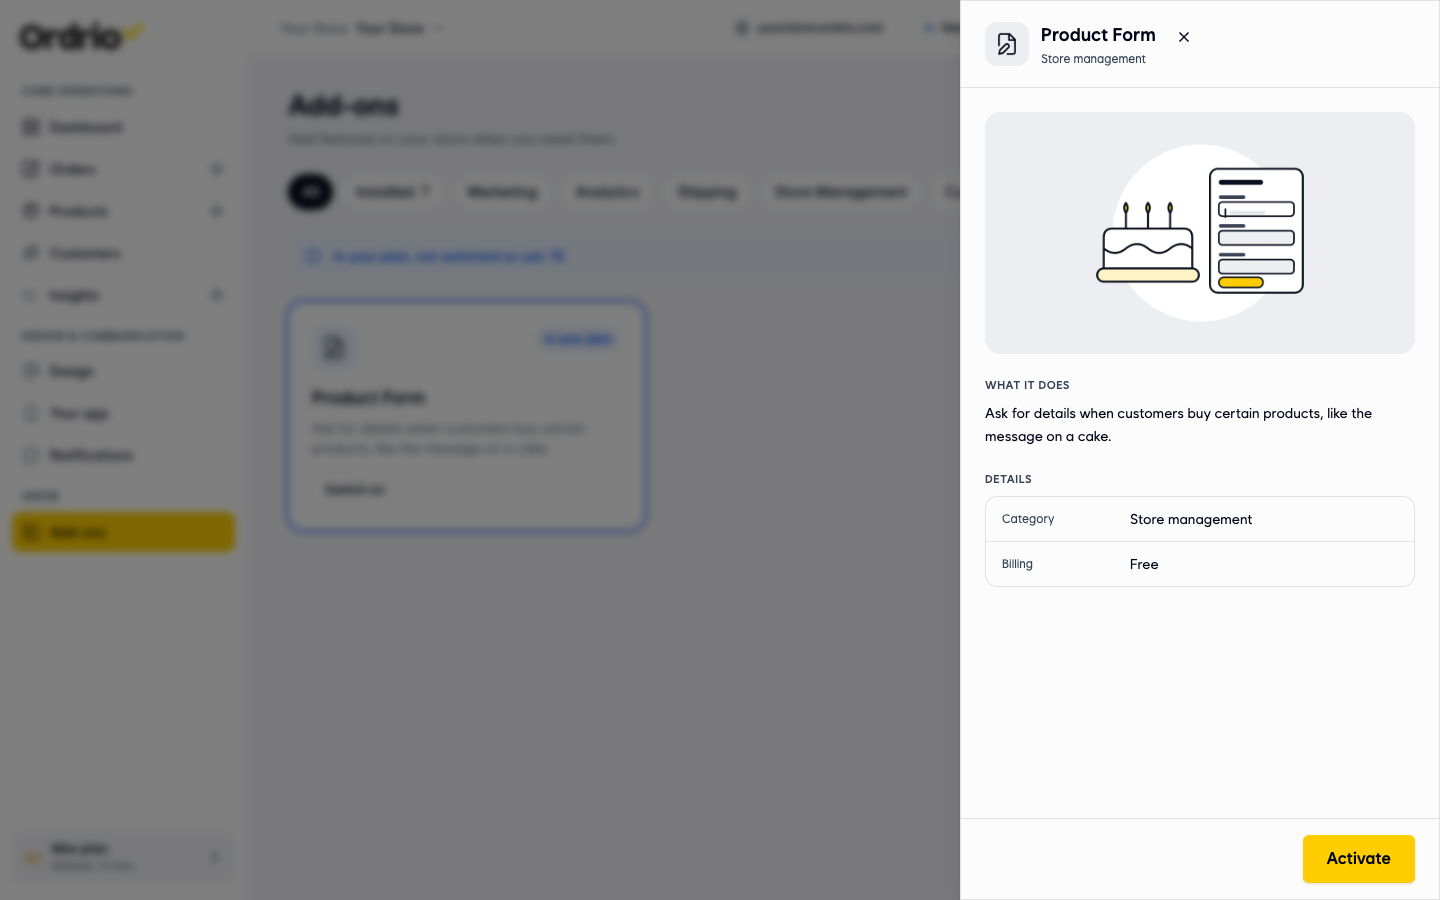
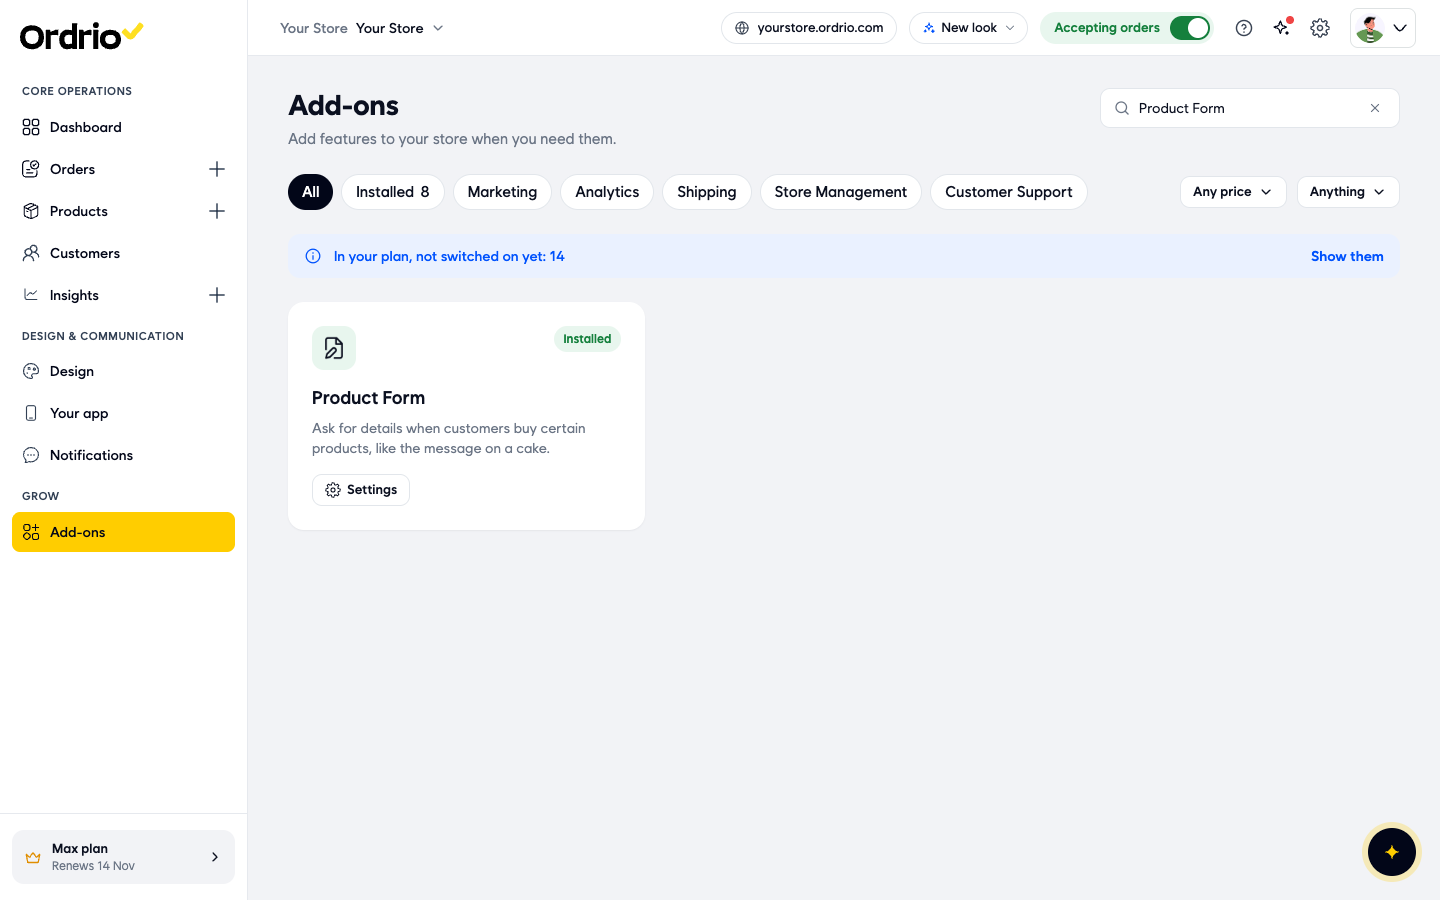
- Click Activate. You can also click Switch on on the card. The card now shows Installed and a Settings button.
Create a form
- On the Product Form card, click Settings. The Product forms page opens. If you have no forms yet, it shows "No product forms yet".
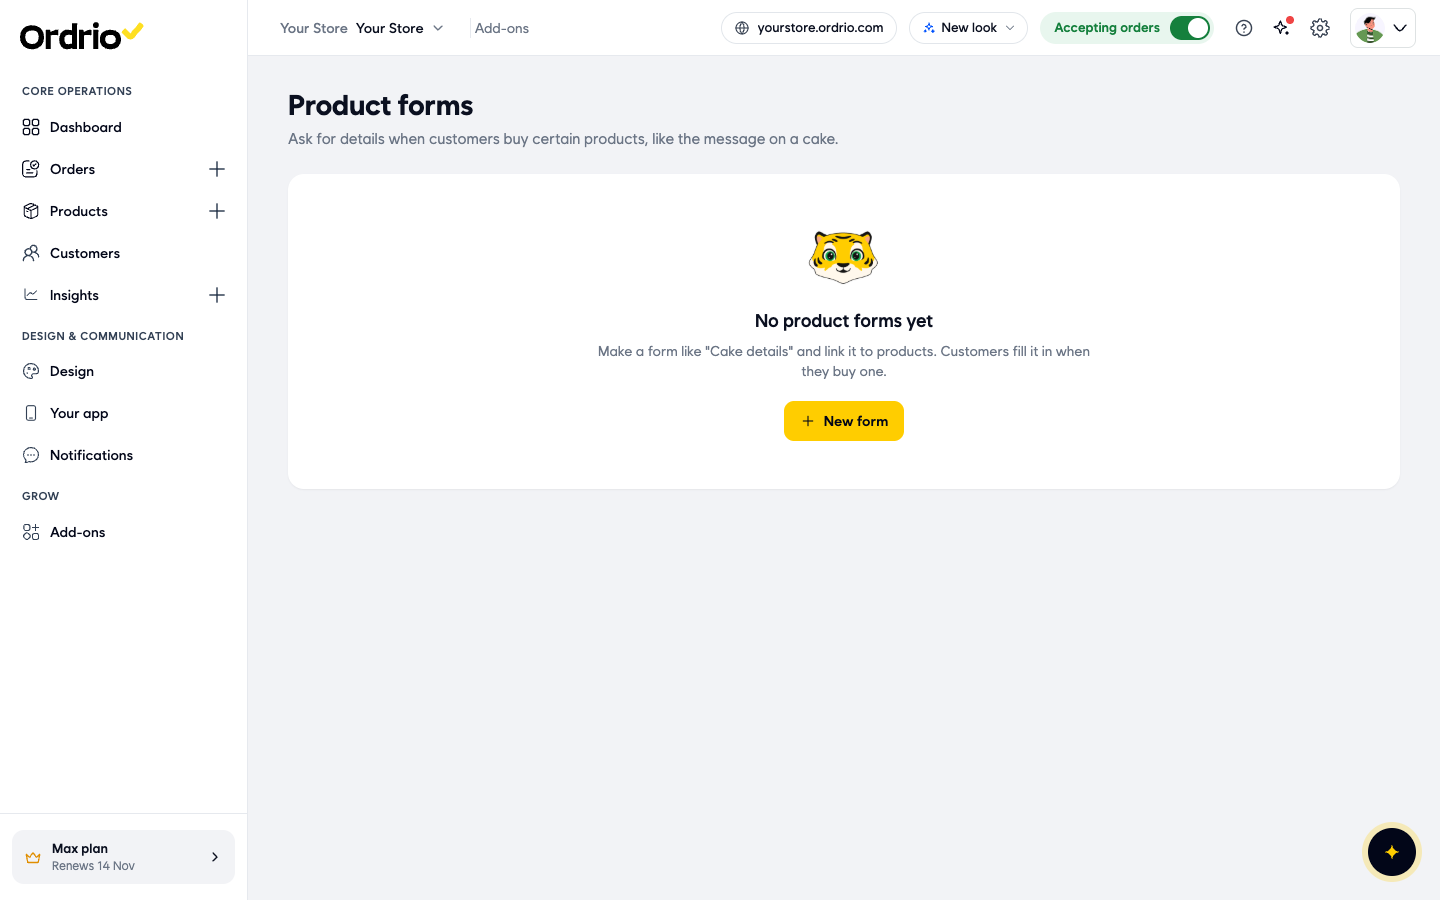
- Click New form. The New product form page opens.
- In Form name, type a name for the form, for example "Cake order details". Customers see it as the heading of the form.
- In Button name, type the text for the button on the product page, for example "Add cake details". Customers tap this button to open the form.
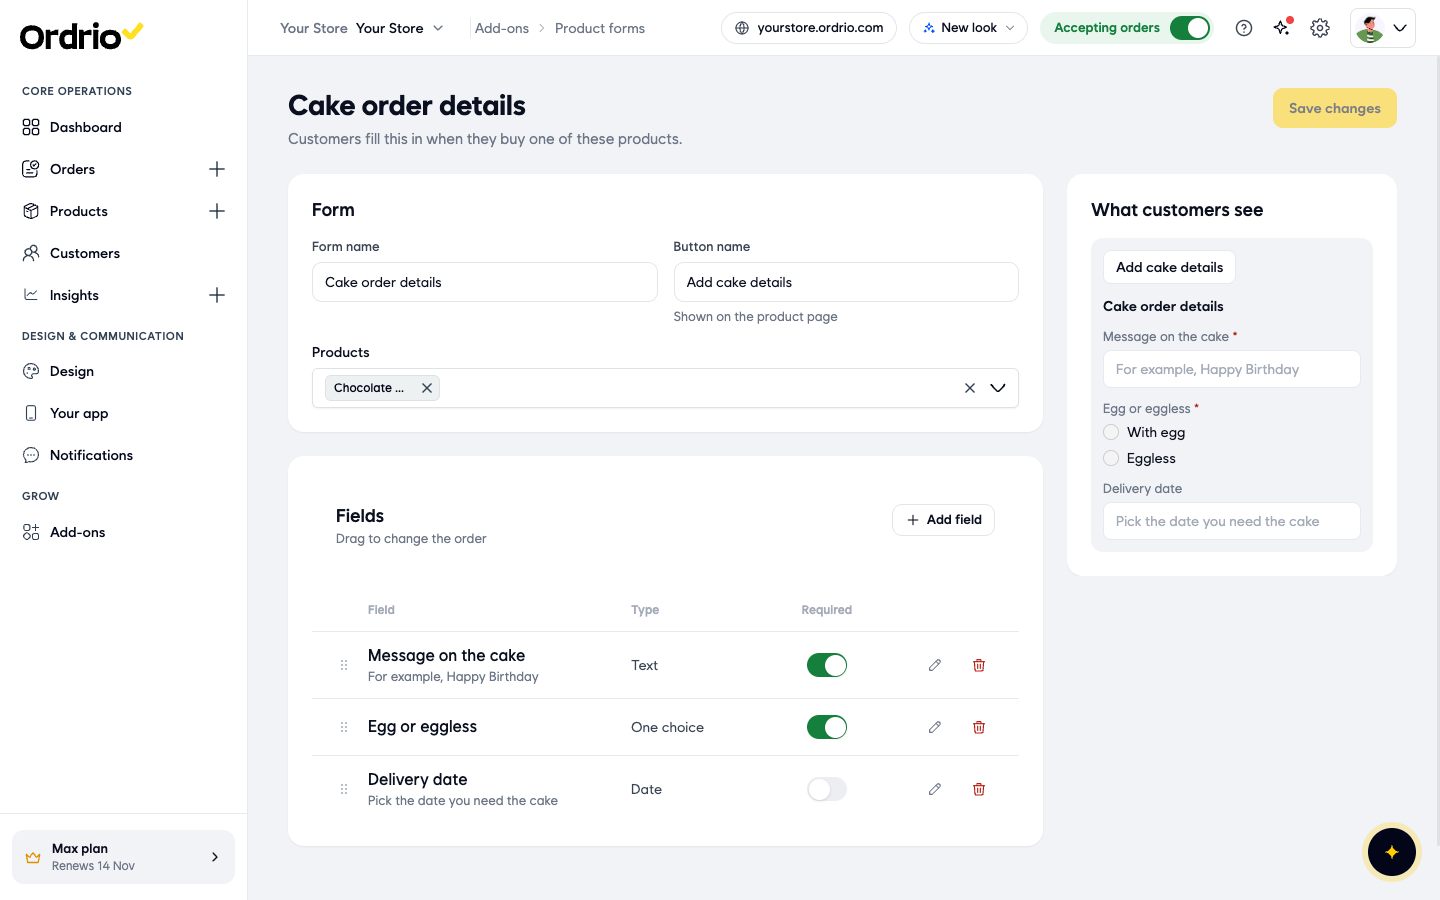
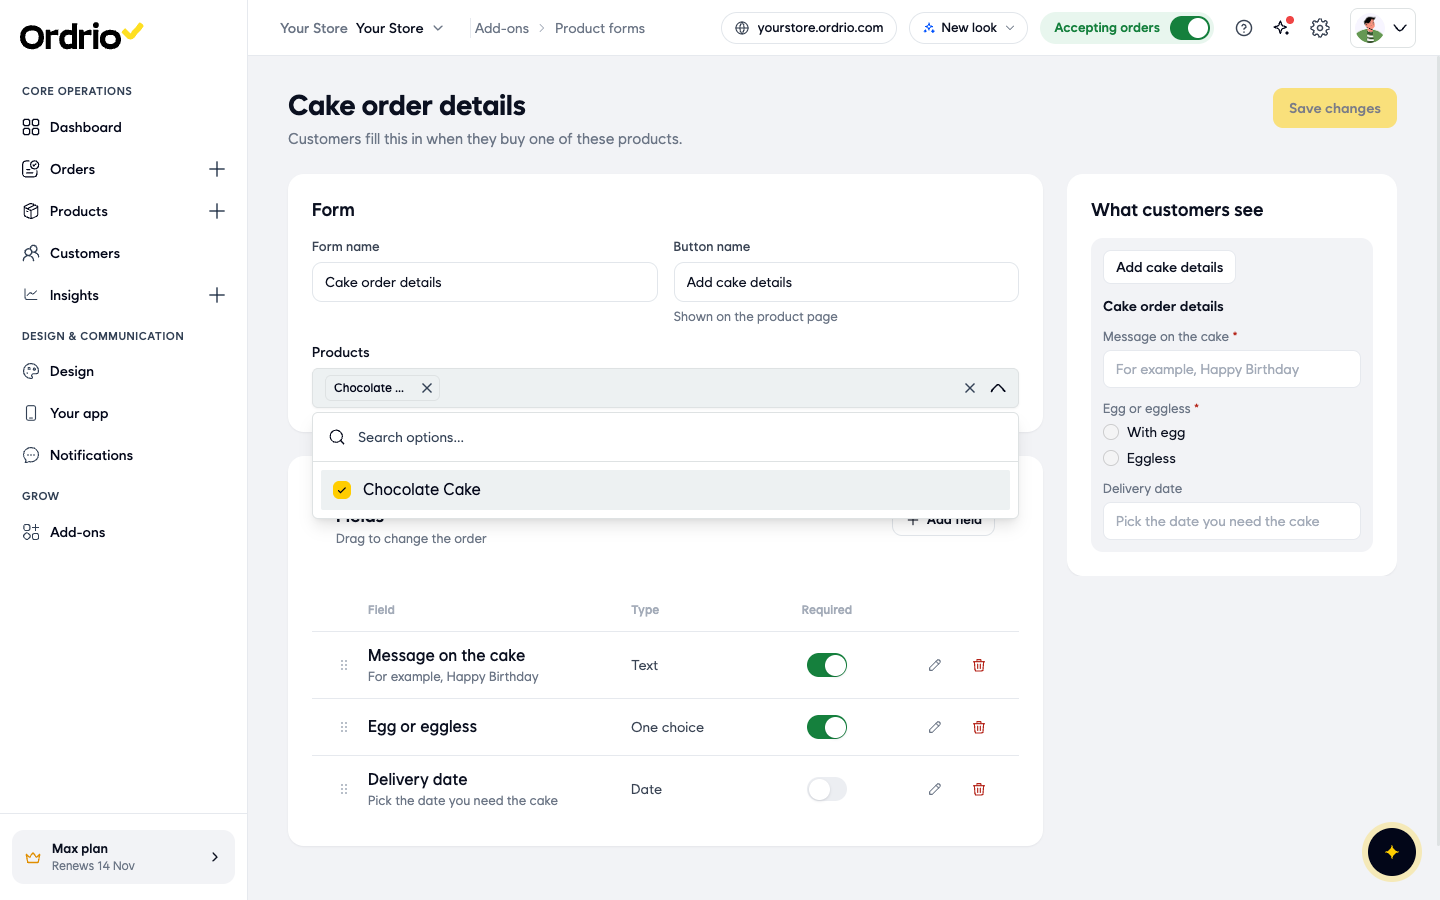
- Click Products and search for the products that should use this form. Tick each one. You need at least one product, or the form will not save.
Add the fields customers fill in
- Under Fields, click Add field. The Add Property window opens.
- Open Type and choose the kind of field you want. Each type is explained below.
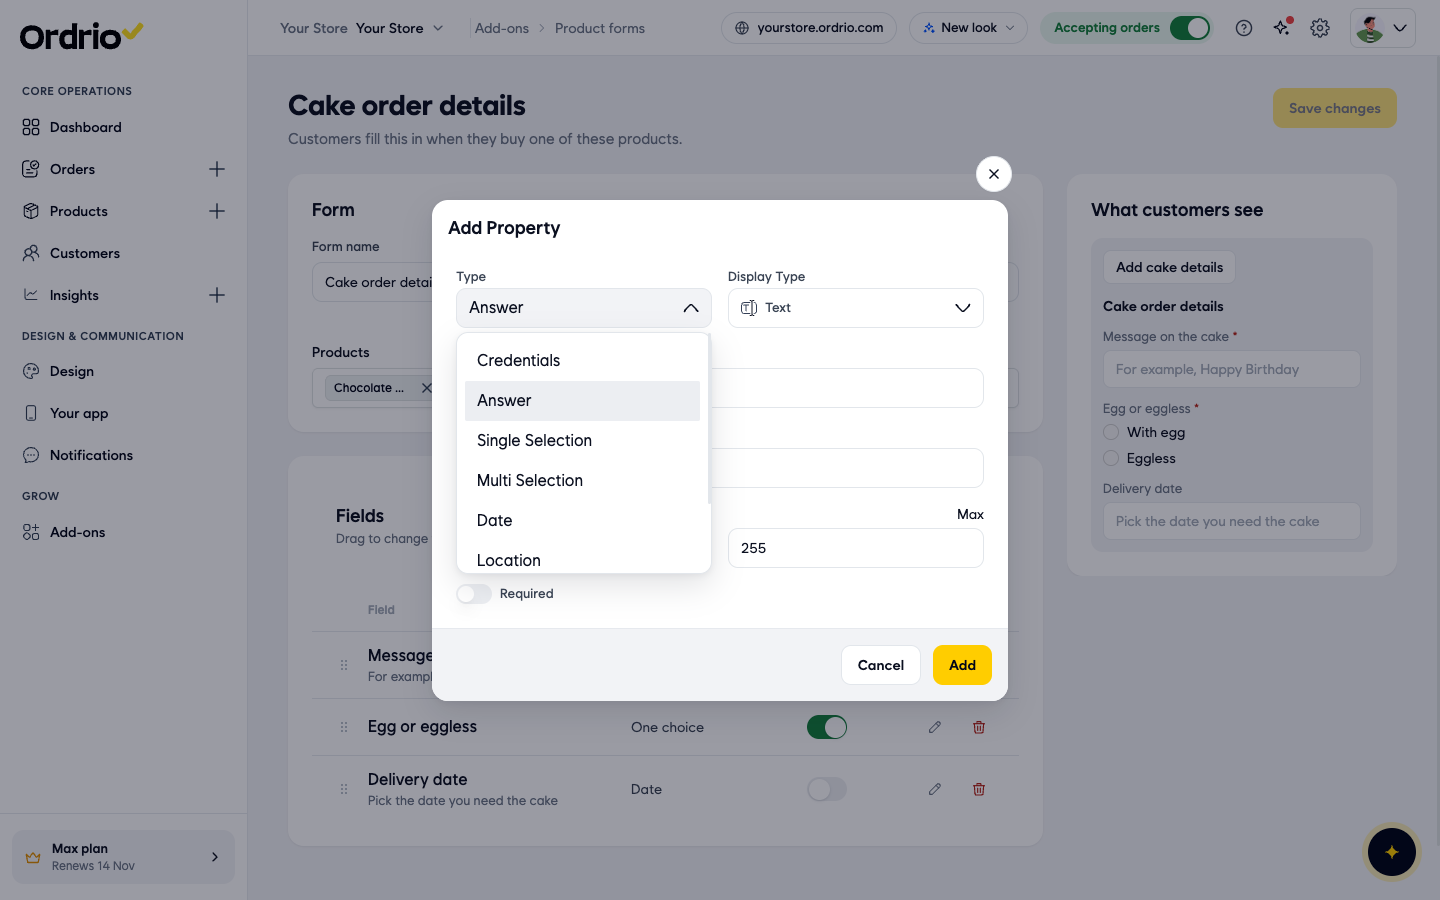
- Choose a Display Type. This is how the field looks to customers. The choices depend on the type.
- In Field Name, type the question or label customers see, for example "Message on the cake".
- Fill in the other settings for that type (see the list below). For example, for a cake message, set Placeholder Text to "For example, Happy Birthday" and the Character Limit Max to 40.
- Turn on Required if customers must fill in this field. Leave it off if the field is optional.
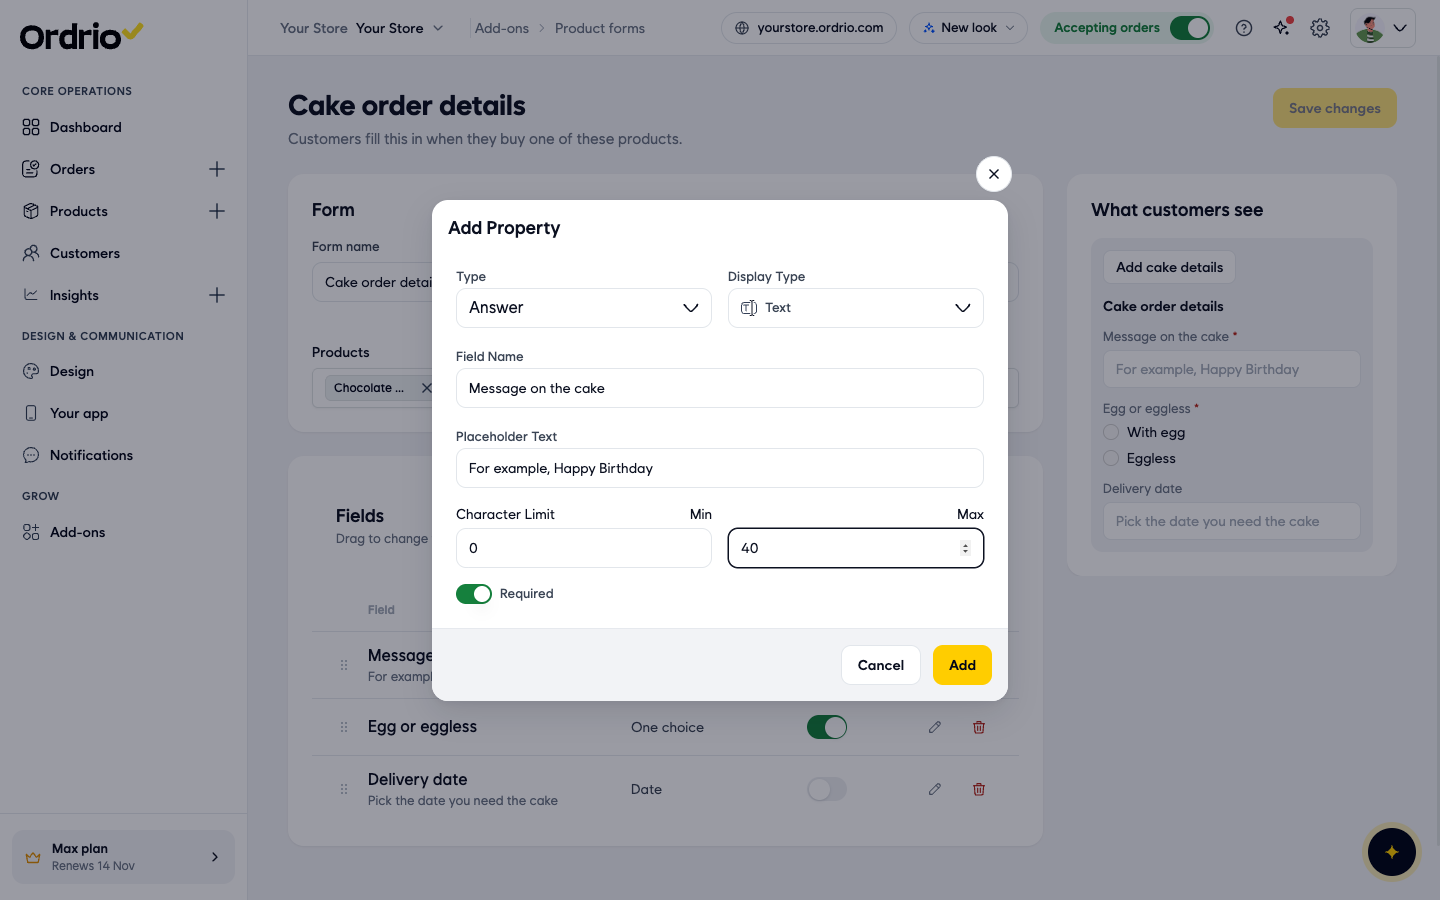
- Click Add. The field appears in the Fields list, and in What customers see on the right.
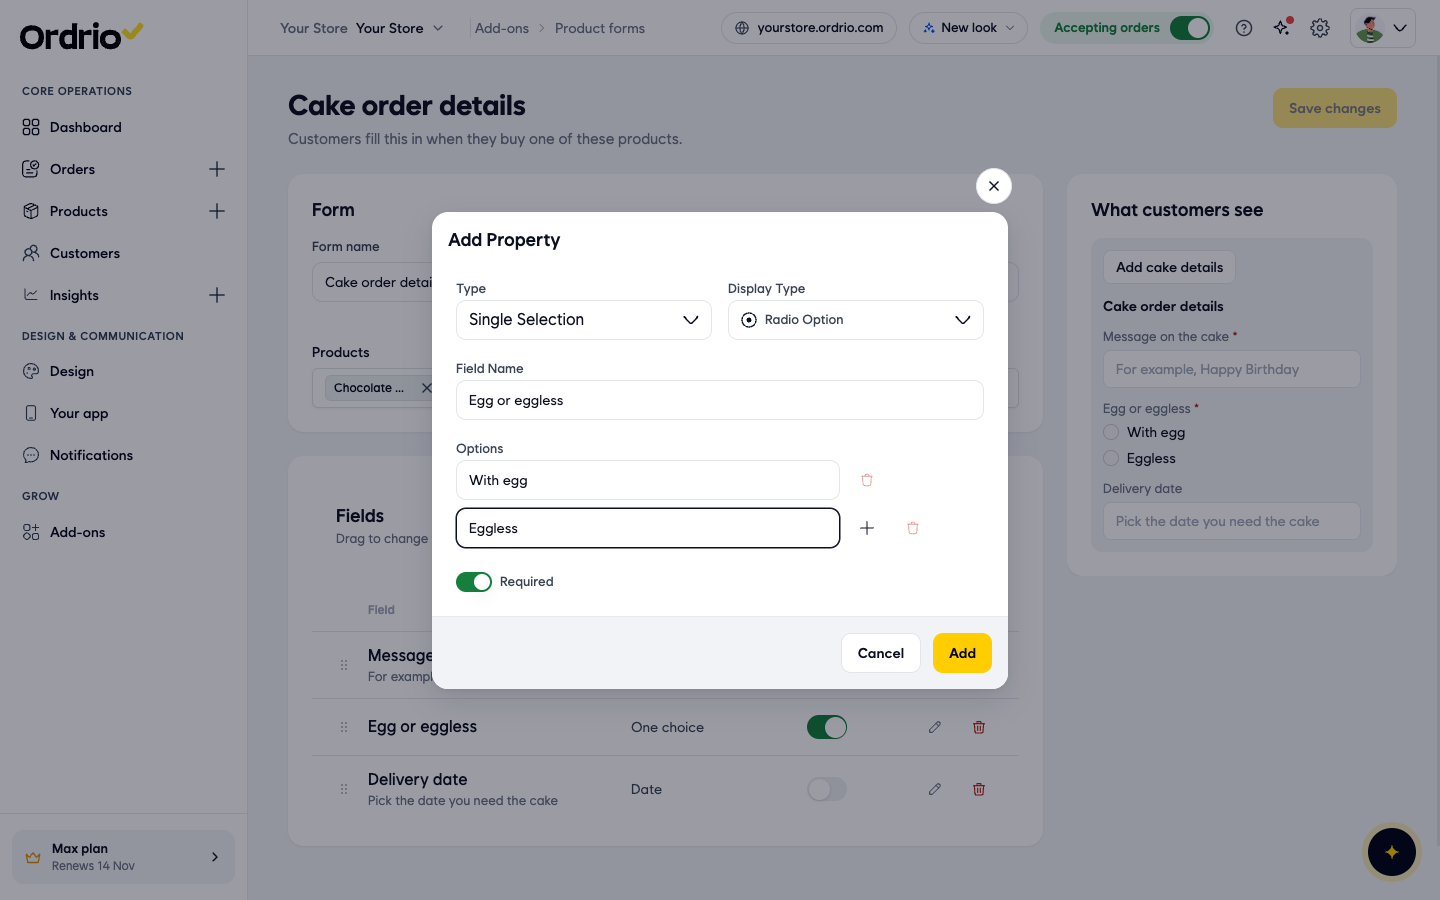
- Repeat the field steps above for each question you want to ask. For example, add a Single Selection field "Egg or eggless" with the options "With egg" and "Eggless".
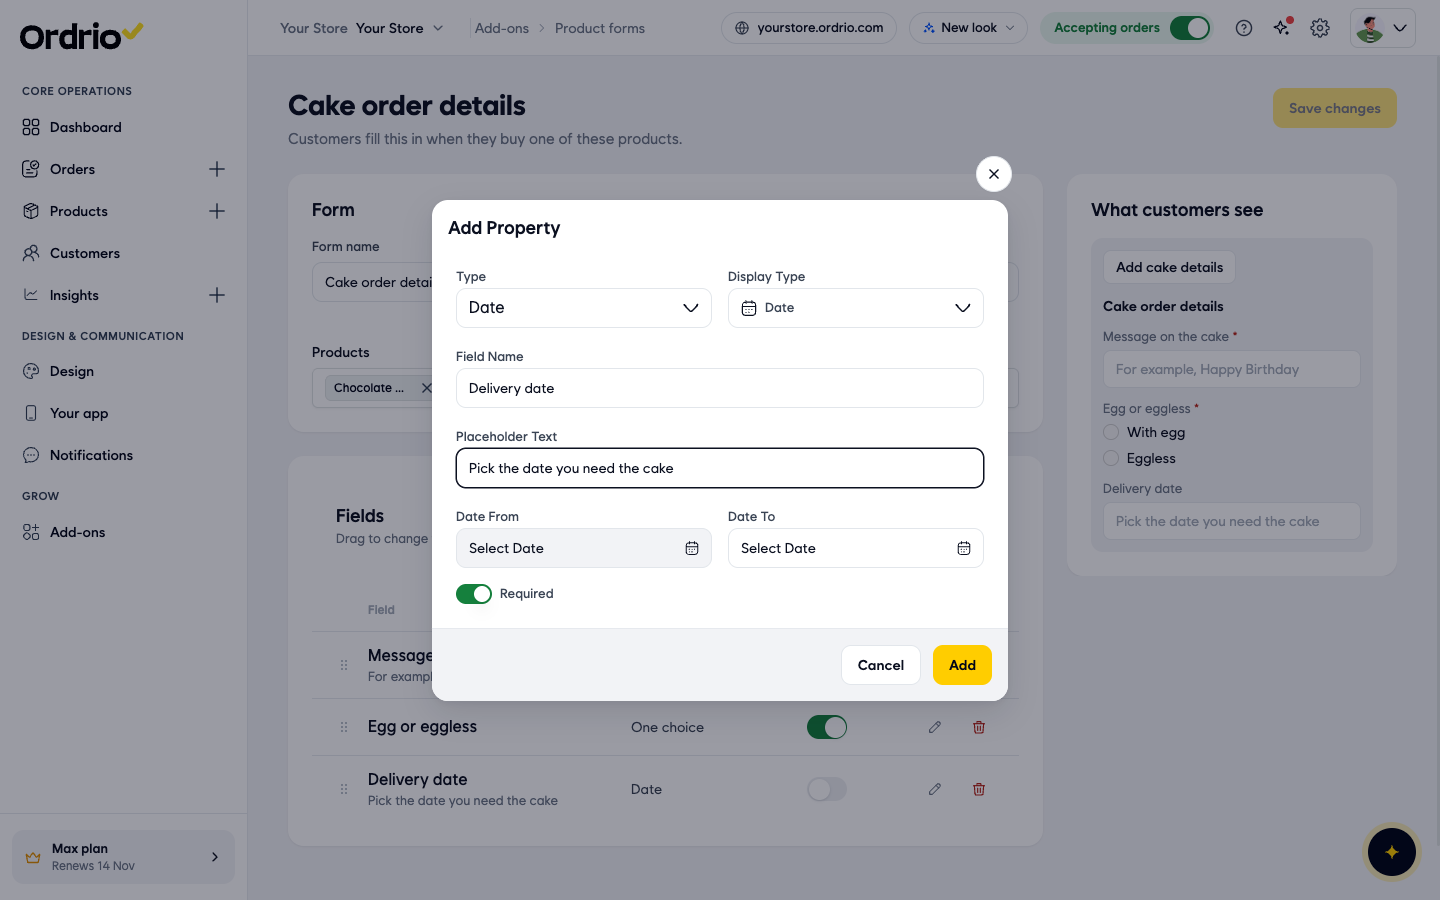
- Add a Date field, for example "Delivery date", if you need to know when the customer wants the product.
- Check What customers see. It shows your button, the form name and every field, in order. Required fields have a red star.
- Click Save changes. You go back to Product forms, and your form is in the list.
Field types and their settings
Every type has Field Name and Required. The other settings are:
- Credentials: for an email address or phone number. Display Type: Email or Phone Number. Also Placeholder Text.
- Answer: for a typed answer, like a message or a name. Display Type: Text or Number. Also Placeholder Text and Character Limit (Min and Max).
- Single Selection: customers pick one option. Display Type: Radio Option or Dropdown. Type each choice under Options. Click + to add another option, or the bin to remove one.
- Multi Selection: customers can pick more than one option. Display Type: Checkbox. Set Option Limit (Min and Max) for how many they can pick, and type each choice under Options.
- Date: customers pick a date or time. Display Type: Date, Time or Date-Time. Also Placeholder Text, Date From and Date To.
- Location: customers share a location. Display Type: Geolocation. Also Placeholder Text and Collect.
- File Upload: customers upload a file, like a photo for a photo cake. Type each format you accept in Allowed File Format(s) (for example pdf or image) and press Enter. Set the file size Min and Max. File sizes are in MB.
- Group: a set of fields. Set Maximum Groups Allowed.
Manage your forms
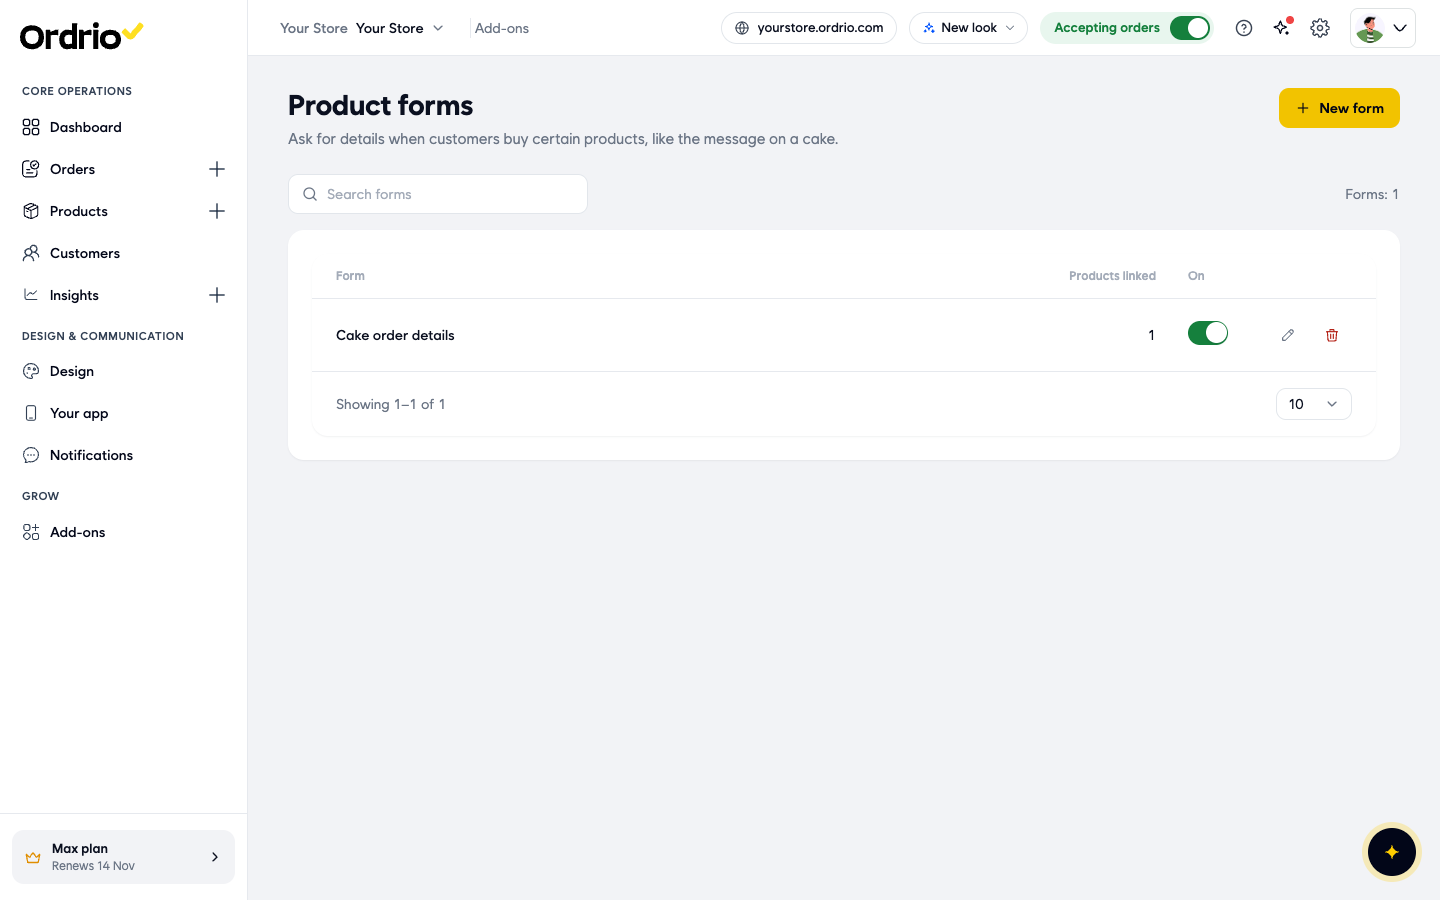
- Product forms lists every form with the number of Products linked.
- Use the On switch to turn a form on or off without deleting it.
- Click the pencil to edit a form, or the bin to delete it.
- To change a field, click the pencil next to it. The Edit Property window opens. Make your changes and click Update. Click the bin next to a field to delete it.
- Drag a field up or down to change the order. You can turn Required on or off right in the Fields list.
- After any change, click Save changes.
Good to know
- Customers see the form on the product page, behind the button you named in Button name.
- A form must have at least one product linked. If not, you see "Please select at least one product" and the form is not saved.
- Sample products do not show in the Products list. Add your own product first.
- Keep forms short. Ask only what you need to prepare the order, and make only the important fields required.
- While you have changes that are not saved, an Unsaved changes bar shows at the bottom. Click Save changes before you leave the page.
Related
- Adding your first product
- Product variations and options
- Add-ons, toppings and bundles
- Product attributes and search tags
क्या यह आर्टिकल काम का था?