यह आर्टिकल अभी हिंदी में नहीं है, इसलिए इसे अंग्रेज़ी में दिखाया जा रहा है।
कैसे करें
Announcement bars and banners
Show messages, offers or updates across your store.
Use the announcement bar and banners on your home page to tell customers about offers, delivery news or anything new in your store. The announcement bar is a thin line of text at the top of your store. Banners are large pictures that customers can tap.
Before you start
- Have your banner pictures ready. The best size is 2560 × 650 for computers and 2560 × 1300 for phones. Each file can be up to 5 MB.
- Keep the text in your pictures away from the edges, so it is not cut off on smaller screens.
Open the home page editor
- Open nadi.ordrio.com (your Ordrio admin panel) and log in.
- In the menu on the left, under Design & Communication, click Design.
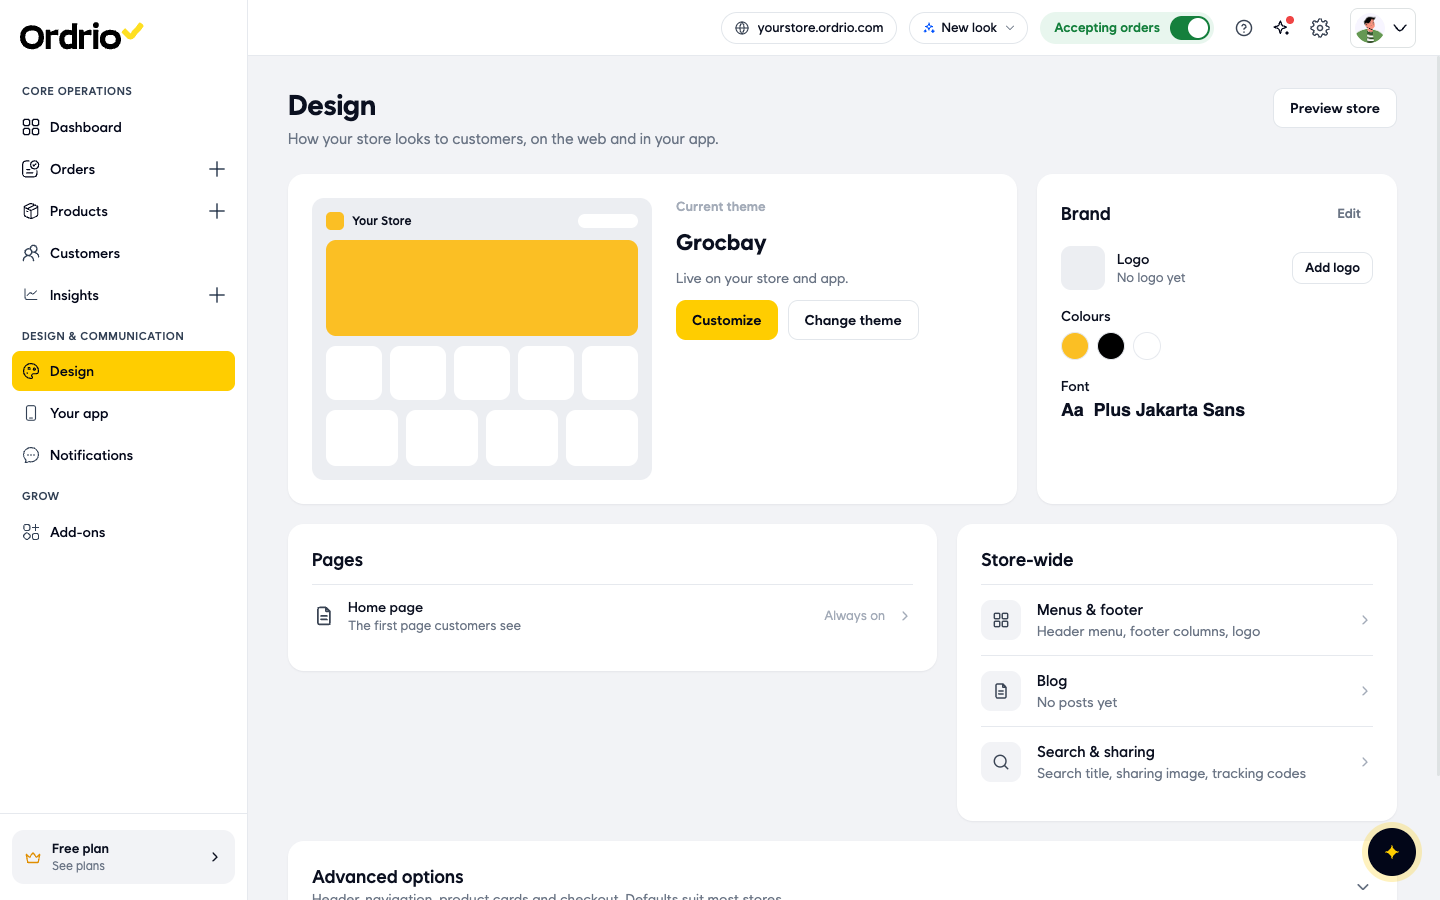
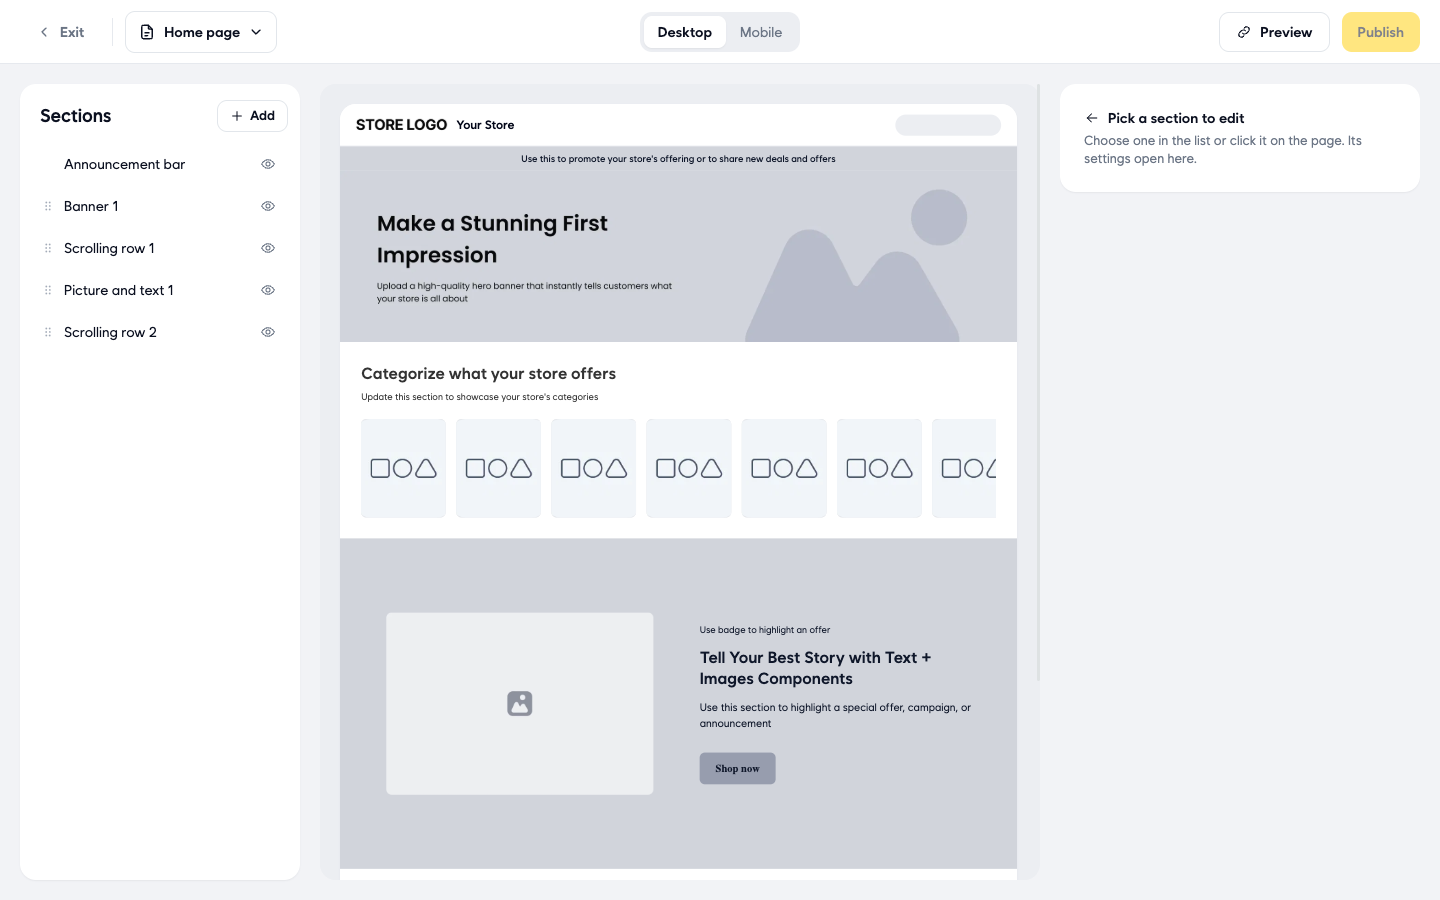
- Under Pages, click Home page. The editor opens. Your sections are listed on the left under Sections, a preview of your store is in the middle, and the settings of the section you pick open on the right.
Set up the announcement bar
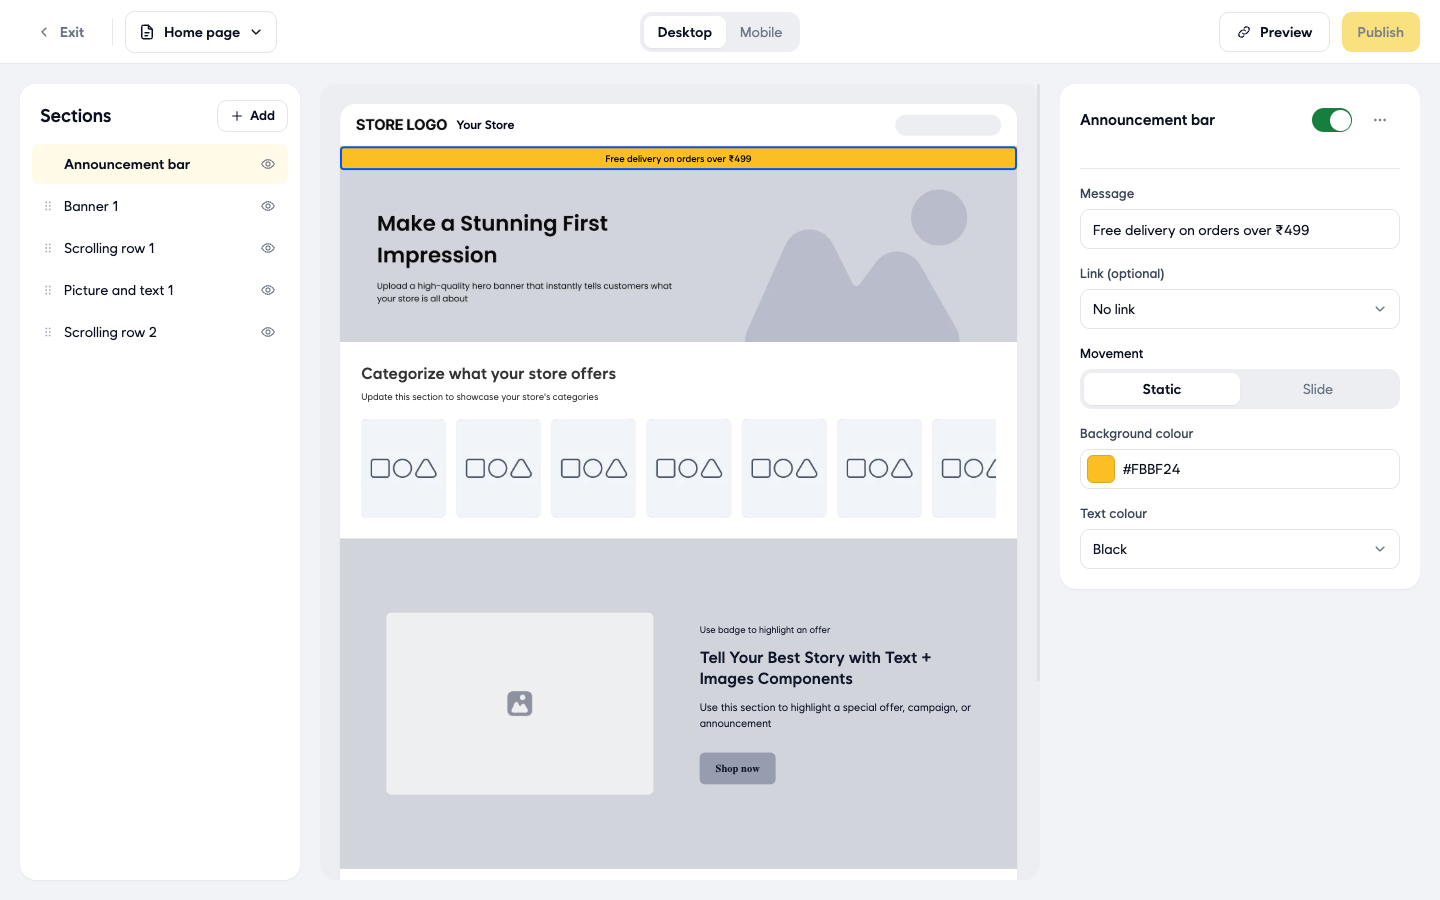
- In Sections, click Announcement bar. Its settings open on the right. Make sure the Show on store switch next to the title is on.
- In Message, type the text customers should see, for example "Free delivery on orders over ₹499". Use your own message.
- In Link (optional), choose what happens when a customer taps the bar:
- No link: the bar is only text.
- A web link: type the address in Web address.
- A category, A product or A brand: click the button that appears (for example Choose a category), type at least 2 letters to search, pick one and click Done.
- Under Movement, choose Static to keep the message still, or Slide to make it move.
- In Background colour, type a colour code (for example #FBBF24) or click the colour box to pick one.
- In Text colour, pick a colour from the list, for example Black. Choose a colour that is easy to read on your background.
- Click Publish at the top right. The new message shows in the preview, and the Unsaved changes note at the top goes away.
Add a banner
- In Sections, click Add.
- Click Banner, then click Add section. The new banner goes to the end of the page. To change a banner you already have, click it in Sections instead (for example Banner 1).
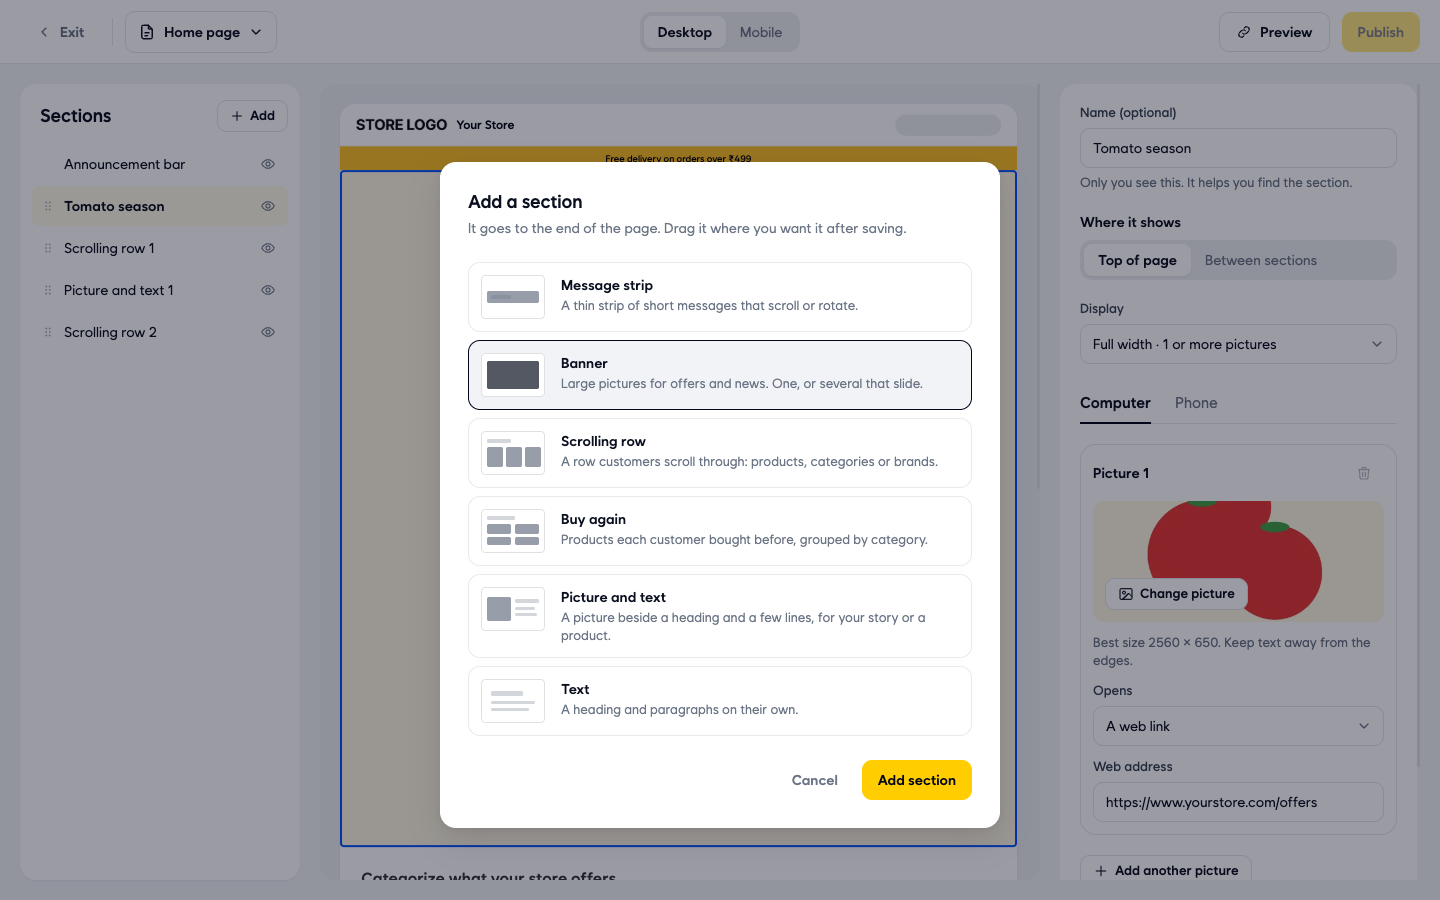
- In Name (optional), type a name that helps you find the banner, for example "Tomato season". Only you see this name. It replaces the banner's name in the Sections list.
- Under Where it shows, choose Top of page or Between sections.
- In Display, choose how the banner looks:
- Full width · 1 or more pictures
- Rectangle, medium · 2 or more pictures
- Rectangle, small · 3 or more pictures
- Thin strip · 1 or more pictures
- Under Pictures for, make sure Computer is selected, then click Change picture (or Add picture if the banner has none yet).
- In Choose a picture or video, pick a picture from your media library, or click Upload to add a new one. Then click Use this. You can use the tabs All, Pictures and Videos, or search by name.
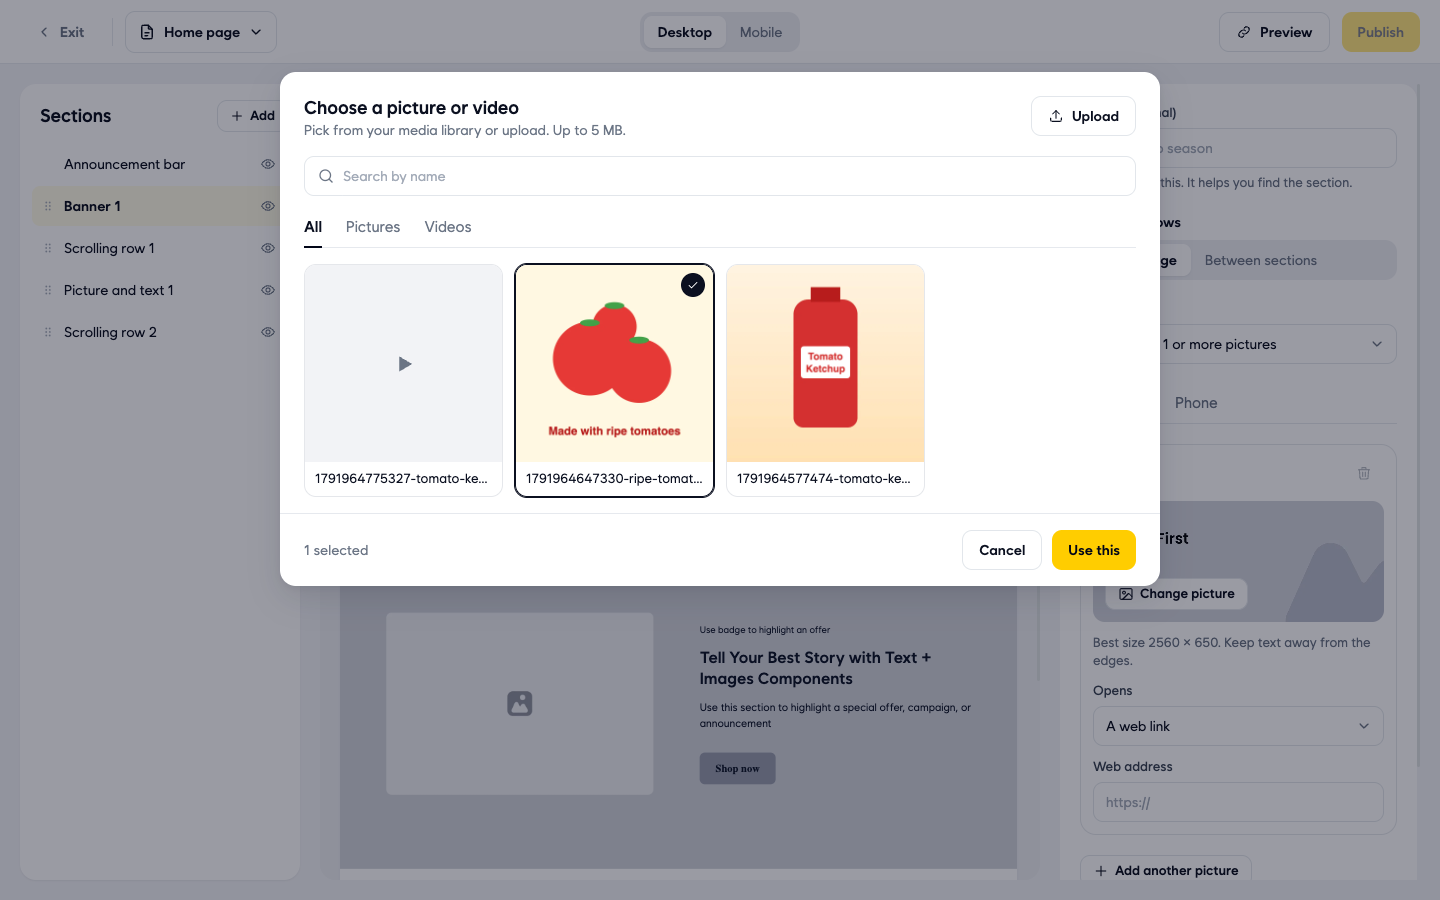
- Click Phone and add a picture for customers on phones in the same way.
- In Opens, choose what happens when a customer taps the banner:
- A web link: type the address in Web address.
- Products: click Choose products, search and pick the products, then click Done.
- A category or A brand: click the choose button, search, pick one and click Done. If you pick nothing, the banner is not clickable.
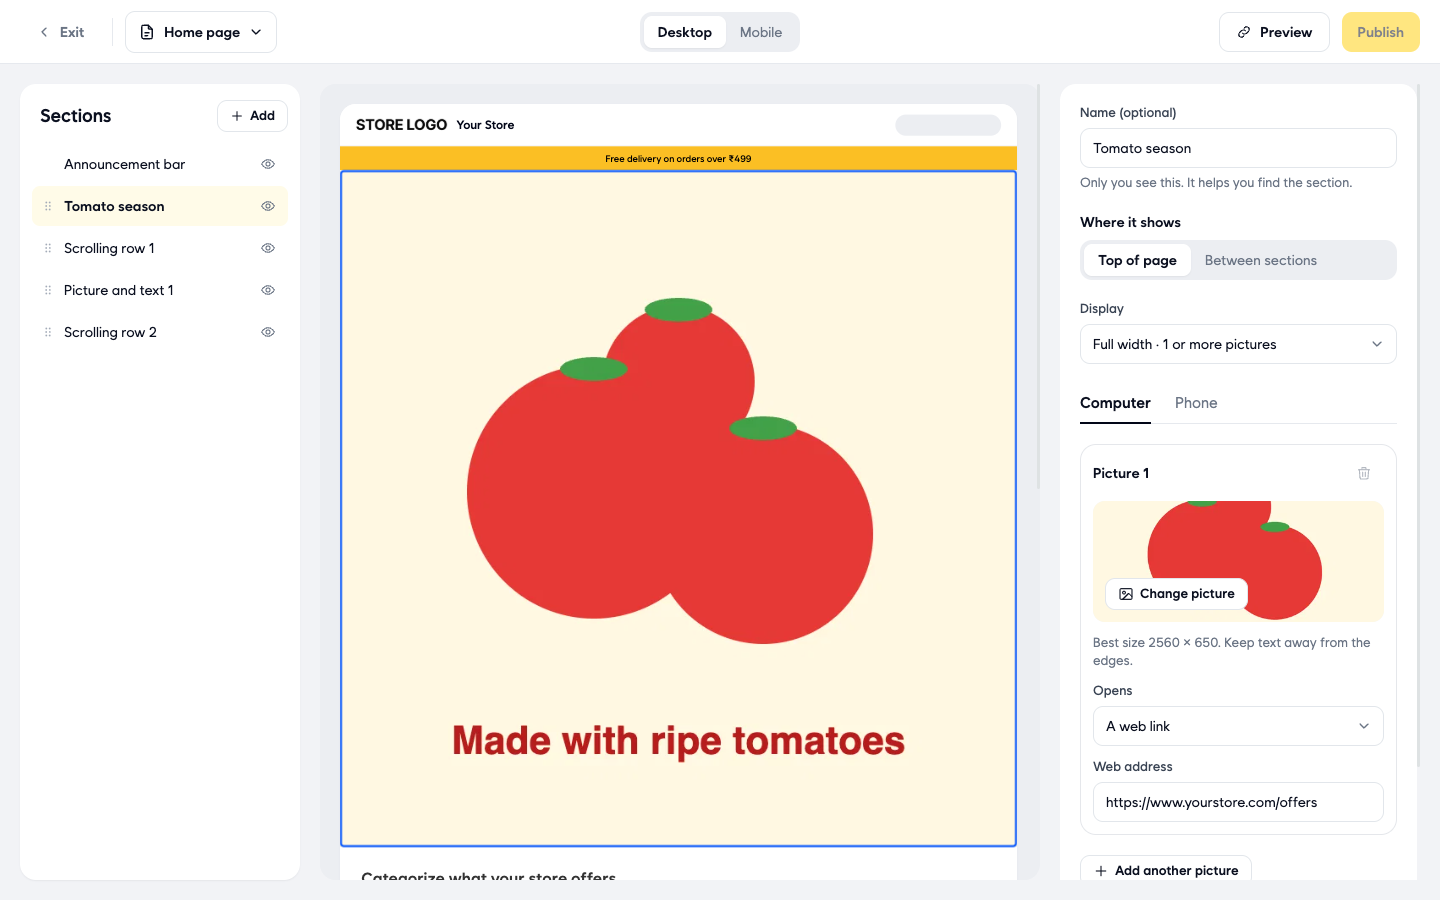
- To show more than one picture in the same banner (a sliding banner), click Add another picture and add its picture and link the same way, for Computer and for Phone.
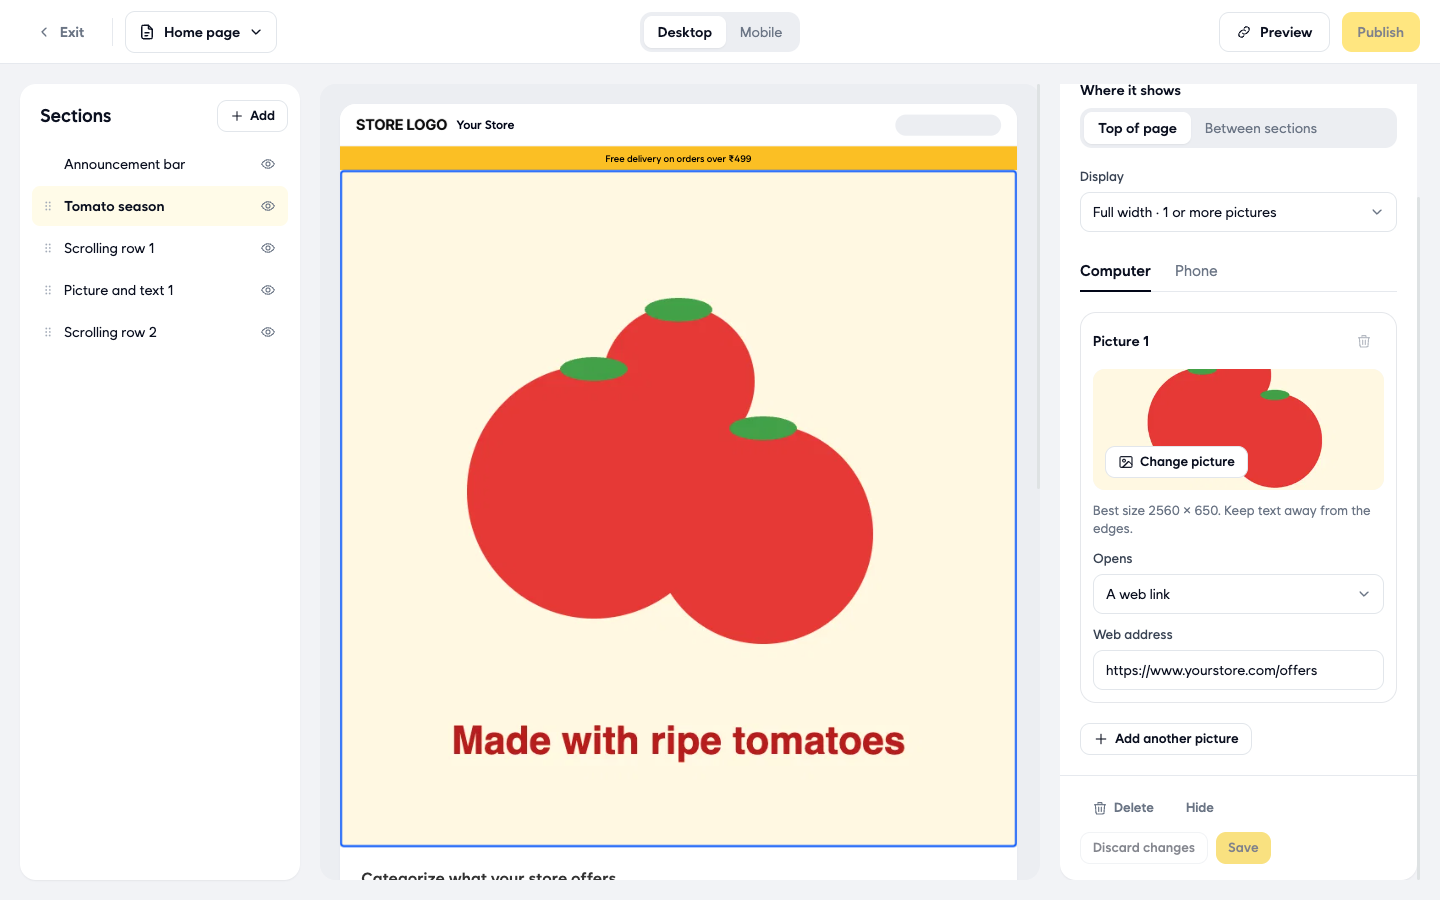
- Click Save at the bottom of the settings. Your banner is now live on your store, and the Publish button at the top turns grey because there is nothing left to publish.
Check how it looks
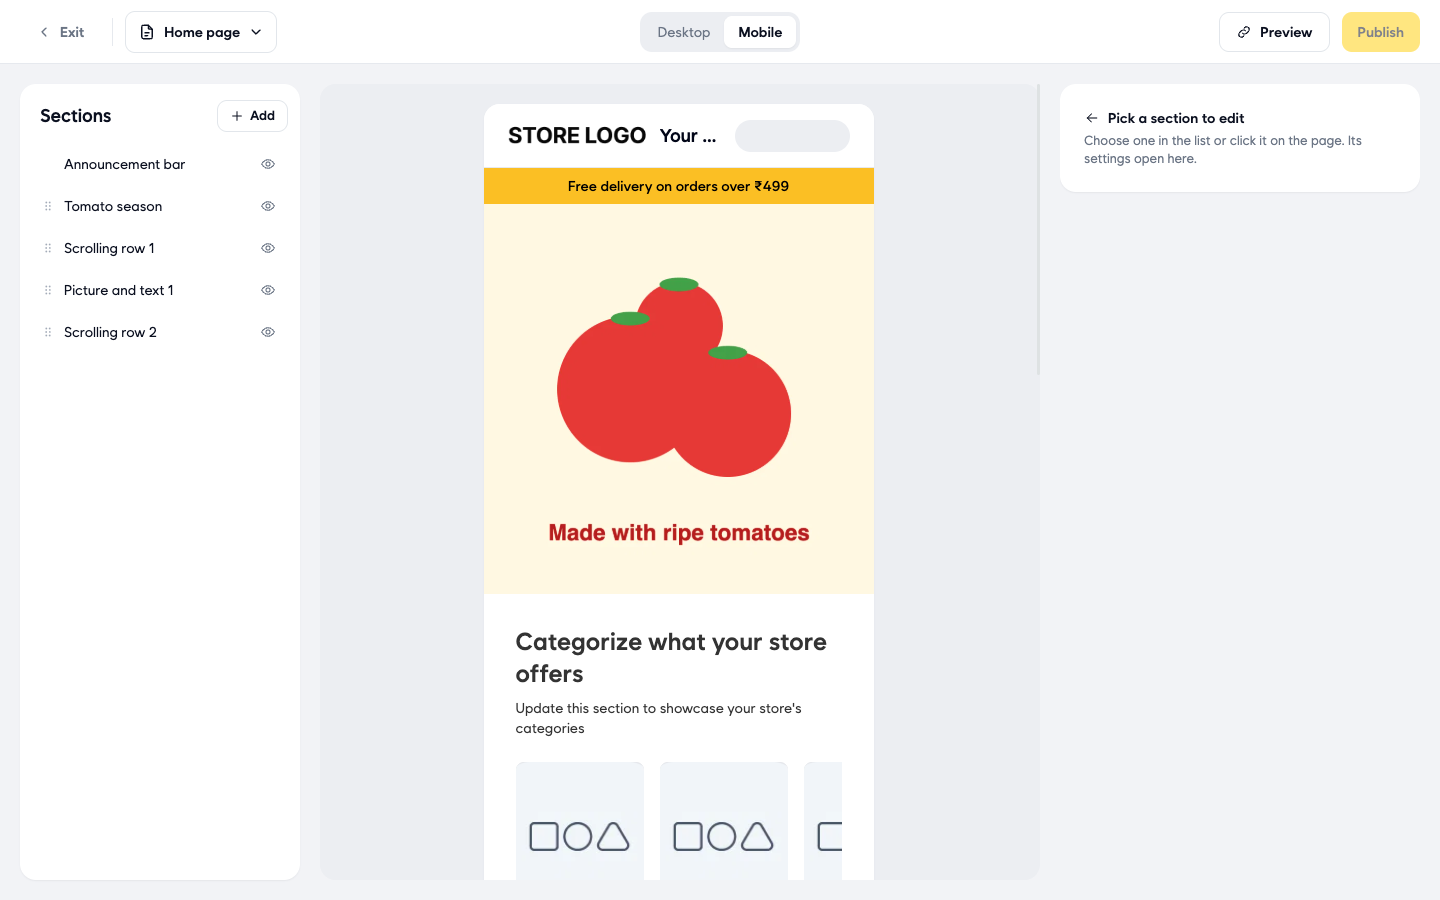
- At the top of the editor, click Mobile to see your announcement bar and banner as customers see them on a phone. Click Desktop to switch back.
- Click Preview at the top right to open your store in a new tab.
Good to know
- The Design page controls how your store looks to customers, on the web and in your app.
- The message, picture, name and link in this article are examples. Use your own text, pictures and links.
- To hide a section without deleting it, click the eye icon next to it in Sections. For the announcement bar you can also turn off the Show on store switch.
- To move a banner up or down the page, drag the handle to the left of its name in Sections. The announcement bar always stays at the top.
- At the bottom of a banner's settings, Hide hides it from your store, Delete removes it, and Discard changes undoes changes you have not saved yet.
- If you see Unsaved changes at the top of the editor, your customers do not see your changes yet. Click Publish or Save first.
- Want several short messages in one strip? Click Add and choose Message strip. It is a thin strip of short messages that scroll or rotate. You set a Name (optional), one or more Messages (each with a Message and a Link (optional), and Add message for more), Movement (Static or Slide), Size (Small, Medium or Large), an Icon between messages, a Background colour and a Text colour.
- Banner pictures look best at 2560 × 650 on computers and 2560 × 1300 on phones.
Related
- Customising store branding
- Choosing and applying a theme
- Setting up your business
- Marketing notifications
क्या यह आर्टिकल काम का था?