यह आर्टिकल अभी हिंदी में नहीं है, इसलिए इसे अंग्रेज़ी में दिखाया जा रहा है।
कैसे करें
Configuring store policies
Set returns, cancellations, delivery terms and customer guidelines.
Store policies tell your customers how returns, refunds, cancellations and deliveries work at your store, and what you expect from them. They show in your store footer and at checkout, so set them up before you take your first orders.
Ordrio gives you six ready policies to edit. You can also add your own, such as a cancellation policy, a delivery policy or customer guidelines.
Before you start
- Decide your rules first: how many days customers have to return an item, until when they can cancel an order, where and when you deliver, and how quickly you refund.
- Keep your store phone number and email handy. Customers will use them to reach you.
Open your store policies
- Open nadi.ordrio.com (your Ordrio admin panel) and log in.
- Click the Settings icon (the gear) at the top right.
- Under Store, click Store policies.
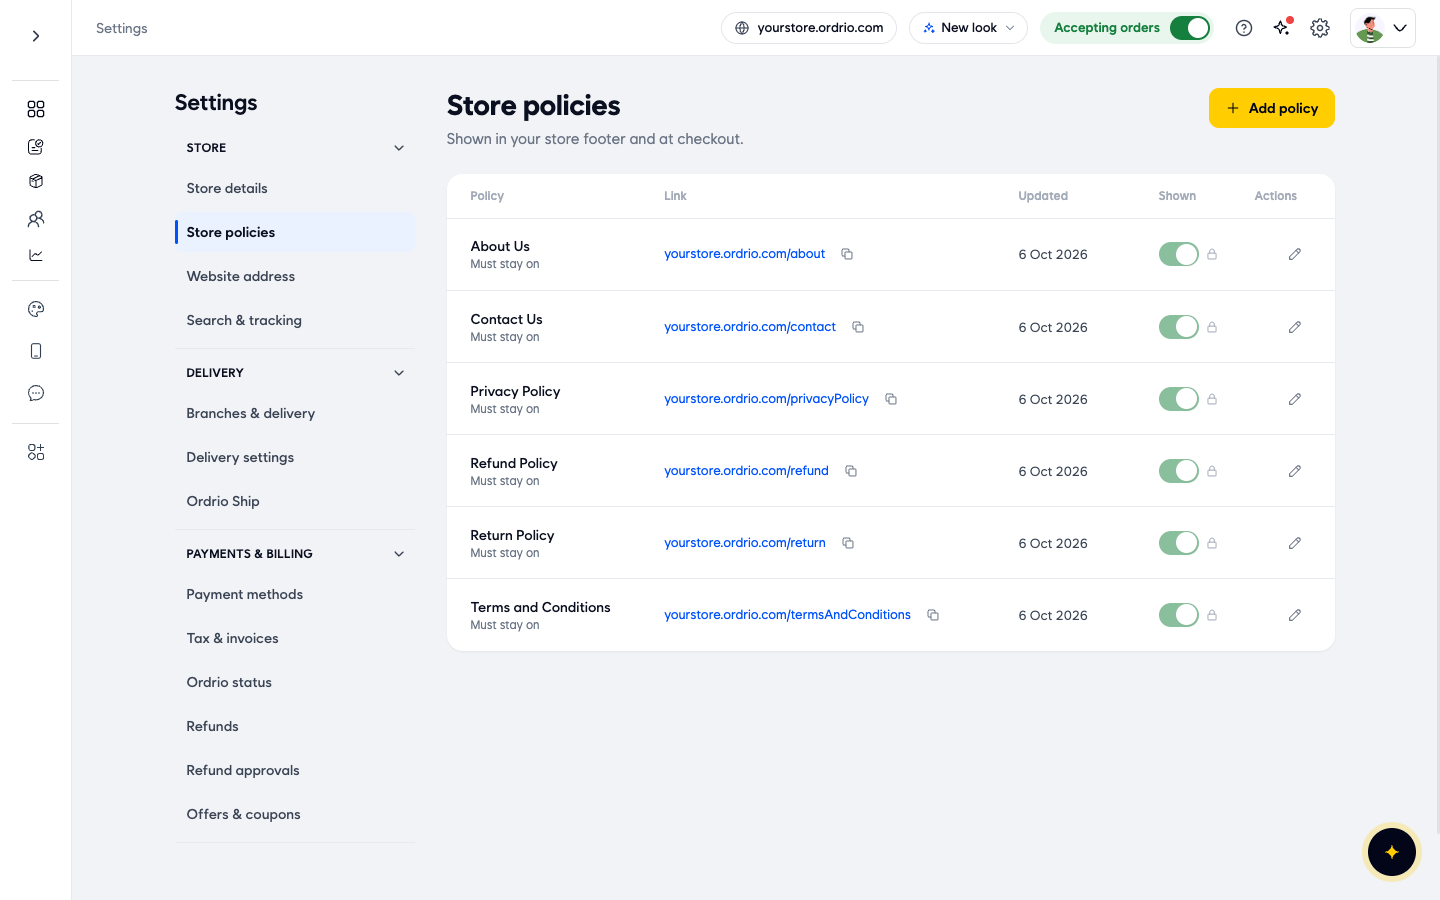
You now see the list of your policies. For each policy the list shows:
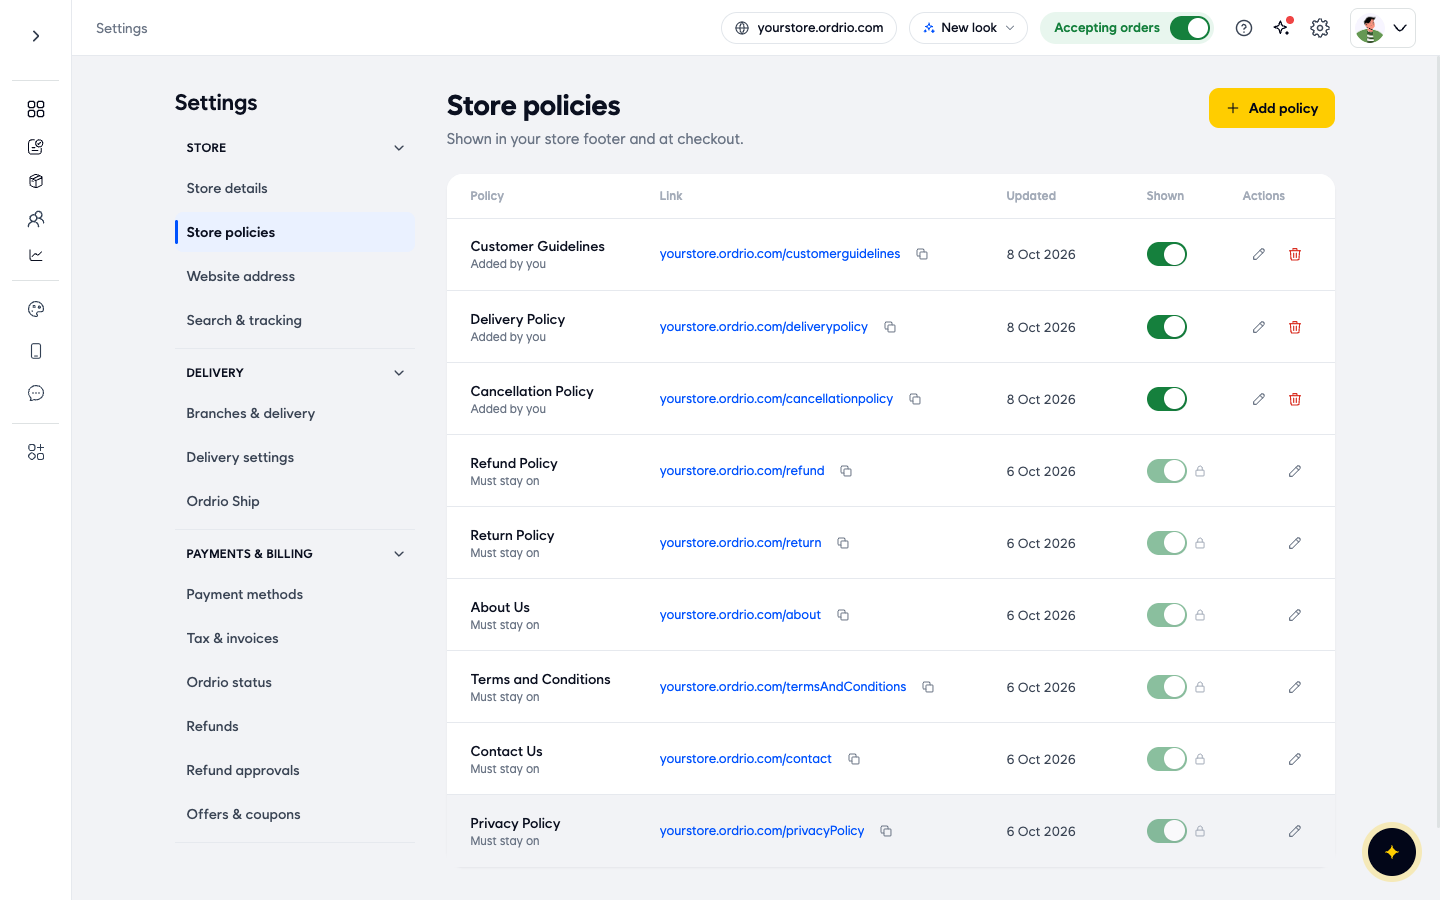
- Policy: the policy name. Ready-made policies say Must stay on. Policies you add say Added by you.
- Link: the web address of the policy page on your store. Click the copy icon next to it to copy the link, for example to share it on WhatsApp.
- Updated: the date you last changed it.
- Shown: whether customers can see it on your store.
- Actions: the pencil icon to edit, and for policies you added, the bin icon to delete.
Edit the ready-made policies
Your store starts with six policies: About Us, Contact Us, Privacy Policy, Refund Policy, Return Policy and Terms and Conditions. They already have sample text. Read each one and change it to match how your store works.
- Click the pencil icon next to Return Policy. The policy opens with its name, link and text.
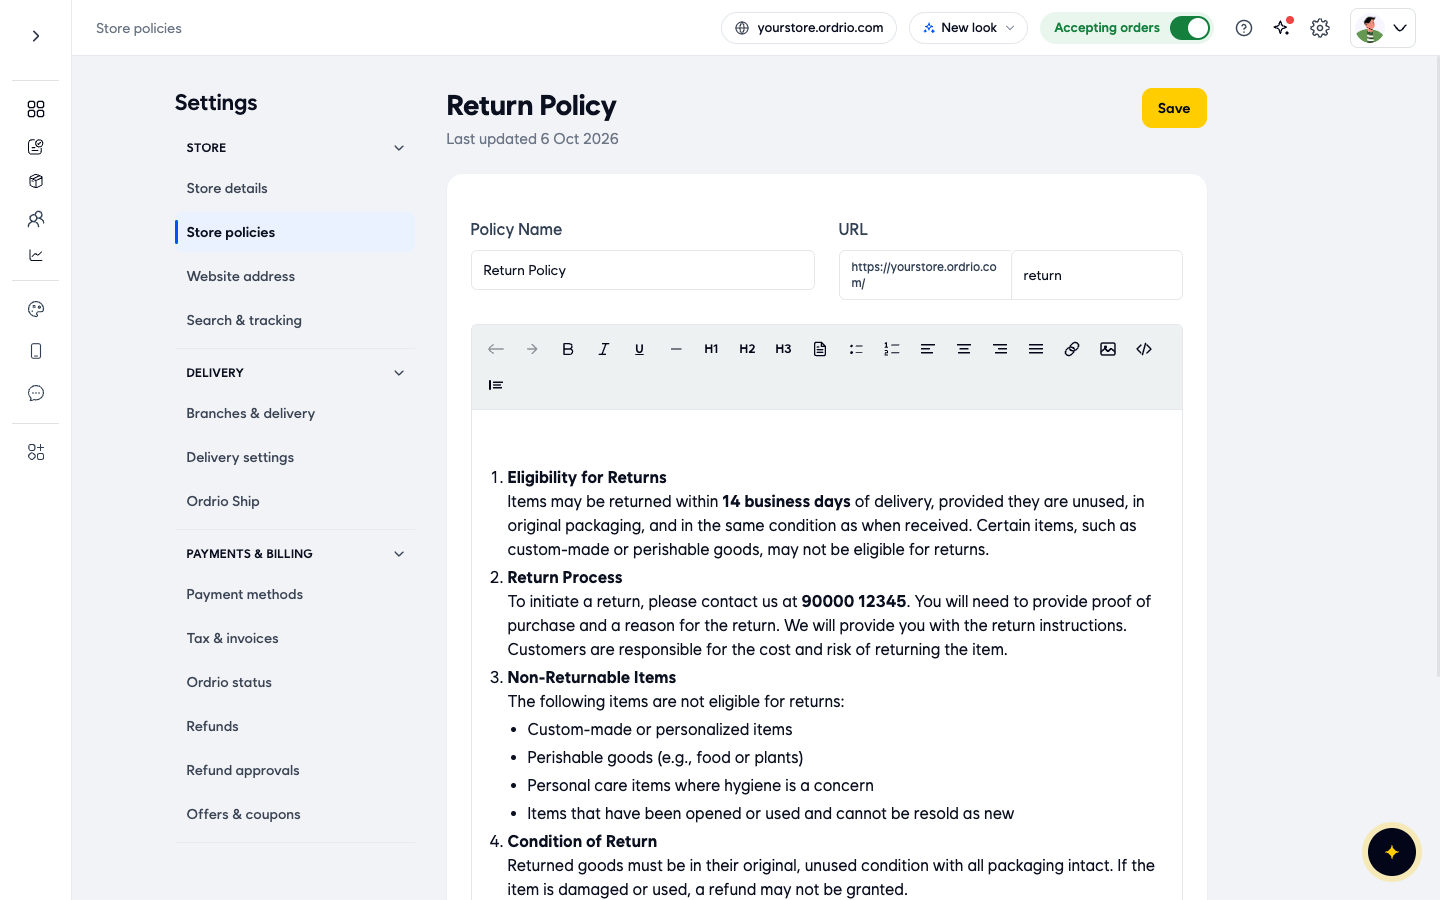
- Check the Policy Name. You can rename it, but most stores keep the name as it is.
- Read the text in the large box below and change it to your own rules. In the sample return policy, check the number of days customers have to return an item, the list of items that cannot be returned, the processing time and the phone number customers should call.
- Use the toolbar above the text to format it if you want: Bold, Italic, underline, H1, H2 and H3 for headings, Normal Text, Bullet List, Numbered List, the alignment buttons, Insert Link and Insert Image from Media.
- Click Save. You go back to the Store policies list.
- Do the same for Refund Policy and Terms and Conditions. Then check About Us, Contact Us and Privacy Policy so your store name, phone number and email are right.
The phone number and text in the screenshots are examples. Use your own store phone number, email and rules.
Add a cancellation policy, delivery terms or customer guidelines
Cancellations, delivery terms and customer guidelines are not in the ready-made list. Add each one as its own policy.
- On the Store policies list, click Add policy. The New policy screen opens.
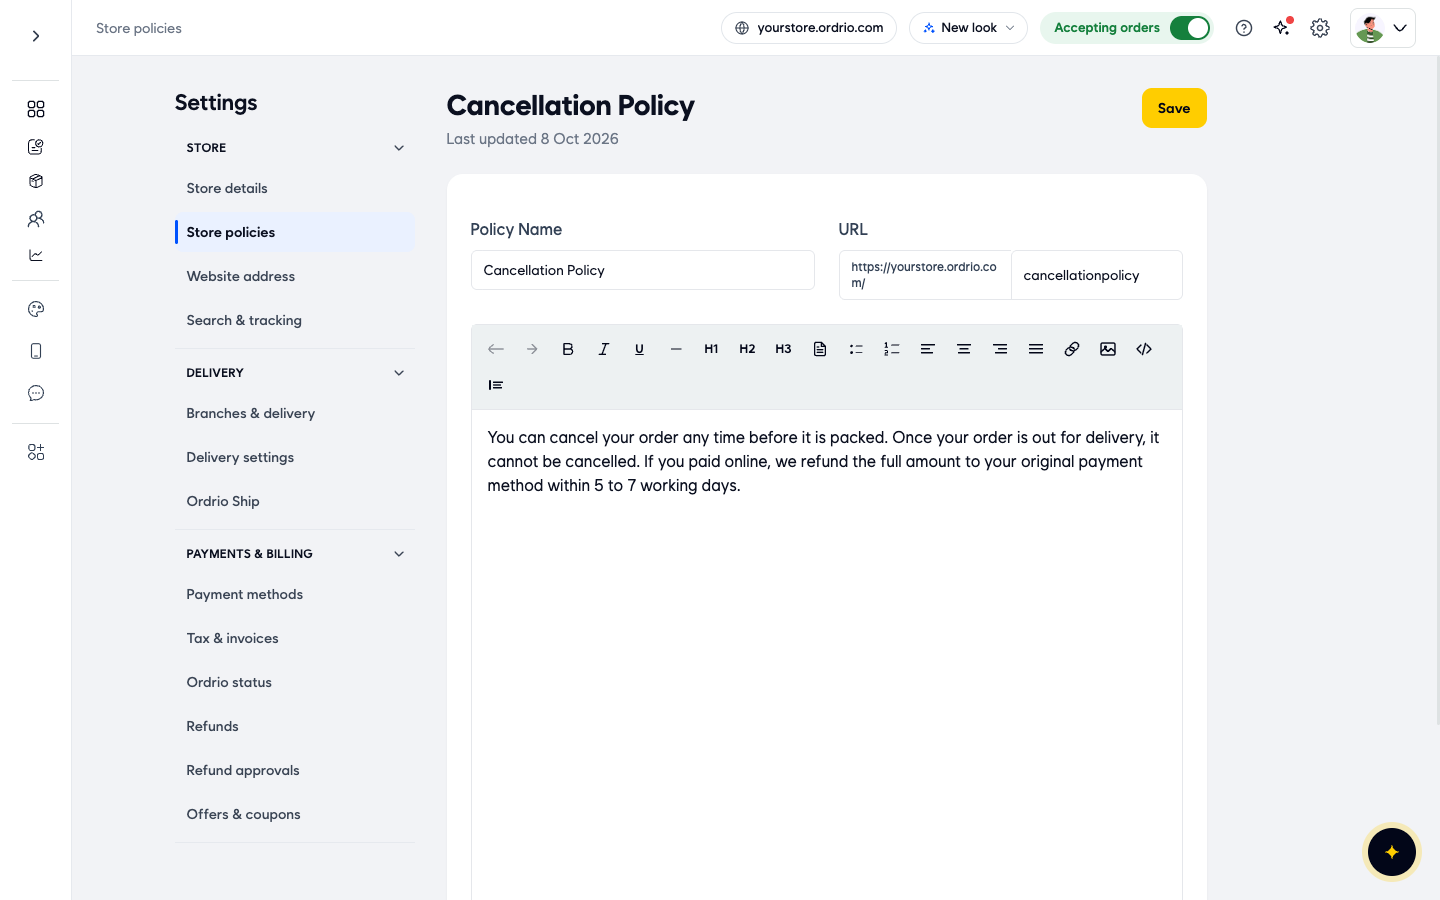
- In Policy Name, type the name customers will see, for example Cancellation Policy.
- Look at URL. Ordrio makes the link from the name for you, for example
cancellationpolicy. You cannot type in this box. - Click in the large box and write your policy. For example: "You can cancel your order any time before it is packed. Once your order is out for delivery, it cannot be cancelled."
- Click Save. Ordrio shows Policy created and takes you back to the list.
- Repeat steps 10 to 14 for your other policies. For example:
- Delivery Policy: the areas you deliver to, delivery days and time slots, any delivery charge, and what happens if nobody is home.
- Customer Guidelines: what customers should do when an order arrives, how soon to report a problem, address directions, and paying cash on delivery.
Your new policies appear at the top of the list with Added by you, and they are shown on your store straight away.
The policy texts above are examples. Write your own rules.
Hide or delete a policy you added
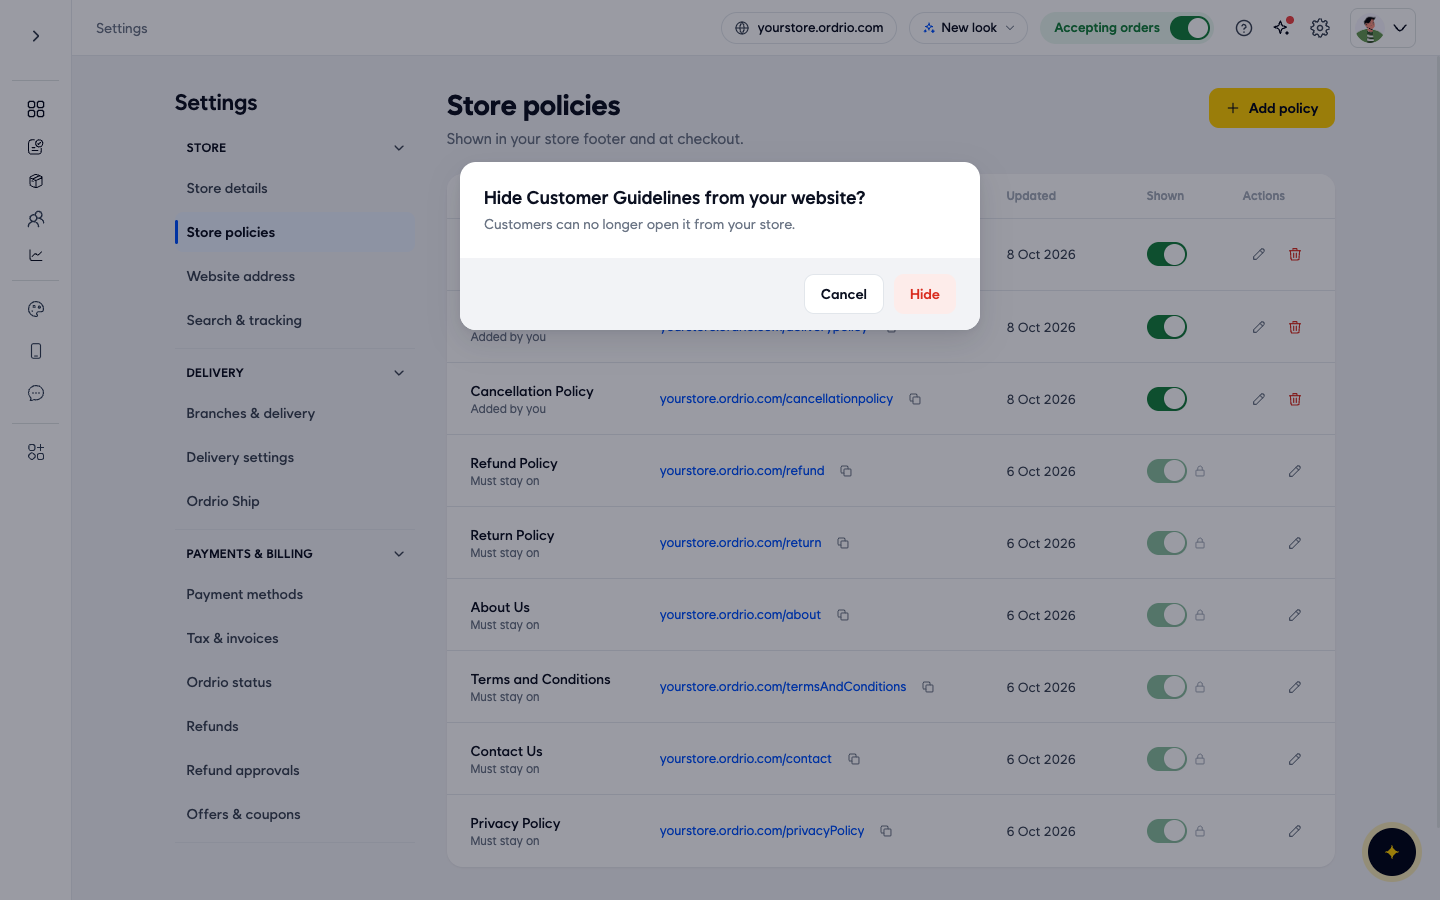
- To hide a policy without deleting it, click its switch under Shown. Ordrio asks "Hide ... from your website?" and tells you customers can no longer open it from your store. Click Hide to confirm, or Cancel to keep it showing.
- To remove a policy for good, click the bin icon under Actions. Ordrio asks "Delete ...?" and tells you customers can no longer open the page. Click Delete to confirm, or Cancel to keep it.
Good to know
- The six ready-made policies always stay on. Their switch is locked, and they have no delete button. You can still edit their text.
- Only policies you added can be hidden or deleted.
- The sample text in the ready-made policies is a starting point. Read it fully and change any day count, item list or contact detail that does not match your store.
- You cannot change a policy's link by hand. It is made from the name when you add the policy.
- Policies show in your store footer and at checkout, so keep them short and clear. Customers read them before they pay.
- Your policies are the text customers read. Your delivery charges and refund options are set separately, in Delivery settings and Refunds under Settings. Make sure your policies say the same thing as those settings.
Related
- Setting up your store details
- Setting up delivery areas, charges and time slots
- Handling refunds