यह आर्टिकल अभी हिंदी में नहीं है, इसलिए इसे अंग्रेज़ी में दिखाया जा रहा है।
कैसे करें
Adding staff members
Invite staff to your business or store.
Add staff members to your Ordrio store so your team can take orders, pack them, deliver them and help run the store without using your own login. This article shows how the store owner invites a staff member, how roles decide what each person can do, and the exact steps the staff member follows to log in.
Before you start
- Open nadi.ordrio.com (your Ordrio admin panel) and log in as the store owner, or as someone whose role can invite and manage people.
- Keep your staff member's mobile number ready. You need it to invite them, and they use it to log in.
- Your plan sets how many people can use your store. The Staff & roles page shows how many you have used, for example "1 of 8 people".
- To invite a Packing Partner, switch on the Packing App add-on in Add-ons first. Without it, Ordrio shows "Packing staff plugin is not active" when you send the invite.
Add a staff member
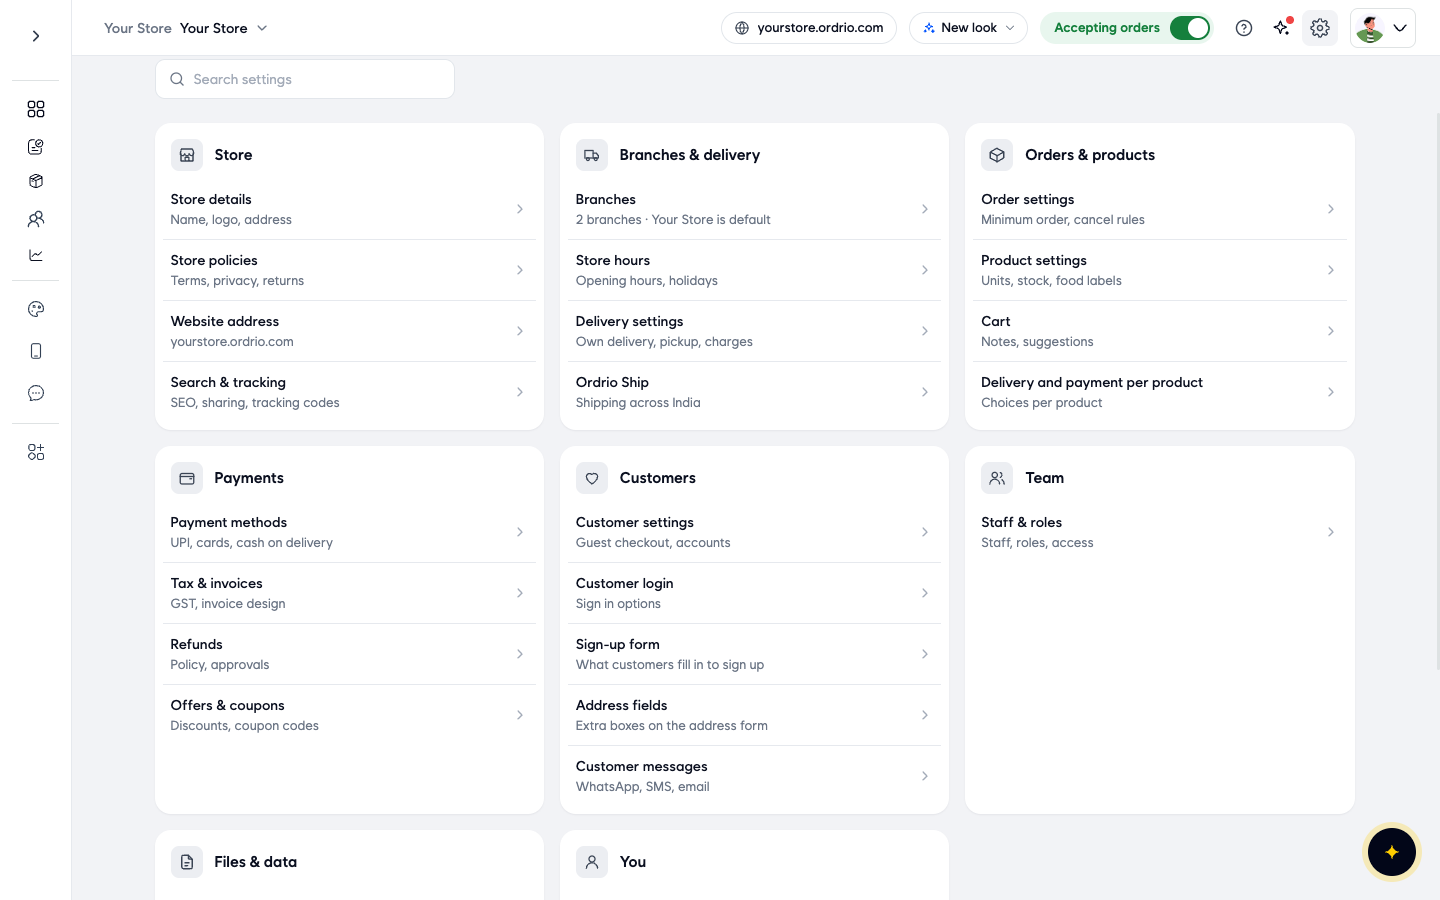
- In your Ordrio admin panel, click Settings (the gear icon at the top right). Under Team, click Staff & roles.
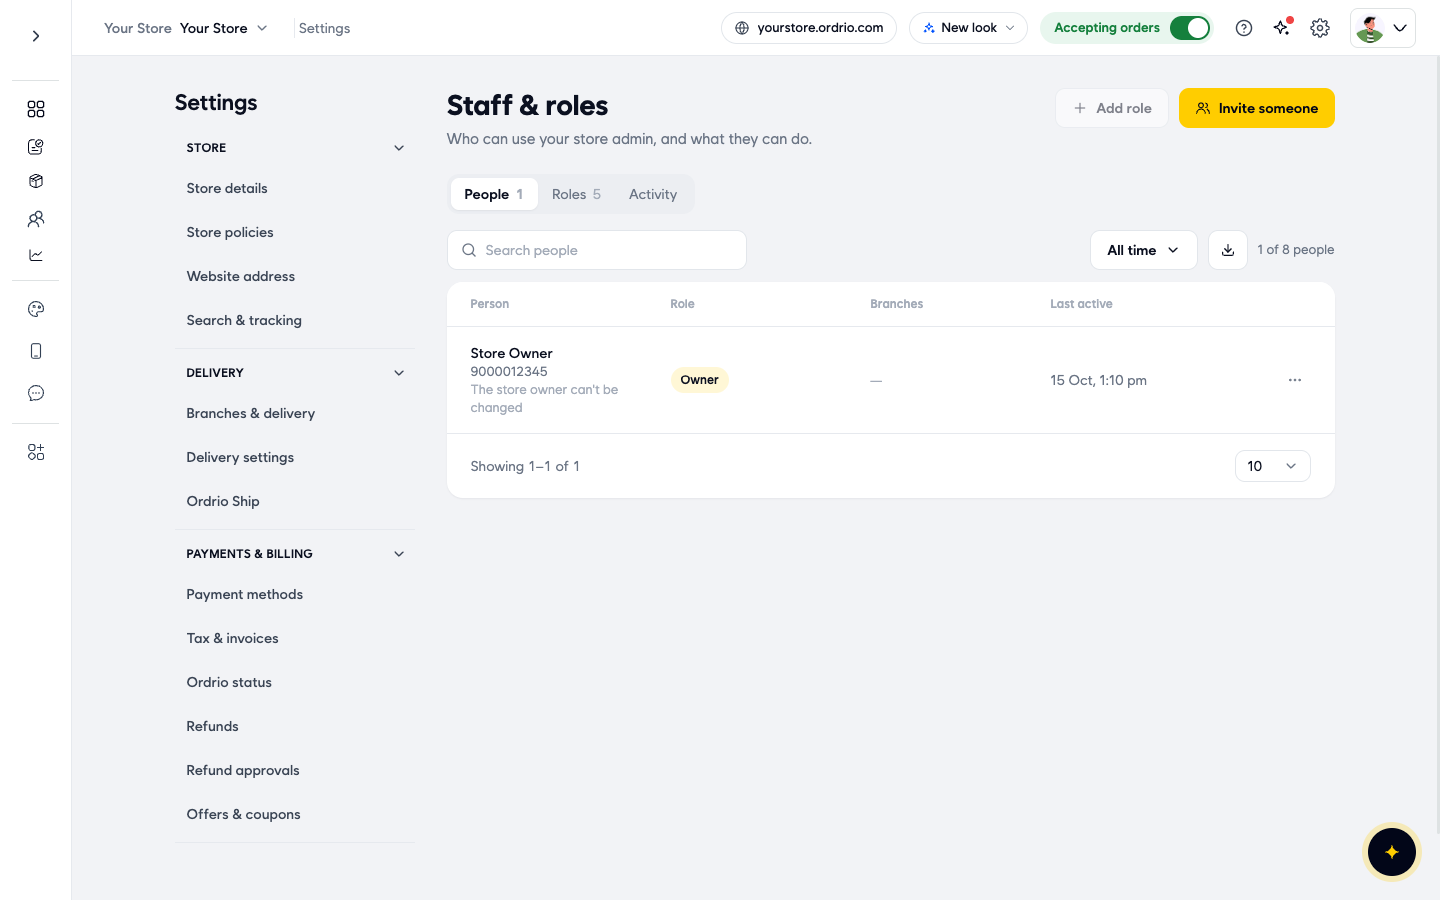
- The Staff & roles page opens on the People tab. It lists everyone who can use your store admin, with their Role, Branches and when they were Last active. The other tabs are Roles and Activity. On the right you see how many people you have and how many your plan allows, for example "1 of 8 people".
- Click Invite someone at the top right. The Invite someone form opens.
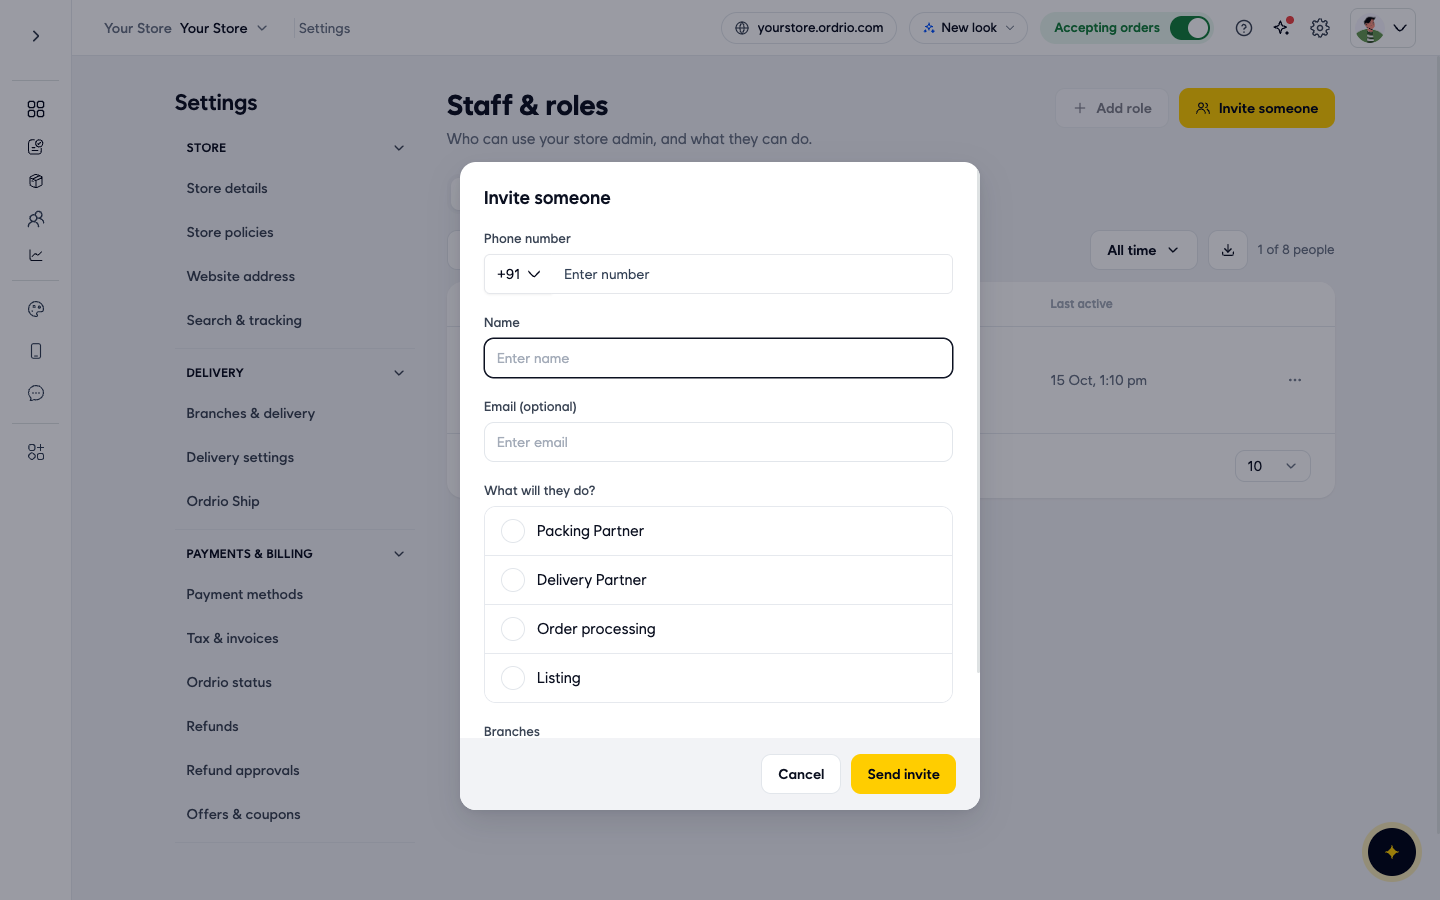
- In Phone number, check the country code. It shows +91 for India. Click it to pick another country if needed. Then type your staff member's mobile number. The screen below shows an example number. Use your staff member's real number.
- In Name, type the staff member's name, so you can tell people apart in the list.
- In Email (optional), type their email address if you want to. You can leave it empty.
- Under What will they do?, pick one role. The built-in roles are Packing Partner (for someone who packs orders) and Delivery Partner (for a rider). Roles you created yourself also appear here. In the example store these are Order processing and Listing.
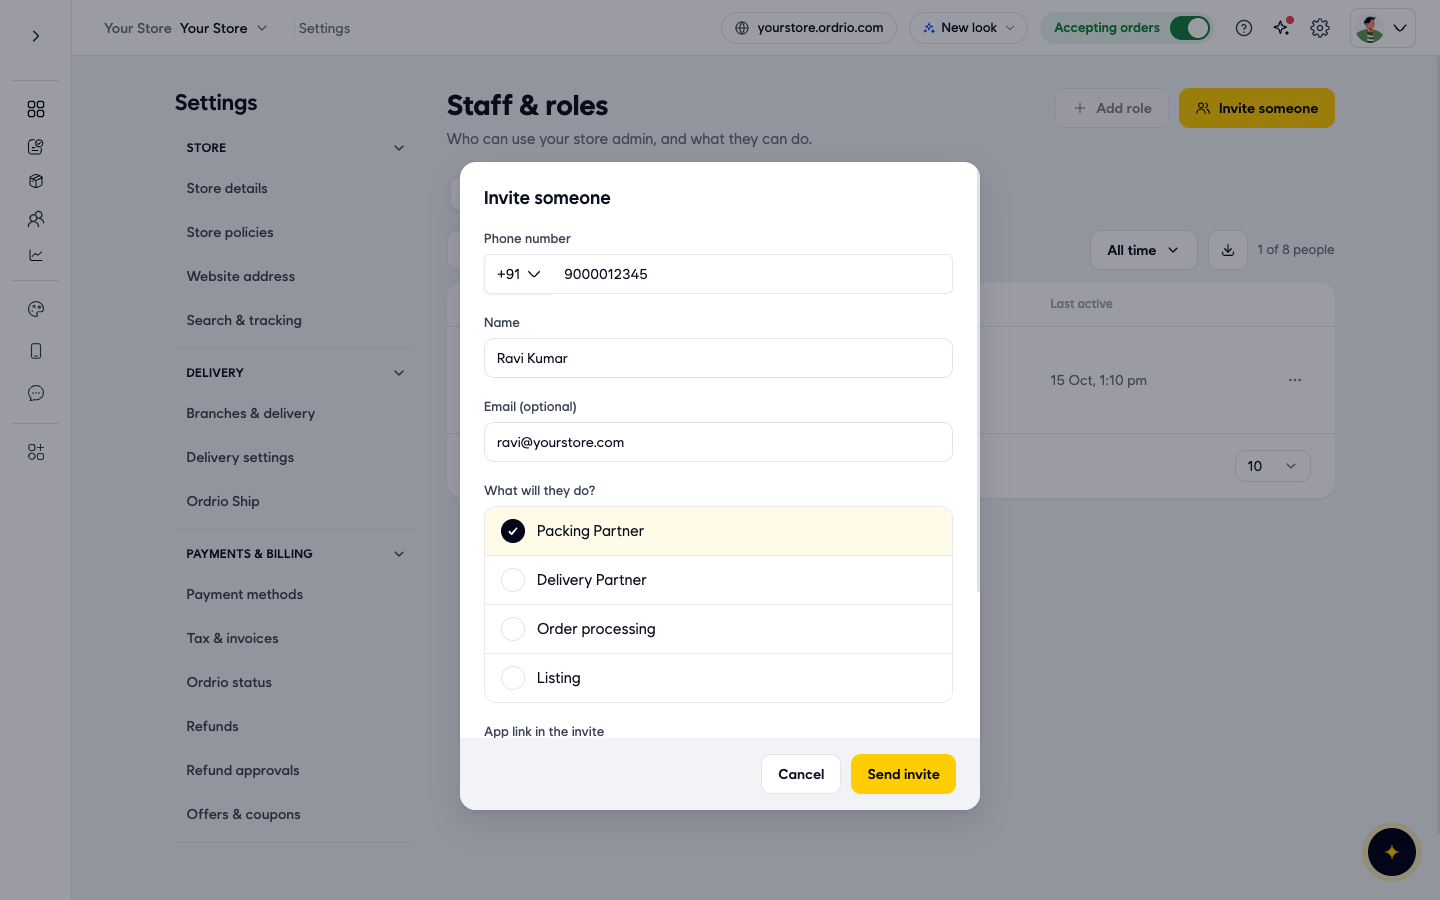
- If you picked Packing Partner or Delivery Partner, the form also shows App link in the invite. Leave Store's delivery app selected to send the link to your store's app, or pick Custom link and paste another app link (for example a Play Store link). Riders and packers install the app from this link and sign in with their email. For other roles this option does not appear.
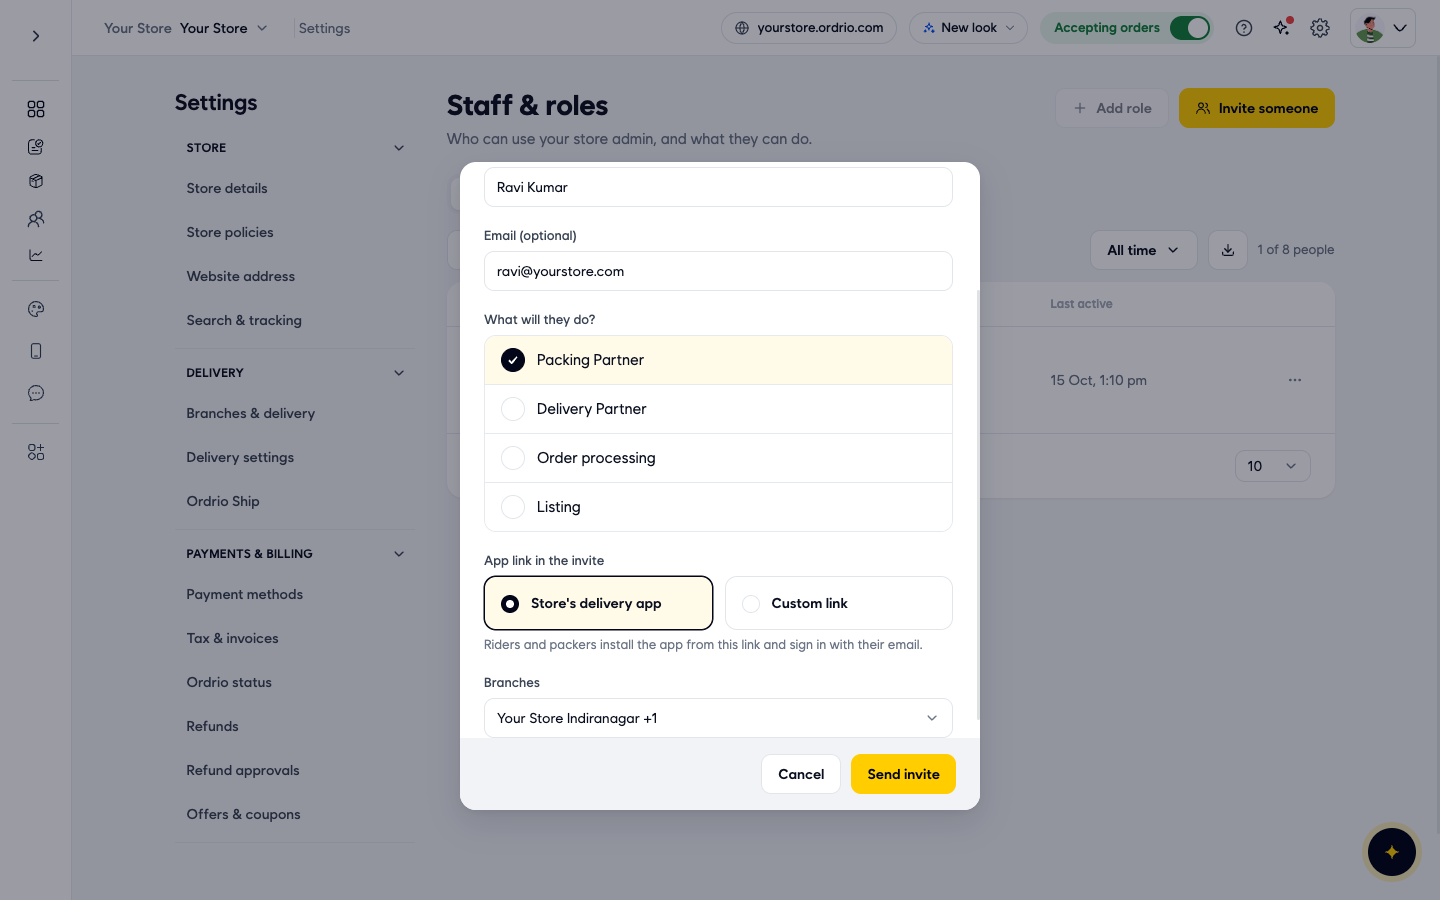
- In Branches, choose which of your branches this person works in. All your branches are ticked at first. Click the field and untick any branch they should not see. You can type in Find a branch to search.
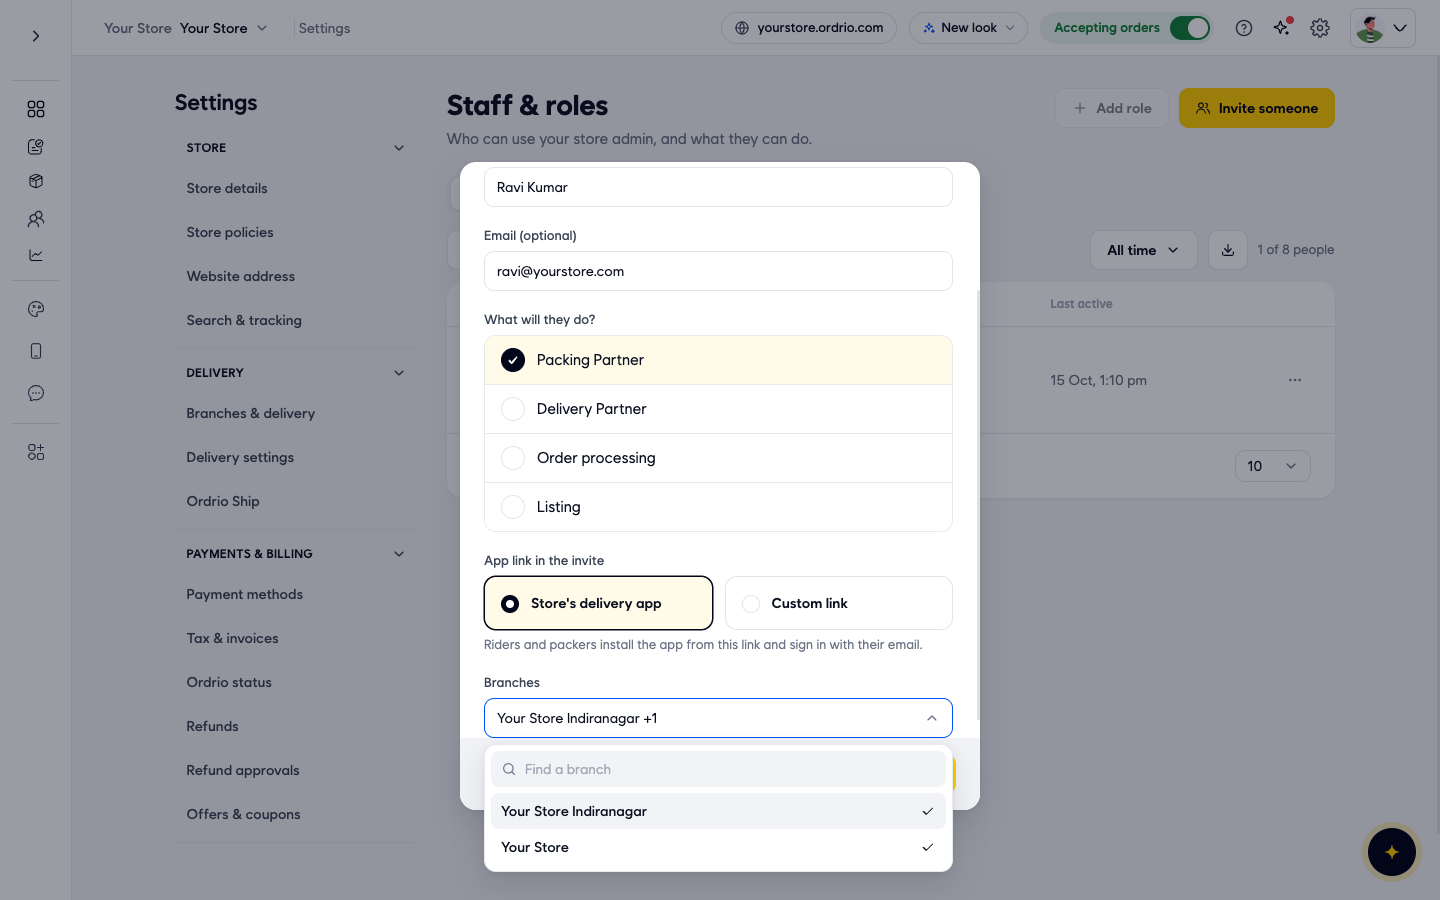
- Click Send invite.
The person now appears on the People tab with their role and Pending, and the count goes up by one (for example "2 of 8 people"). They stay Pending until they log in for the first time. If they did not get the invite, click Resend next to their name.
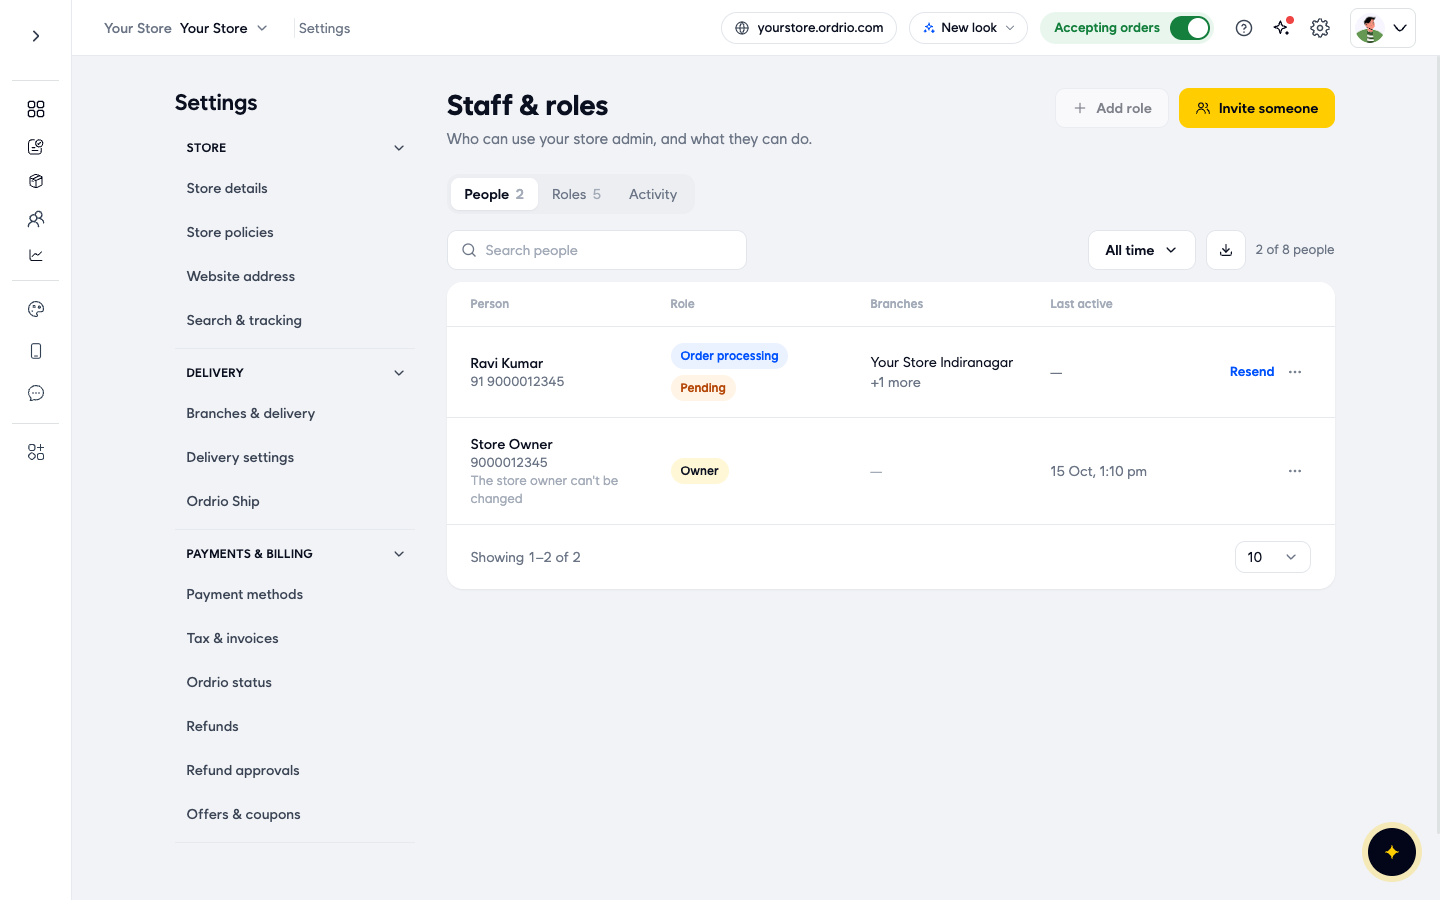
Manage a staff member
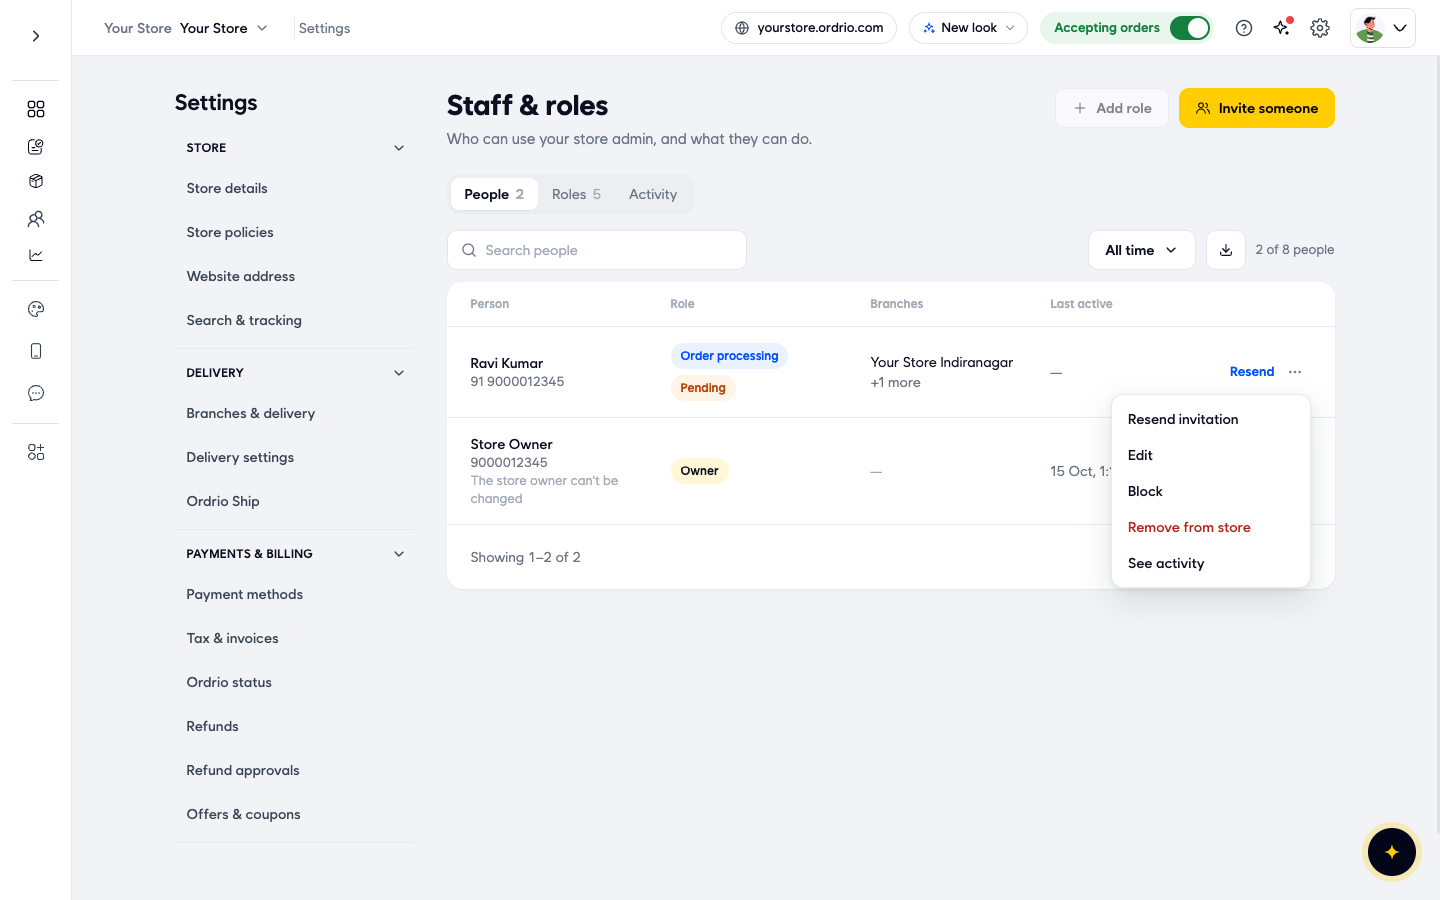
Click the ... button at the end of a person's row to see more actions:
- Resend invitation: sends the invite again.
- Edit: opens this person's details so you can change them.
- Block: blocks this person from your store.
- Remove from store: Ordrio asks "Remove (name)?" and tells you they lose access to your store. Click Remove from store again to confirm. They no longer count toward your plan's number of people.
- See activity: shows this person's activity.
The store owner's row cannot be changed.
Roles
A role decides what a person can see and do. Open the Roles tab on the Staff & roles page to see all your roles. For each role you see how many People have it, what it Can do, and its Status (for example Active). Owner, Packing Partner and Delivery Partner are marked Built in.
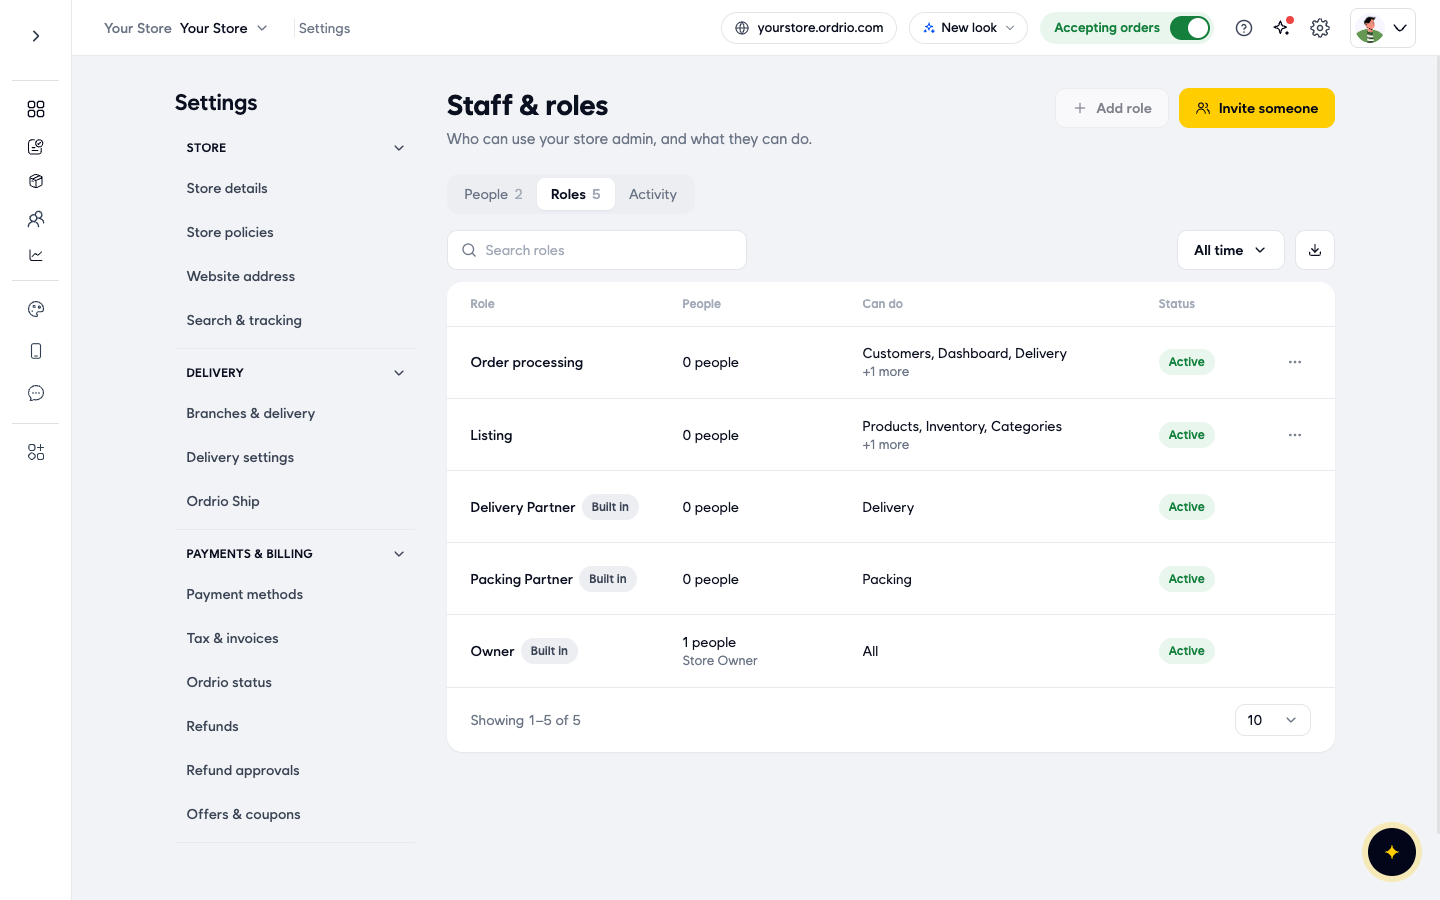
Create your own role
- Go to Settings > Staff & roles.
- Click Add role at the top right.
- In Role name, type a name for the role, for example "Cashier".
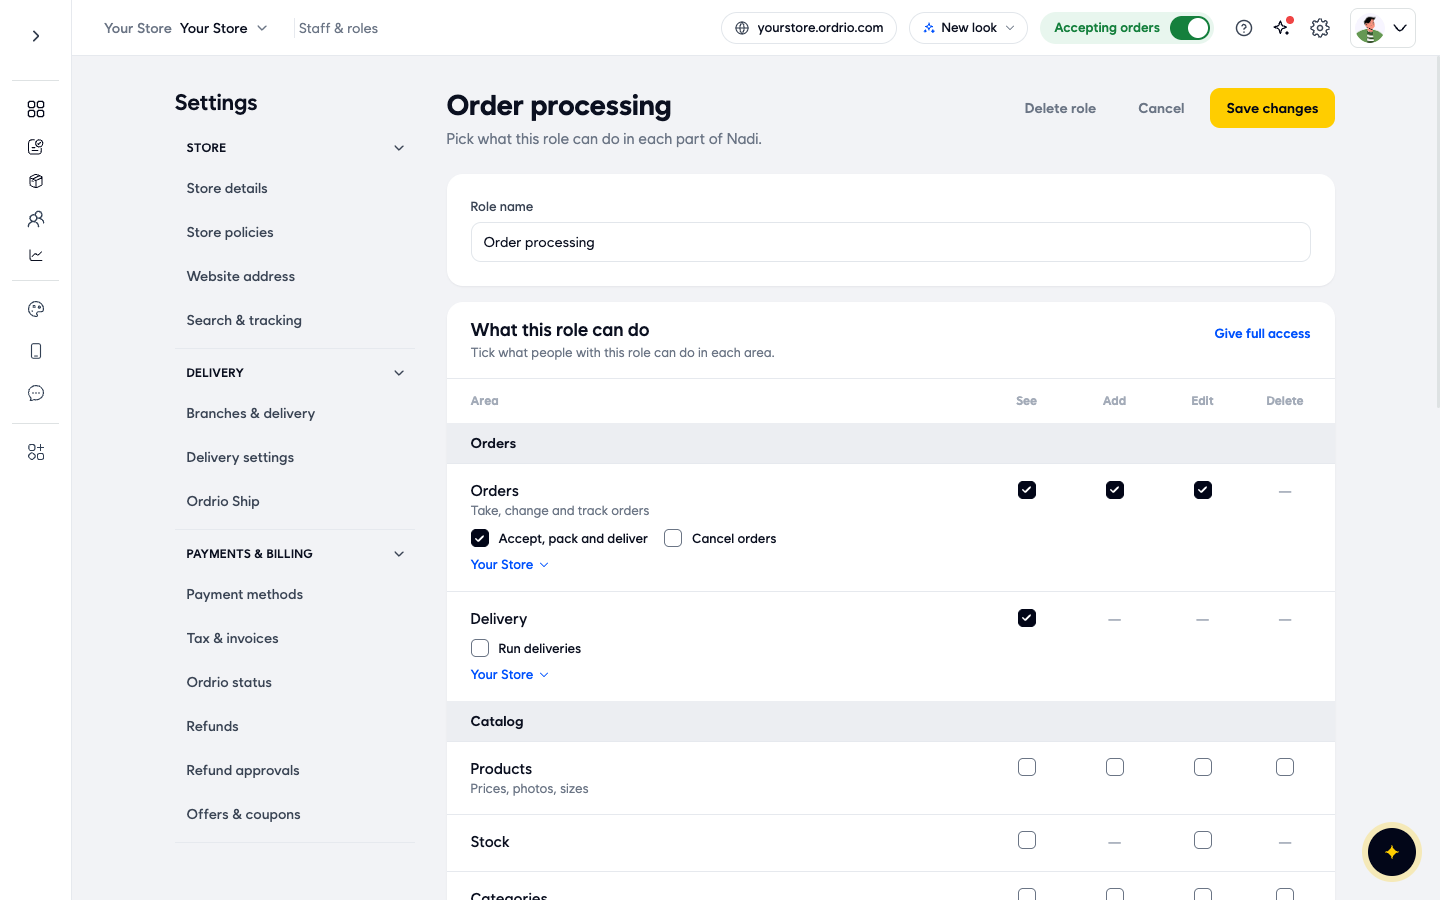
- Under What this role can do, tick what people with this role can do in each area. Each area has a row with See, Add, Edit and Delete columns. A dash means that action is not available for that area. The areas are grouped under Orders, Catalog, Customers, Grow, Home and Store.
- Some areas have extra ticks under their name, for example Accept, pack and deliver and Cancel orders for Orders, or Invite and manage people and Create and manage roles for Settings.
- Some areas also show a branch name under them, such as Your Store. Click it to choose which branches this permission covers, or tick All branches.
- To let the role do everything, click Give full access.
- Click the save button at the top right of the page. When you edit an existing role, it is called Save changes. To leave without saving, click Cancel.
The example below shows the same form when you edit an existing role. A new role starts with an empty Role name.
Your new role then appears in the What will they do? list when you invite someone.
To change a role you made, click ... on its row on the Roles tab. You can Edit role, Turn off role or Delete role. Built-in roles cannot be changed this way.
If Invite someone or Add role is greyed out
- Invite someone is greyed out when you have reached the number of people your plan allows, for example "8 of 8 people". Click the Upgrade link on the same page to move to a plan with more people, or remove someone you no longer need.
- Add role is greyed out when you have reached the number of roles your plan allows. If you point at it, it says "You have reached the role limit of your plan". You can still edit or delete roles you made.
How a staff member logs in
Share these steps with your staff member once you have invited them.
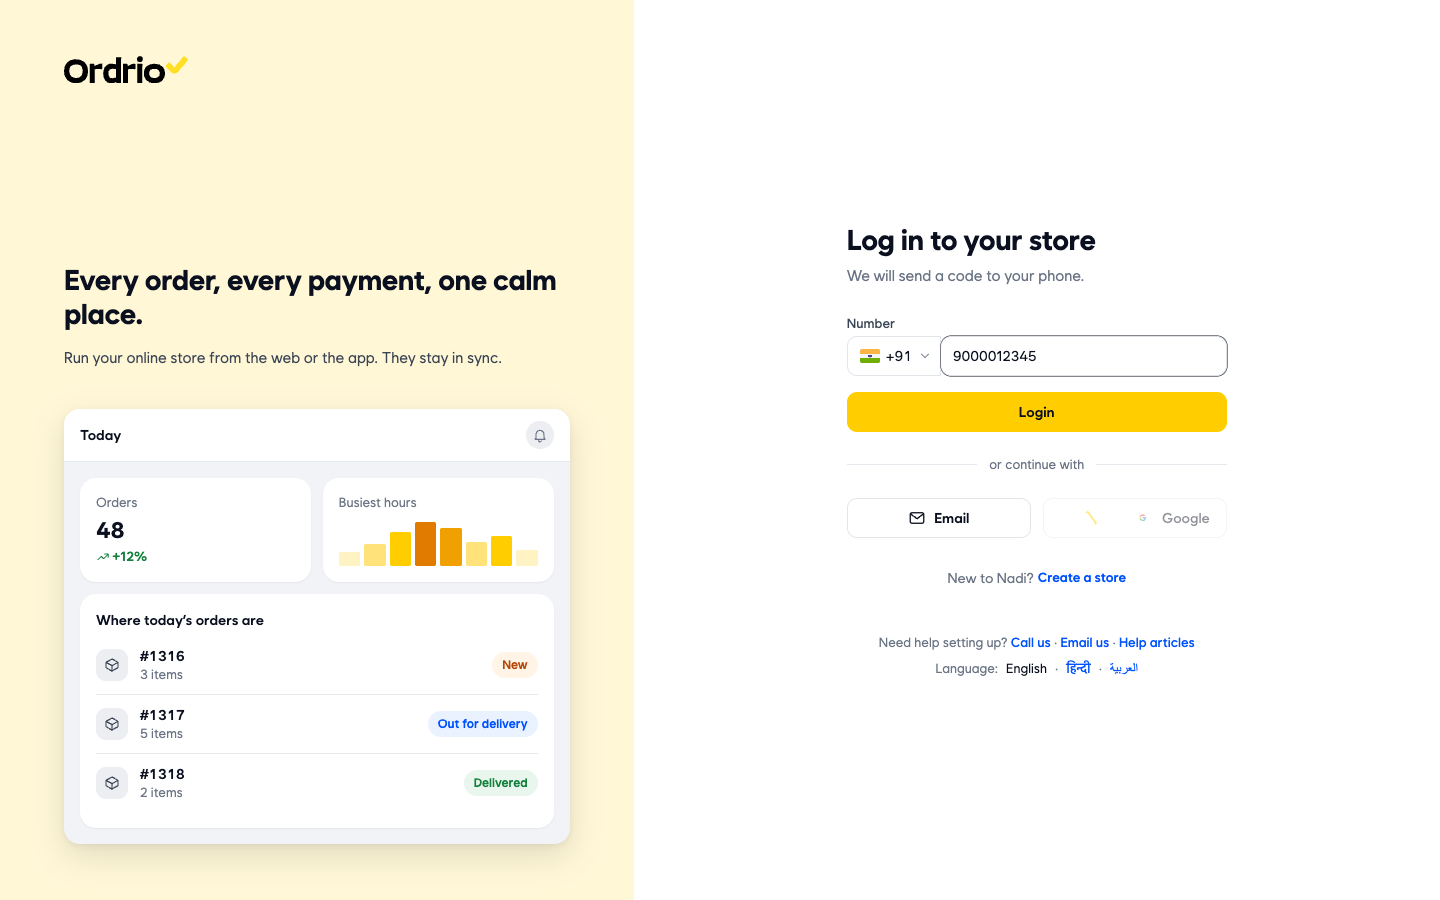
- Open nadi.ordrio.com (your Ordrio admin panel) in a web browser. You see the Log in to your store screen.
- Under or continue with, click Phone number. The screen changes to say "We will send a code to your phone."
- Check the country code next to Number. It shows +91 for India. Click it to pick another country if needed.
- Type your registered mobile number in Number. This is the number the owner invited. The screen below shows an example number. Use your own.
- Click Login.
- The Enter the 6-digit code screen opens. Ordrio sends the code to your WhatsApp. Open WhatsApp, find the code and type it into the six boxes. The screen below shows an example code. Type the code you received.
- Click Verify. You are taken into the store's admin panel, and you only see what your role allows.
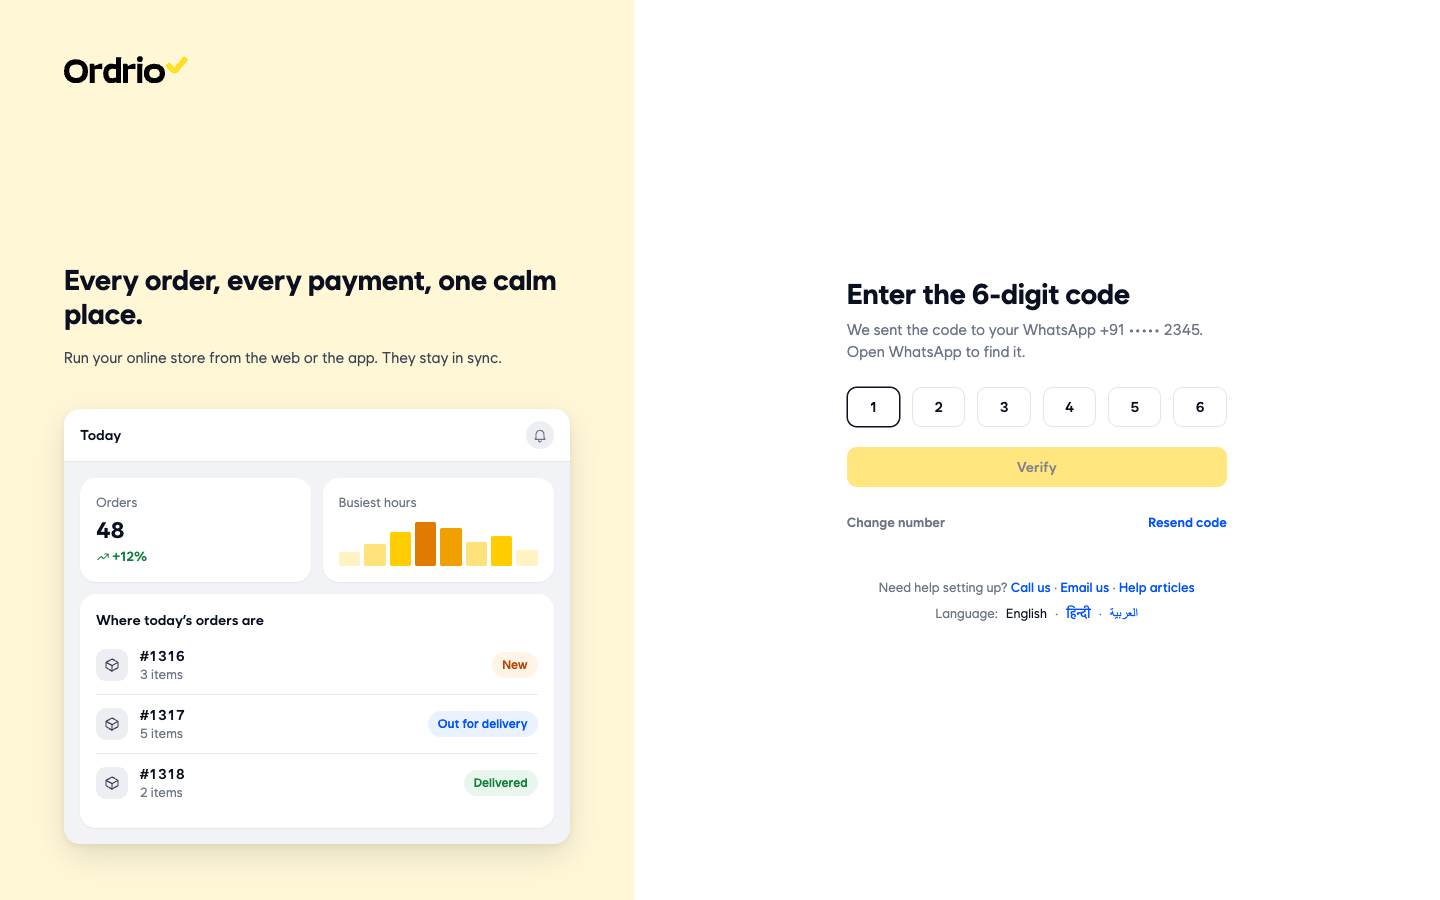
If the code does not arrive, click Resend code. If you typed the wrong number, click Change number.
To log in with email instead:
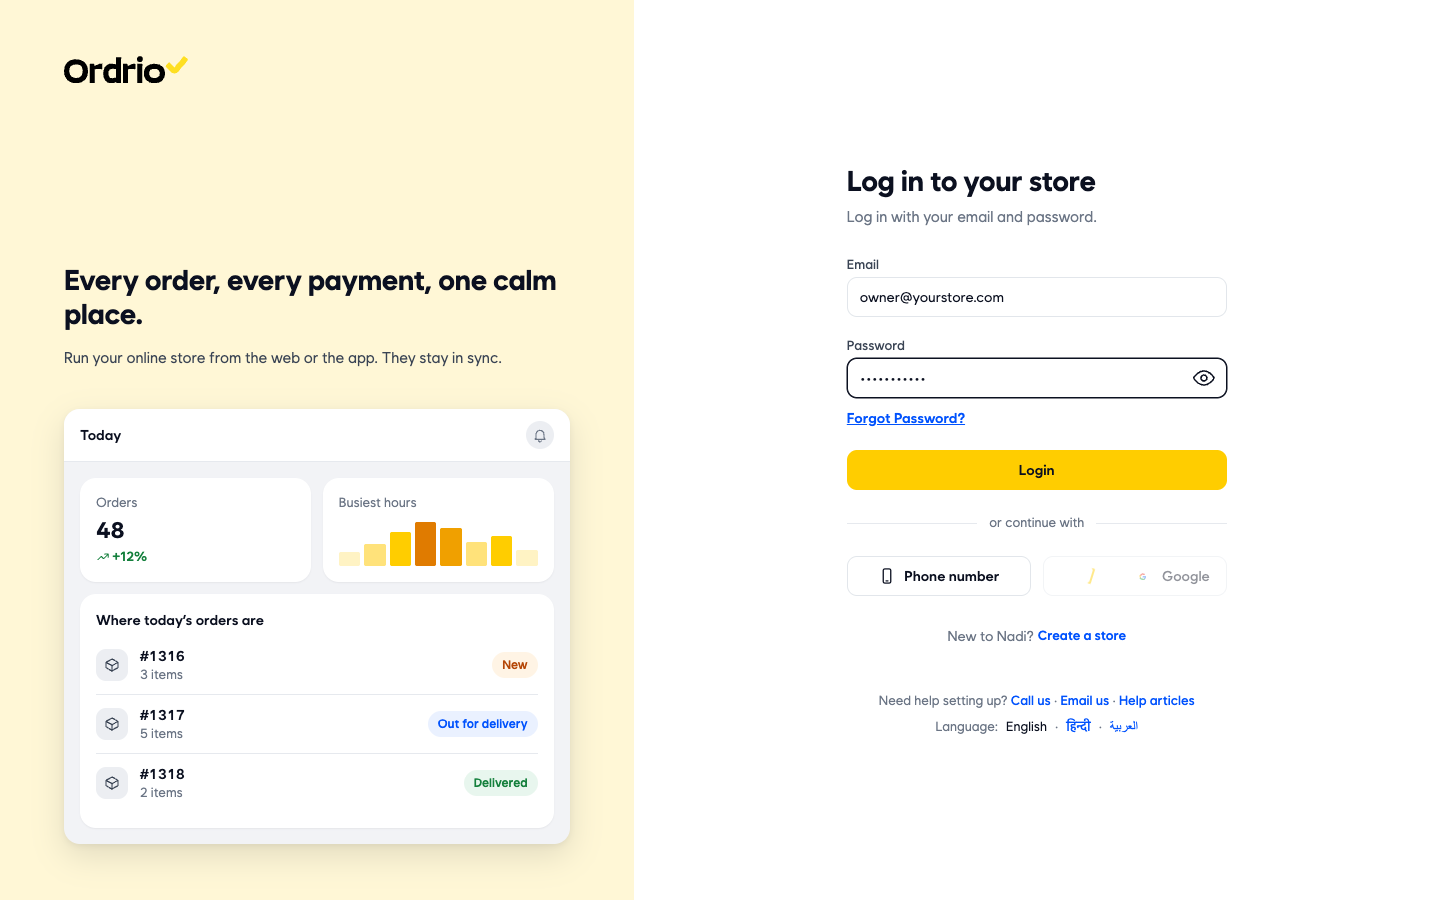
- The Log in to your store screen opens on email login. If it shows Number instead, click Email under or continue with.
- Type your registered email address in Email. The screen below shows an example. Use your own email.
- Type your password in Password. Click the eye icon if you want to check what you typed.
- Click Login.
Good to know
- Staff log in on the same screen as the store owner, at nadi.ordrio.com.
- Staff should use the mobile number the owner invited. A different number will not open your store.
- Packers and riders (Packing Partner and Delivery Partner) get an app link in their invite. They install the app from it and sign in with their email, so add their email when you invite them.
- Staff should not click Create a store. That starts a brand new store instead of opening yours.
- Give each person the role that matches their work, and only the branches they work in, so they only see what they need.
- A person who is still Pending already counts toward your plan's number of people.
- If a staff member forgets their password, they can click Forgot Password? on the login screen.
- If you need help, the login screen has Call us, Email us and Help articles links.
Related
- Roles and permissions
- Changing or removing access
- Contacting support