यह आर्टिकल अभी हिंदी में नहीं है, इसलिए इसे अंग्रेज़ी में दिखाया जा रहा है।
कैसे करें
Roles and permissions
Default roles, and custom roles by module.
Roles decide what each person on your team can see and do in your Ordrio admin panel. Ordrio comes with built-in roles, and you can create your own roles area by area, so each staff member gets only the access they need.
Before you start
- You need to be logged in as the store Owner, or with a role that has Create and manage roles ticked.
Built-in roles
Every store starts with three roles. They are marked Built in on the Roles tab, and they have no actions menu, so you cannot edit or delete them.
- Owner: can do everything (All). This is the person who created the store.
- Packing Partner: for staff who pack orders (Packing).
- Delivery Partner: for riders who deliver orders (Delivery).
If none of these fits a job in your store, create a custom role.
Create a custom role
- Open nadi.ordrio.com (your Ordrio admin panel) and log in.
- Click the Settings icon (the gear at the top right).
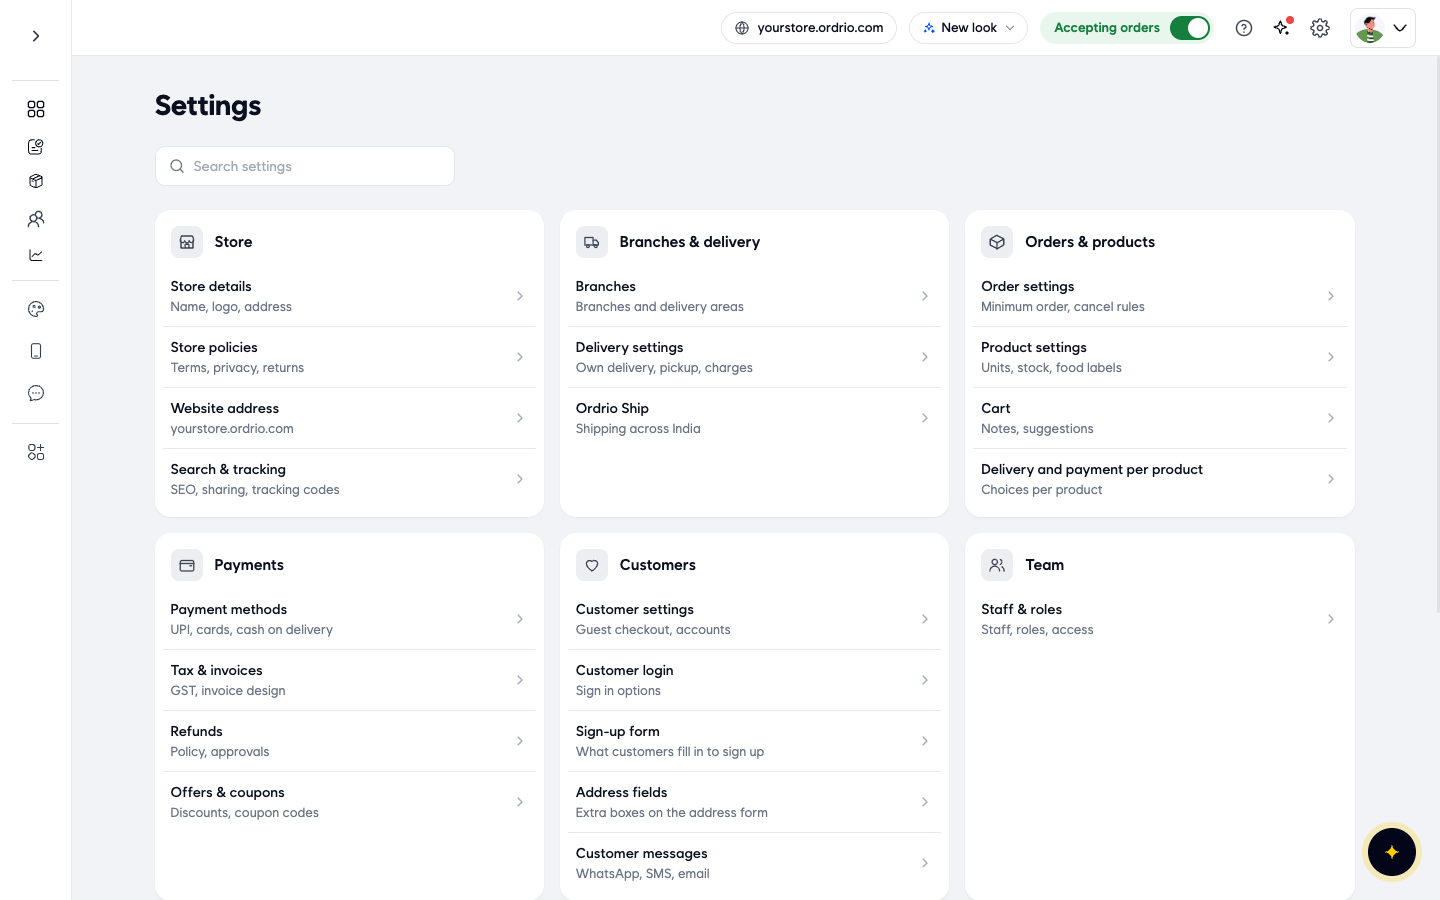
- Under Team, click Staff & roles. The page opens on the People tab, which lists everyone who can log in to your admin.
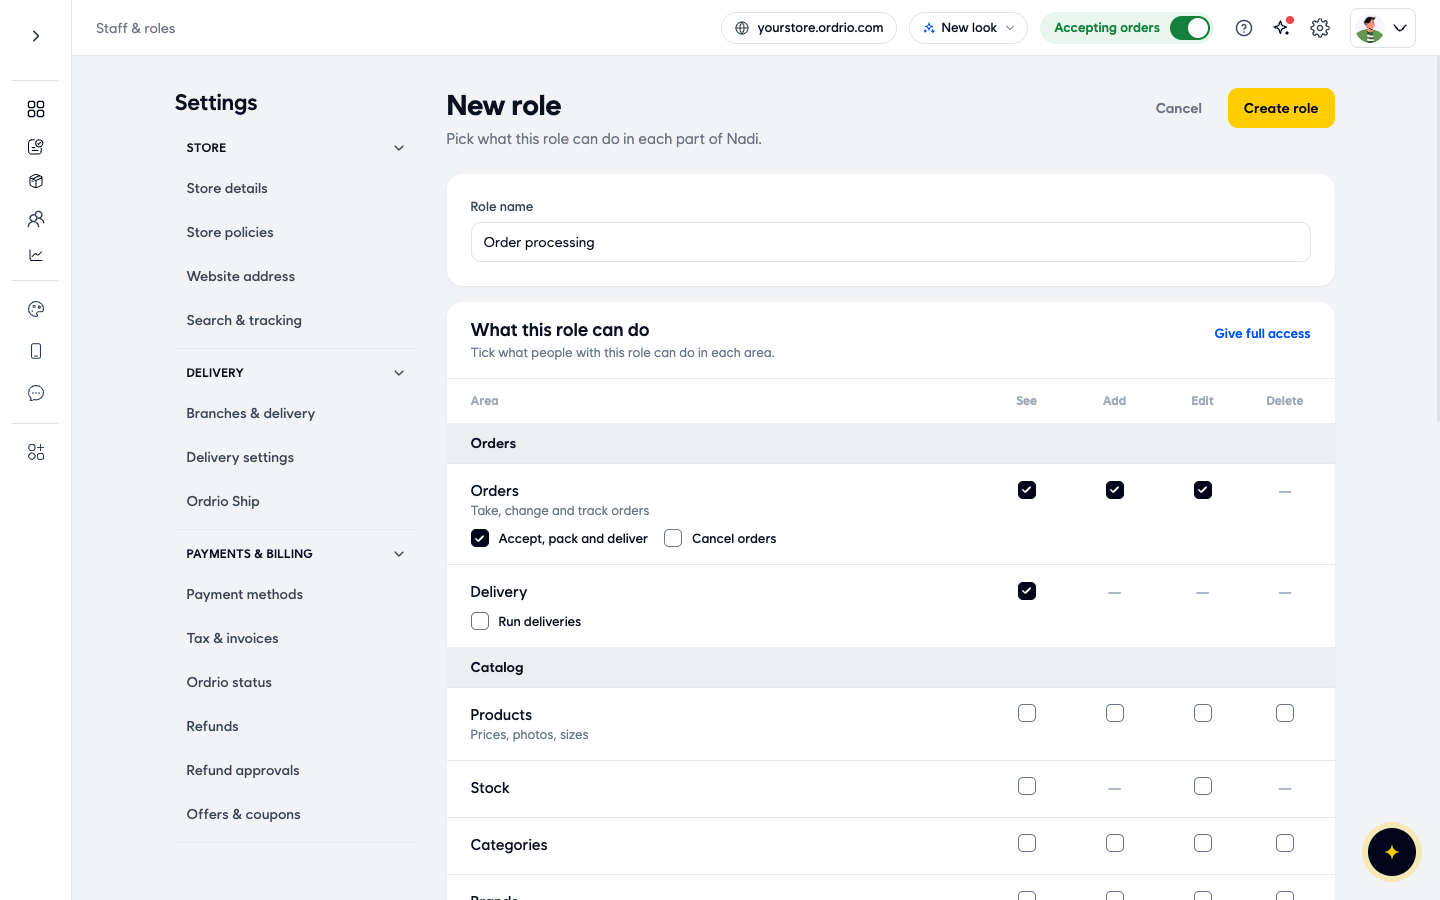
- Click the Roles tab. You see every role, how many people have it, what it Can do, and its Status.
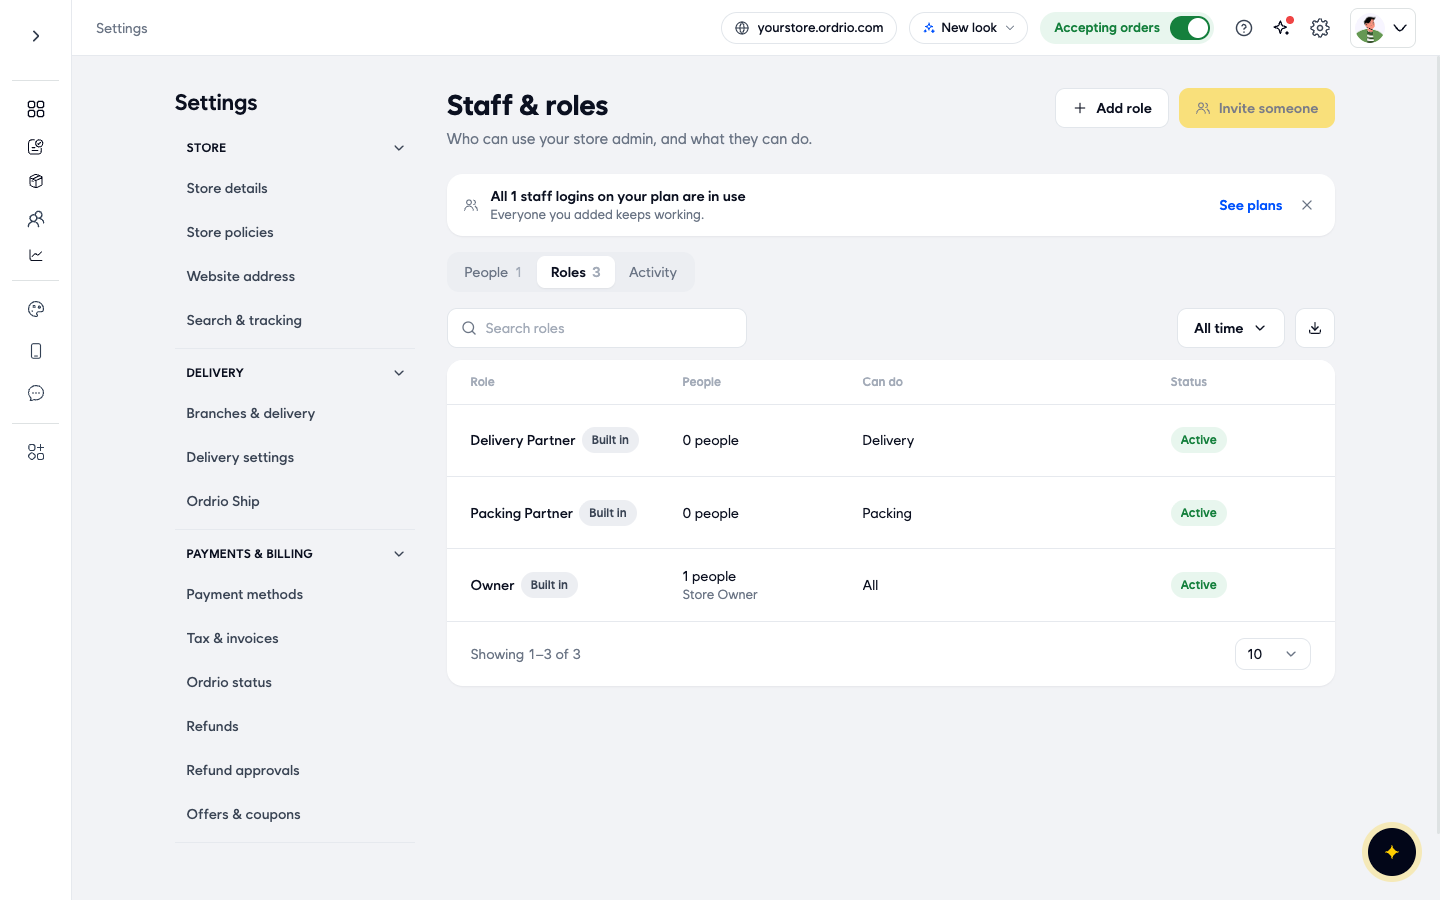
- Click Add role. The New role page opens.
- In Role name, type a name your team will understand, for example "Listing". Use your own role name.
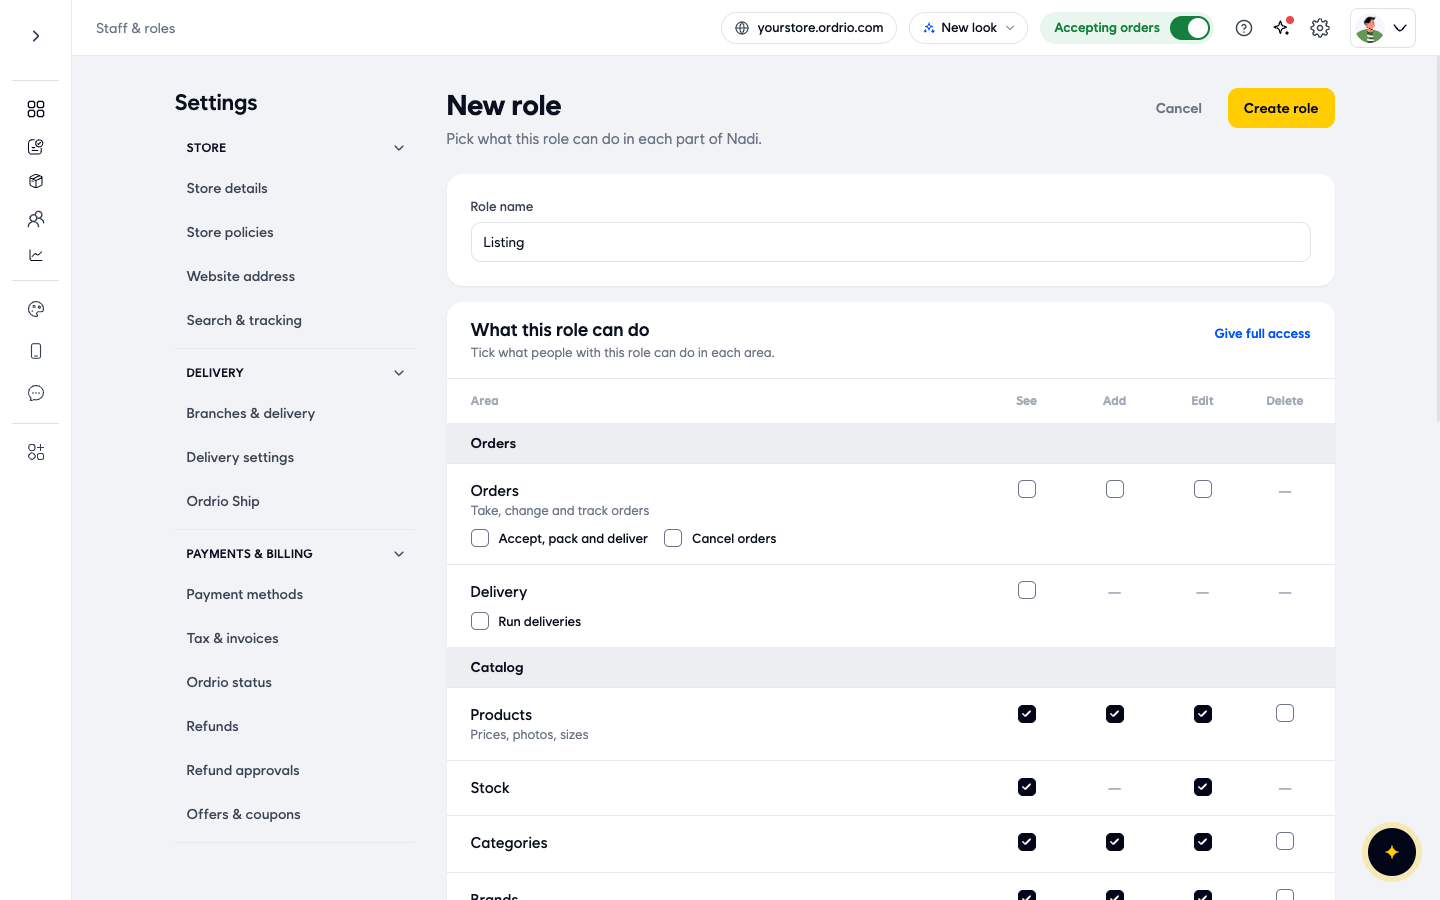
- Under What this role can do, tick what people with this role can do in each area. Each area has up to four columns:
- See: open and view this area.
- Add: create new items here, for example new products.
- Edit: change existing items.
- Delete: remove items.
A short dash instead of a tick box means that action is not available for that area. Some areas also have extra ticks below their name (see the next section). Ticking Add or Edit does not tick See for you, so tick See too.
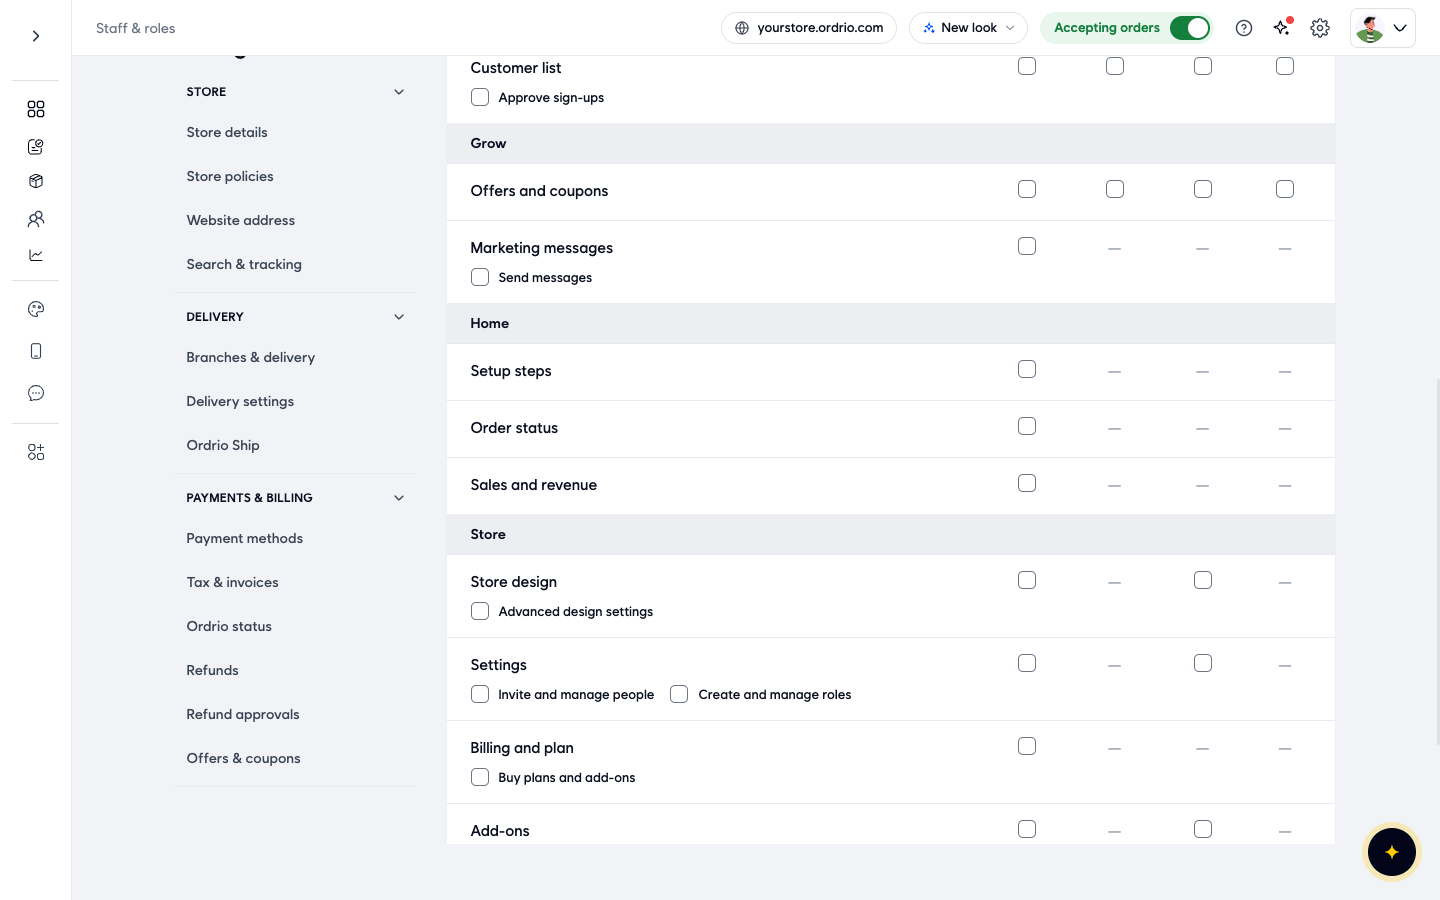
- Click Create role. Ordrio shows "Role created" and takes you back to the Roles tab, where your new role is listed as Active with 0 people.
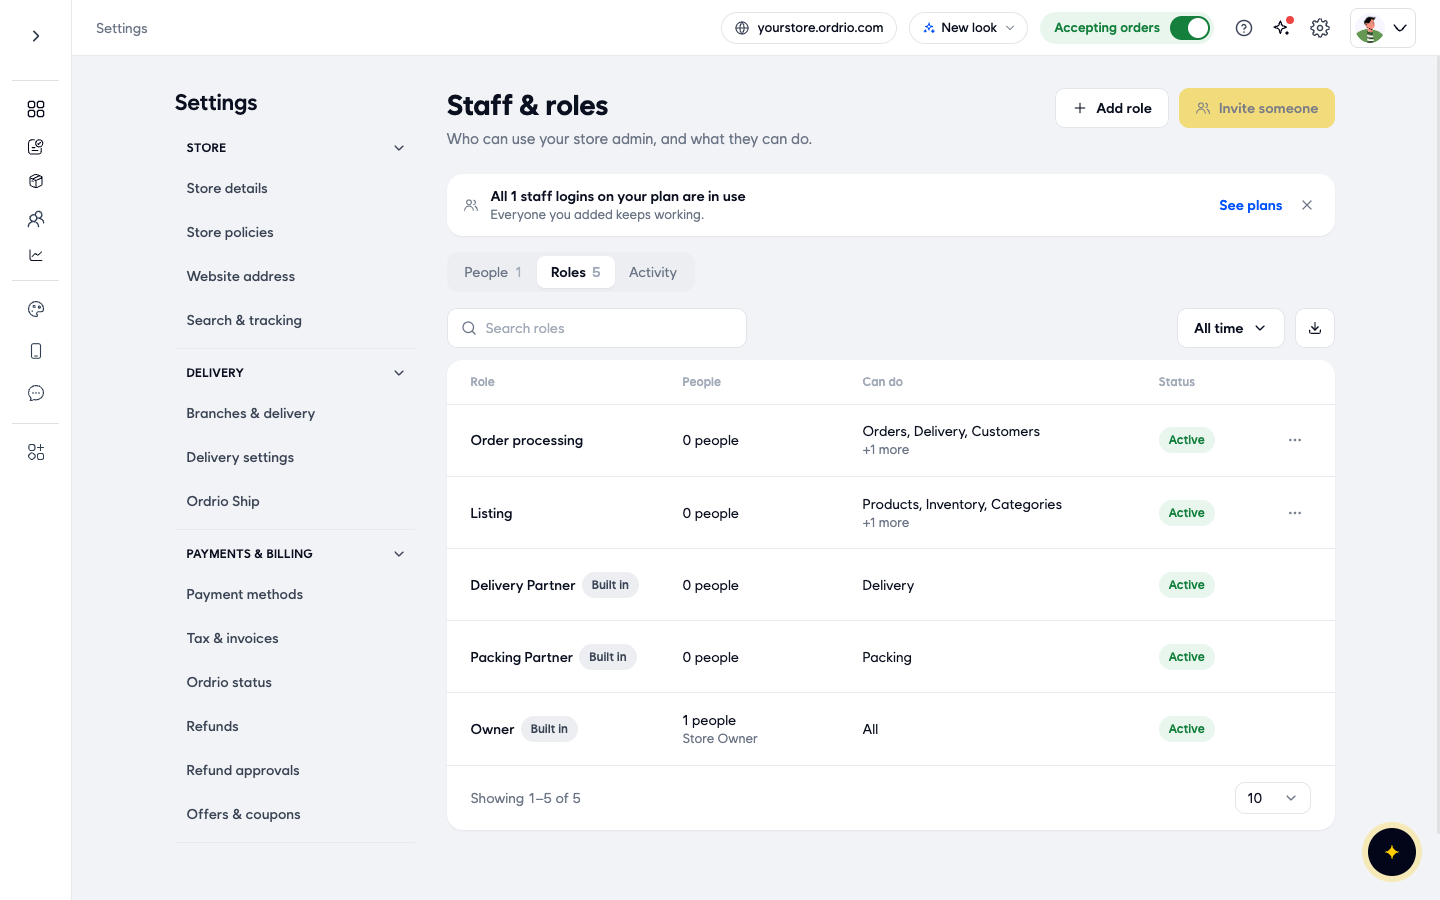
To give everything at once, click Give full access instead of ticking each box. To leave without saving, click Cancel.
What each area controls
The areas on the New role page are grouped like your admin menu:
- Orders
- Orders (take, change and track orders): See, Add, Edit. Extra ticks: Accept, pack and deliver and Cancel orders.
- Delivery: See. Extra tick: Run deliveries.
- Catalog
- Products (prices, photos, sizes): See, Add, Edit, Delete.
- Stock: See, Edit.
- Categories: See, Add, Edit, Delete.
- Brands: See, Add, Edit, Delete.
- Customers
- Customer list: See, Add, Edit, Delete. Extra tick: Approve sign-ups.
- Grow
- Offers and coupons: See, Add, Edit, Delete.
- Marketing messages: See. Extra tick: Send messages.
- Home
- Setup steps: See.
- Order status: See.
- Sales and revenue: See.
- Store
- Store design: See, Edit. Extra tick: Advanced design settings.
- Settings: See, Edit. Extra ticks: Invite and manage people and Create and manage roles.
- Billing and plan: See. Extra tick: Buy plans and add-ons.
- Add-ons: See, Edit. Extra ticks: Turn add-ons on and Turn add-ons off.
- Help & Support: See, Add. Add lets the person raise and follow their own tickets. See shows every ticket.
Example: Listing and Order processing roles
Ordrio does not have built-in Listing or Order processing roles. You can create them yourself in a minute. These are examples. Tick what fits your own team.
Listing (for staff who add and update your products):
- Products: See, Add, Edit
- Stock: See, Edit
- Categories: See, Add, Edit
- Brands: See, Add, Edit
Leave Delete unticked if you do not want them to remove products. Leave the Orders, Customers and Store areas unticked so they cannot see orders, customer details or settings.
Order processing (for staff who handle incoming orders):
- Orders: See, Add, Edit, and Accept, pack and deliver
- Delivery: See
- Customer list: See
- Order status: See
Leave Cancel orders unticked if only you should cancel orders. Leave Catalog and Store unticked so they cannot change products or settings.
Change, turn off or delete a role
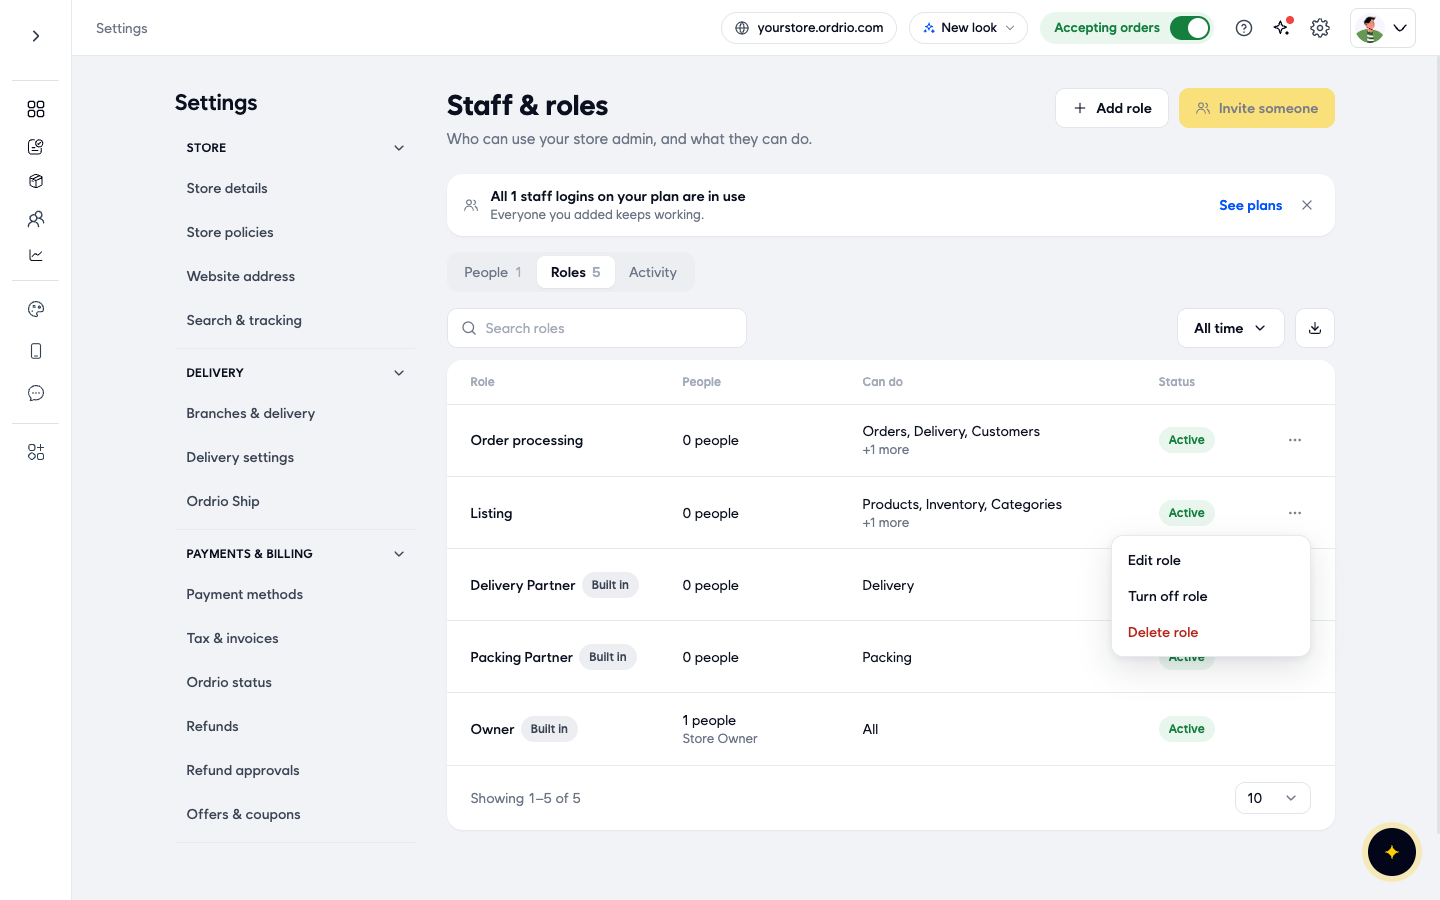
On the Roles tab, click the ⋯ button at the end of a custom role's row. You can choose:
- Edit role: change the name or the ticks.
- Turn off role: stop using the role without deleting it.
- Delete role: remove the role.
Good to know
- Built-in roles (Owner, Packing Partner, Delivery Partner) cannot be edited or deleted.
- The Can do column on the Roles tab shows a short summary of each role, such as "Products, Inventory, Categories +1 more".
- The number of staff logins depends on your plan. When all of them are in use, Ordrio shows a message on Staff & roles saying all staff logins on your plan are in use, and Invite someone is greyed out. You can still create roles. Click See plans to add more staff logins.
- Give each person only what they need. For example, do not tick Settings or Billing and plan for staff who only pack or list products.
- The Activity tab on Staff & roles shows changes in your admin: When it happened, What happened, Who did it and the Device they used.
Related
- Contacting support
- Changing or removing access
- Adding staff members