هذا المقال غير متوفر بالعربية بعد، لذلك نعرضه بالإنجليزية.
دليل استخدام
Branch operating hours and availability
Set store timings and availability per branch.
Each branch in Ordrio can have its own opening hours, holidays and special days. Set them so every branch takes orders only when it is open, and turn a branch off when it can't take orders at all.
Before you start
Store hours need the Store timings add-on. It is free. Turn it on once and it works for all your branches.
- Open nadi.ordrio.com (your Ordrio admin panel) and log in.
- In the left menu, click Add-ons.
- Find Store timings ("Set the hours each branch takes orders.") and click it. The details panel shows Billing: Free.
- Click Activate. The card now shows Installed.
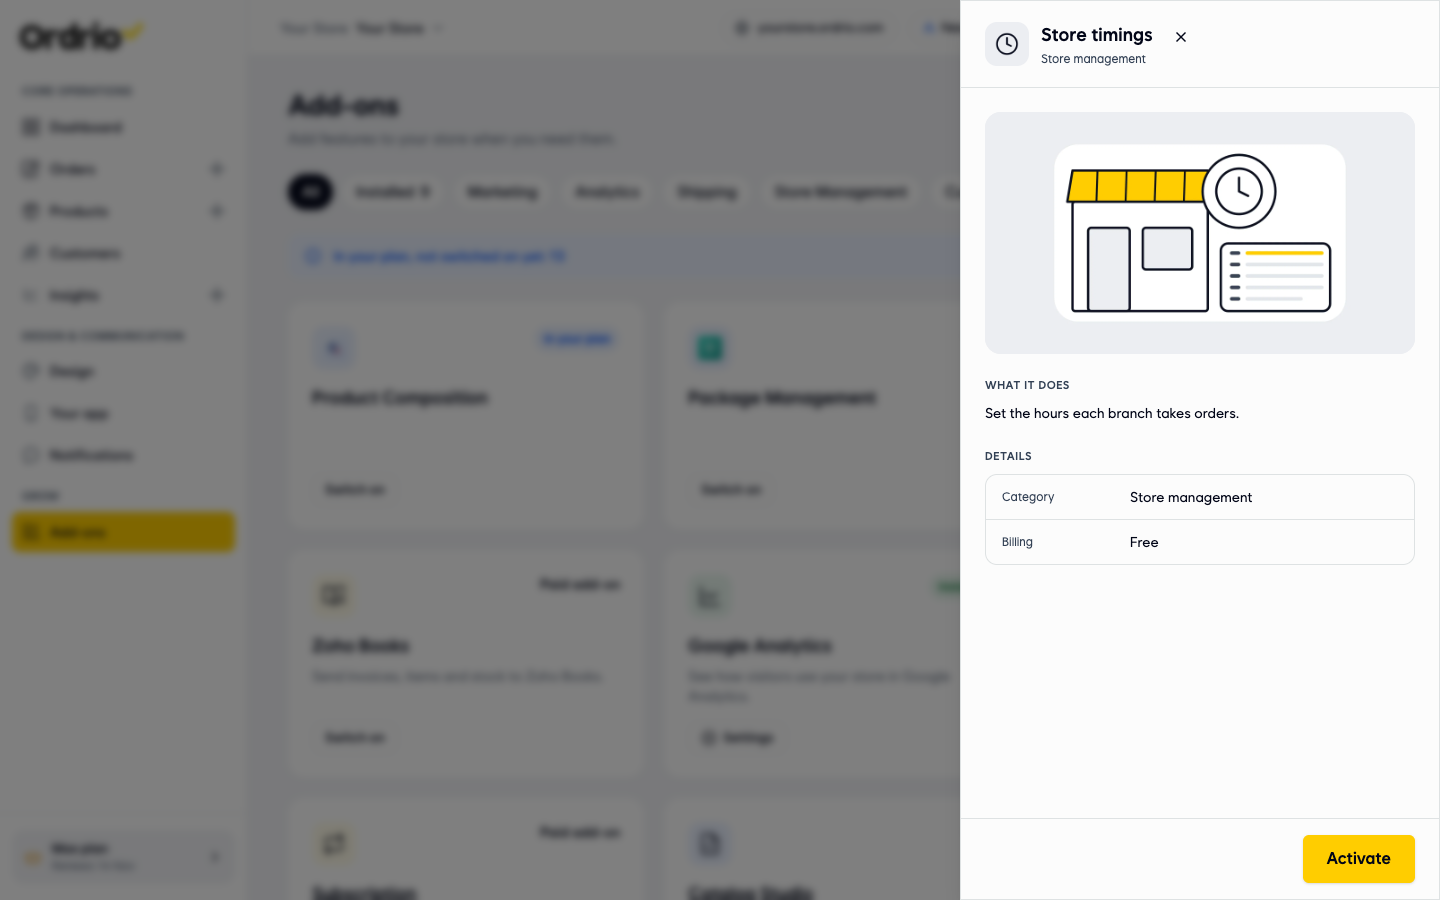
Until the add-on is on, Store hours shows "Store timings add-on needed" and an Activate button that takes you to the same place.
Open the store hours of a branch
For your default branch:
- Click the Settings icon (the gear) at the top right.
- Under Branches & delivery, click Store hours.
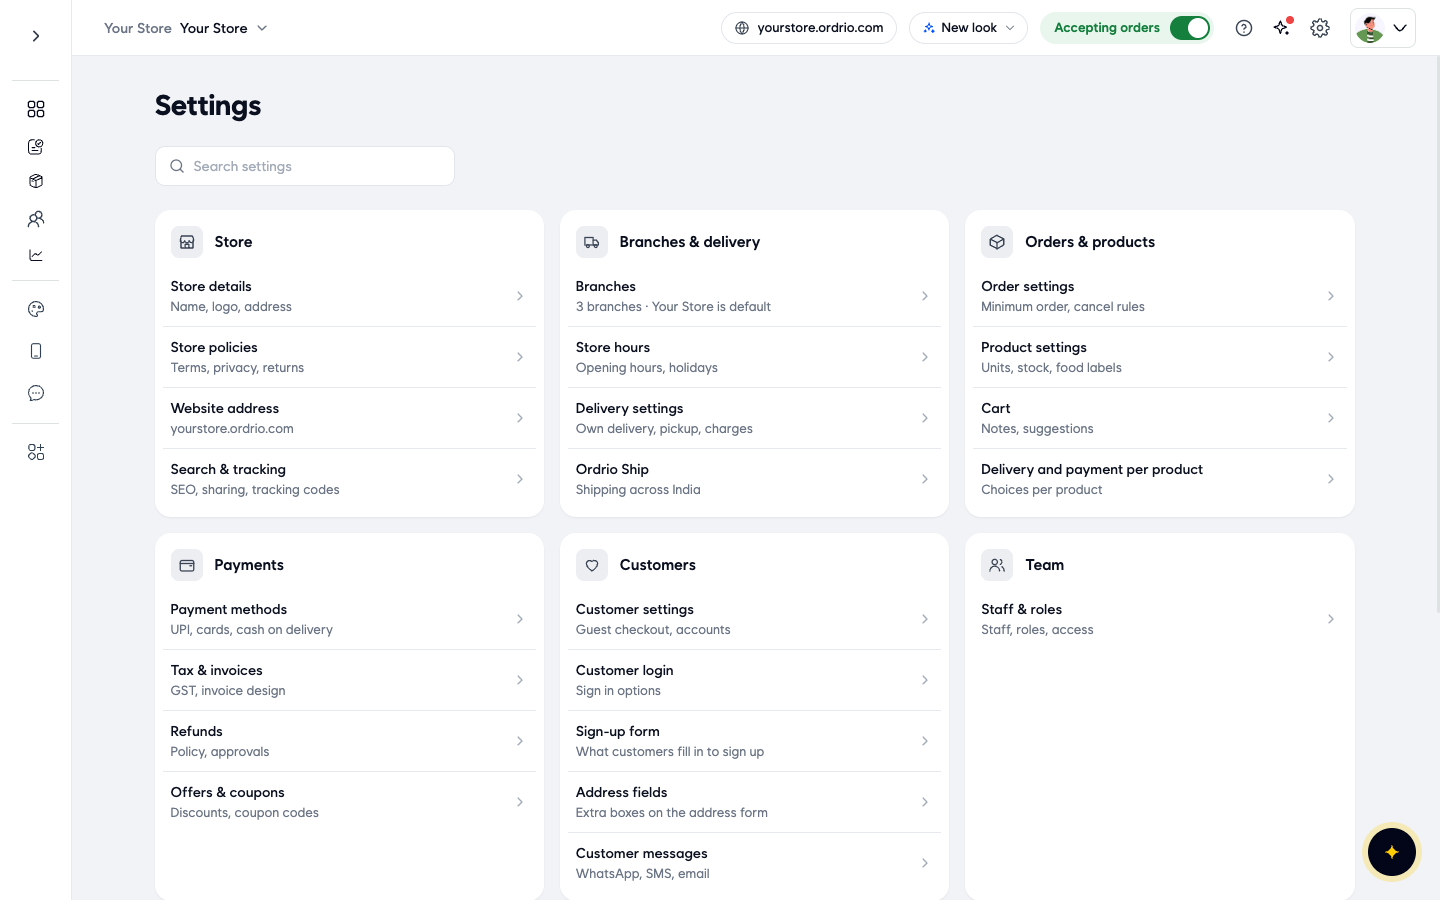
For any other branch:
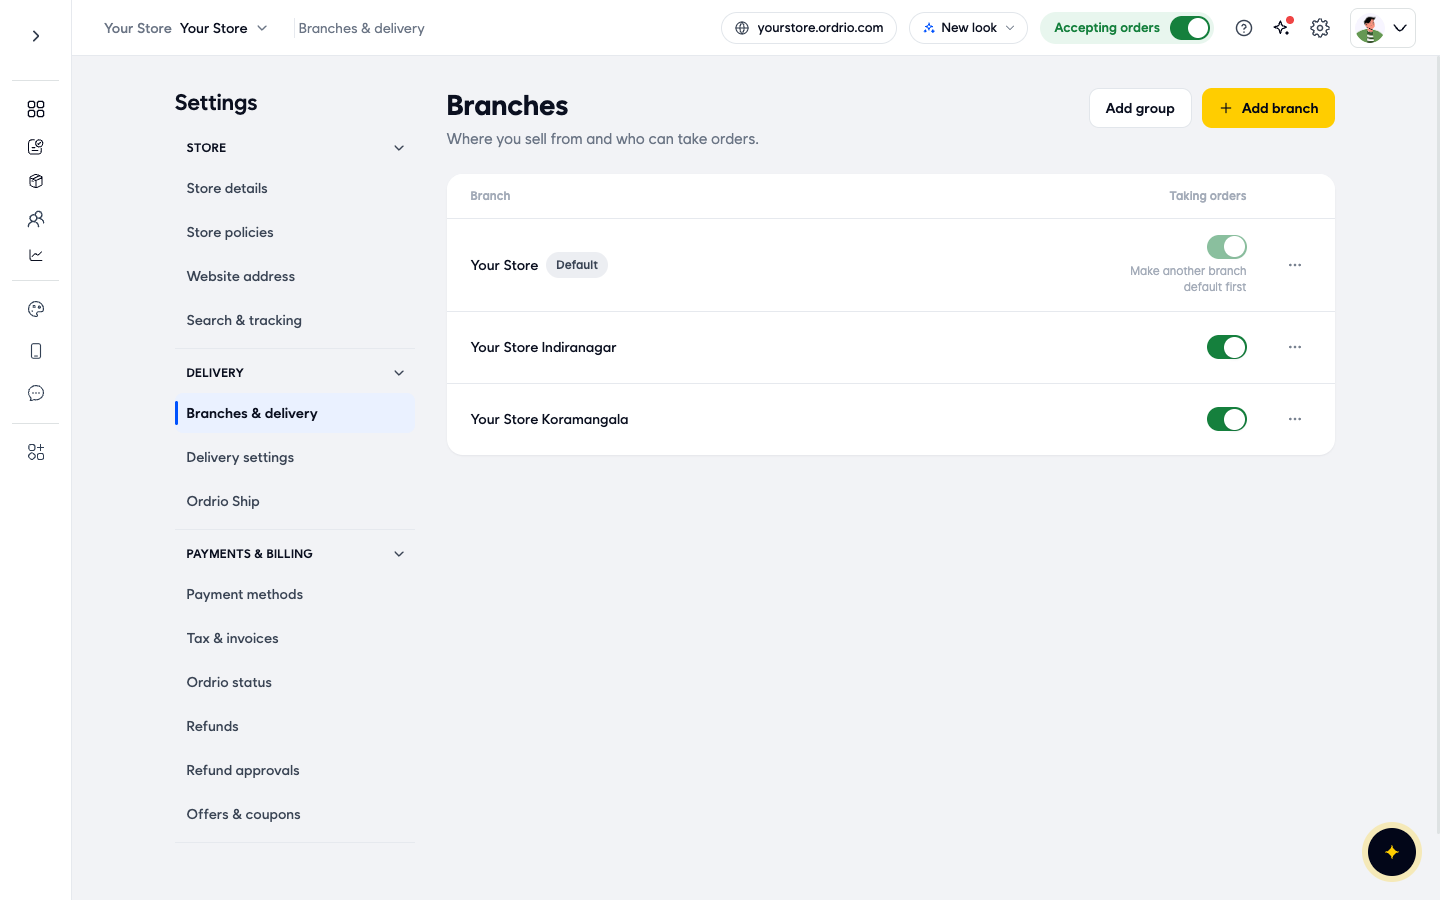
- In Settings, under Branches & delivery, click Branches. The list shows each branch and its Taking orders switch.
- Click the ... button next to the branch and choose Edit branch.
- Scroll down to Hours & delivery. Make sure the Store hours switch is on. It means "Take orders only during opening hours."
- Click Edit next to Store hours.

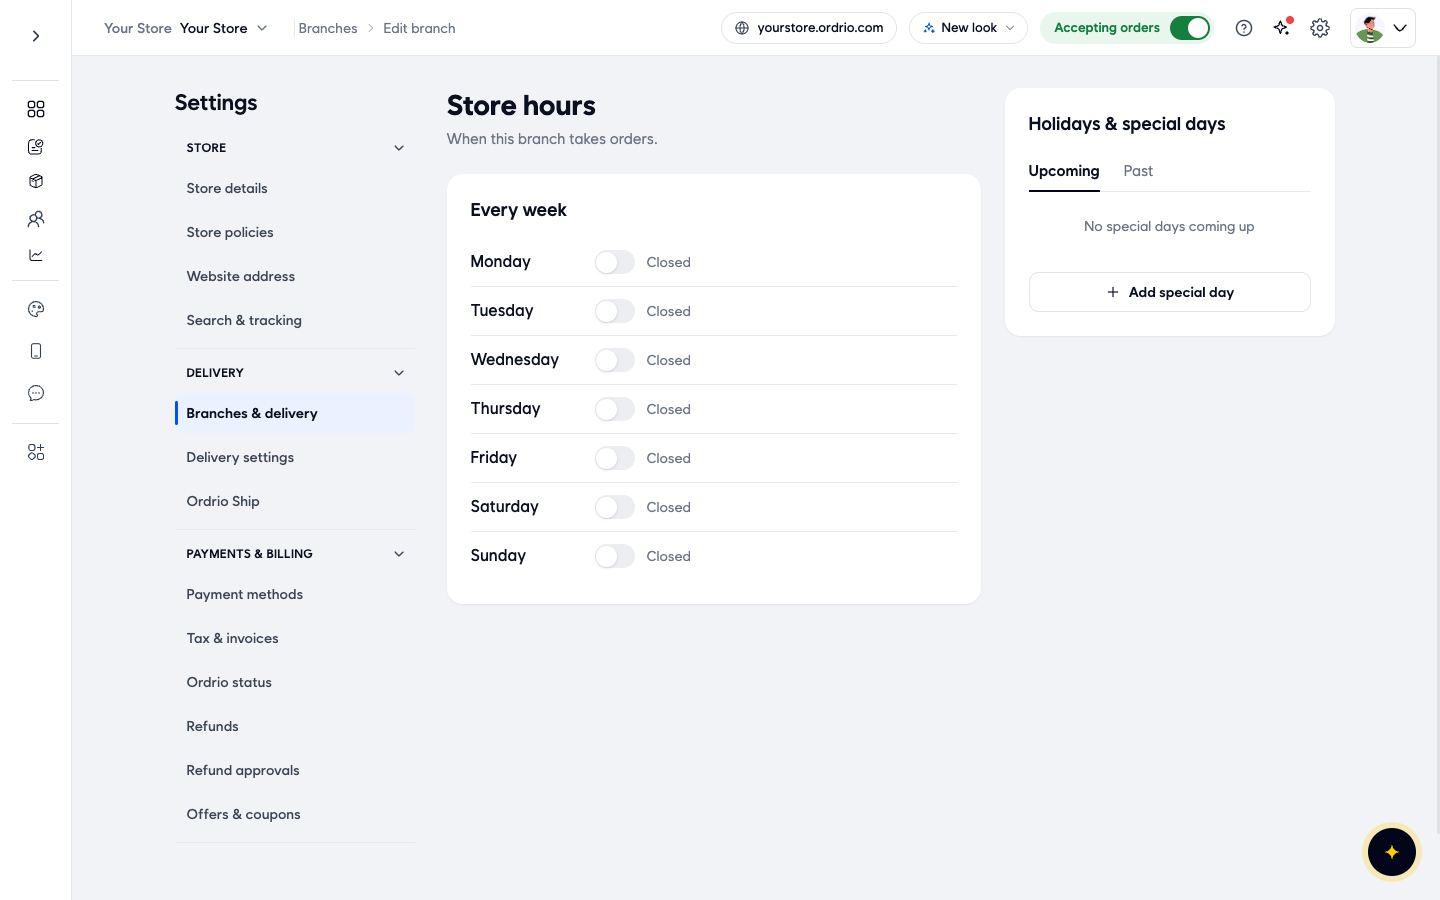
The Store hours page opens. It says "When this branch takes orders." and has two parts: Every week on the left and Holidays & special days on the right. A branch with no hours yet shows every day as Closed.
Set the weekly hours
- Under Every week, turn on the switch next to a day, for example Monday. An Add hours button appears.
- Click Add hours. A window opens with the name of the day.
- In From, enter the time the branch starts taking orders, for example 09:00 AM.
- In To, enter the time it stops, for example 09:00 PM.
- Click Done. The day now shows the hours, for example "9:00 am – 9:00 pm".
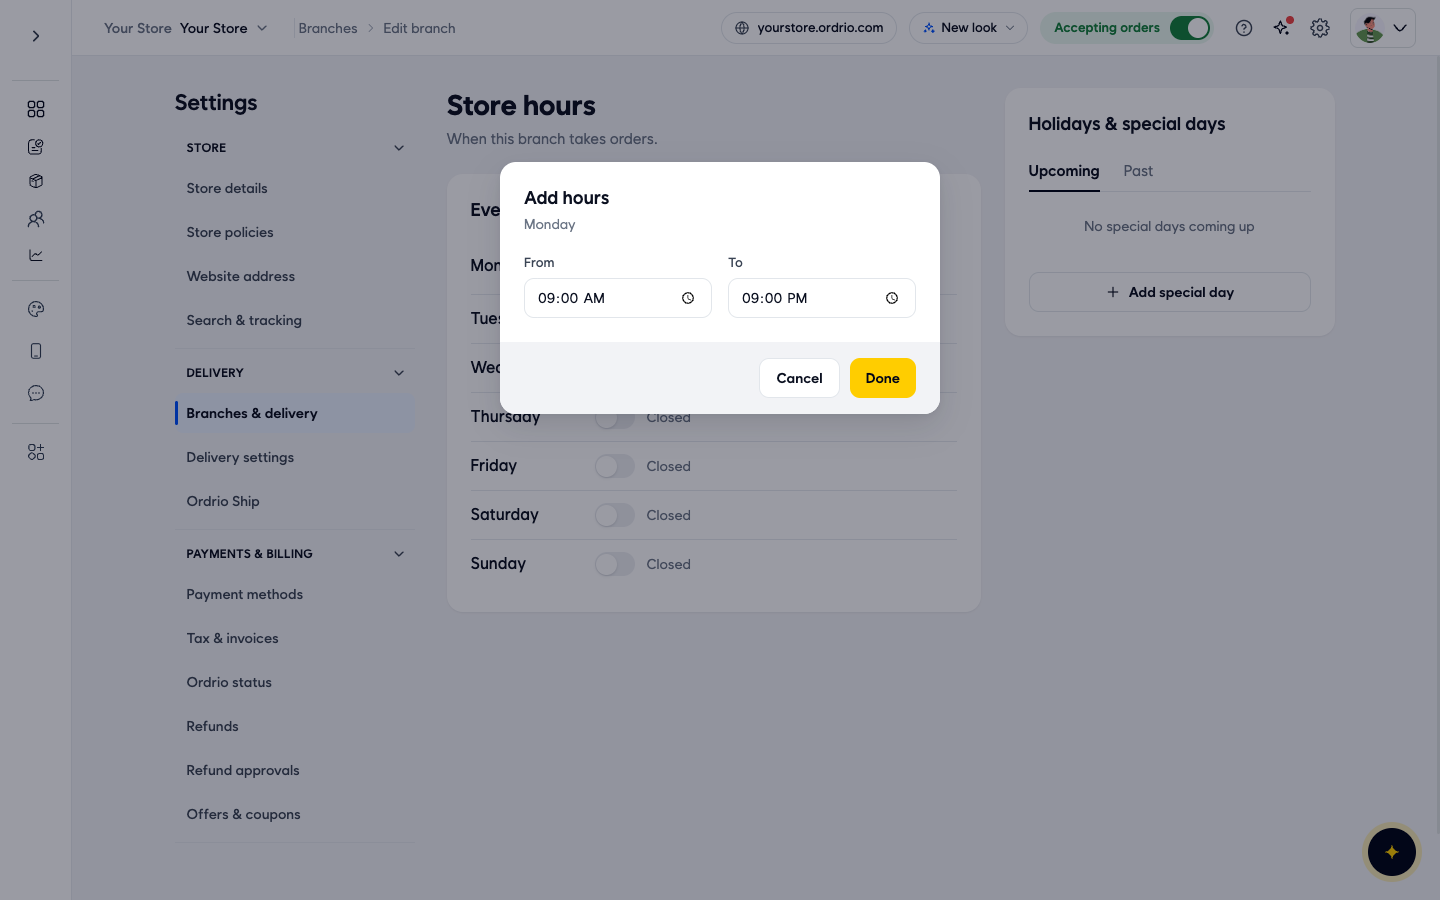
- Repeat for each day you are open. Leave the switch off on days you are closed. They show Closed.
- To take a break in the day (for example closed in the afternoon), click Add more hours next to that day and add a second time range, for example 05:00 PM to 09:00 PM.
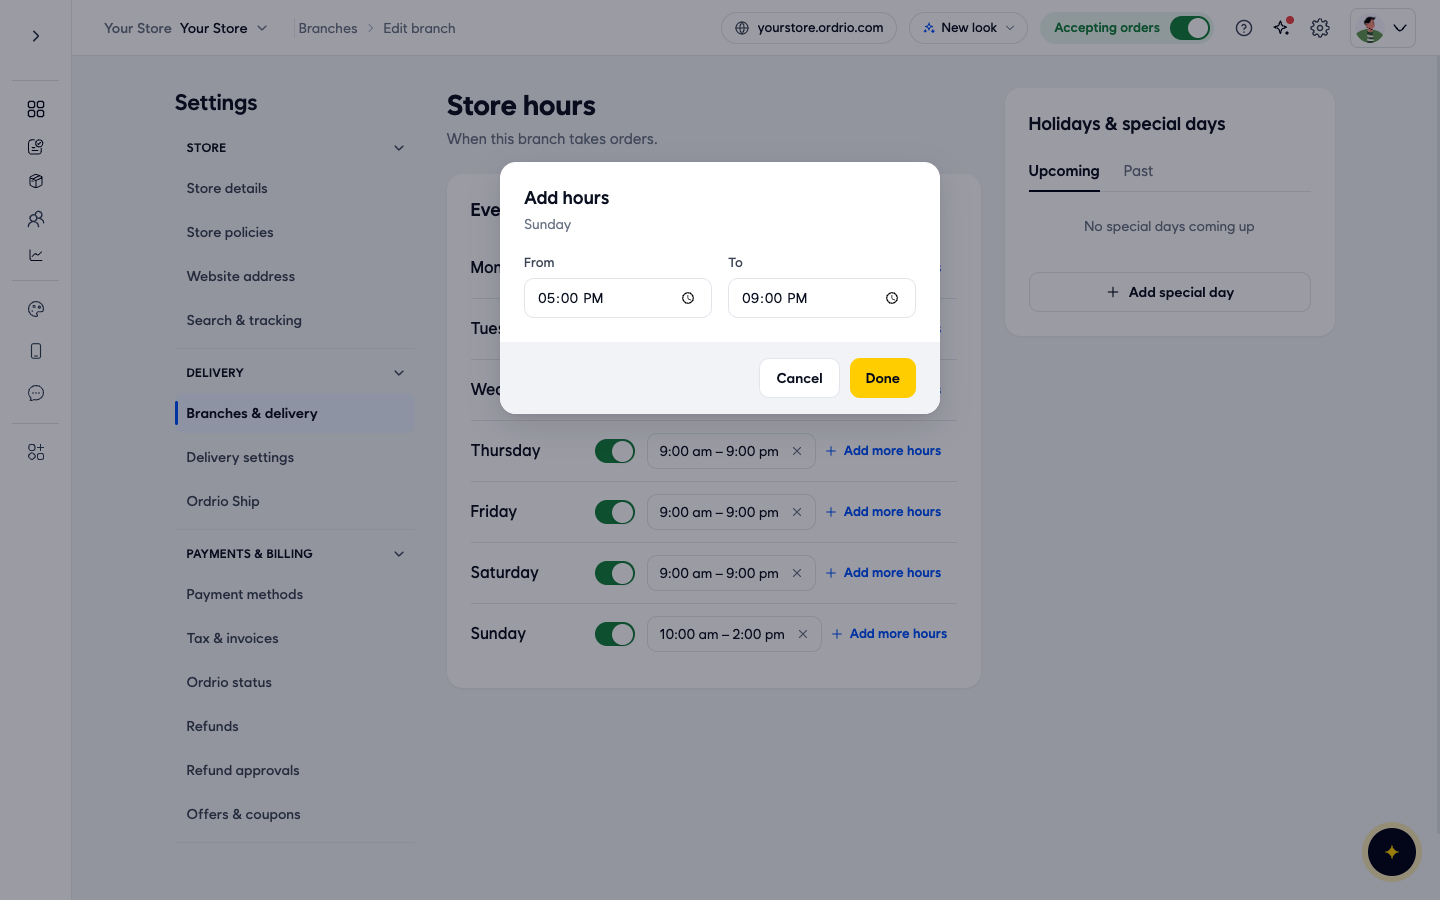
- Click Save in the bar at the bottom of the page.
The times shown here are examples. Use your own opening hours.
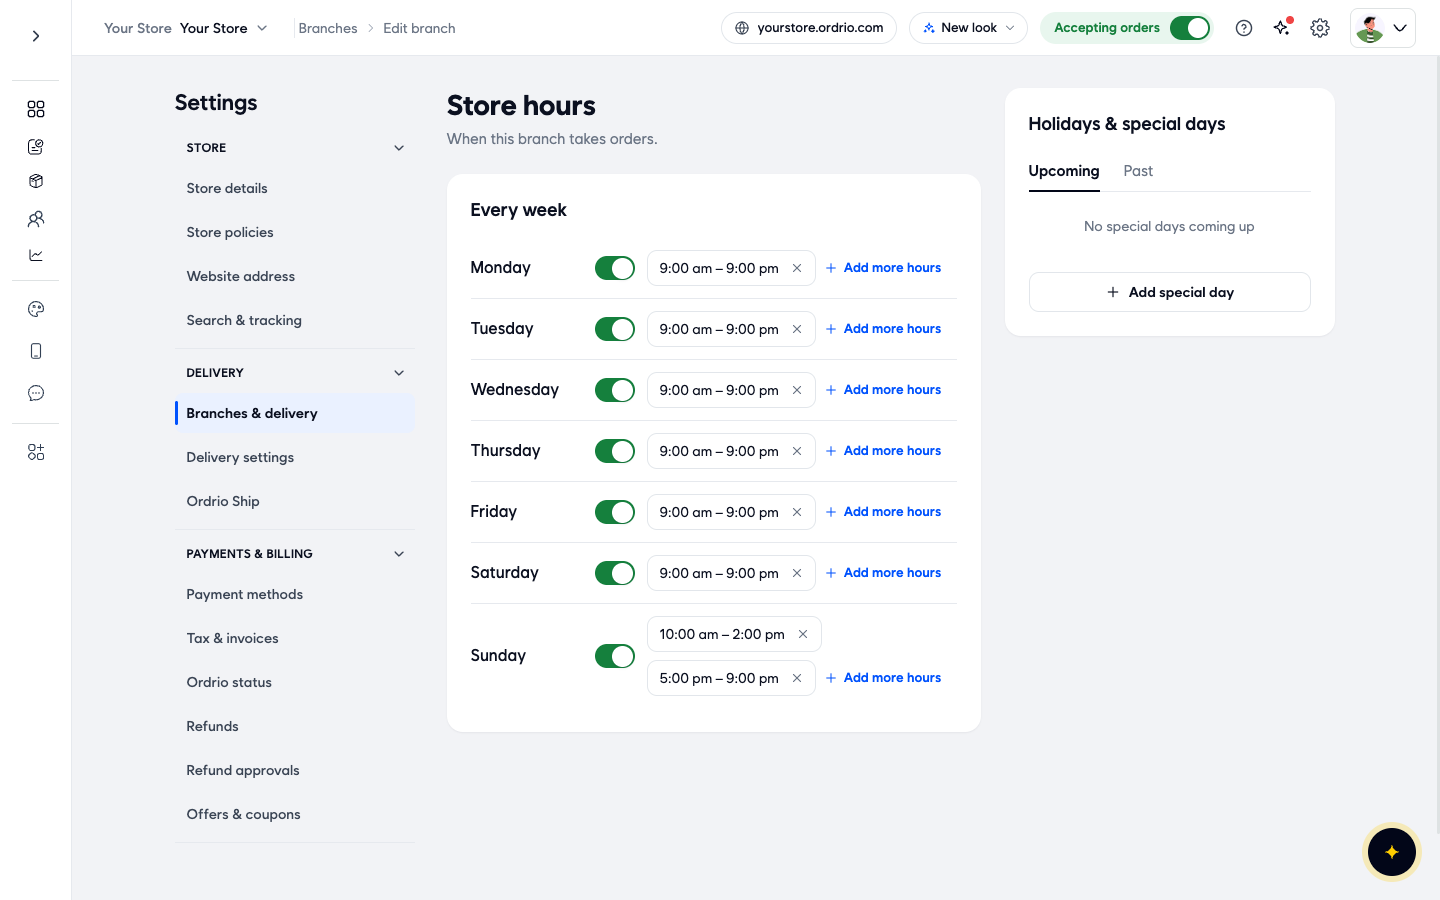
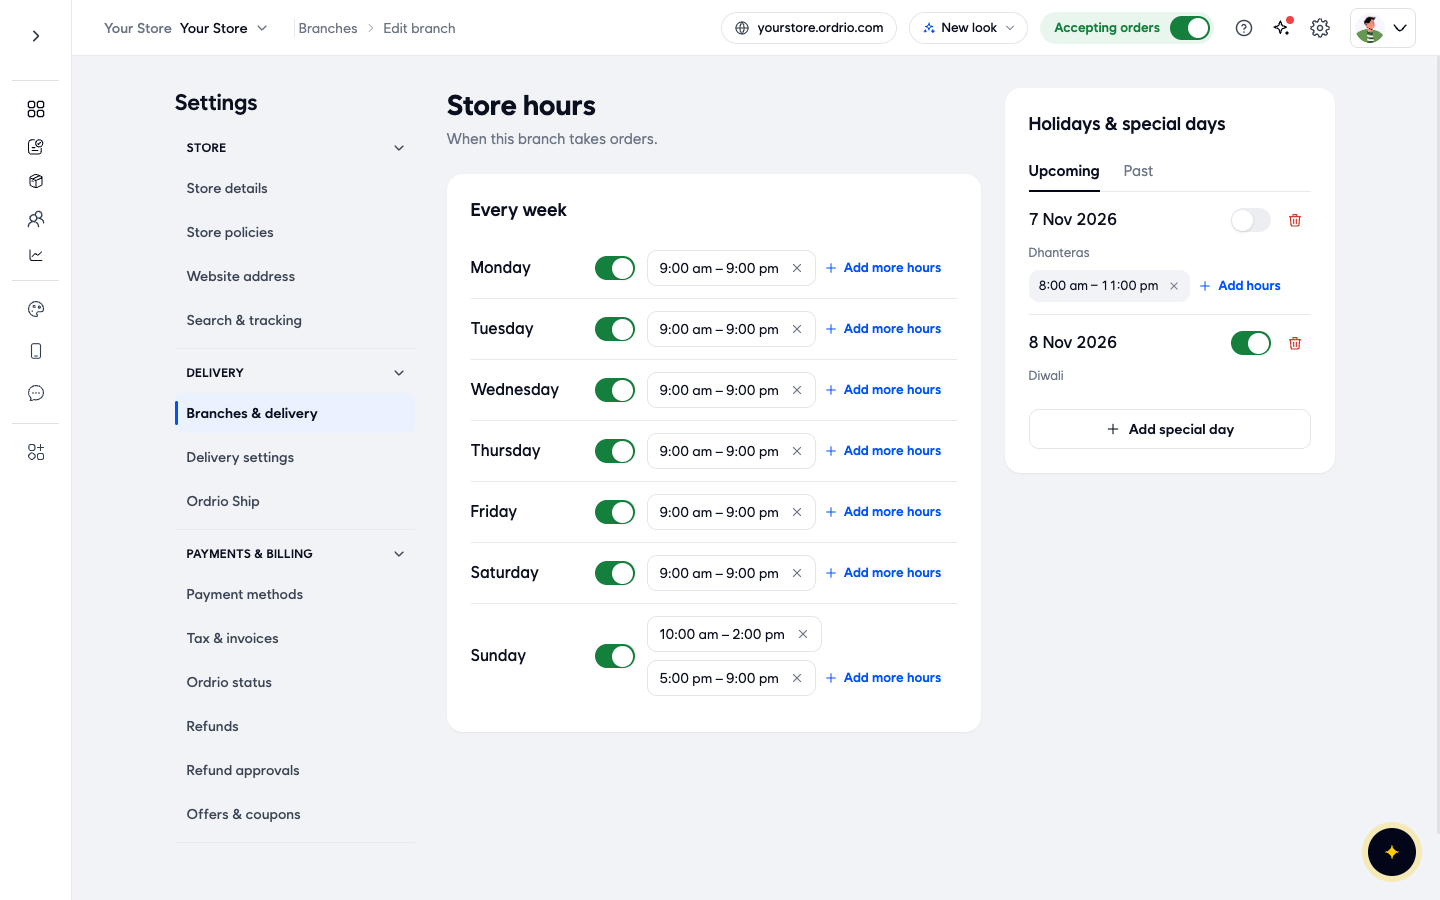
After you save, the week shows the hours for each day. To change a time range, click it. To remove it, click the x next to it.
Add holidays and special days
Use special days when a branch is closed for a festival or opens for different hours on one date. These replace the weekly hours for that date.
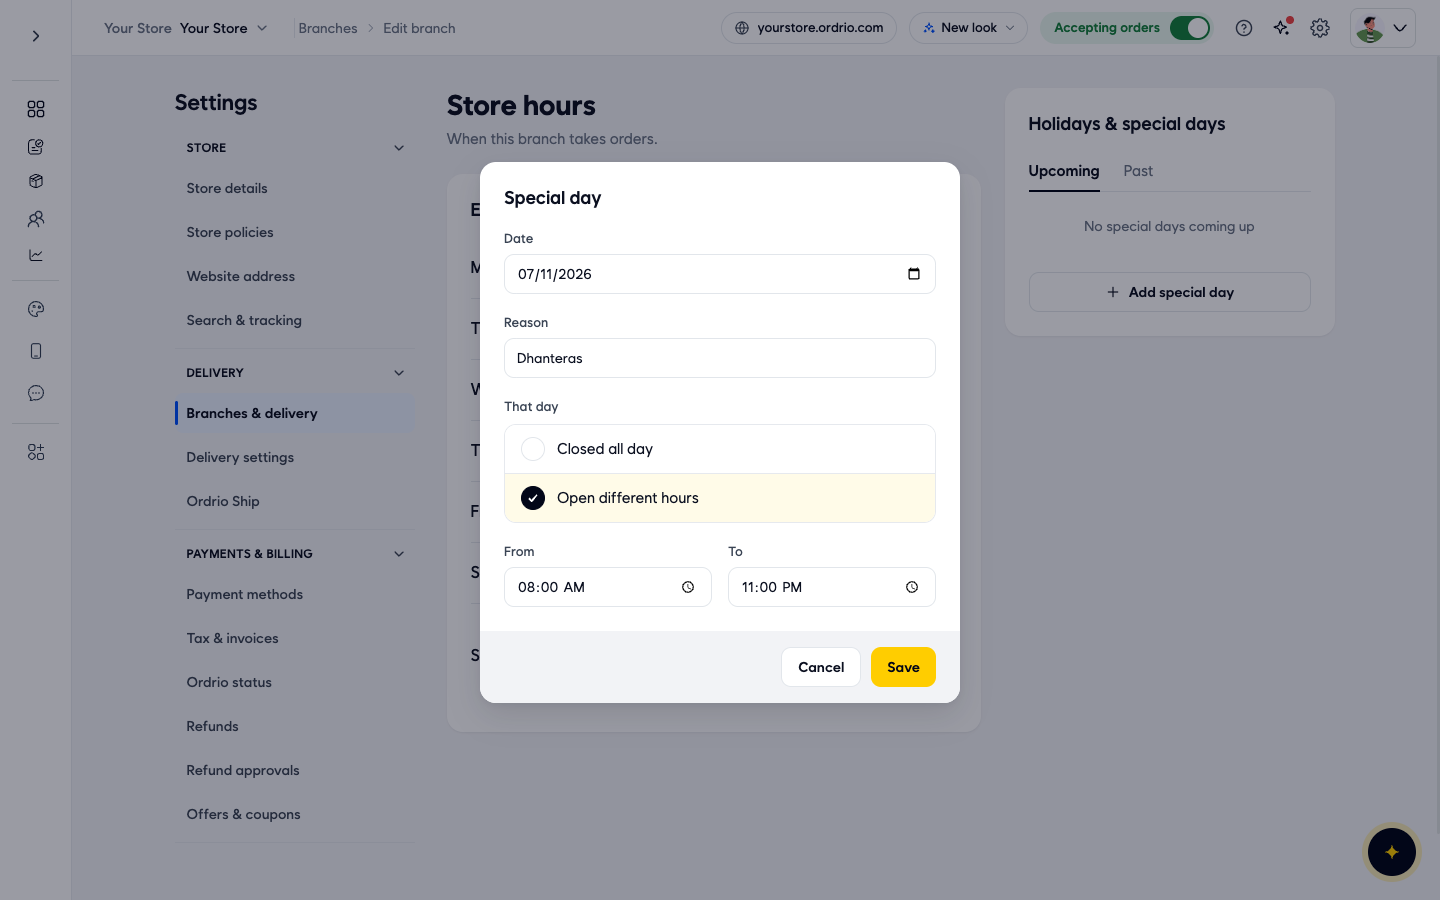
- On the Store hours page, under Holidays & special days, click Add special day.
- In Date, pick the day. You can pick today or a later date.
- In Reason, type a short name, for example "Diwali".
- Under That day, choose one:
- Closed all day: the branch takes no orders on that date.
- Open different hours: a From and To time appear. Enter the hours for that date.
- Click Save in the window.
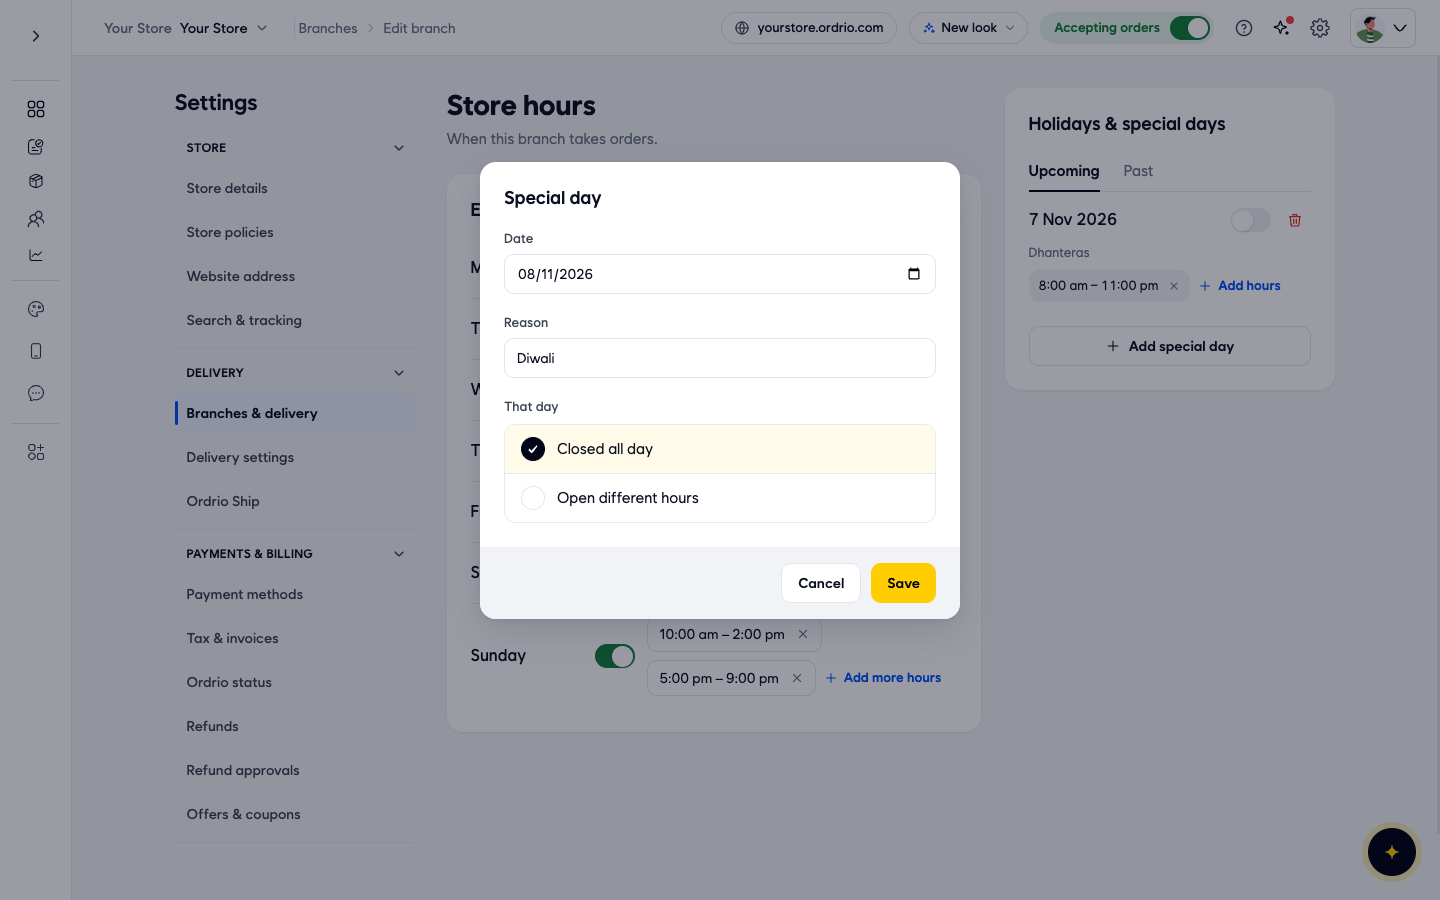
- Click Save in the bar at the bottom of the page to keep your special days.
The dates and reasons here are examples. Add your own.
Your special days now appear in the Upcoming list, with the date, the reason and the hours. A day that is closed all day has its switch on. Click the bin icon to delete a special day. The Past tab shows special days that have already gone by.
Stop taking orders at one branch
Use this when a branch can't take orders for now, whatever its hours say.
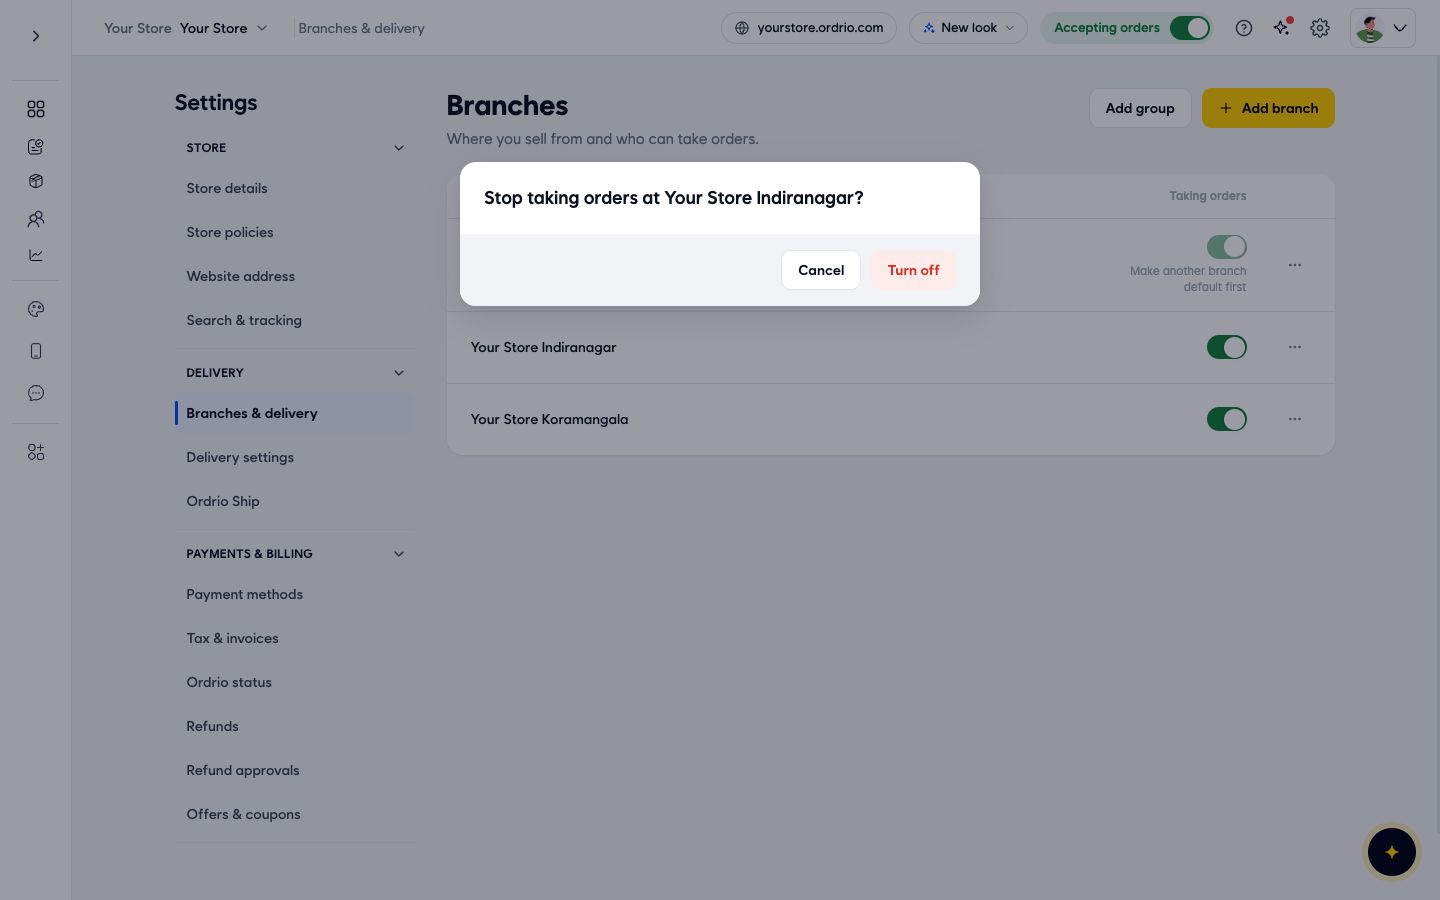
- Go to Settings > Branches.
- Turn off the Taking orders switch next to the branch.
- A window asks "Stop taking orders at", followed by the branch name. Click Turn off. Click Cancel to keep the branch open.
Turn the switch back on when the branch is ready to take orders again.
You can't turn off your default branch. Its switch shows "Make another branch default first". To make another branch the default, open that branch with Edit branch and tick Make this the default branch.
Close the whole store
To stop orders at every branch at once, use the Accepting orders switch at the top of your Ordrio admin panel.
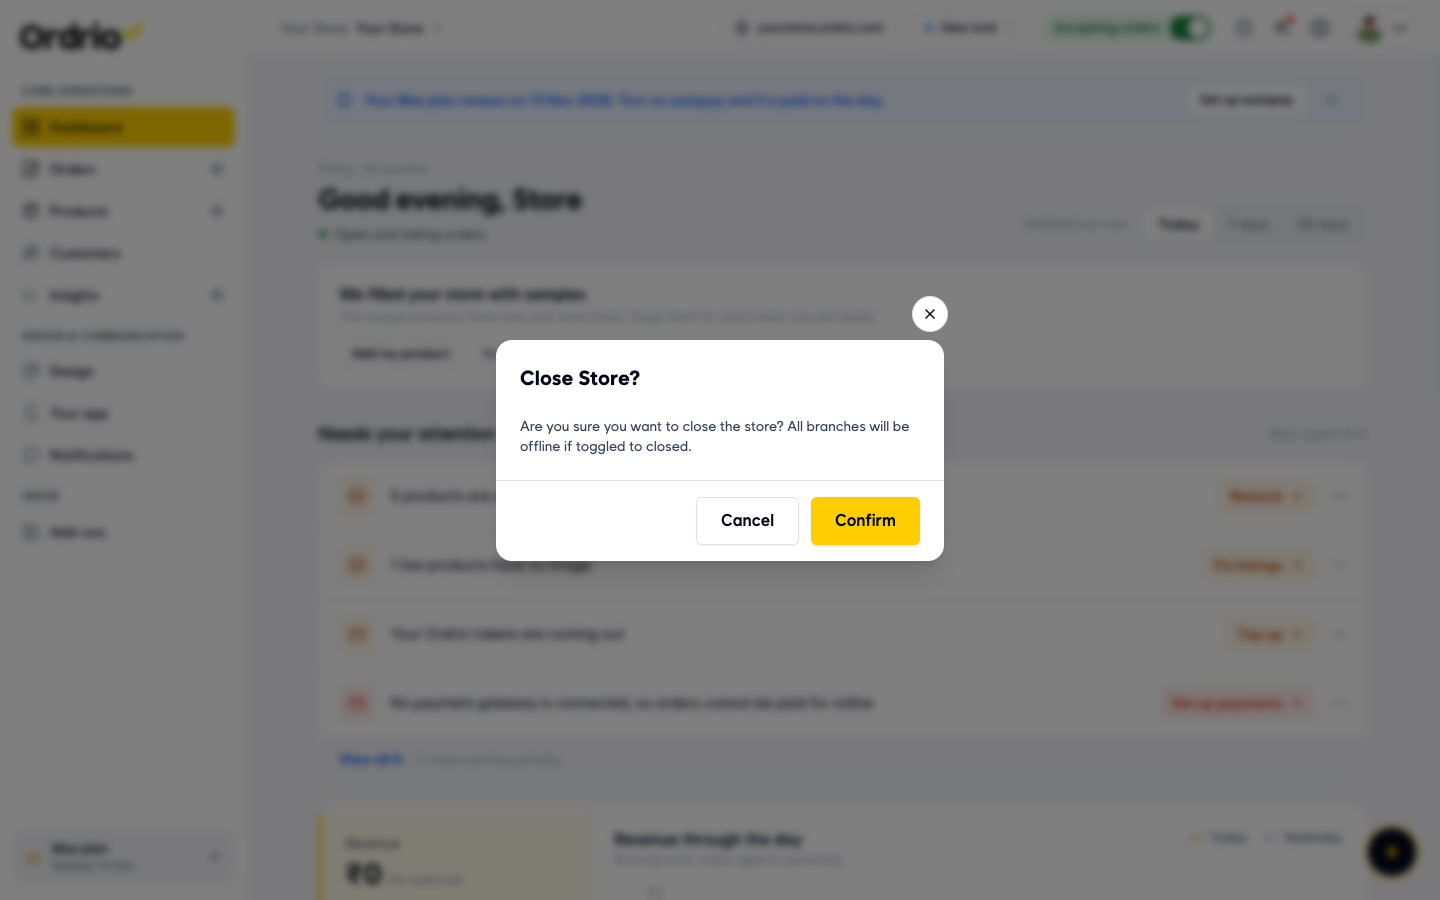
- Turn off the Accepting orders switch.
- A window asks "Close Store?" and tells you that all branches will be offline. Click Confirm. Click Cancel to keep the store open.
Turn the switch back on to start taking orders again.
Good to know
- Hours are set per branch. Each branch has its own weekly hours and special days. Setting them for one branch does not change the others.
- The Store hours switch on each branch. In Edit branch > Hours & delivery, the Store hours switch decides whether the branch takes orders only during its opening hours.
- There is no copy to all days. Add the hours for each day one by one.
- Time checks. If the end time is before the start time, you see "Ends before it starts. Pick a later end time." If two time ranges on the same day overlap, you see "Overlaps" and the other range. Fix the time before you click Done.
- Save before you leave. Changes on the Store hours page are kept only after you click Save. Click Discard to undo them.
- Closing the store or a branch is different from hours. Hours open and close a branch on a schedule. The Taking orders switch stops one branch until you turn it back on, and Accepting orders stops all branches.
Related
- Creating and managing branches
- Delivery zones and geo mapping
- Enabling and managing add-ons