هذا المقال غير متوفر بالعربية بعد، لذلك نعرضه بالإنجليزية.
مرجع
Recommended setup order for new stores
The order to set things up in, so nothing blocks going live.
When you open a new Ordrio store, set things up in this order. Each step gets your store a bit closer to its first online order, and doing them in order means nothing holds you up later.
Where to find your setup list
Open nadi.ordrio.com (your Ordrio admin panel) and log in with your email and password, or click Phone number to log in with your mobile number. New owners click Create a store there. After you log in, you land on the Dashboard.
The Dashboard shows Get ready for your first order, a list of six steps with a short video for each. It says how many steps are done and about how many minutes are left. Each step has a Start button that takes you straight to the right screen. The step to do next is marked Up next.
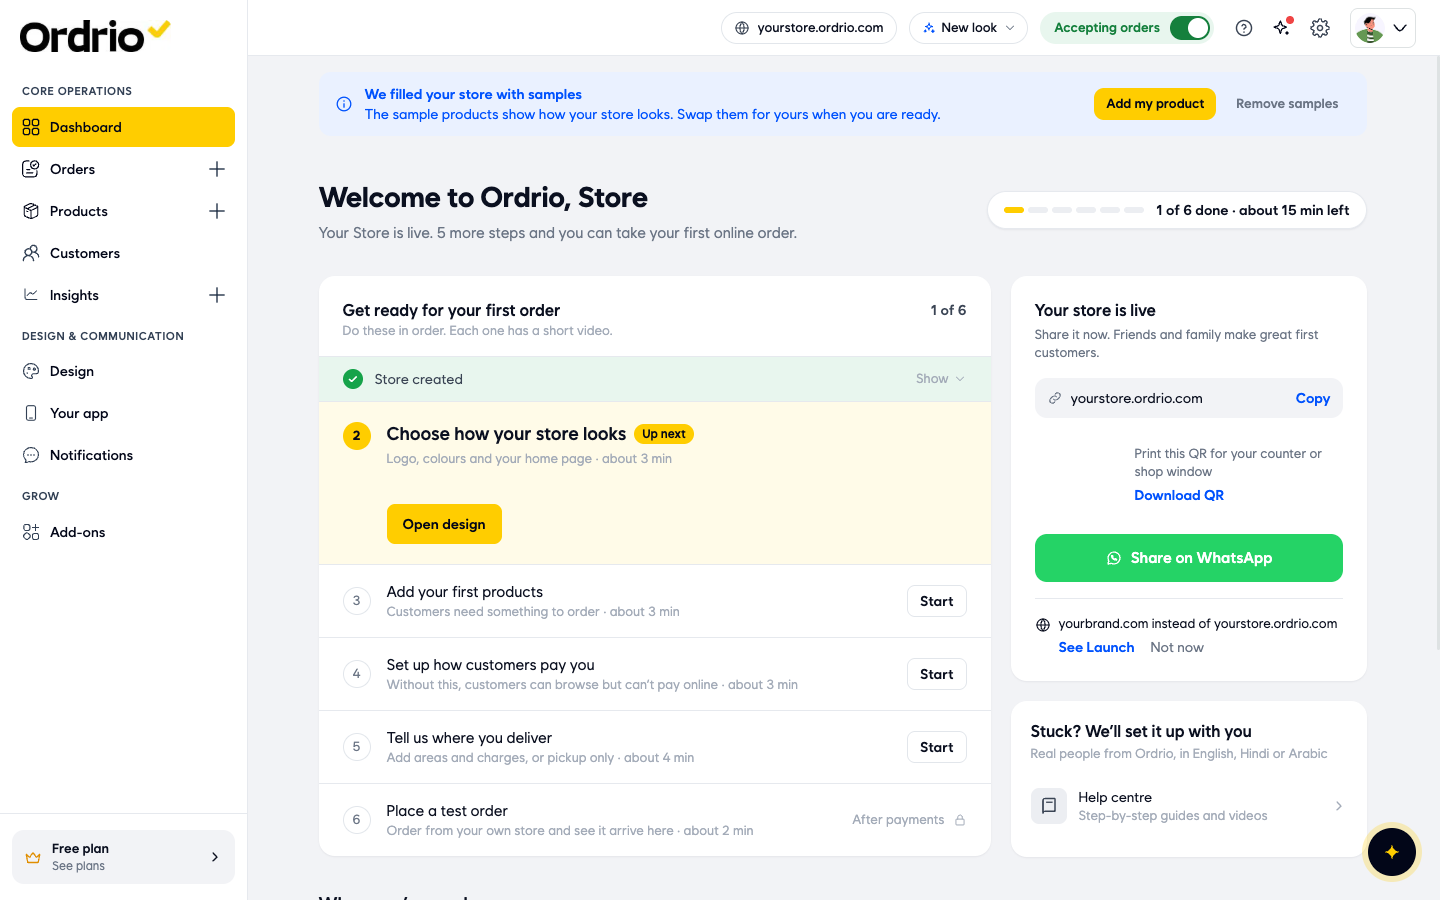
Here is the order, and what each step does.
1. Add your store details
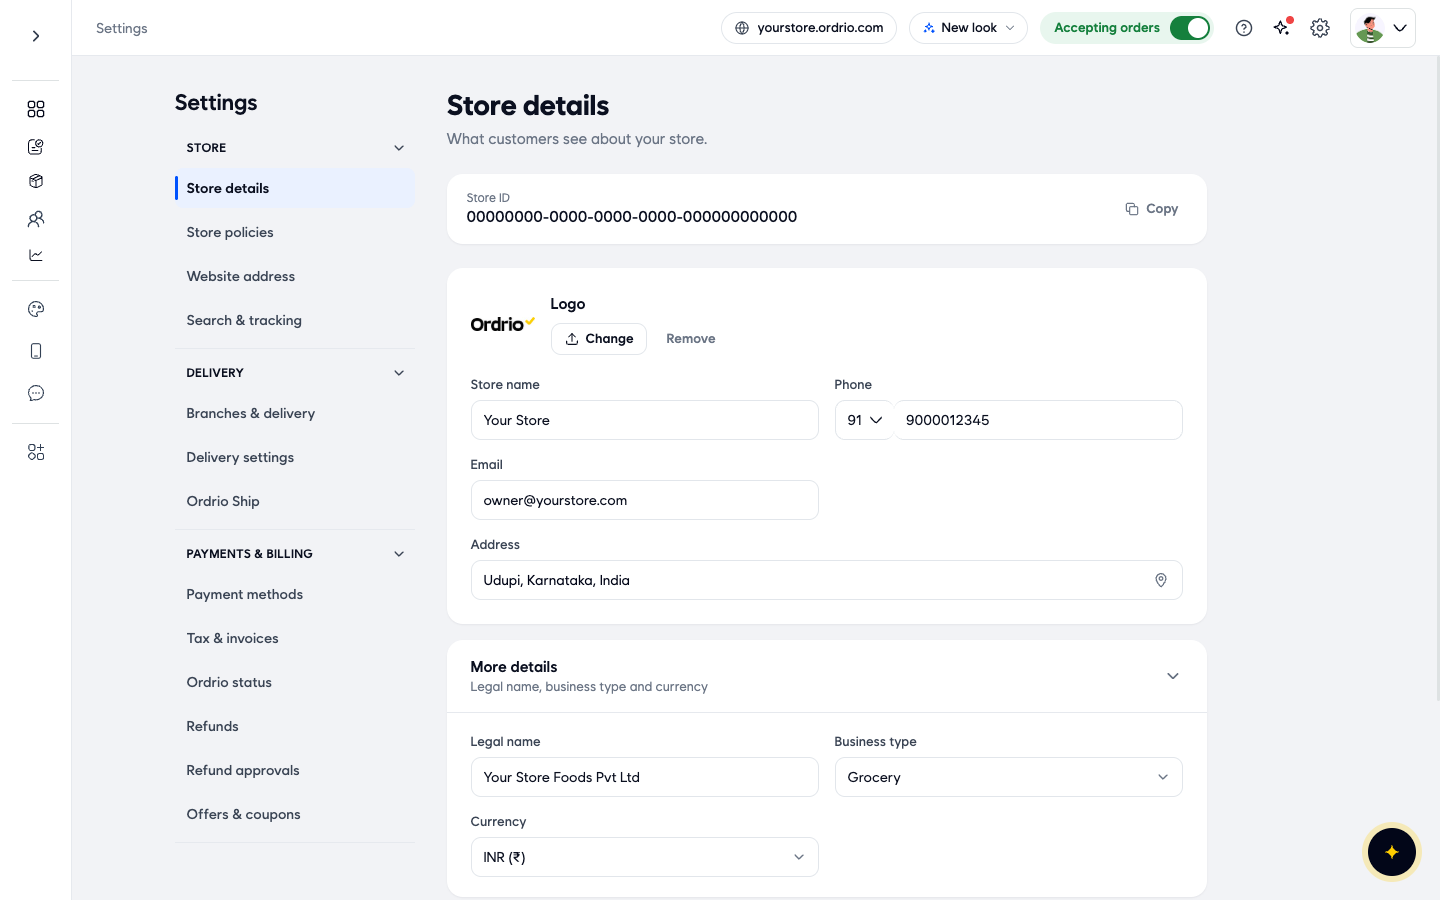
Your store is already live on its own Ordrio web address. First, tell customers who you are: their name, address and contact details. When this is done, the step shows a tick and reads Store created.
- Click Add store details in the list, or click the Settings icon (the gear) at the top right.
- Open Store details under Store.
- Check each field:
- Logo: click Change to upload your logo, or Remove to take it off.
- Store name: the name customers see.
- Phone and Email: how customers can reach you.
- Address: your store's location.
- More details: open it to set your Legal name, Business type and Currency.
The screenshot shows example values. Use your own store name, phone number, email and address.
2. Choose how your store looks
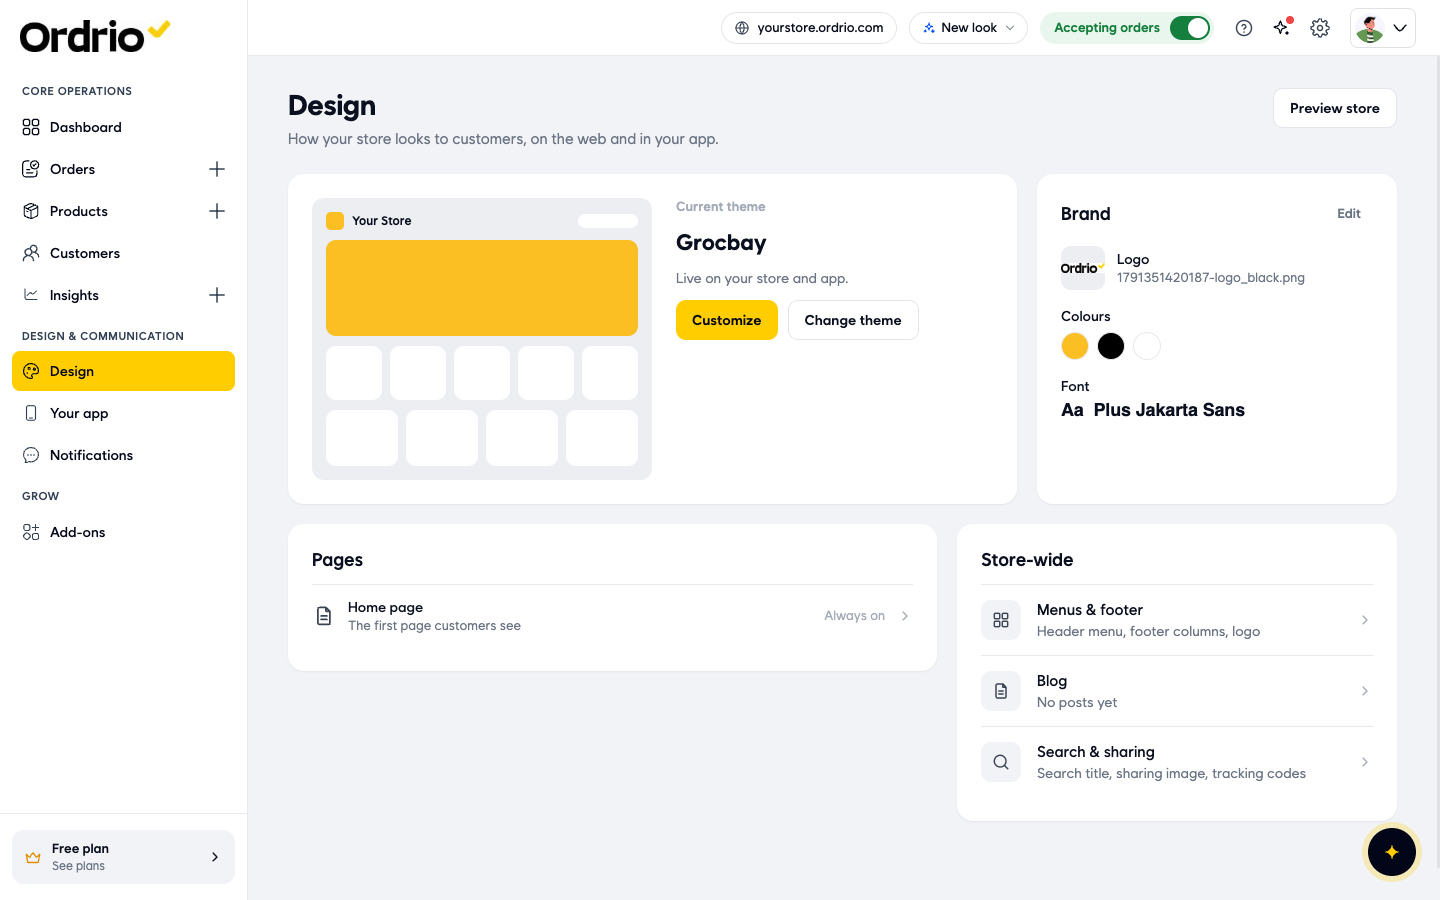
Click Open design in the list, or go to Design in the left menu. Here you can:
- See your Current theme, then click Customize to change it or Change theme to pick another one.
- Under Brand, click Edit to set your logo, colours and font.
- Under Pages, edit your Home page, the first page customers see.
- Under Store-wide, set up Menus & footer, your Blog, and Search & sharing.
Click Preview store to see how it looks to customers.
3. Add your first products
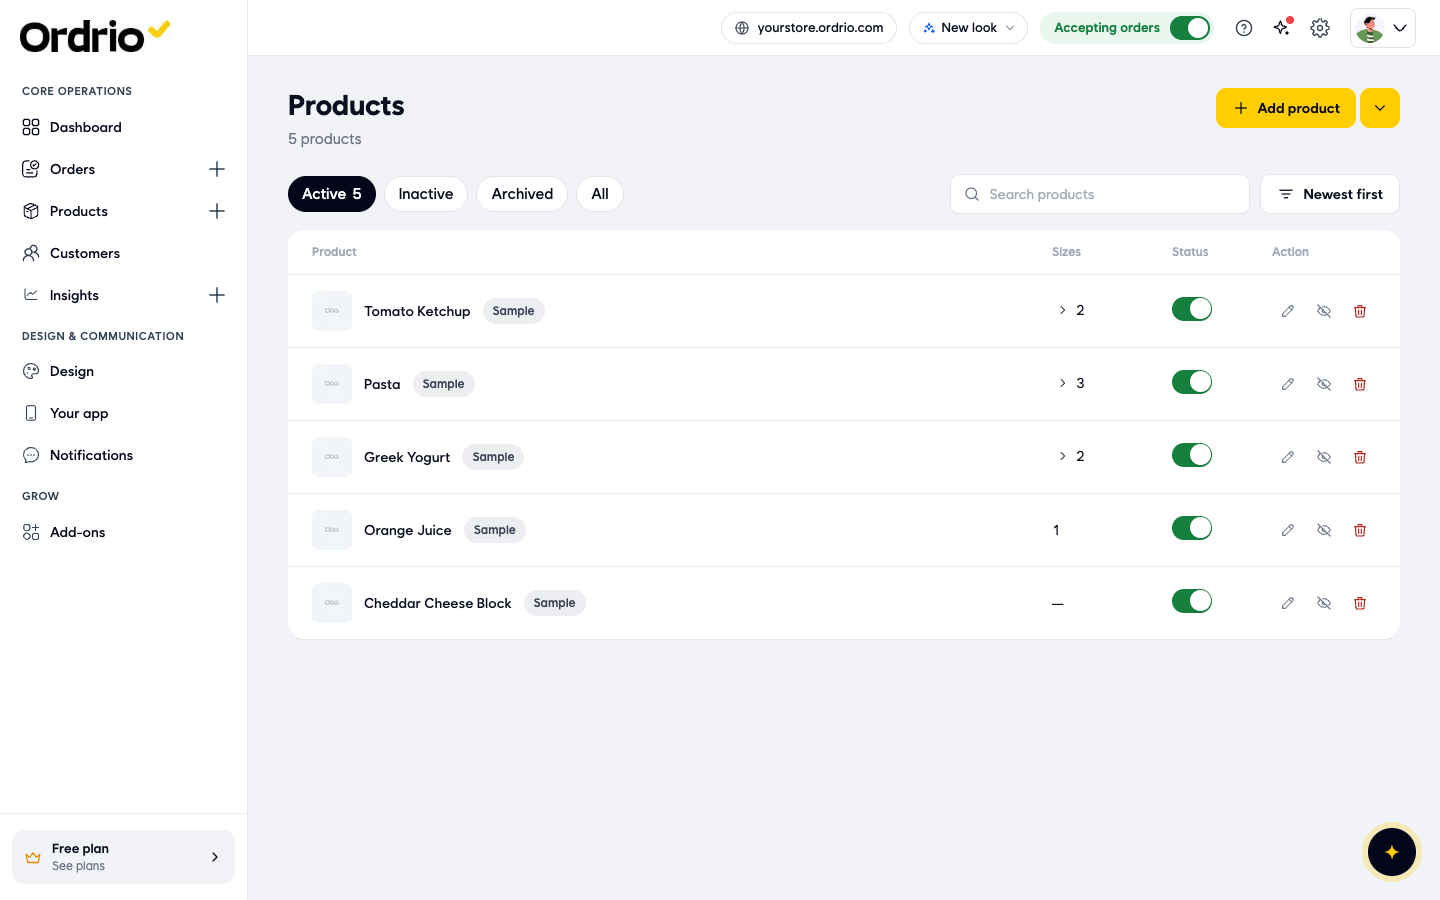
Customers need something to order. Click Start on this step, or go to Products in the left menu and click Add product.
Your new store comes with a few sample products, each marked Sample, so you can see how your store looks. When you are ready, replace them with your own. On the Dashboard you can click Add my product to add one, or Remove samples to clear the samples.
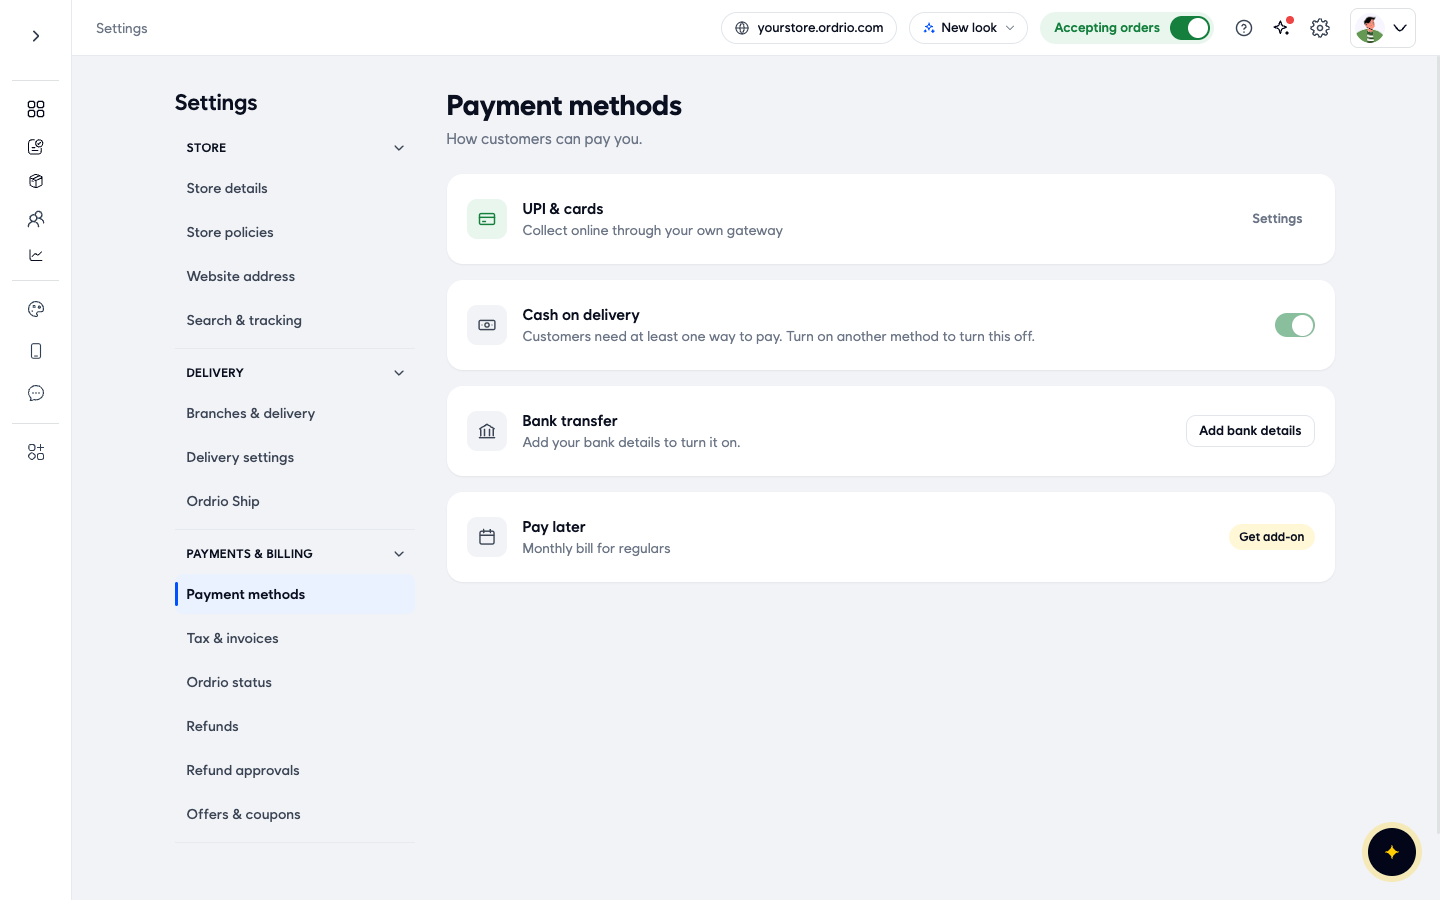
4. Set up how customers pay you
Without this, customers can browse your store but cannot pay online. Click Start, or go to Settings and open Payment methods under Payments & billing. You will see:
- UPI & cards: collect online payments through your own gateway. Click Settings to connect it.
- Cash on delivery: on by default. Customers need at least one way to pay, so you can only turn it off after you turn on another method.
- Bank transfer: click Add bank details to turn it on.
- Pay later: a monthly bill for regular customers. It needs an add-on (Get add-on).
5. Tell us where you deliver
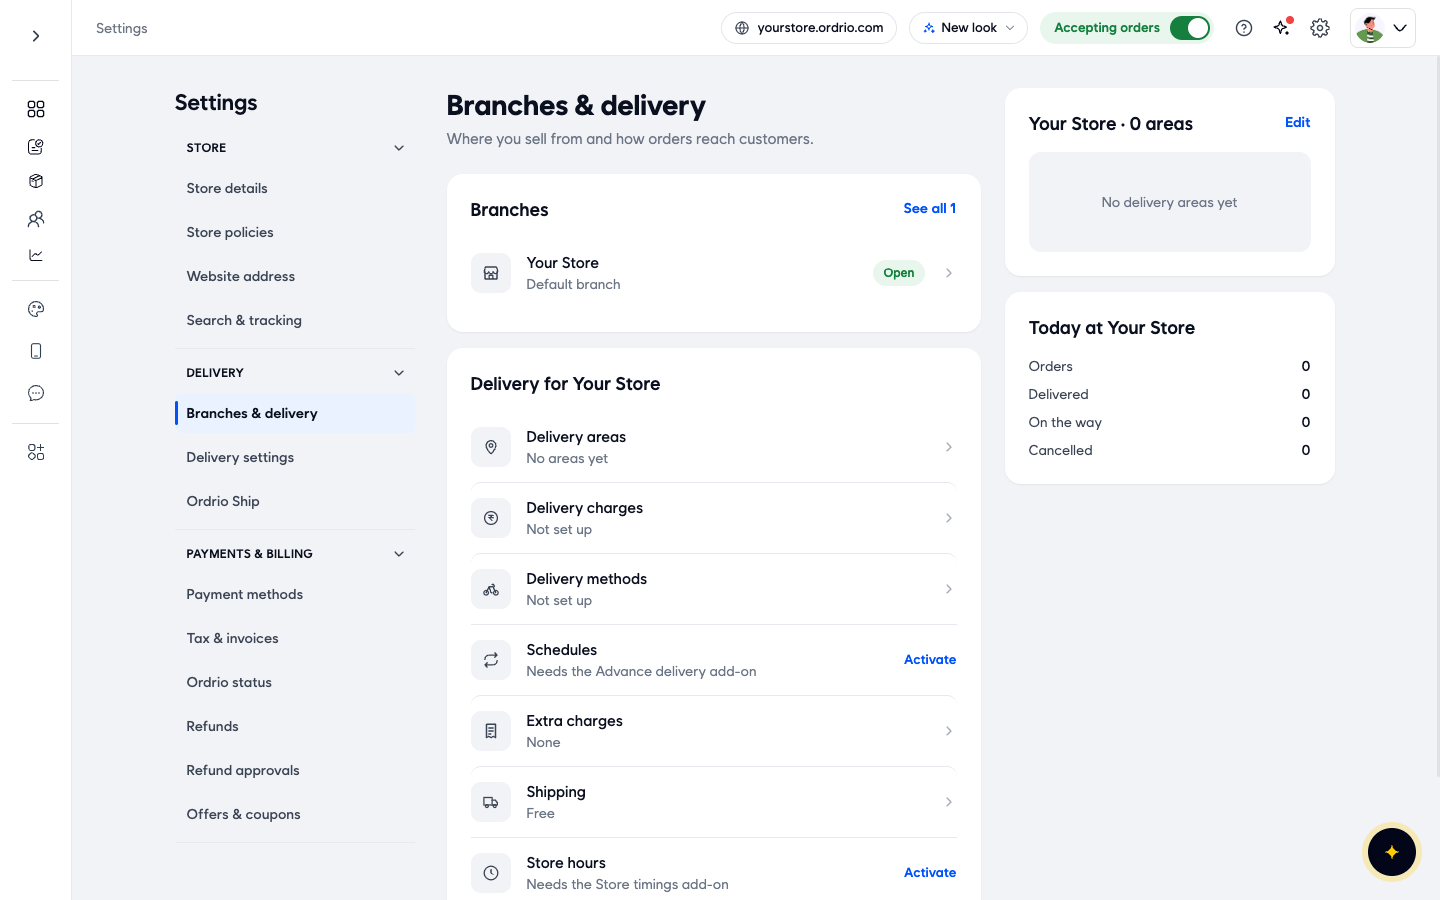
Add the areas you deliver to and your charges, or choose pickup only. Click Start, or go to Settings and open Branches & delivery under Delivery. For your branch you can set:
- Delivery areas: the places you deliver to.
- Delivery charges: what customers pay for delivery.
- Delivery methods: how orders reach customers.
- Extra charges: any other charges you add.
- Shipping: for orders you ship further away.
Schedules and Store hours need add-ons. Click Activate next to them to see the add-on.
6. Place a test order
Order something from your own store and watch it arrive in your Ordrio admin. This step shows After payments until you have set up payments in step 4.
When you are ready
Below the list, the Dashboard shows When you're ready. These are not needed for your first order, but stores that do them sell more:
- Set your opening hours, so customers see when you deliver.
- Create a welcome discount, for example 10% off the first order.
- Invite your staff, and give them only the pages they need.
- Use your own domain, so customers see your own web address instead of an ordrio.com one.
Each one has a Set up button.
Good to know
- Your store is live from the moment you sign up. The Accepting orders switch at the top of every screen shows whether customers can order right now.
- The Your store is live box on the Dashboard lets you copy your store link, download a QR code for your counter, or click Share on WhatsApp.
- If you charge tax, go to Settings and open Tax & invoices to set it up and design your invoice.
- Stuck? The Dashboard also shows Stuck? We'll set it up with you, where you can reach the Ordrio team in English, Hindi or Arabic.
Related
- What you need before getting started
- Accessing Ordrio for the first time
- What is Ordrio