هذا المقال غير متوفر بالعربية بعد، لذلك نعرضه بالإنجليزية.
دليل استخدام
Flexi Box bulk upload with a CSV
Add many Flexi Boxes at once from a CSV file in Products, and update them later with a second CSV.
With Flexi Box bulk upload you can add many Flexi Boxes at once from one CSV file, instead of building each box by hand. Later, you can change the same boxes with a second CSV.
What your customers see
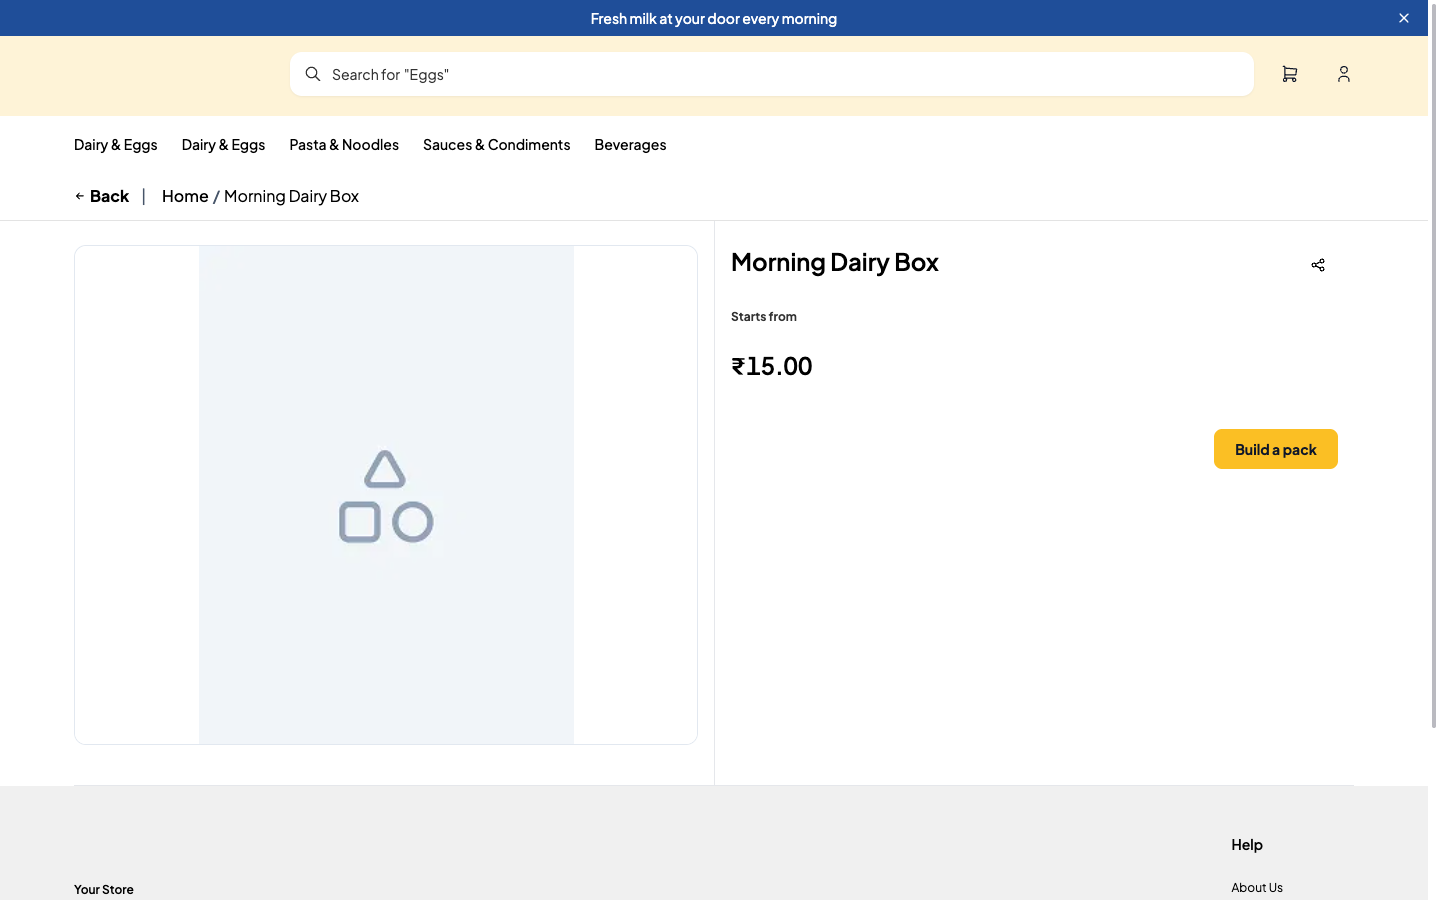
After the upload, each box is a product on your store. The product page shows the box name, a "Starts from" price and a Build a pack button.
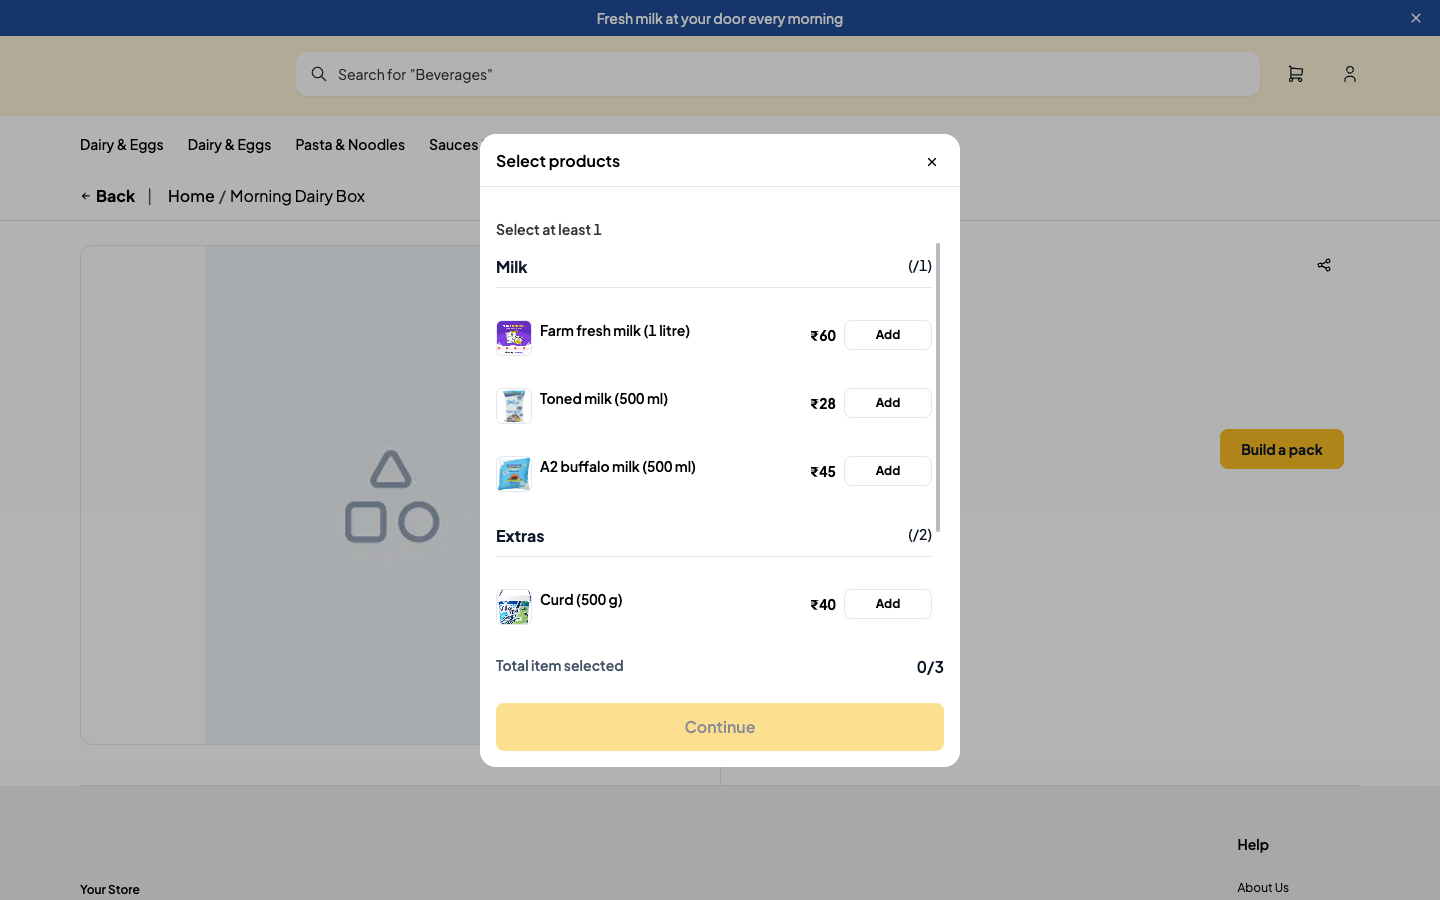
When a customer taps Build a pack, a Select products window opens. It shows each section of the box (for example Milk and Extras), how many items they can pick from it, and the price of each item. They add the items they want and tap Continue.
Before you start
- The items you put in a box should already be products in your store. Type their names exactly as they show in Products.
- You need a spreadsheet app that can save a CSV file, for example Google Sheets or Excel.
Add Flexi Boxes with a CSV
- Open manage.ordrio.com (your Ordrio admin panel) and log in.
- In the left menu, click Products, then Products.
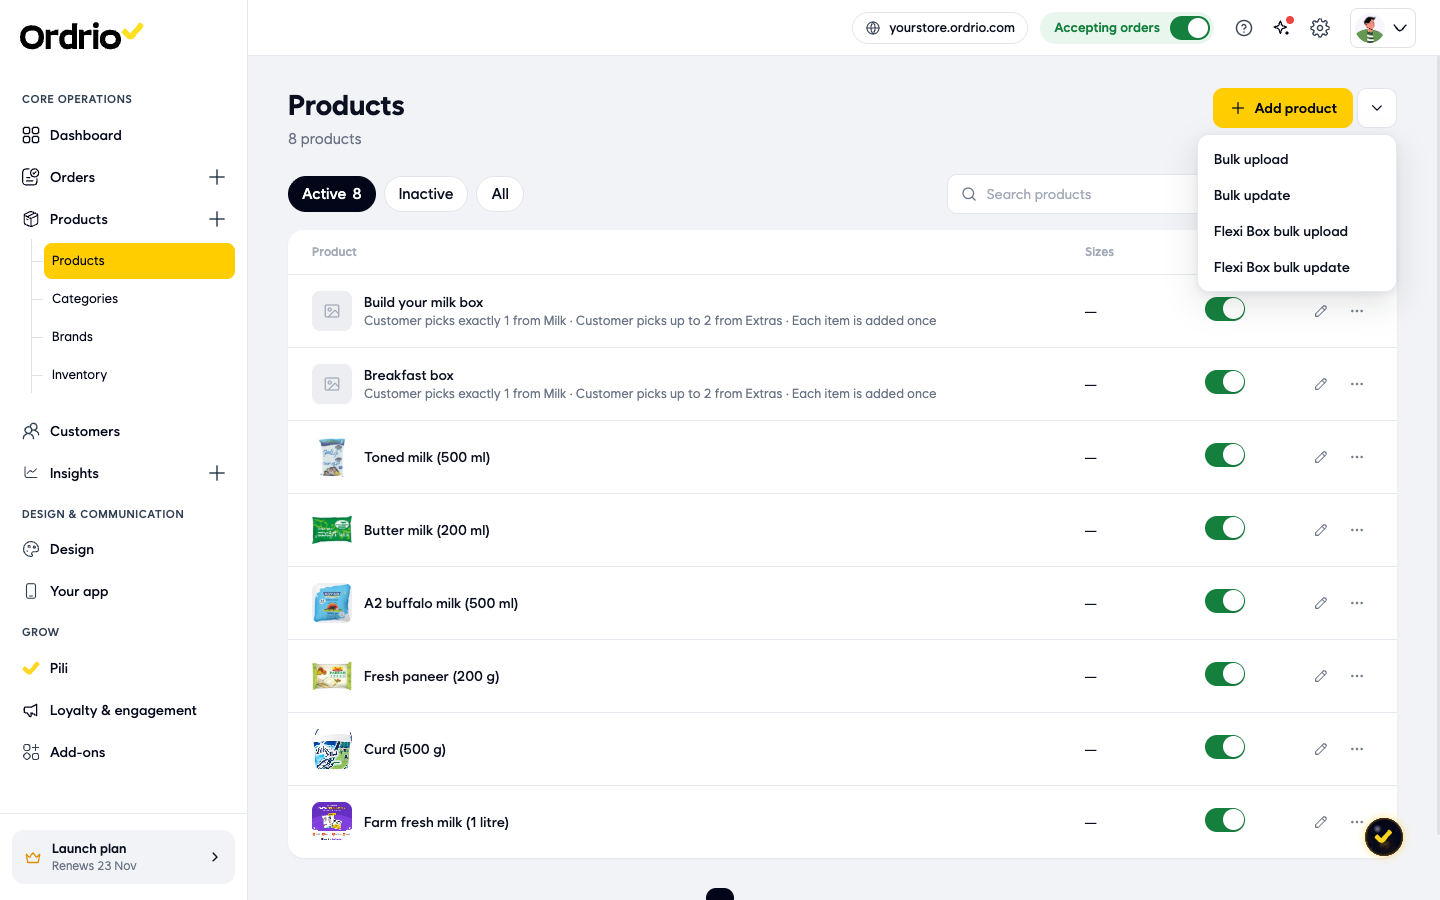
- Click the arrow next to Add product (More ways to add) and choose Flexi Box bulk upload.
- Under 1. Download a sheet, click Blank sheet. To start from the boxes you already have, click My current boxes instead.
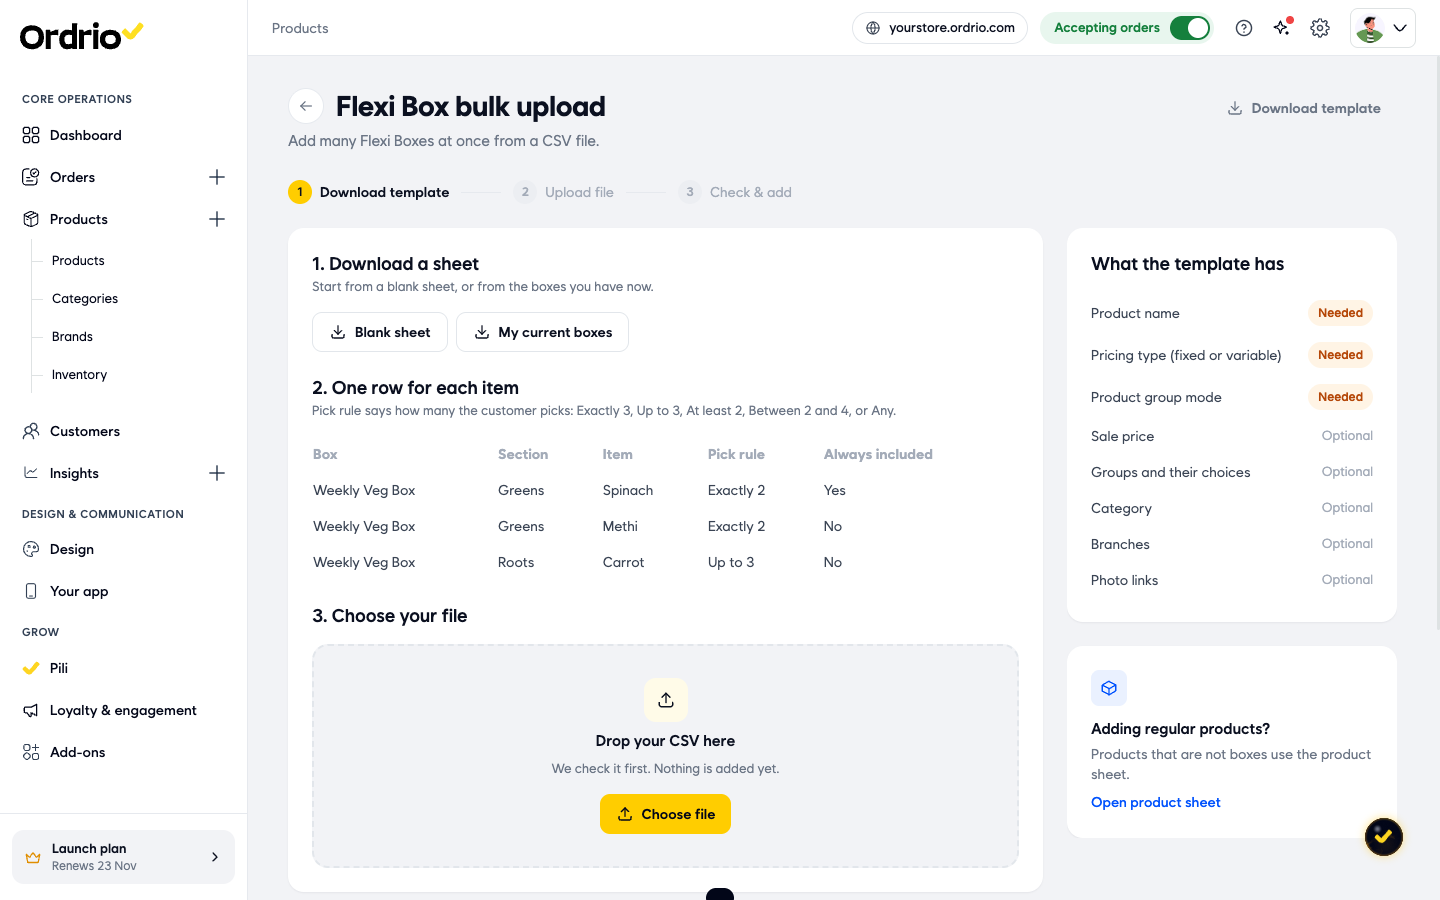
- Open the file in your spreadsheet app and fill in one row for each item in a box. The sheet has these columns:
- Box: the name of the box, for example "Morning Dairy Box". Every row with the same box name goes into the same box.
- Section: the part of the box the item belongs to, for example "Milk" or "Extras".
- Item: the product the customer can pick, written exactly as it shows in Products.
- Pick rule: how many items the customer picks from that section. You can use Exactly 3, Up to 3, At least 2, Between 2 and 4, or Any (with your own numbers). Use the same rule on every row of a section.
- Always included: Yes or No. Type Yes for an item that is always part of the box.
- Variation: the size or variation of the product, if it has one. Leave it empty if not.
- Price: the price of this item inside the box.
- Starts selected: Yes or No. Type Yes for the item you want ready selected for the customer.
For example, the first rows of a sheet could look like this:
```
Box,Section,Item,Pick rule,Always included,Variation,Price,Starts selected
Morning Dairy Box,Milk,Farm fresh milk (1 litre),Exactly 1,No,,60,Yes
Morning Dairy Box,Milk,Toned milk (500 ml),Exactly 1,No,,28,No
Morning Dairy Box,Extras,Curd (500 g),Up to 2,No,,40,No
```
These are example values. Use your own box names, products and prices.
- Save the file as a CSV.
- Back on the Flexi Box bulk upload page, under 3. Choose your file, click Choose file and pick your CSV. You can also drag the file onto the box.
- Ordrio checks the file first and nothing is added yet. Read the message, for example "6 rows are ready: 1 new boxes and 0 updated. Nothing is added until you confirm." If something looks wrong, click Choose another file and upload a fixed file.
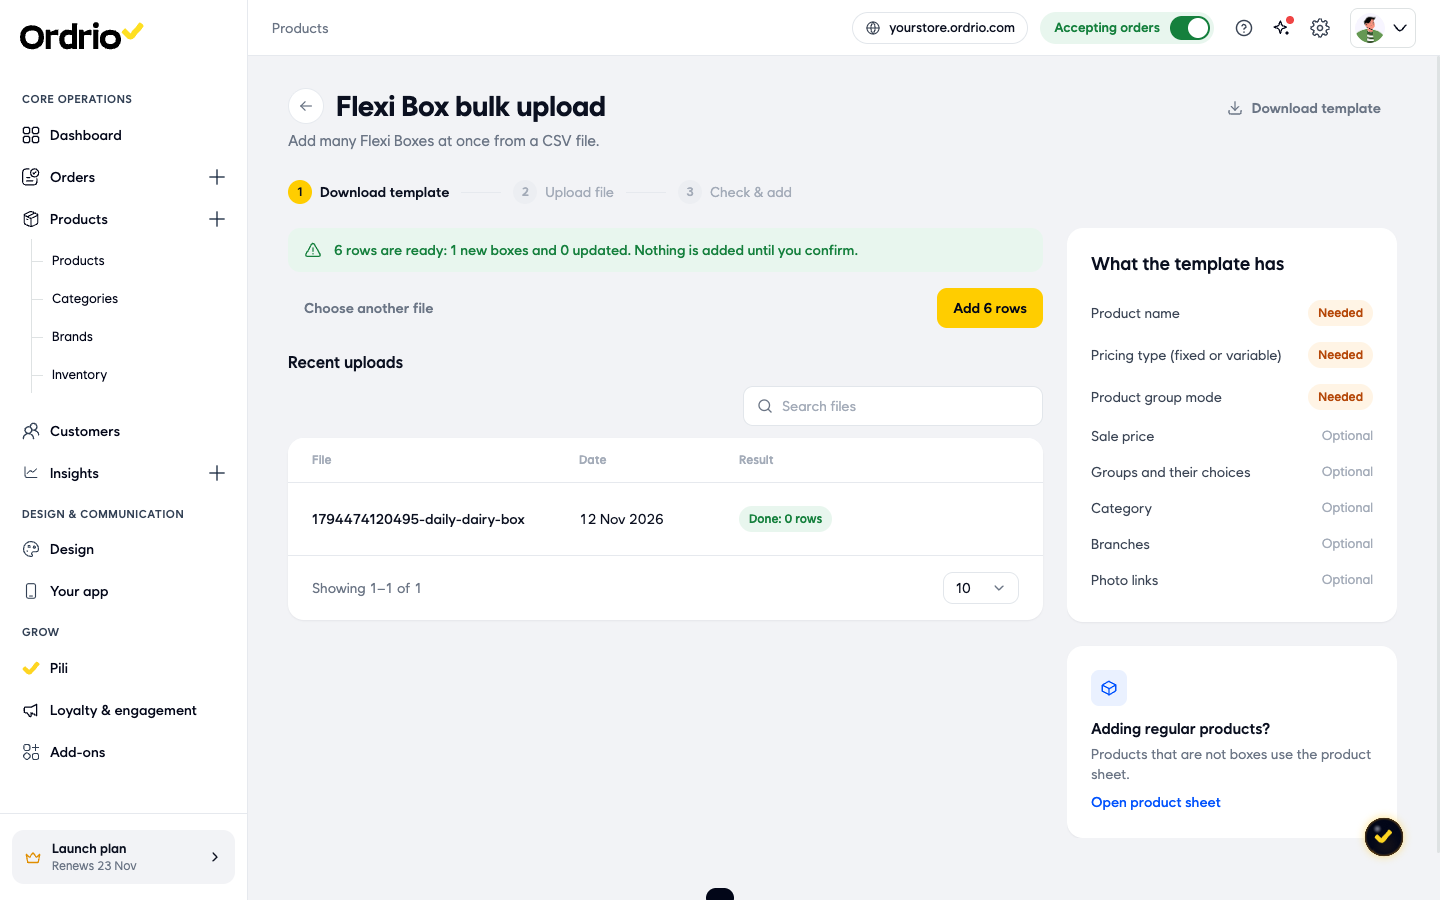
- Click Add 6 rows. The button shows the number of rows in your file.
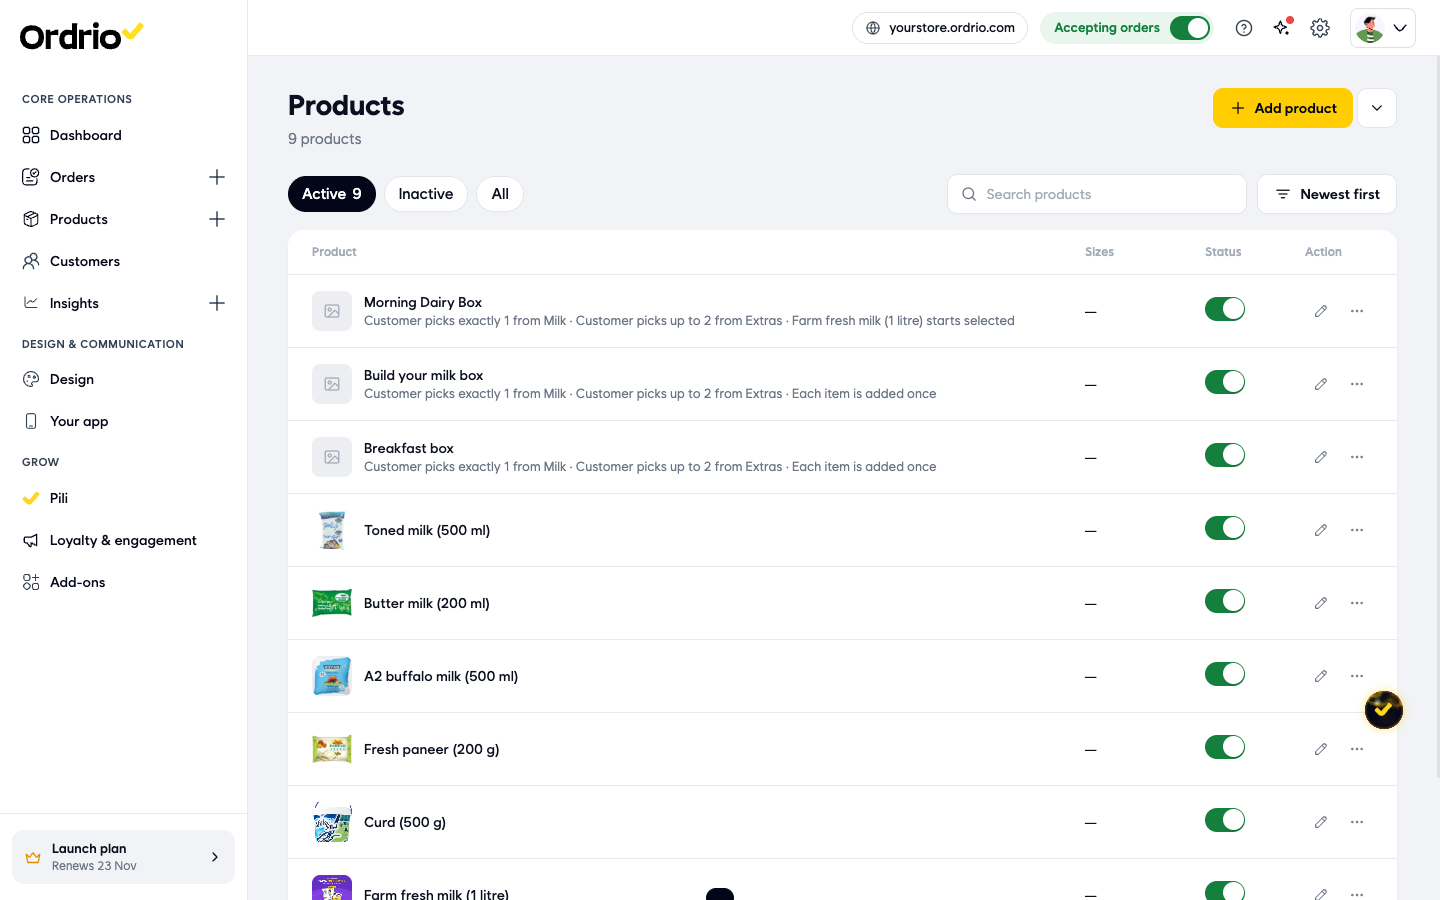
- The file appears under Recent uploads while Ordrio adds the boxes. Go to Products to see your new boxes at the top of the list, with their pick rules written under each name.
Update your boxes later with a CSV
- In Products, click the arrow next to Add product (More ways to add) and choose Flexi Box bulk update.
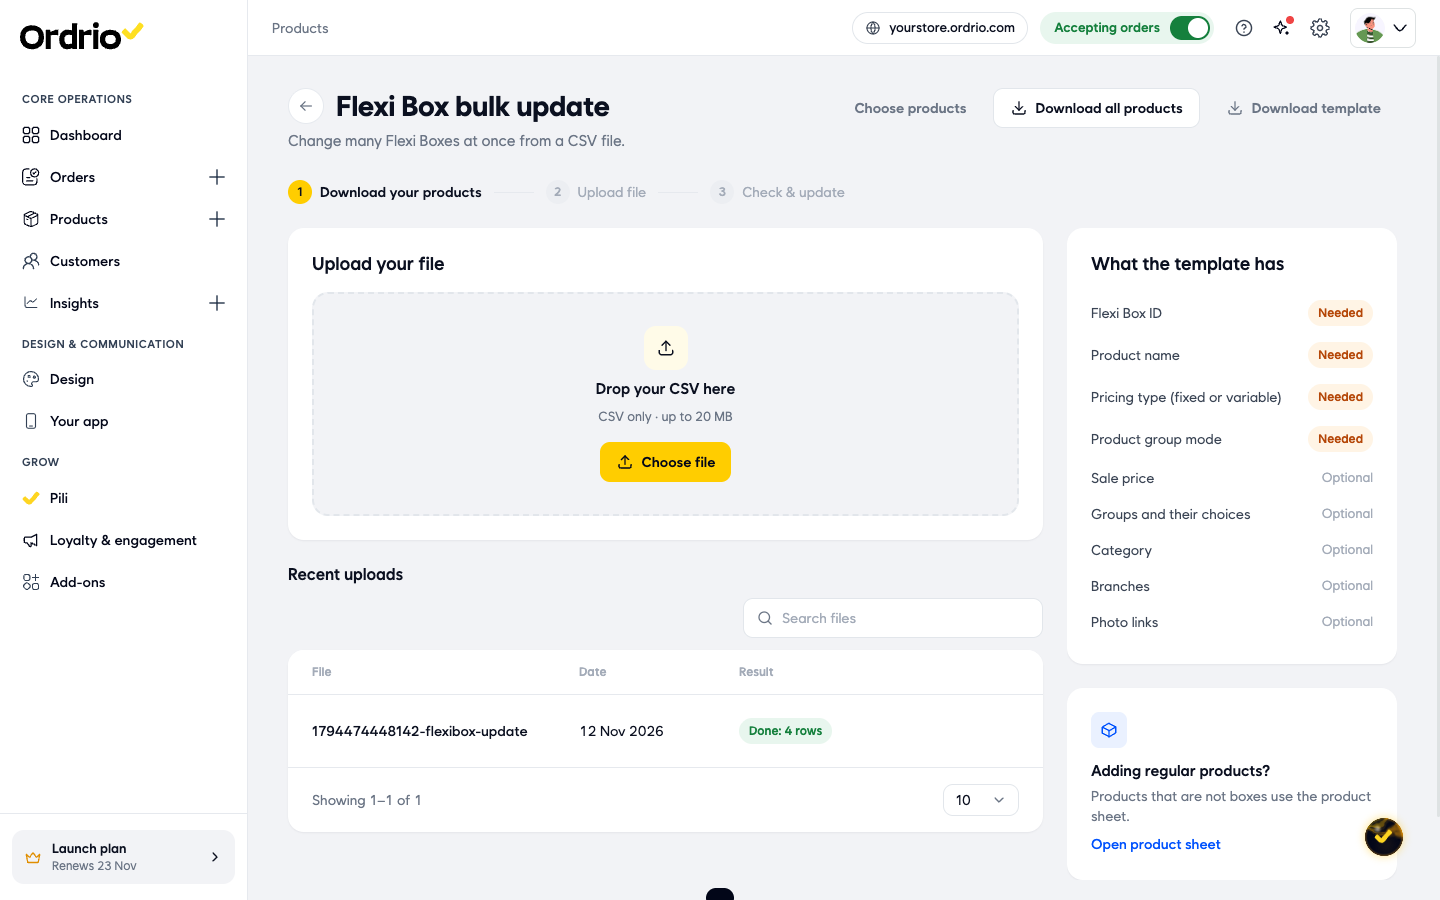
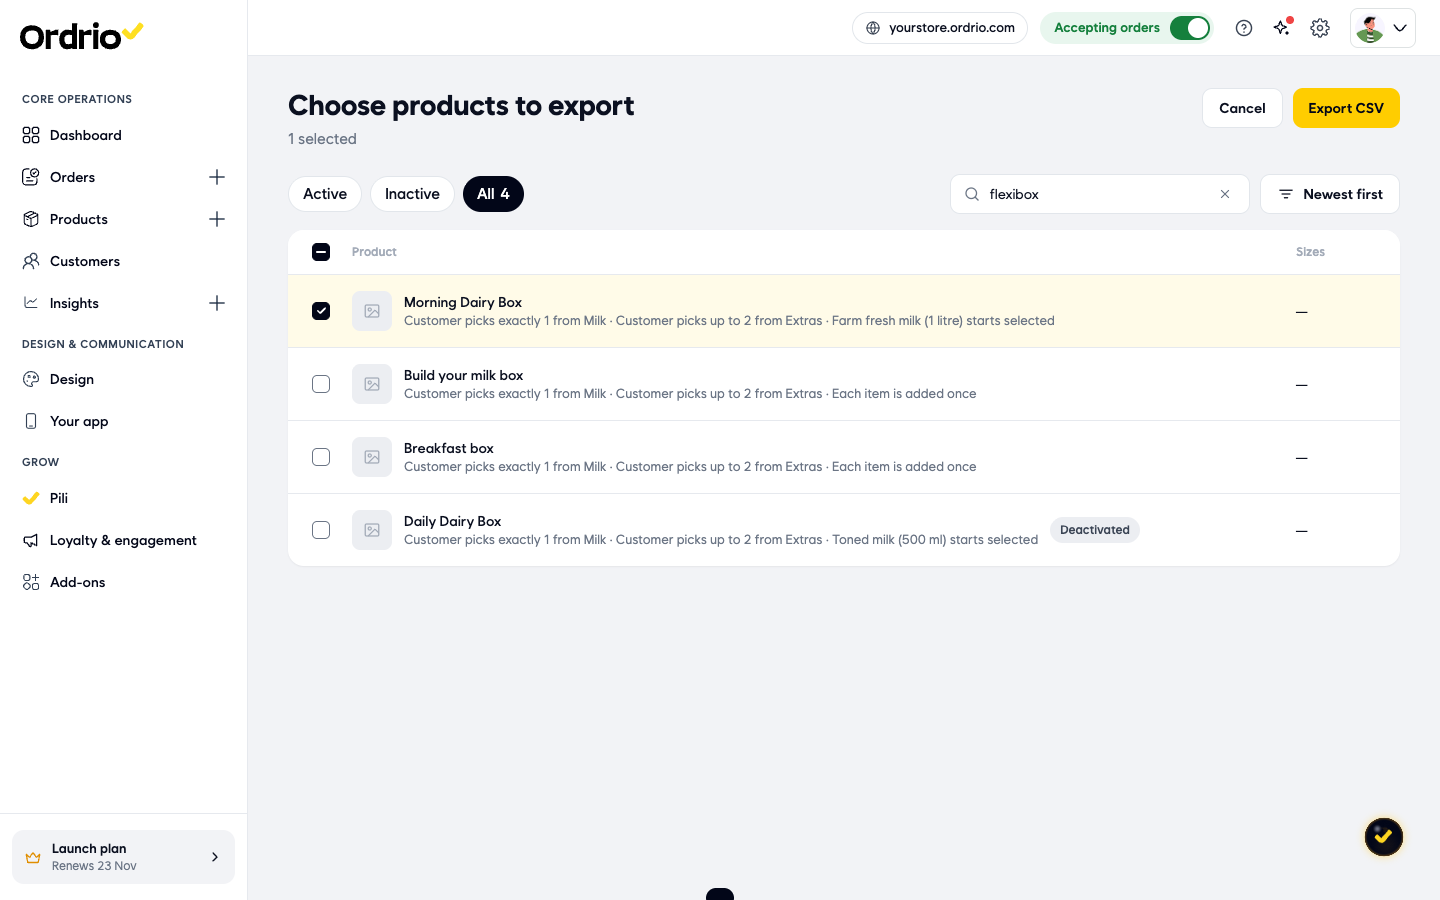
- Click Download all products to get a file with all your boxes. To get only some boxes, click Choose products, tick the boxes you want and click Export CSV.
- Open the file and change what you need, for example an item's Price, a Group Name or the Product Name of the box. Do not change the ID columns (Flexi Box ID, Group ID, Item ID), because Ordrio uses them to find each box and item.
- Save the file as a CSV.
- Under Upload your file, click Choose file and pick your CSV.
- Click Update CSV.
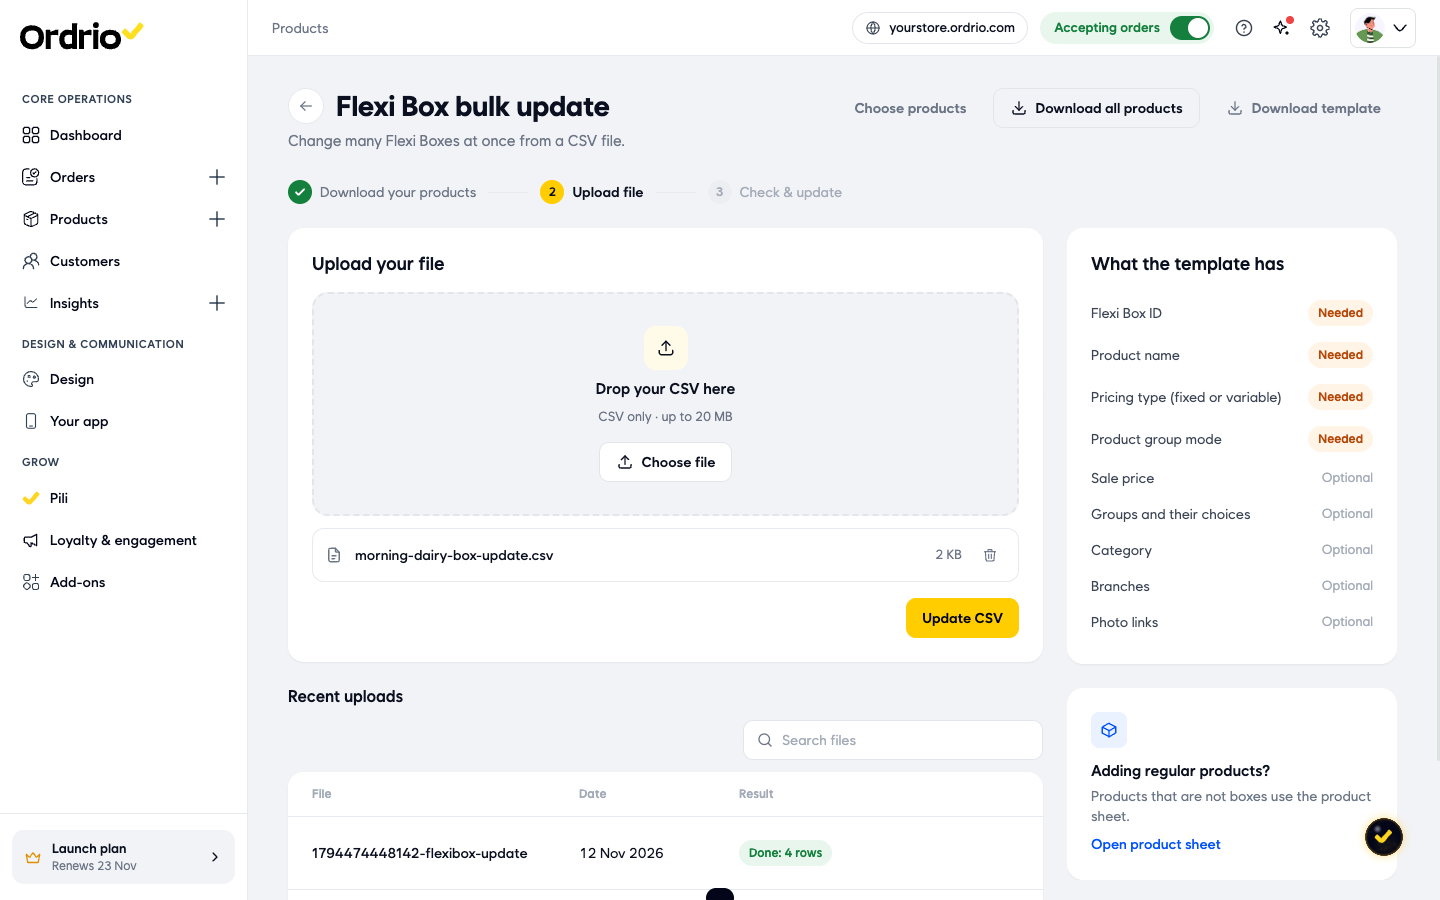
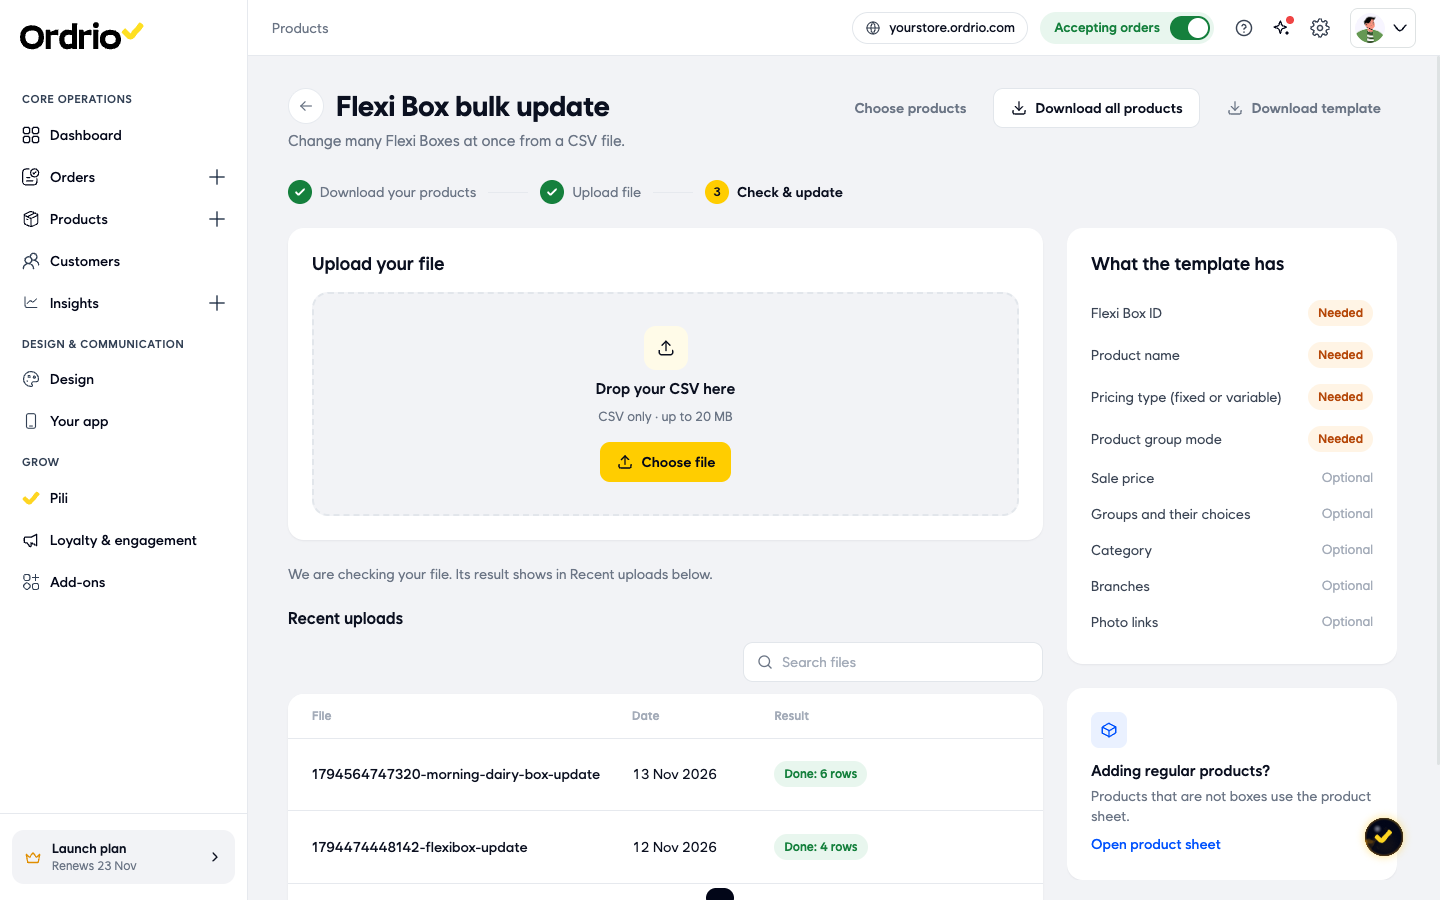
- Ordrio checks the file and the result shows under Recent uploads, for example "Done: 6 rows". Your store shows the new values straight away.
Good to know
- Upload files must be CSV. The update page takes files up to 20 MB.
- The upload adds boxes only after you click the Add button. Until then, nothing changes on your store.
- The update applies as soon as you click Update CSV. Download a fresh copy first, so you start from your latest boxes.
- To check the result of any upload, open Products and look at the box, or open it on your store.
- Regular products that are not boxes use a different sheet. Click Open product sheet on the same page.
Related
- Adding products in bulk with a CSV
- Updating products in bulk with a CSV
- Creating a Flexi Box