هذا المقال غير متوفر بالعربية بعد، لذلك نعرضه بالإنجليزية.
دليل استخدام
Customising your store header and footer
How to change your store logo, header menu and footer: add links and columns, set the copyright line and extras, and choose colours.
The header is the strip at the top of every page of your store: your logo, your menu links, and the search, cart and account icons. The footer is the area at the bottom of every page, with link columns, your copyright line and extras like policy links. You edit both in one place in your Ordrio admin panel, so your store looks the same everywhere and customers can find what they need.
Before you start
- Add your categories, products and policy pages first, so you have something to link to from the menu and footer.
- Have your logo ready as an image file of up to 1 MB.
What the header and footer show
Header
- Logo: your store logo, at the top left of every page.
- Menu: up to 5 links. Each one can open a category, a product, a brand, your own web address, your blog or one blog post.
- Search, cart and account icons on the right. These are added for you.
Footer
- Your logo.
- Up to 5 columns of links or information, for example a "Help" column with your About Us and Terms and Conditions pages.
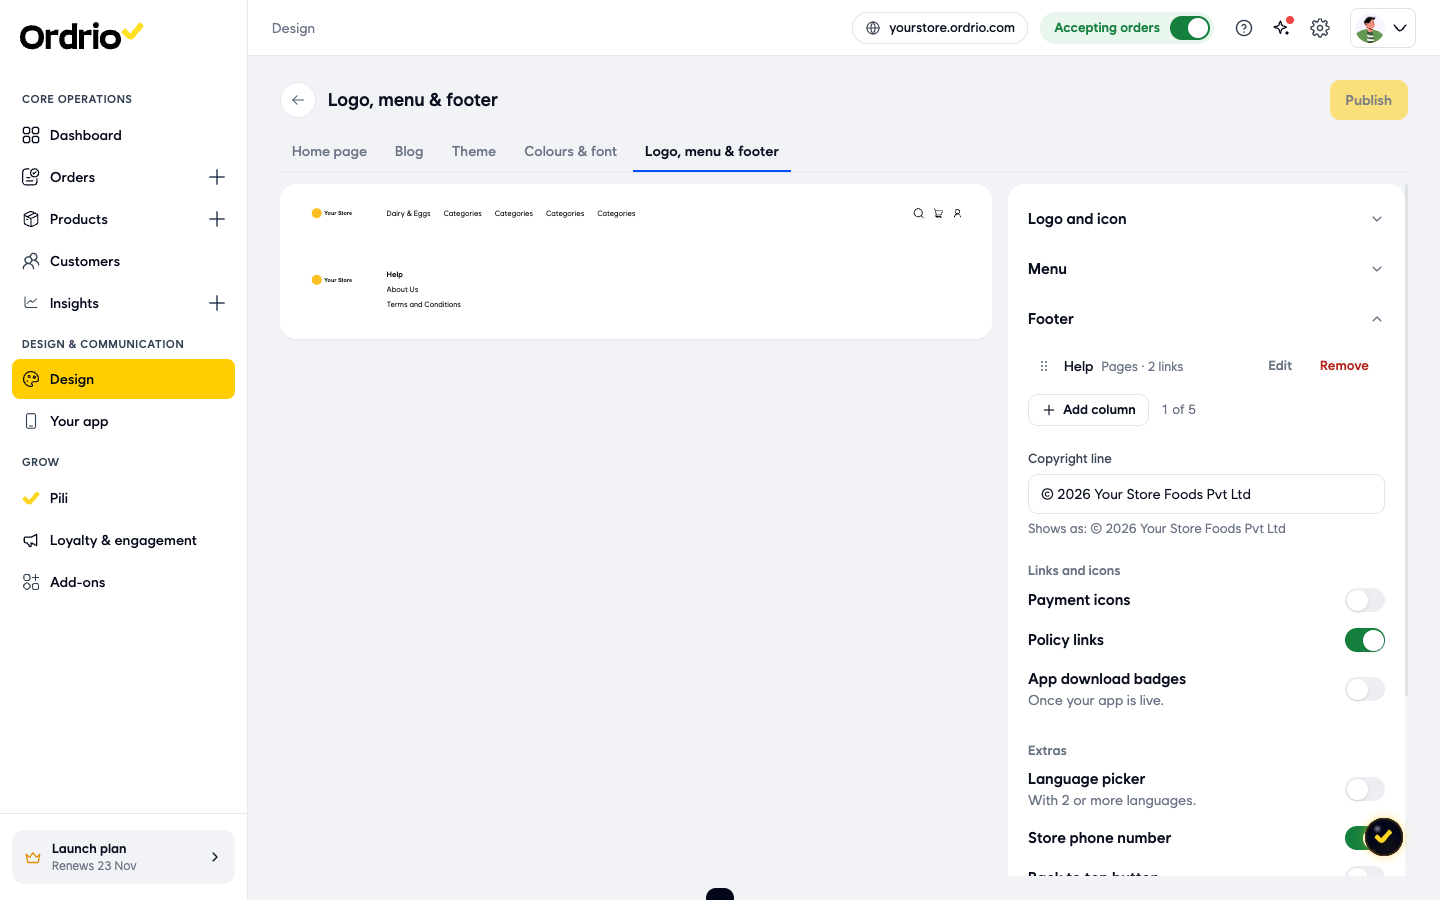
- A copyright line, for example "© 2026 Your Store Foods Pvt Ltd".
- Optional extras: payment icons, policy links, app download badges, a language picker, your store phone number and a back to top button.
Open the header and footer settings
- Open manage.ordrio.com (your Ordrio admin panel) and log in.
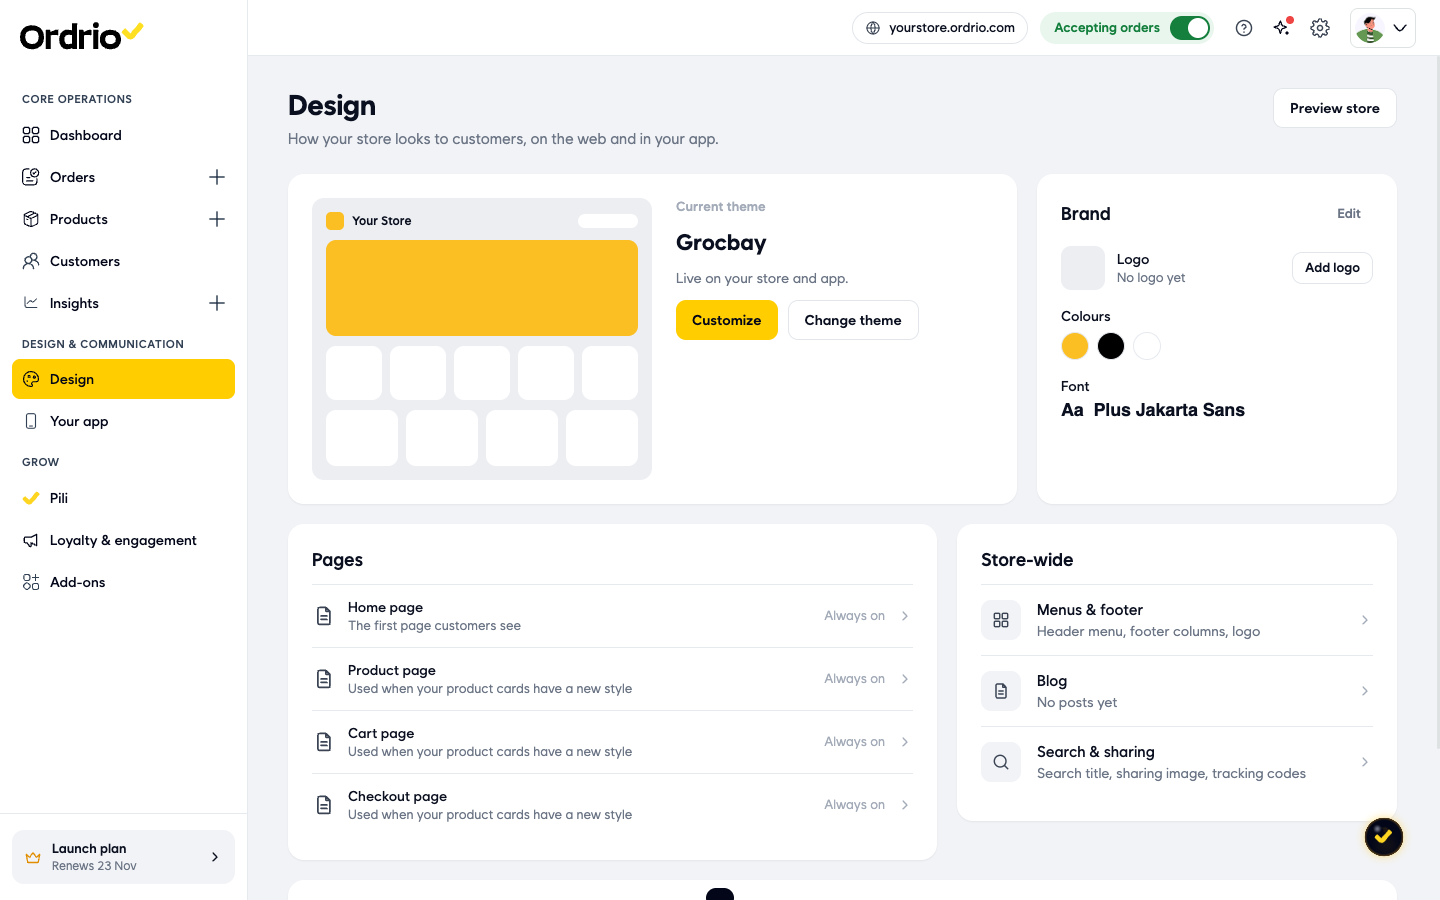
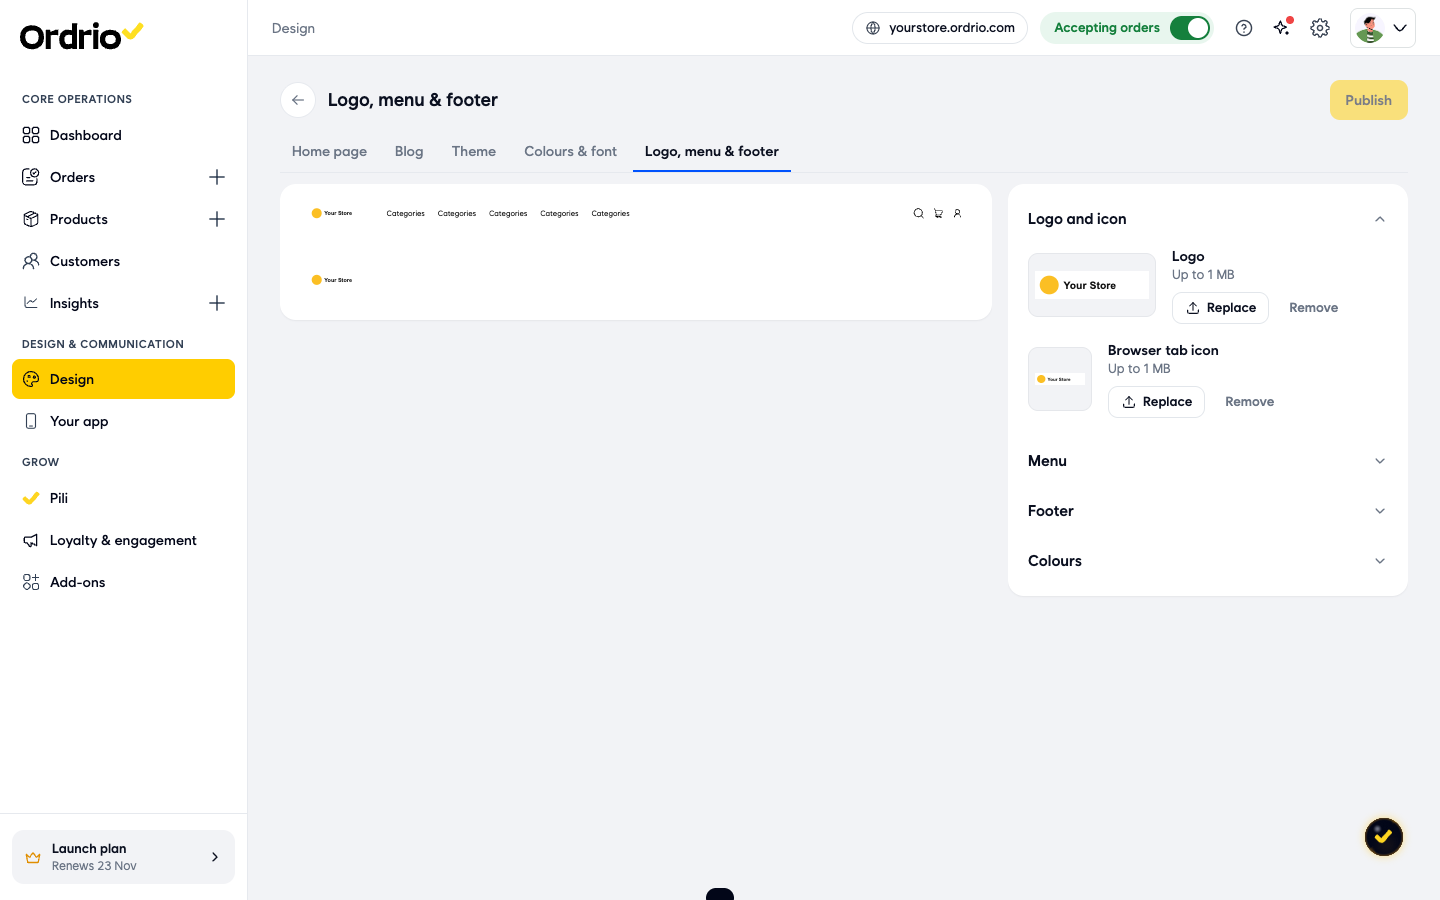
You can also get here from the Add logo button in the Brand box on the Design page.
Change your logo and browser tab icon
- In Logo and icon, next to Logo, click Replace and choose your logo image (up to 1 MB). This is the logo in your header and footer.
- Next to Browser tab icon, click Replace and choose a small square image (up to 1 MB). This is the little picture customers see on the browser tab when your store is open.
To take an image off, click Remove next to it.
Edit the header menu
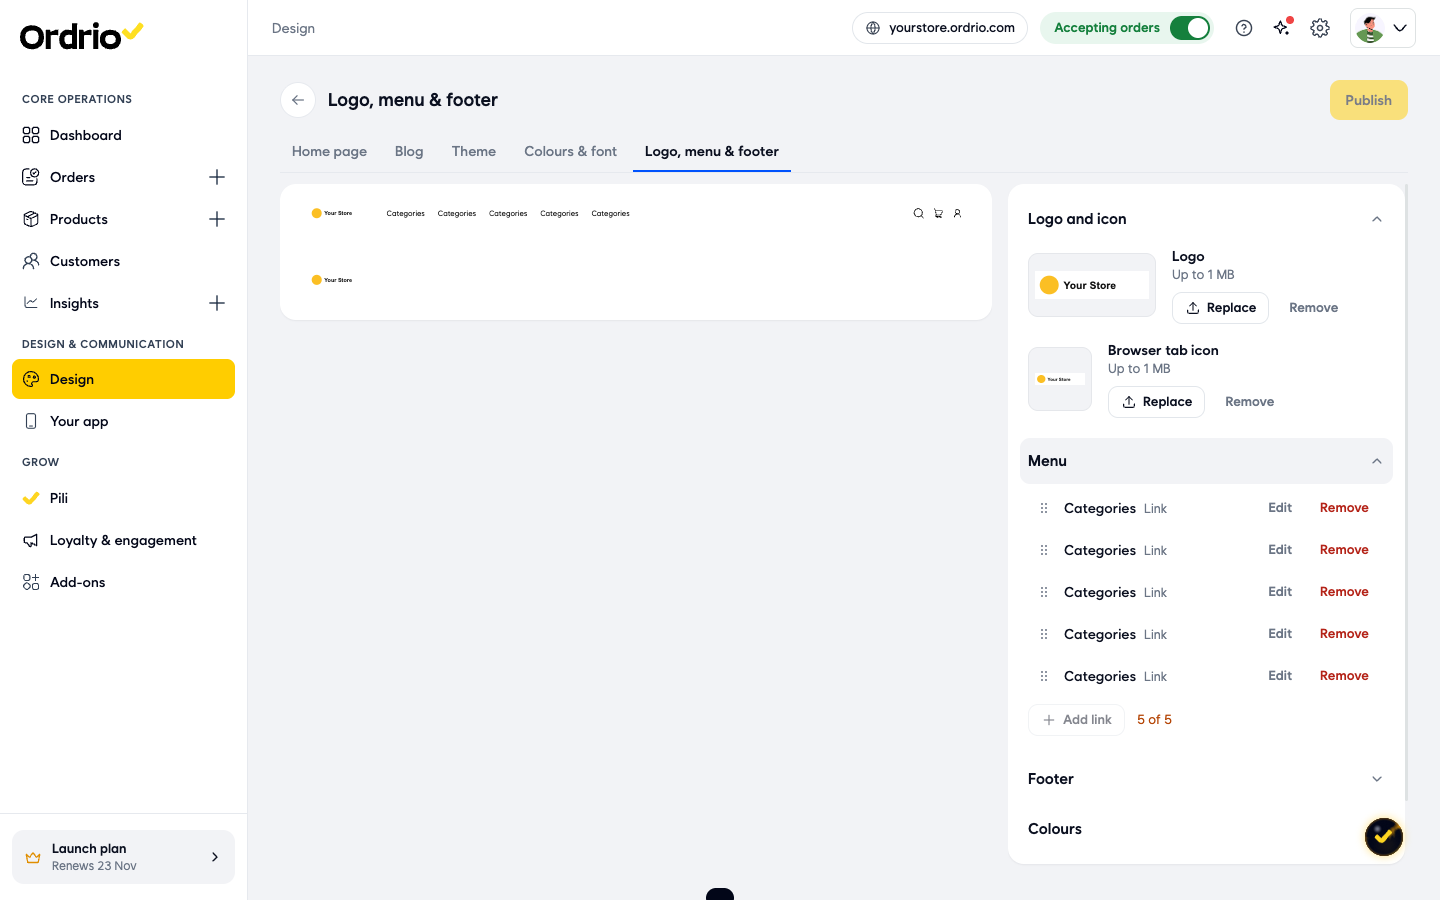
- Click Edit next to the link you want to change. To add a new link instead, click Add link. This button is greyed out when you already have 5 links, so remove one first.
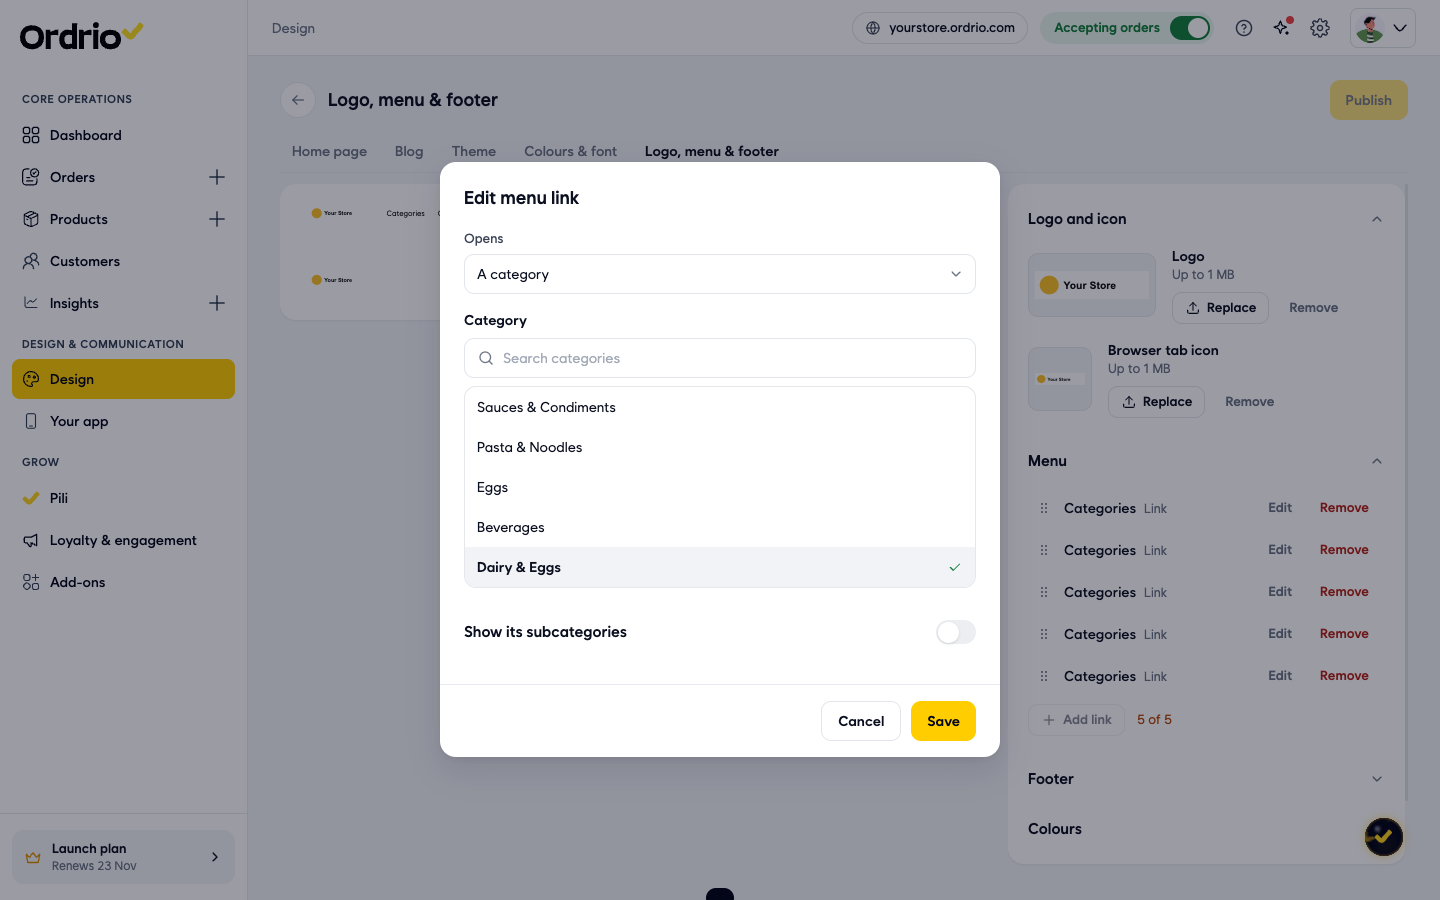
- In the Edit menu link box, choose what the link opens in Opens:
- A category: pick the category from the list. Use Search categories to find it. Turn on Show its subcategories to show that category's subcategories under the link.
- A product: pick the product from the list. Use Search products to find it.
- A brand: choose the brand the link opens.
- Your own link: type the Link name customers see (for example "Offers") and the Web address it opens (it starts with https://). Turn on Show sub-pages under this link if you want sub-pages under it.
- The blog (all posts): opens your blog page. There is nothing else to fill in.
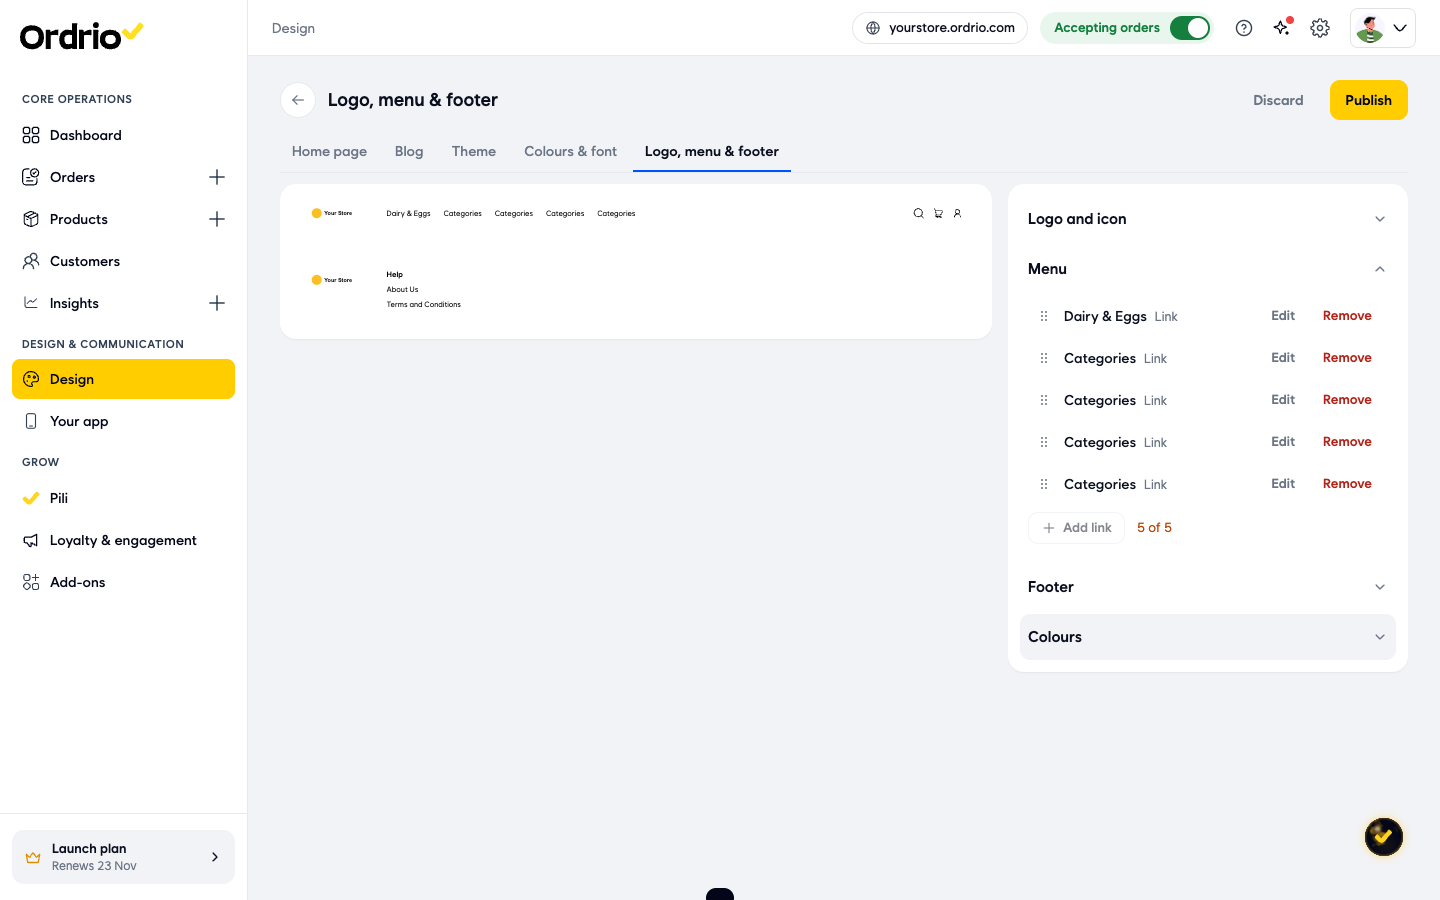
To change the order of your menu links, drag a link up or down by the dotted handle on its left. To take a link out of the menu, click Remove.
Edit the footer
- Click Footer to open it, then click Add column. The counter next to it shows how many columns you have, up to 5.
- In the Add a footer column box, choose a Column type. Each type shows a short line under it that says what it does:
- Categories: a column of category pages.
- Products: links to specific products.
- Brands: a column of brands.
- Pages: your store pages, such as About Us, Contact Us, Privacy Policy, Refund Policy, Return Policy, and Terms and Conditions.
- Custom links: any web address, on your store or elsewhere. For each link, fill in a name and a web address.
- Blog: one link to all your blog posts.
- Blog post: specific posts you choose.
- Rich text: a heading and your own text, for anything else. The Content box takes up to 4000 characters.
- Store details: your logo, description, address, email, contact number, social links and business information. Anything you have not added yet shows as Not filled in.
- Business information: business identifiers in their own column, for example your registration or tax numbers. For each row, pick or type a Label and enter the Value. A row without both is not saved.
- Policy links: your shipping, returns, privacy and terms pages, kept in step with your policy pages.
- Payment icons: the payment methods you have turned on in your store.
- Newsletter signup: a box where customers leave their email. The emails go into your customer list.
- Type the Column title customers see above the column, for example "Help".
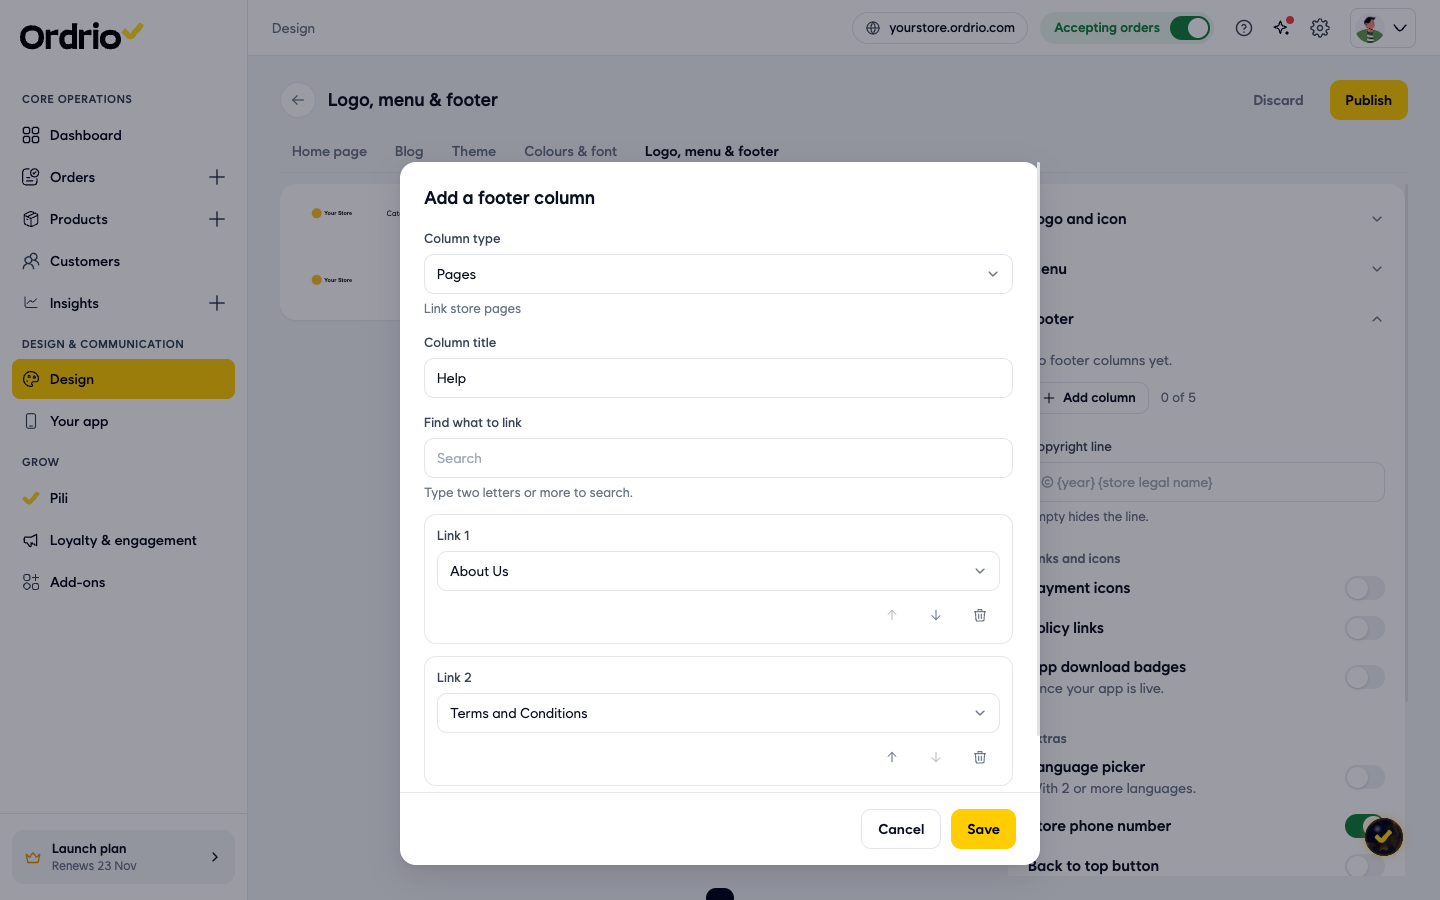
- Click Save. The column appears in the Footer list (for example "Help, Pages · 2 links") and in the footer preview.
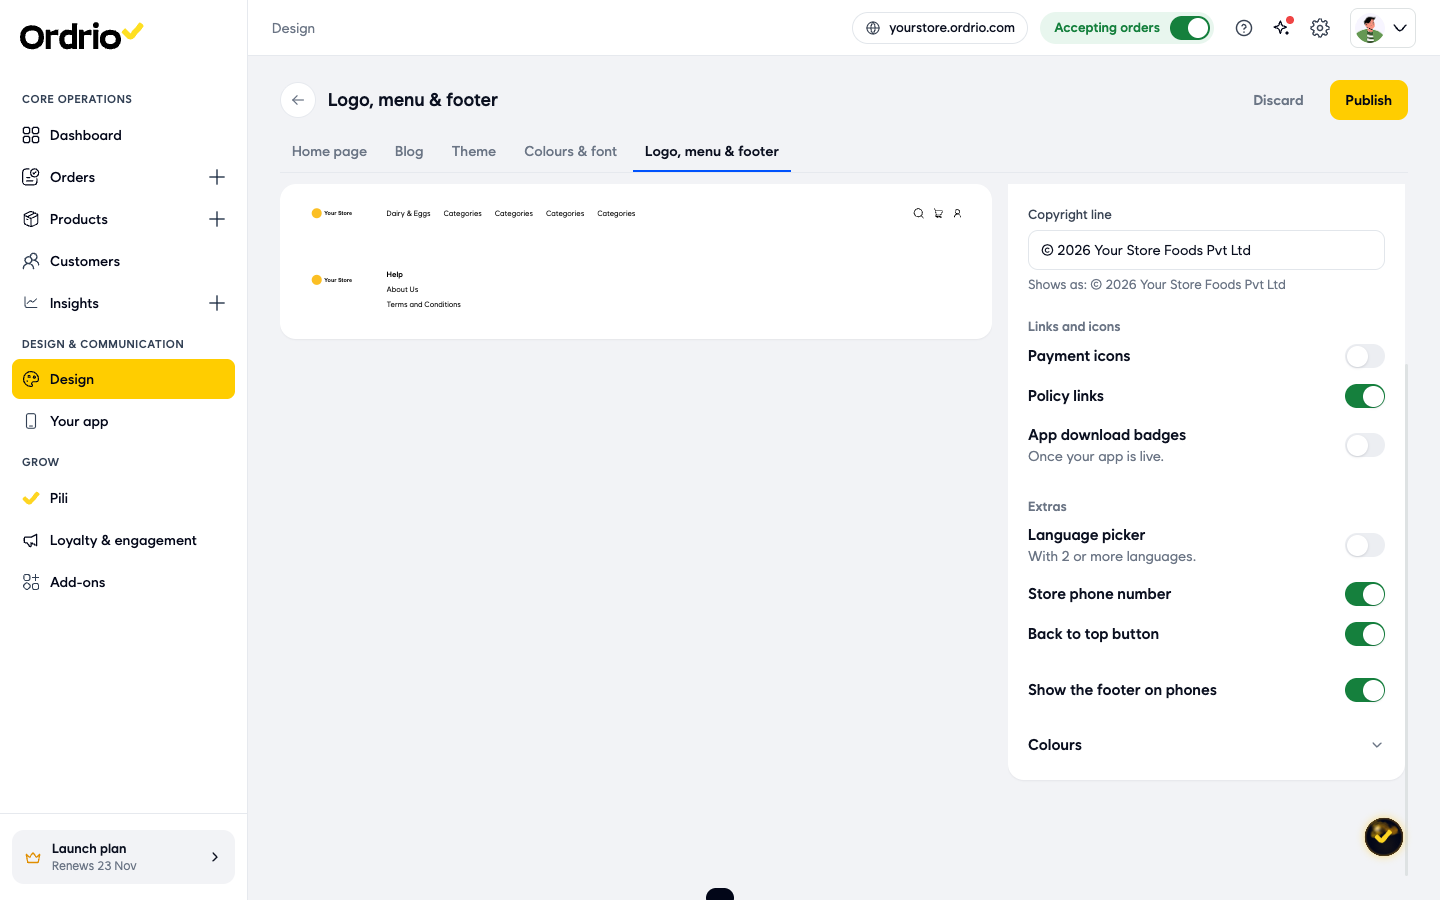
- In Copyright line, type the line you want at the bottom of the footer, for example "© 2026 Your Store Foods Pvt Ltd". Use your own business name. The line under the box shows how it will look. Leave the box empty to hide the copyright line.
- Turn on the extras you want. Under Links and icons:
- Payment icons: shows the payment methods you accept.
- Policy links: shows links to your policy pages.
- App download badges: shows links to download your app. These show once your app is live.
Under Extras:
- Language picker: lets customers change the language. It shows when your store has 2 or more languages.
- Store phone number: shows your store's phone number.
- Back to top button: adds a button that takes customers back to the top of the page.
Choose header and footer colours
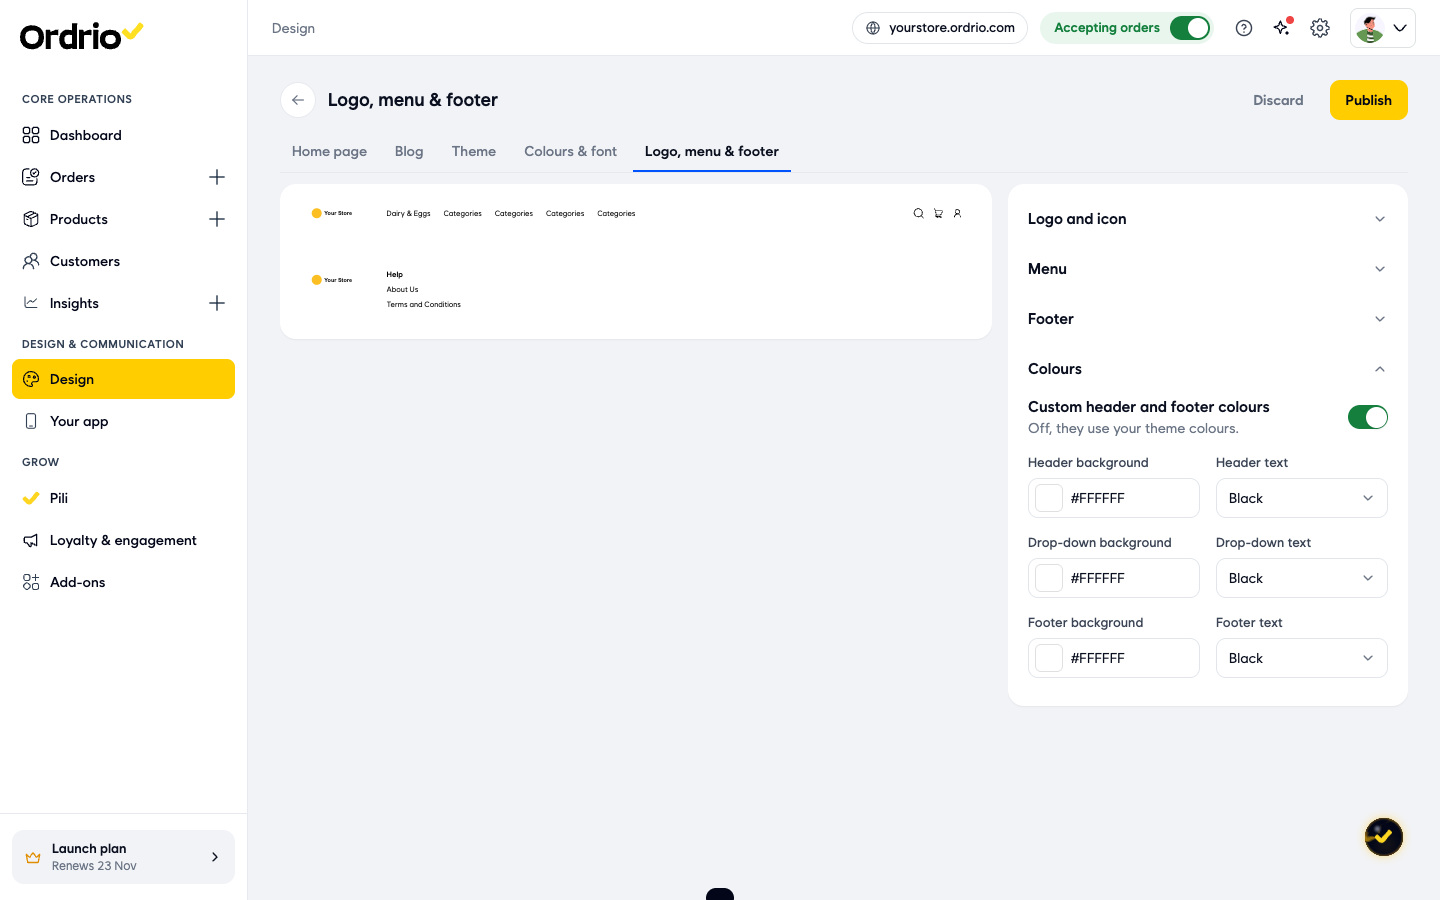
- Click Colours to open it. Your header and footer use your theme colours unless you turn on Custom header and footer colours. When it is on, you can set:
- Header background: the colour behind your logo and menu. Click the colour box to pick a colour, or type a colour code like #FFFFFF.
- Header text: the colour of your menu links, for example Black, White or Theme text colour.
- Drop-down background and Drop-down text: the colours of the drop-down lists in your header.
Publish your changes
Open your store and check the header and footer on a computer and on a phone. You can click Preview store on the Design page to open your store in a new tab.
Good to know
- Nothing changes on your store until you click Publish. Saving a menu link or a footer column only updates the preview.
- To throw away changes you have not published, click Discard next to Publish. It happens straight away, without asking you to confirm.
- The menu holds up to 5 links and the footer up to 5 columns.
- Logo and browser tab icon images can be up to 1 MB each.
- The values in the screenshots, such as "Your Store", "Help" and "© 2026 Your Store Foods Pvt Ltd", are only examples. Use your own store name, links and business name.
- The header and footer are the same on every page of your store, so you set them once.
Related
- Changing your store theme
- Setting your brand colours and font
- Editing your home page
- Setting up your policy pages