هذا المقال غير متوفر بالعربية بعد، لذلك نعرضه بالإنجليزية.
دليل استخدام
Pointing your domain to Ordrio (BigRock, Cloudflare, GoDaddy, Hostinger)
Add two A records (@ and www, 95.211.81.166) where your domain's DNS is managed so your own domain opens your Ordrio store.
Point your own domain (for example yourbrand.com) to your Ordrio store by adding two records where your domain's DNS is managed. Custom domains are supported on Launch plans and above. Free subdomains end with .ordrio.com and need no DNS changes.
This guide shows the steps for BigRock and Cloudflare with screenshots, and for GoDaddy and Hostinger in short steps with a link to their own help page.
Before you start
- Connect the domain in your Ordrio admin panel first: open nadi.ordrio.com (your Ordrio admin panel), go to Settings > Website address and click Connect a domain. See Connecting your store domain.
- Find out where your domain's DNS is managed. Usually it's the company you bought the domain from. If your domain's nameservers point to another service (for example Cloudflare or your hosting company), add the records there, not where you bought the domain.
The two records to add
- Record 1: type A, name @, value 95.211.81.166
- Record 2: type A, name www, value 95.211.81.166
@ means the domain itself (yourbrand.com). www is for www.yourbrand.com.
BigRock
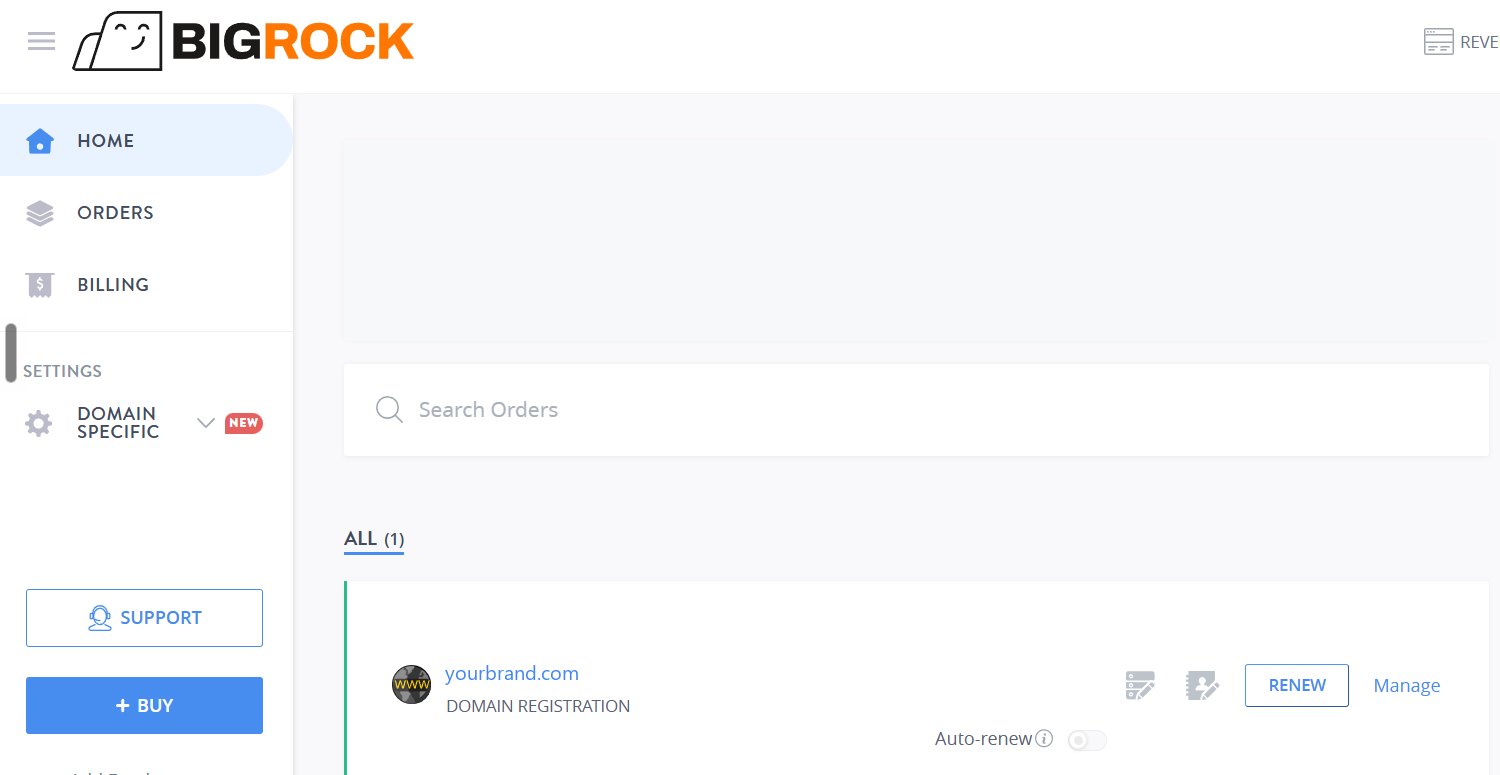
- Log in to BigRock. On Home, click Manage next to your domain.
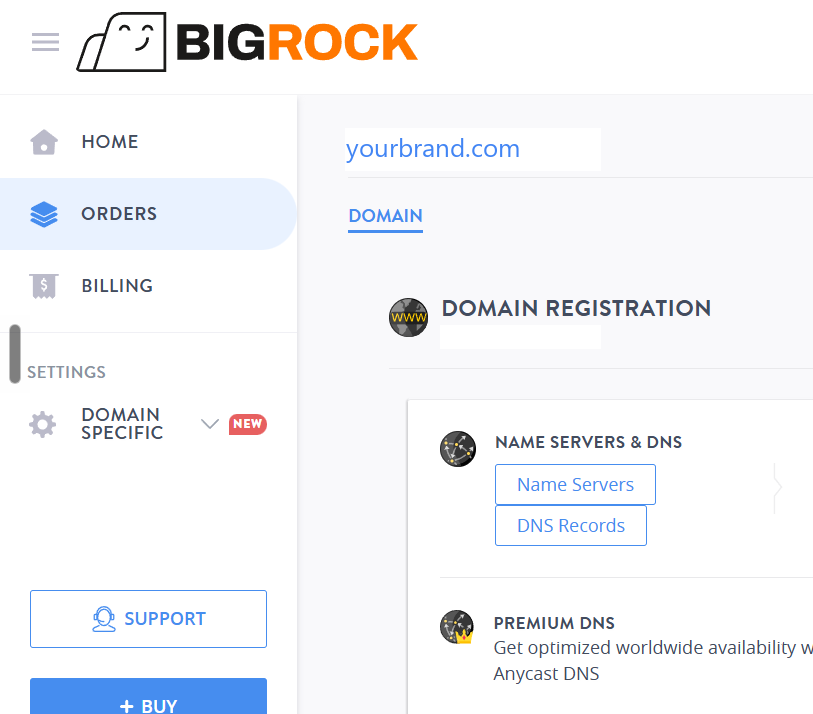
- Under Name Servers & DNS, click DNS Records.
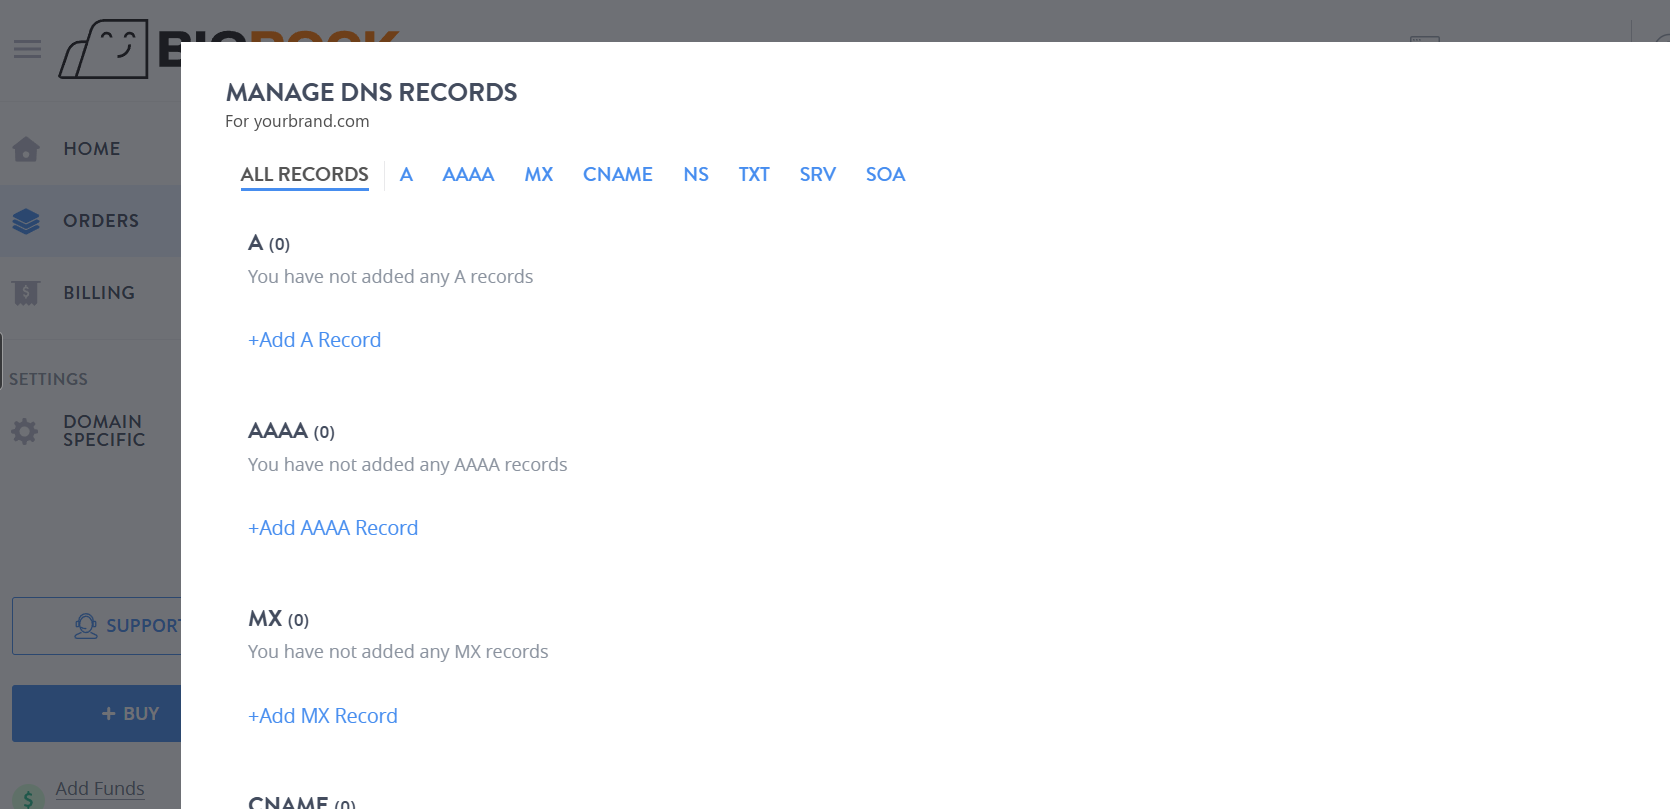
- The Manage DNS Records window opens. Under A, click +Add A Record.
- In Domain/Sub-domain, type @. In IPv4 Address, type 95.211.81.166. Click Save Record.
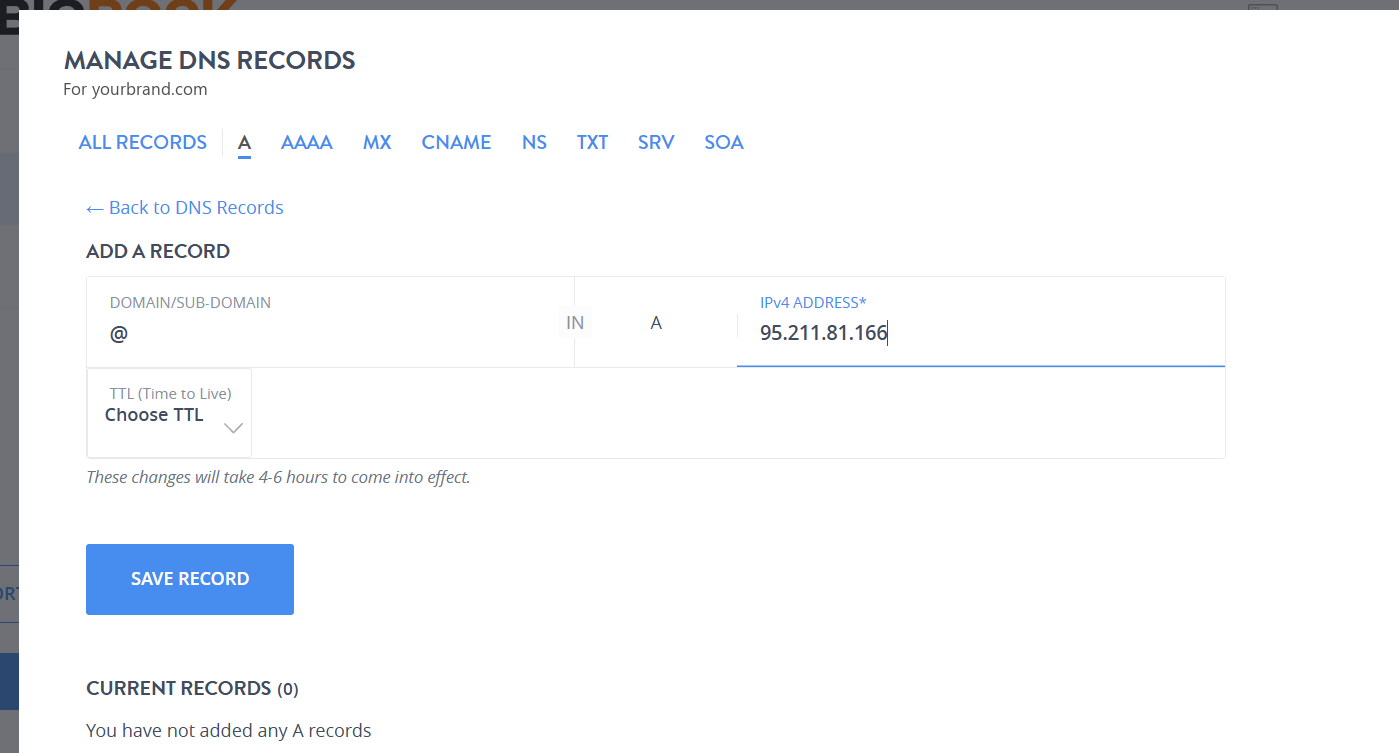
- Click +Add A Record again. Type www in Domain/Sub-domain and 95.211.81.166 in IPv4 Address. Click Save Record.
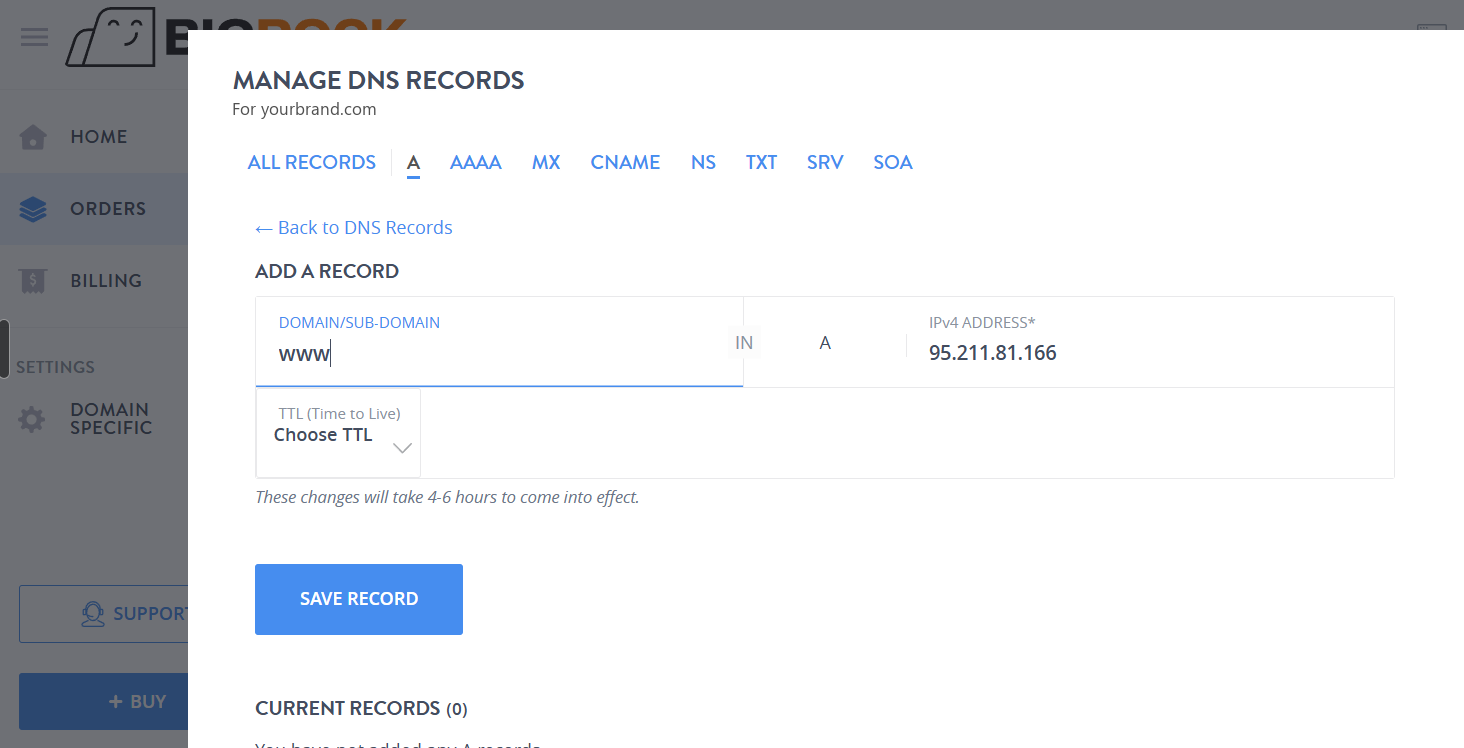
Both records now appear under Current Records. BigRock says changes can take 4-6 hours.
Cloudflare
- Log in to Cloudflare, open your domain, then go to DNS > Records. Click Add record.
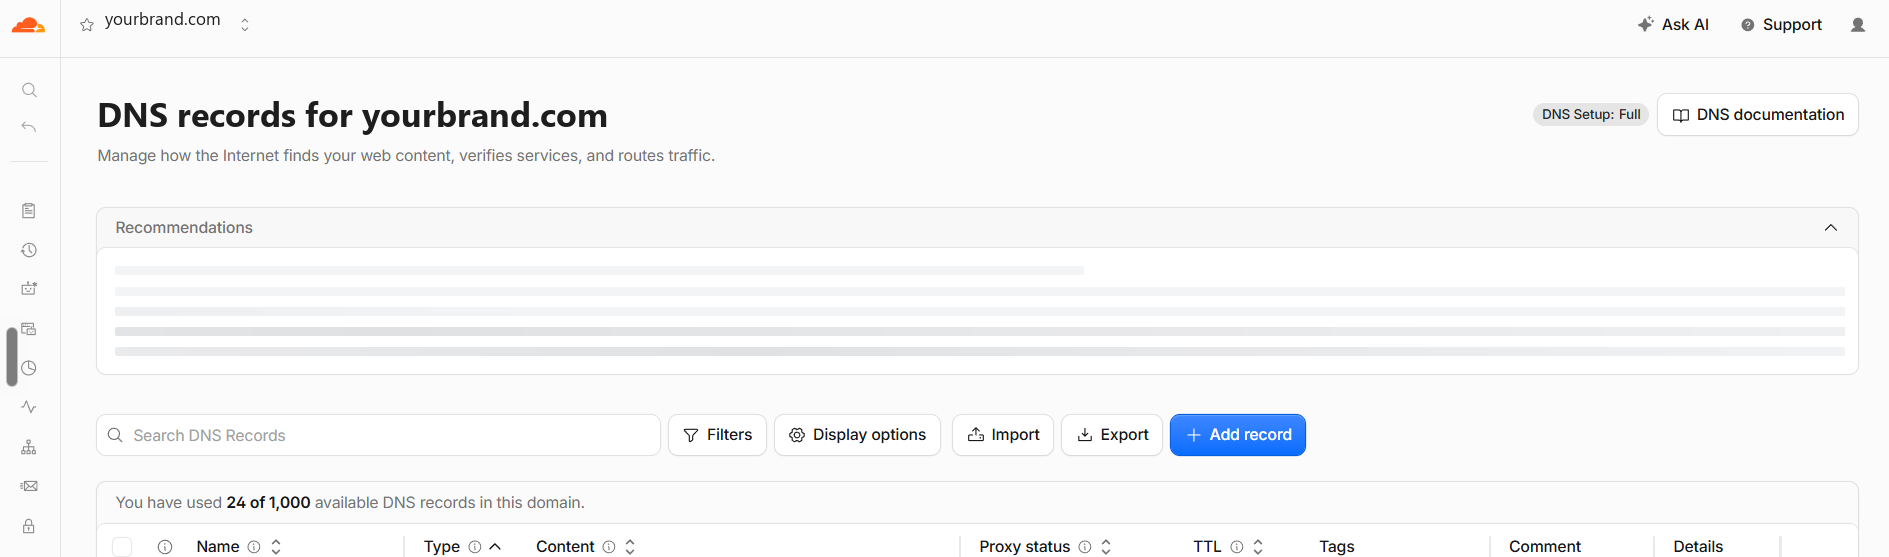
- Set Type to A, Name to @ and IPv4 address to 95.211.81.166. Turn Proxy status off so it shows DNS only (grey cloud). Leave TTL on Auto. Click Save.
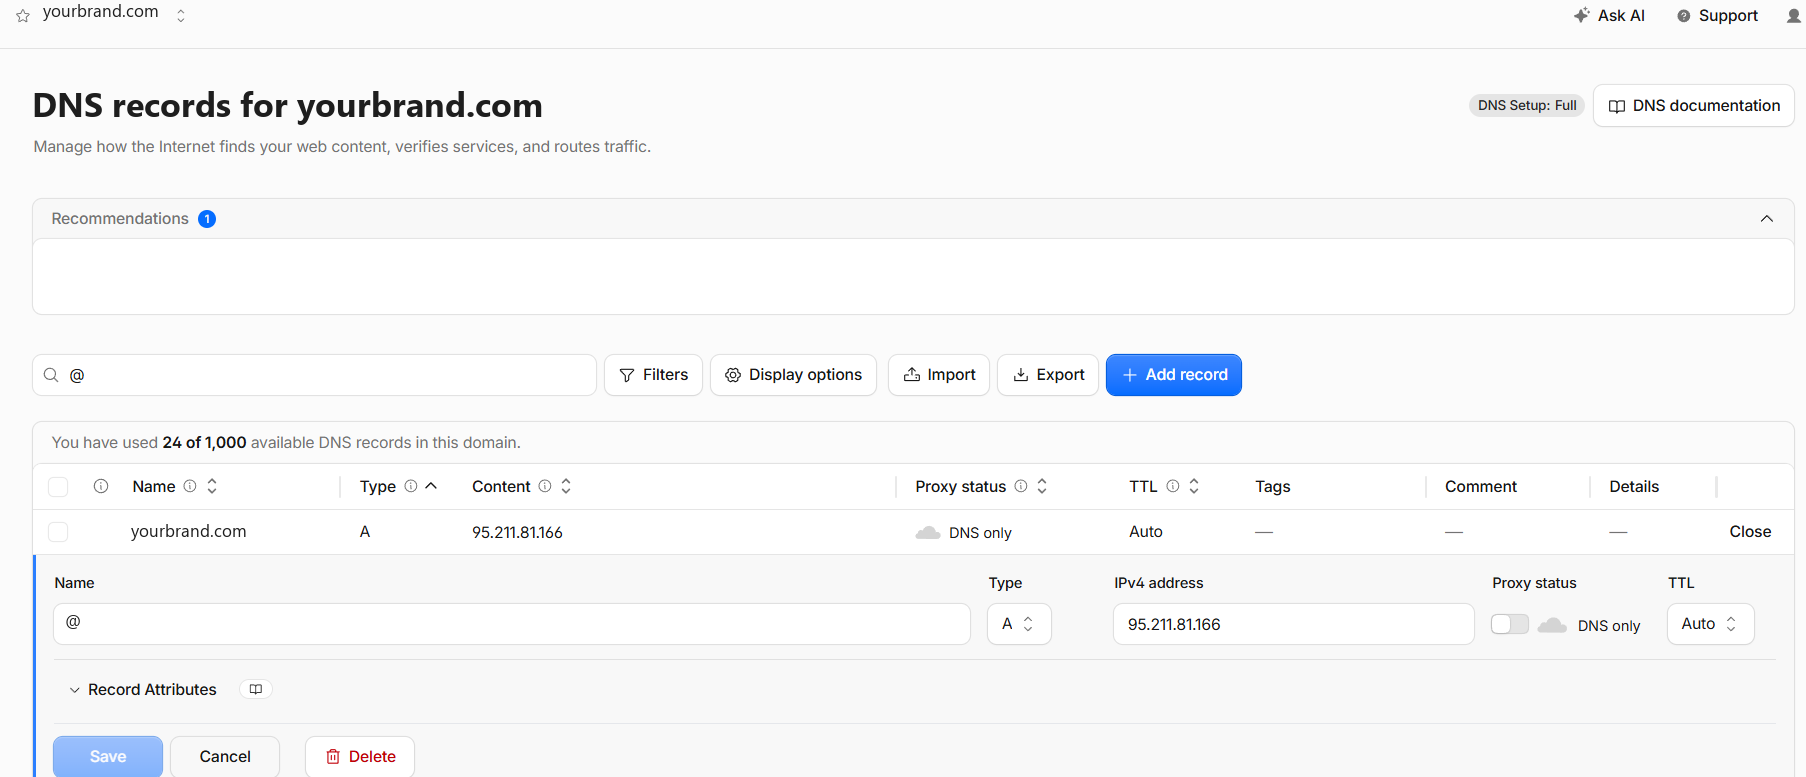
- Click Add record again. Set Type to A, Name to www and IPv4 address to 95.211.81.166, with DNS only. Click Save.

Keep both records on DNS only (grey cloud), so Ordrio can set up the secure (https) connection for your domain.
GoDaddy
- Log in to GoDaddy. Go to My Products, find your domain and click DNS.
- Click Add New Record. Choose type A, name @, value 95.211.81.166, and click Save.
- Add a second record: type A, name www, value 95.211.81.166, and click Save.
GoDaddy's own steps: Add an A record.
Hostinger
- Log in to Hostinger. Click Domains in the sidebar and open your domain.
- Open DNS / Nameservers and the DNS records tab.
- Add a record: type A, name @, points to 95.211.81.166. Then add another: type A, name www, points to 95.211.81.166.
Hostinger's own steps: How to manage DNS records at Hostinger.
Check the connection
Go back to the Ordrio window and click Check. If it shows Check failed, make sure the type, name and value match exactly, wait a few minutes and click Check again. Some providers take a few hours.
If you closed the window, click Connect a domain in Settings > Website address, type the same domain and check again.
Good to know
- If there is already an A record for @, edit it to use 95.211.81.166 instead of adding a second one.
- If www already has a CNAME record, delete it, then add the A record for www.
- Don't change the NS, MX or TXT records. Your email and other services keep working.
Related
- Connecting your store domain