هذا المقال غير متوفر بالعربية بعد، لذلك نعرضه بالإنجليزية.
دليل استخدام
Delivery routes: create routes and assign them to delivery persons and new signups
Create delivery routes with pickup points, give each route to a delivery person, and put new subscribers on the right route so their orders reach that rider.
Delivery routes group your subscribers' addresses so one rider can deliver them all from one pickup point. You add pickup points and routes, give each route to a delivery person, and put new subscribers on the right route so their orders reach that rider.
Before you start
Routes are part of the Subscription add-on, and riders come from the Delivery App Basic add-on. Set these up first.
- Open manage.ordrio.com (your Ordrio admin panel) and log in.
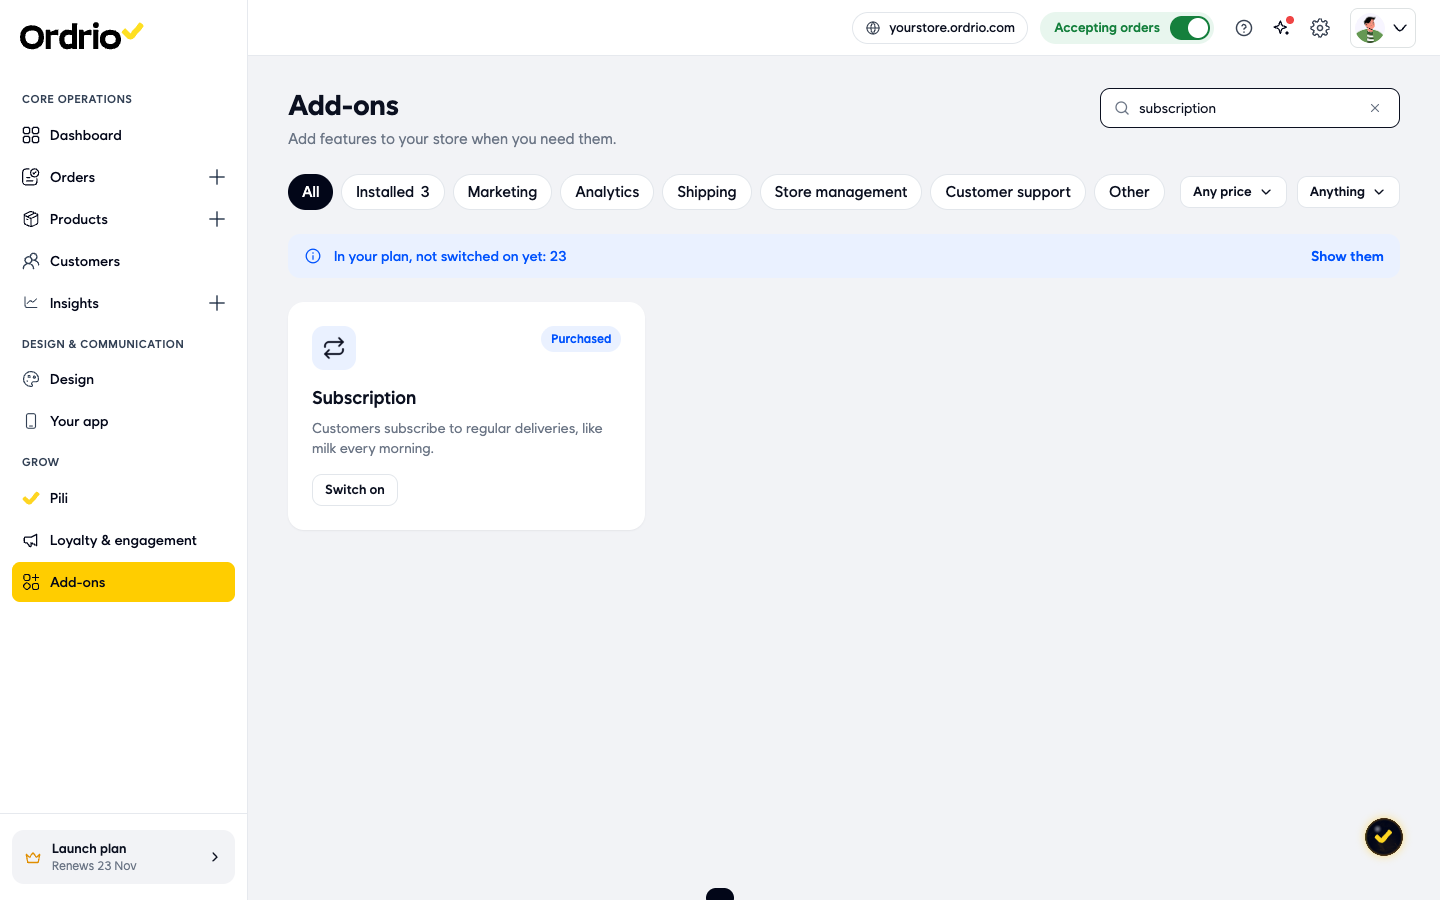
- In the menu, click Add-ons. Type Subscription in Search add-ons, then click Switch on on the Subscription card.
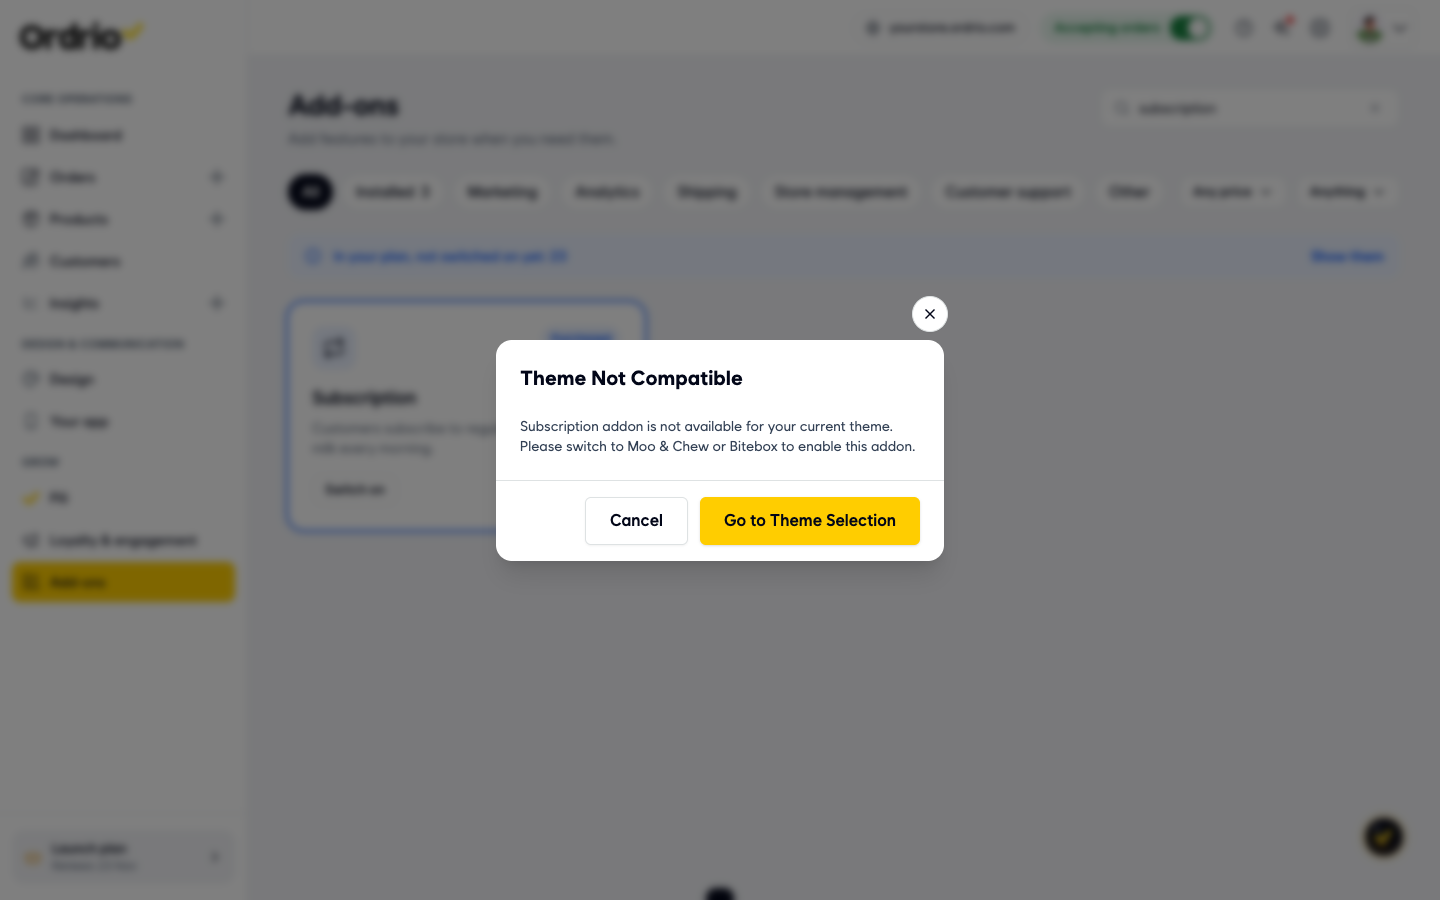
- If your store uses a theme that does not support subscriptions, Ordrio shows Theme Not Compatible. The Subscription add-on works with the Moo & Chew and Bitebox themes. Click Go to Theme Selection to change your theme, or Cancel to keep your current theme for now.
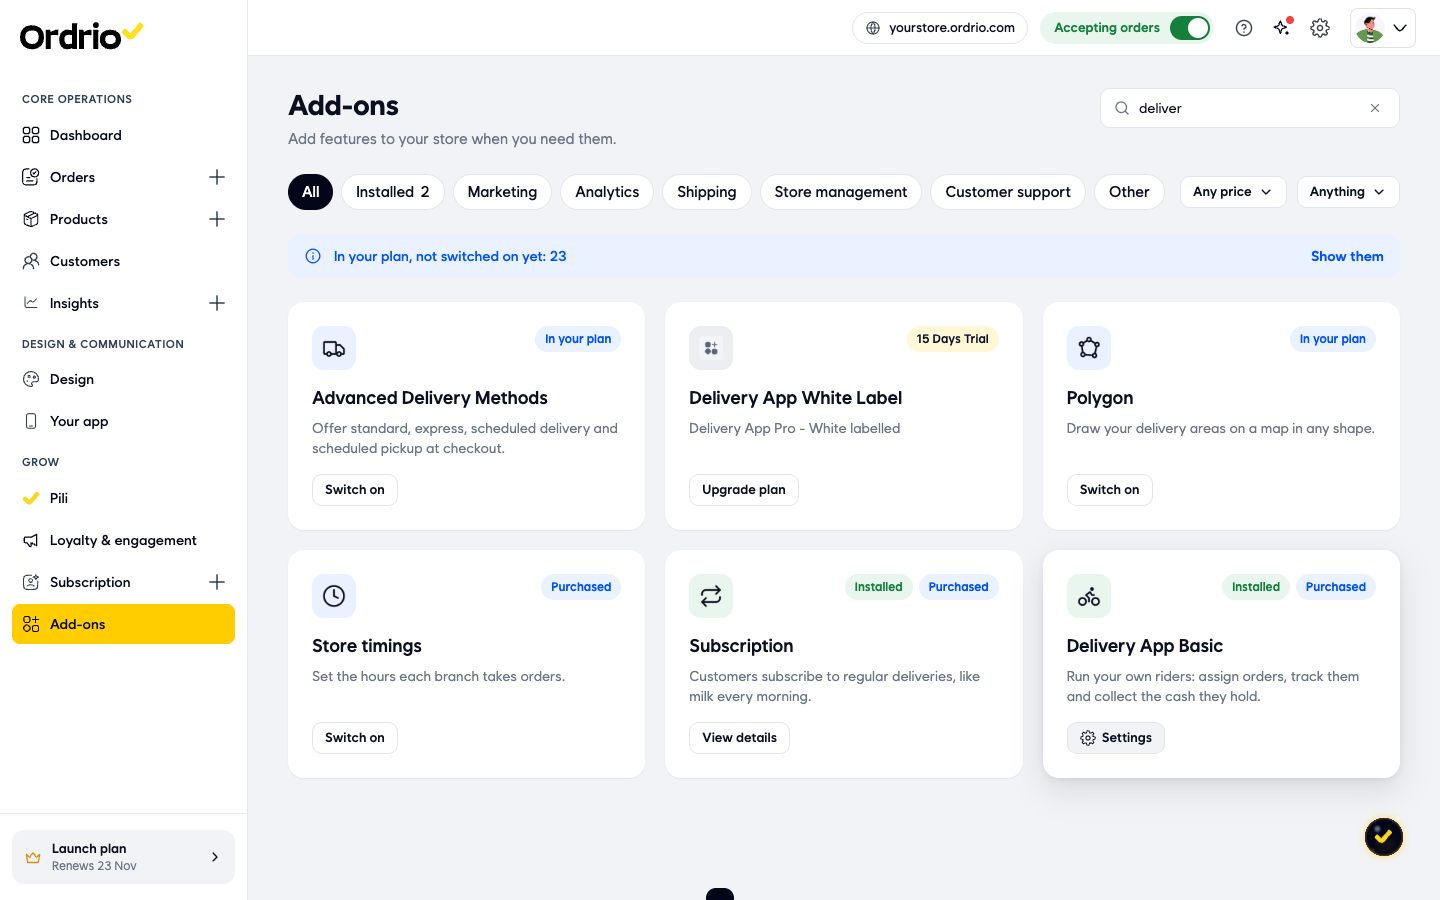
- Still in Add-ons, find Delivery App Basic ("Run your own riders: assign orders, track them and collect the cash they hold.") and click Switch on. When it is on, the card shows Installed and a Settings button.
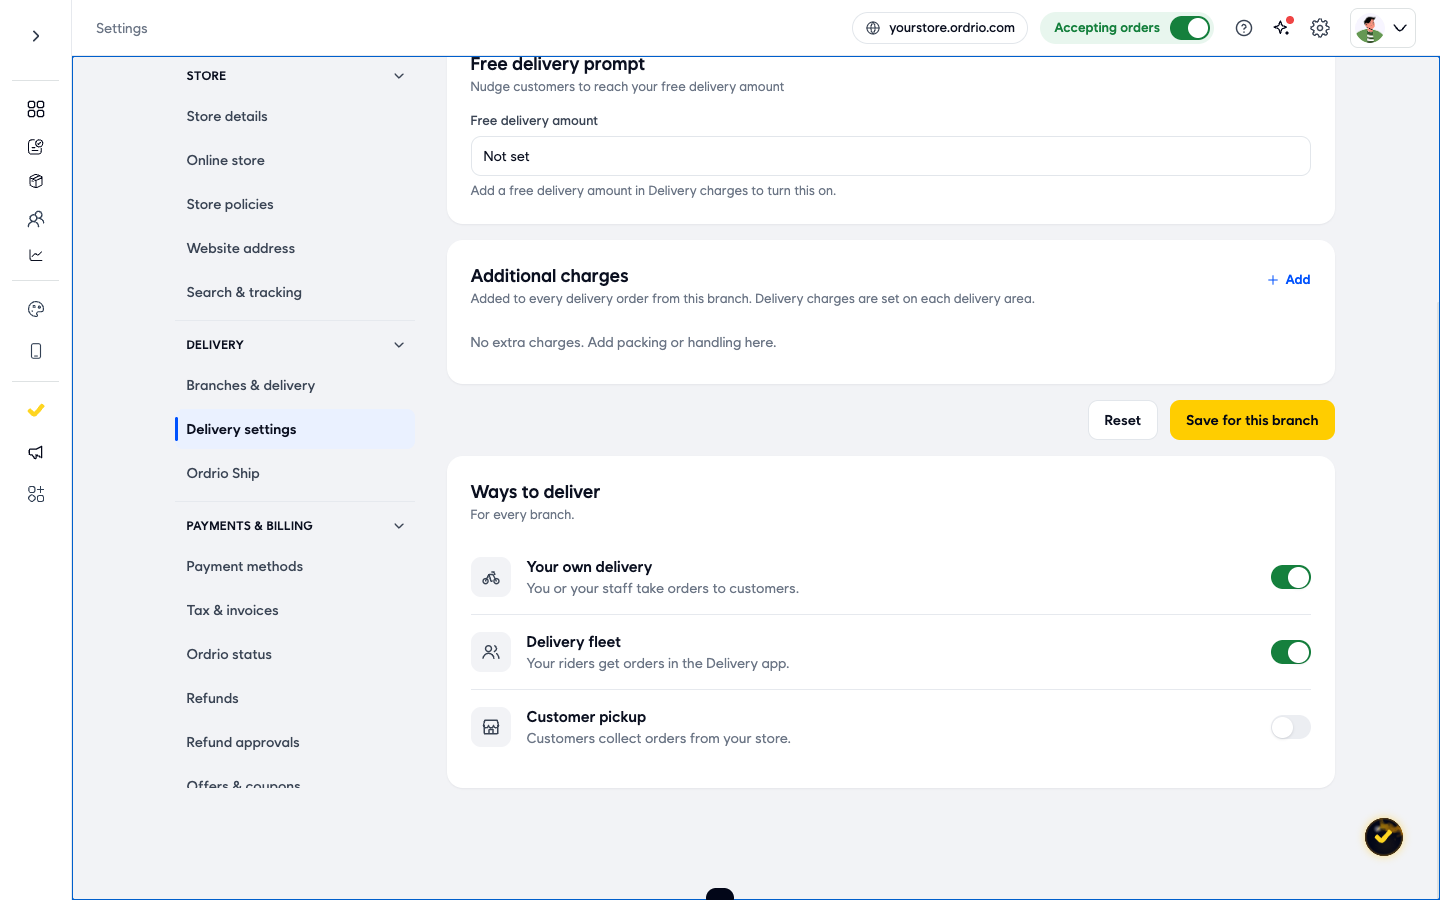
- Click the settings icon at the top right, then Delivery settings. Under Ways to deliver, switch on Your own delivery (you or your staff take orders to customers) and Delivery fleet (your riders get orders in the Delivery app). The Delivery fleet switch only shows once Delivery App Basic is on.
Invite your delivery people
A route is given to a rider. Riders are staff members with the Delivery Partner role.
- Click the settings icon at the top right, then Staff & roles.
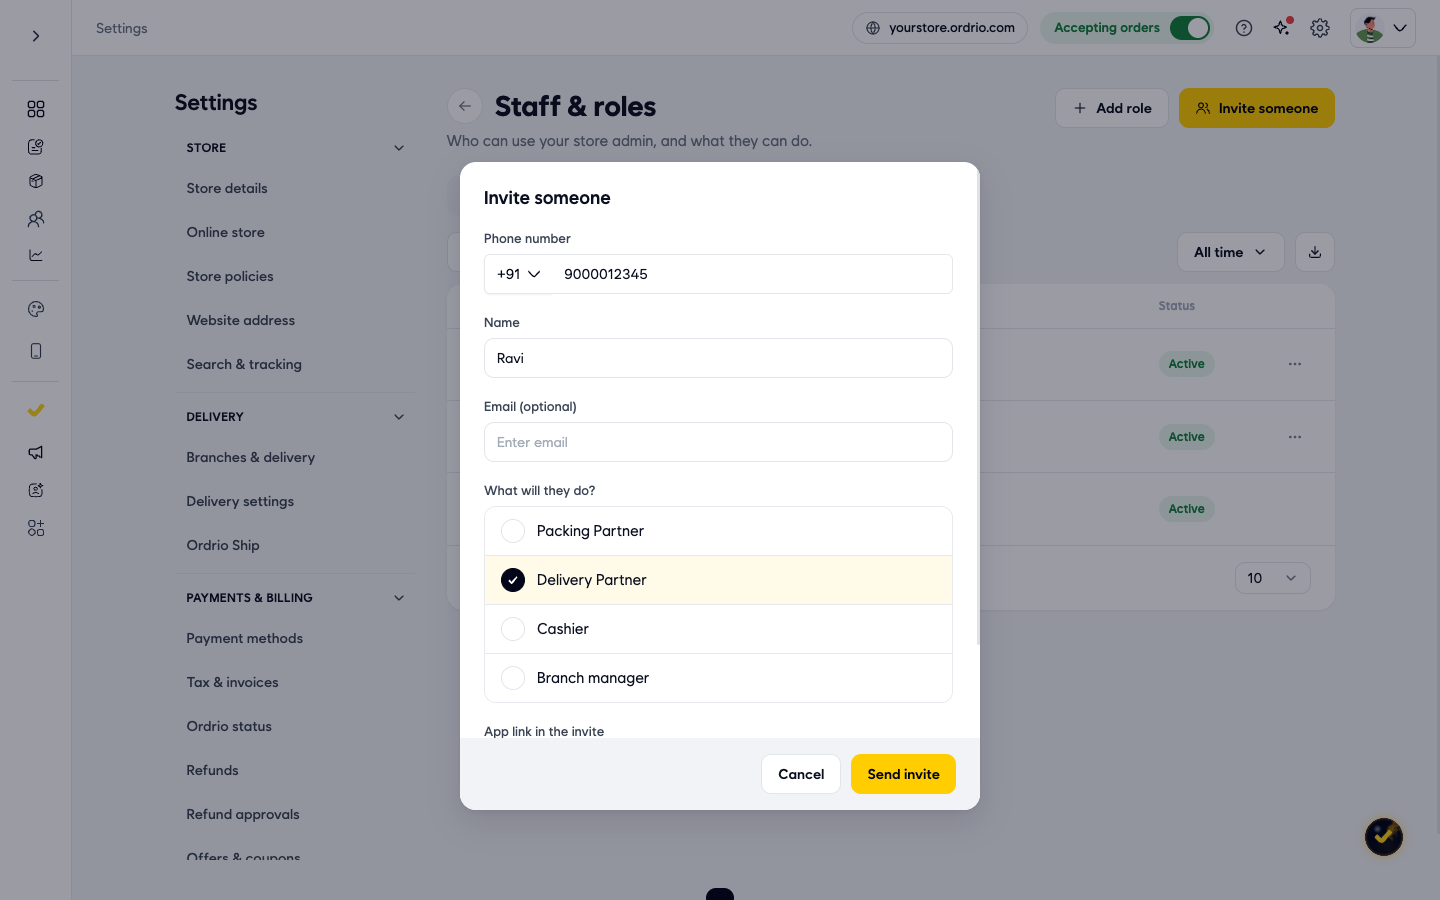
- Click Invite someone and fill in the form:
- Phone number: your rider's mobile number. Type your rider's own number, not the example shown in the picture.
- Name: the rider's name, for example "Ravi".
- Email (optional): the rider's email, if you have it.
- What will they do?: choose Delivery Partner. The other choices are Packing Partner, Cashier and Branch manager.
- App link in the invite: keep Store's delivery app, or choose Custom link. Riders install the app from this link and sign in.
- Click Send invite. The rider is added to the People list with the role Delivery Partner and the label Pending until they accept the invite.
Add a pickup point
A pickup point is where riders collect the day's orders, like your store or a hub. Every route needs one.
- In the menu, click Subscription, then Deliveries. This page shows your Routes, Riders and Pickup points, with a count for each and for Routes with no rider.
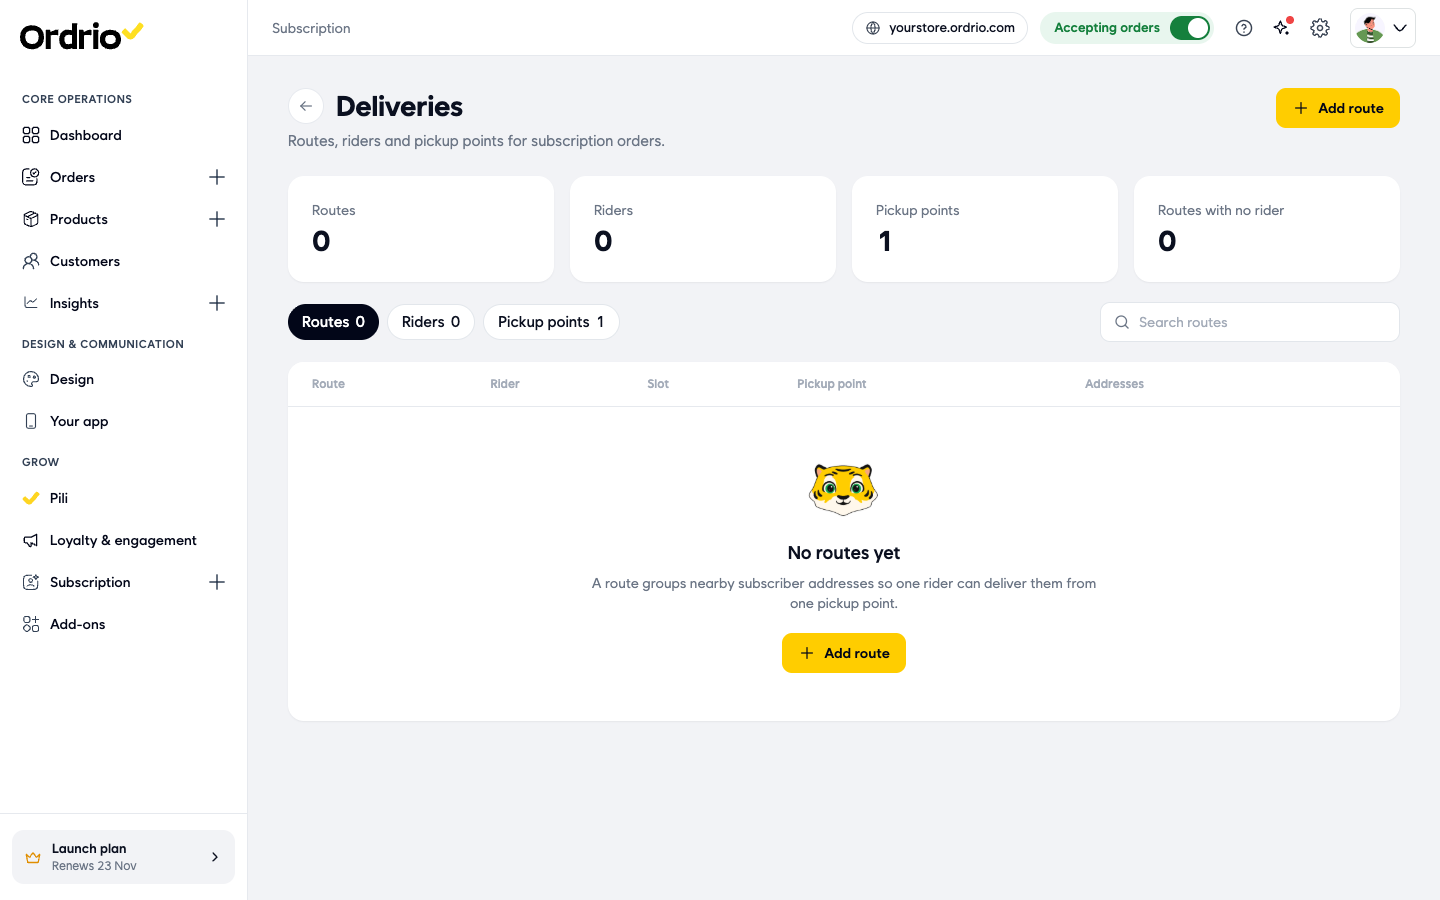
- Click the Pickup points tab, then Add pickup point.
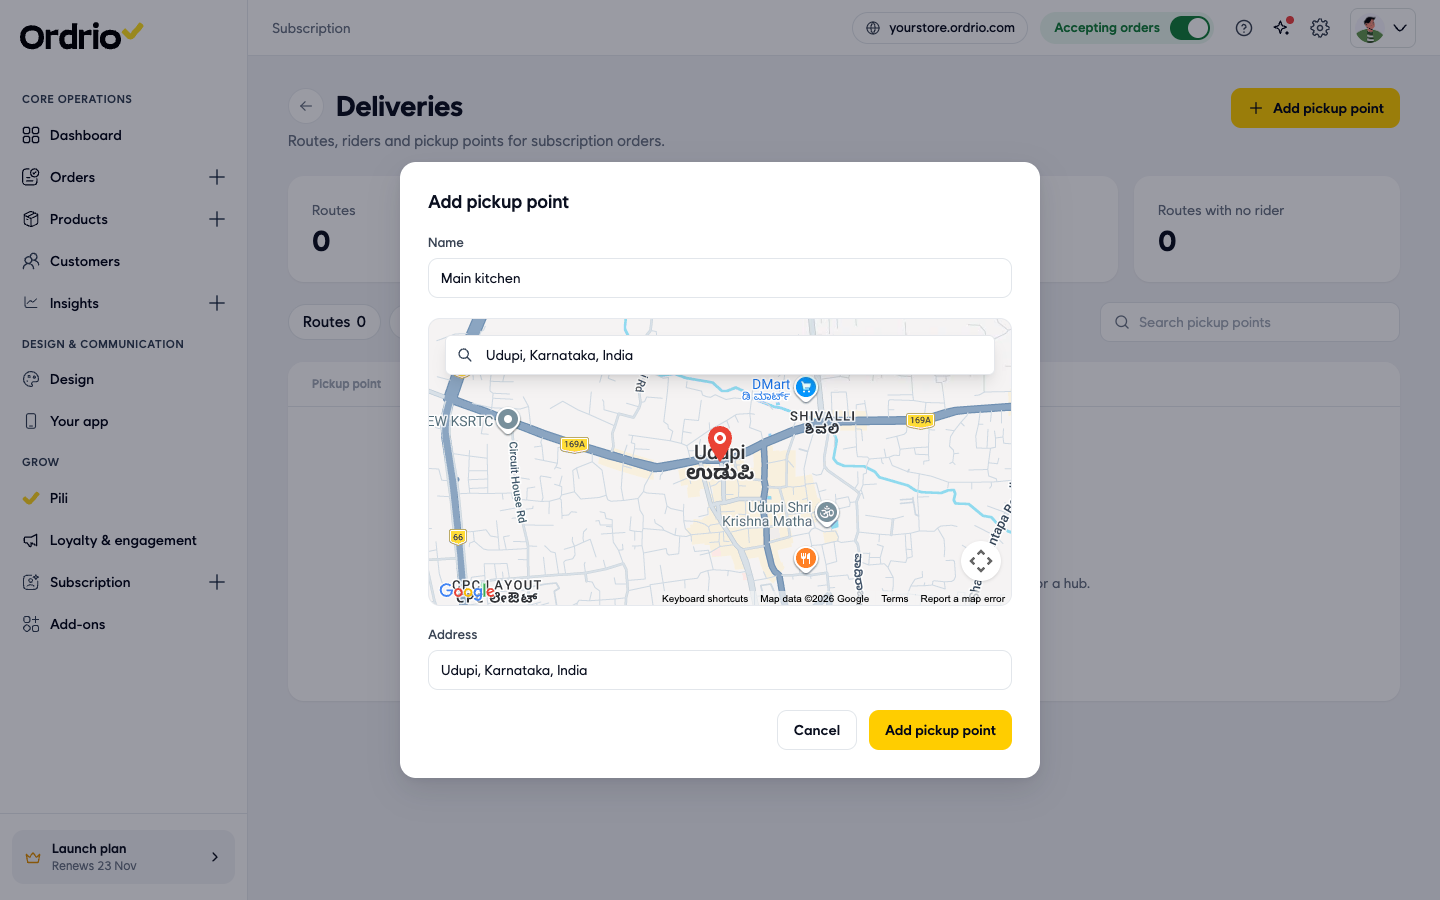
- Fill in the form:
- Name: a short name your riders will know, for example "Main kitchen".
- Search a place: type your address and pick it from the list. The map moves to that place.
- Address: filled in from your search. You can change the text if needed.
- Click Add pickup point.
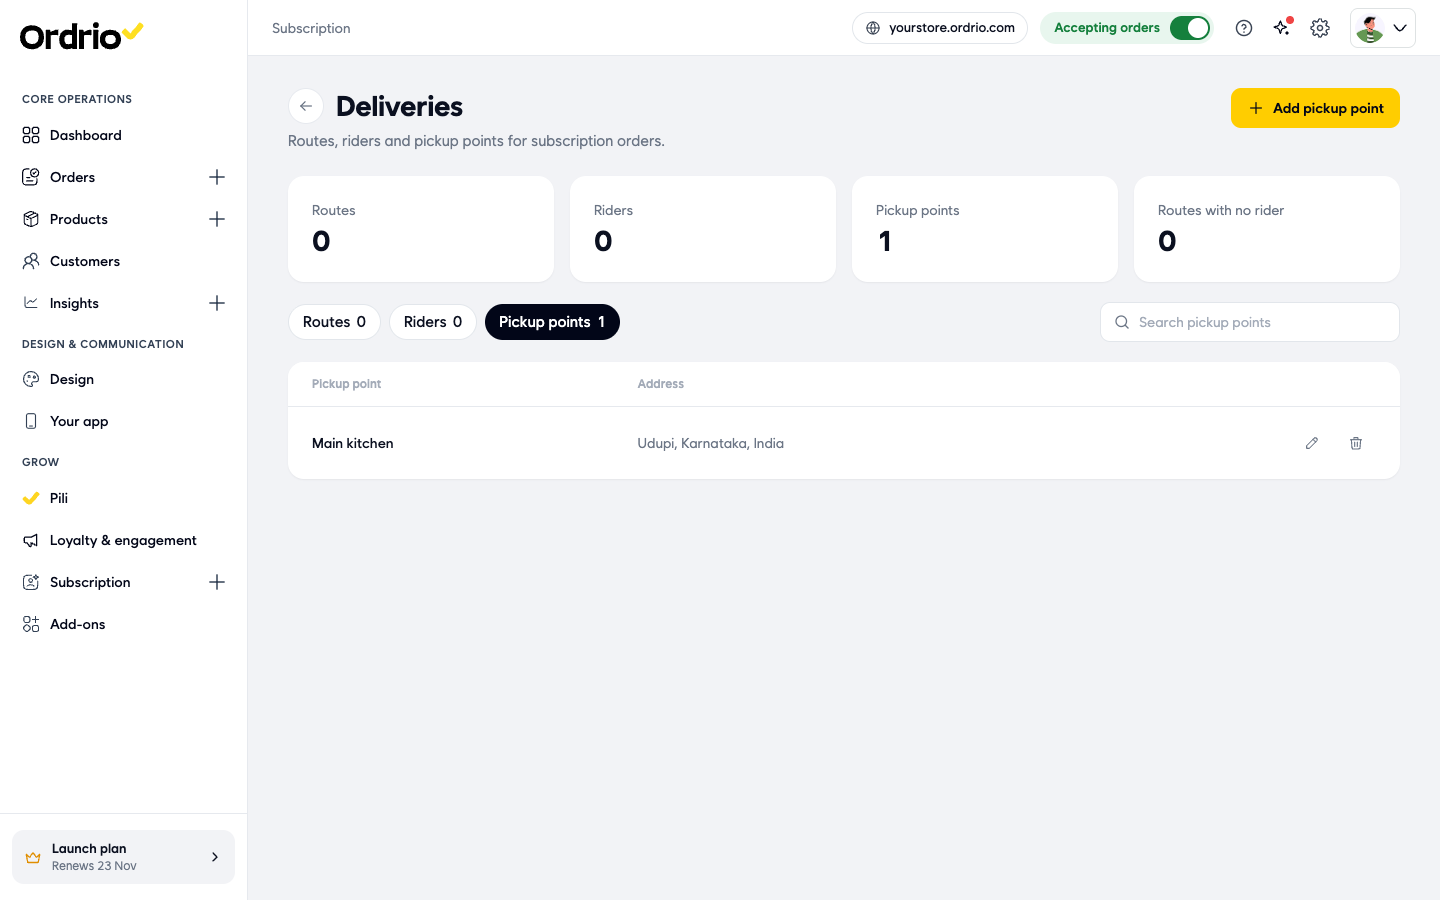
The pickup point now shows in the Pickup points list with its address, and Edit and Delete buttons.
Create a route
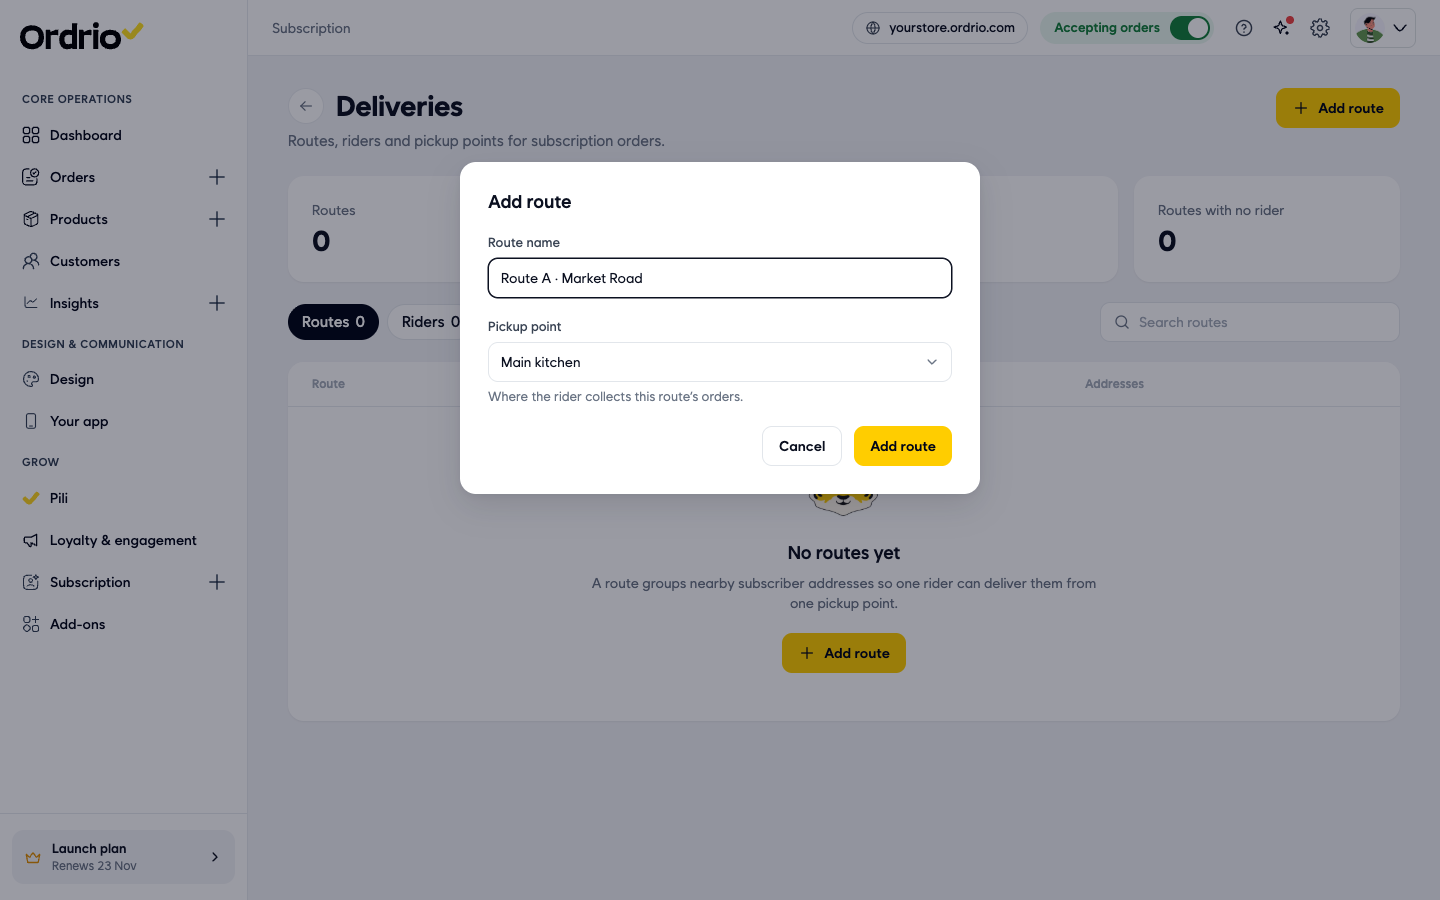
- On the Deliveries page, click the Routes tab, then Add route.
- Fill in the form:
- Route name: a name that tells you where the route goes, for example "Route A · Market Road".
- Pickup point: choose where the rider collects this route's orders.
- Click Add route.
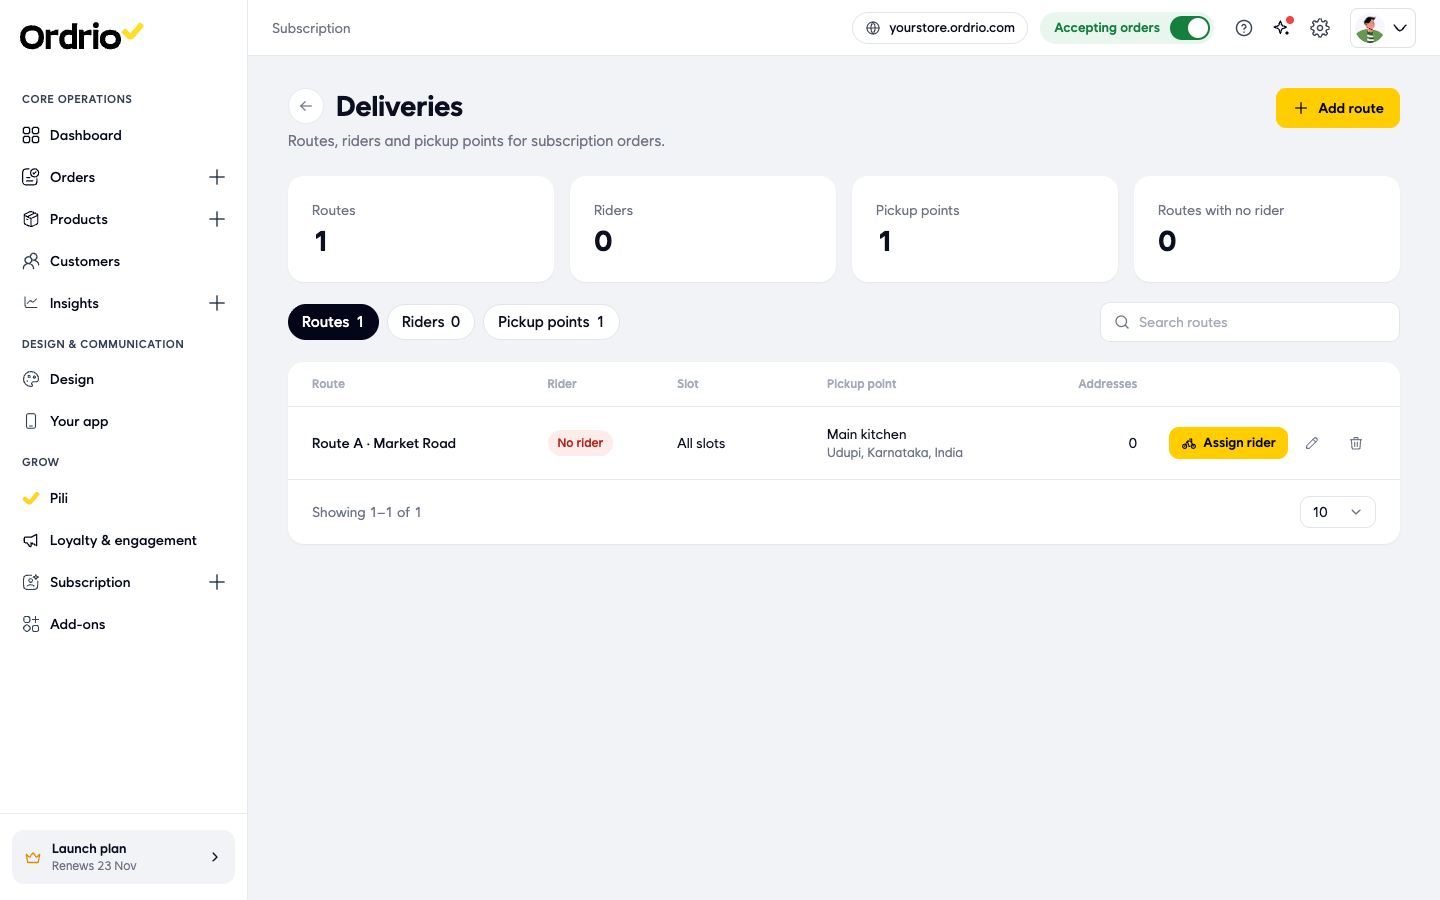
The route shows in the Routes list with the columns Route, Rider, Slot, Pickup point and Addresses. A new route shows No rider, All slots and 0 addresses. Each row has Assign rider, Edit and Delete buttons. Edit lets you change the route name and pickup point, then Save changes.
Give the route to a delivery person
- On the Routes tab, click Assign rider on the route.
- In Rider, choose the delivery person. Every subscription on this route gets this rider. Pinned subscriptions keep their own rider.
- Click Save rider.
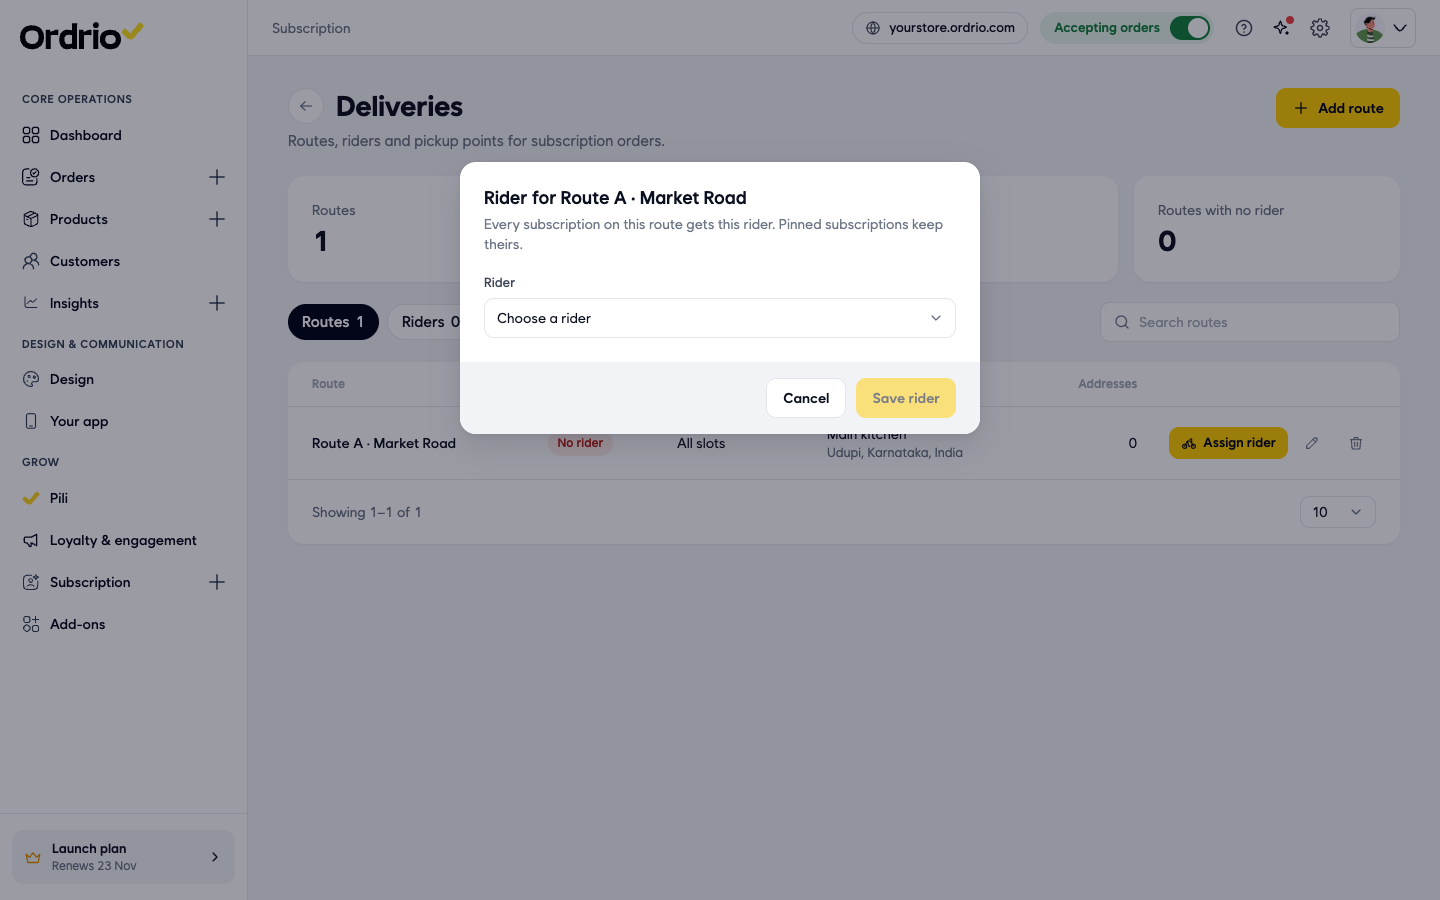
A rider whose invite still shows Pending in Staff & roles is not in the Rider list yet. If the list is empty, check that your rider has accepted the invite.
Choose how new subscriptions find a rider
This setting decides which rider gets each new subscription's orders.
- In the menu, click Subscription, then Settings.
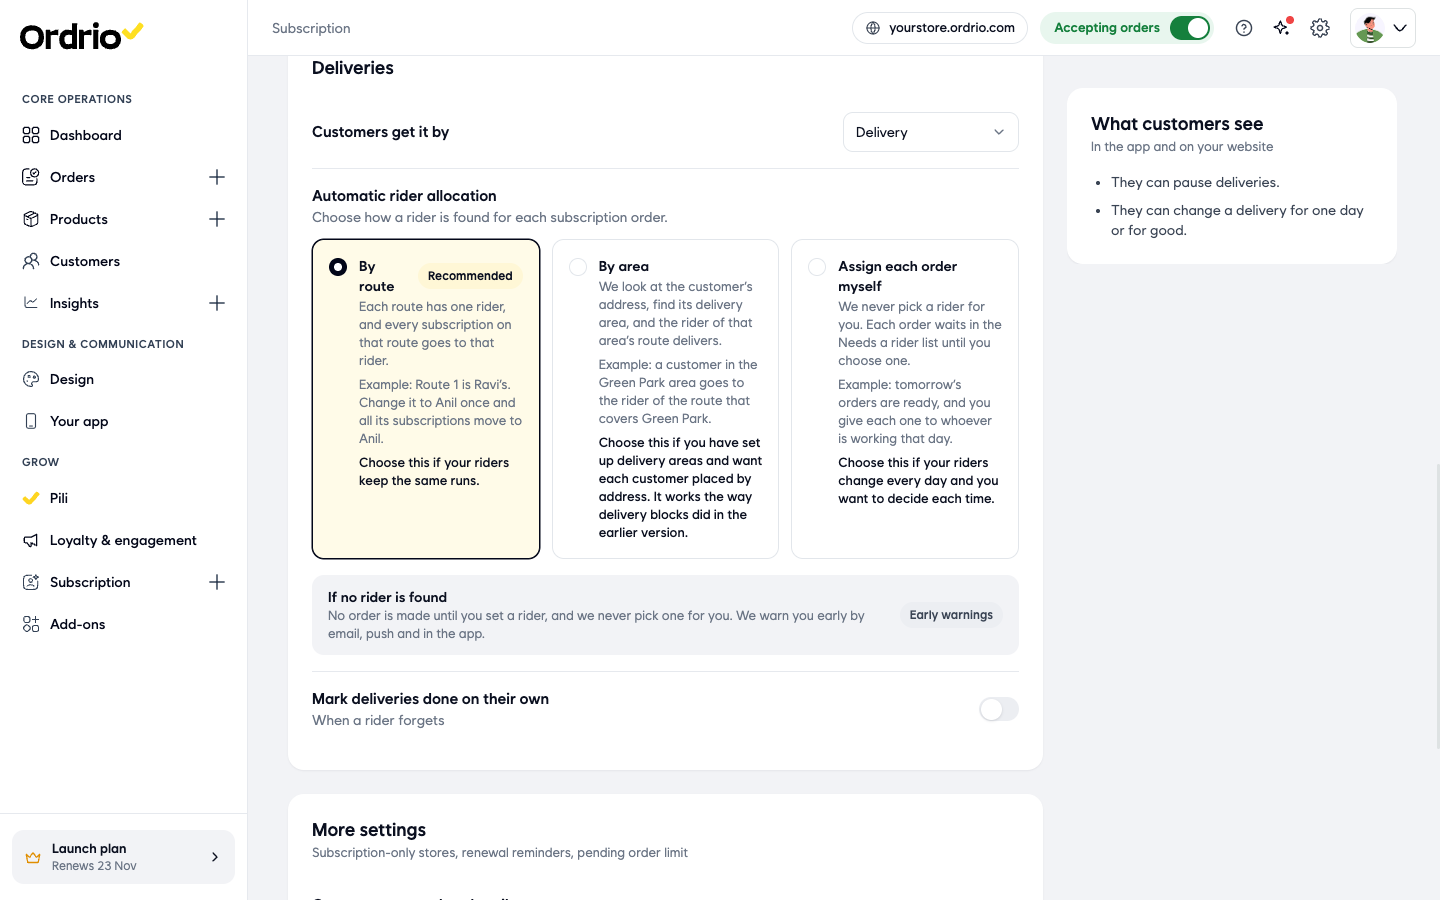
- Scroll to Deliveries and find Automatic rider allocation. Choose one:
- By route (recommended): each route has one rider, and every subscription on that route goes to that rider. If you change the route's rider, all its subscriptions move to the new rider. Choose this if your riders keep the same runs.
- By area: Ordrio looks at the customer's address, finds its delivery area, and the rider of that area's route delivers. Choose this if you have set up delivery areas and want each customer placed by address.
- Assign each order myself: Ordrio never picks a rider. Each order waits in the Needs a rider list until you choose one. Choose this if your riders change every day.
Your choice is saved as soon as you click it. There is no separate save button.
Put new subscribers on a route
When a customer subscribes and is not on a route yet, they show in a separate list so you can place them.
- In the menu, click Subscription, then Customers. The Subscribers page opens.
- Click the No route yet tab. It shows each subscriber's name, phone, email and delivery address.
- Tick the subscribers who belong on the same route, then click Put on route.
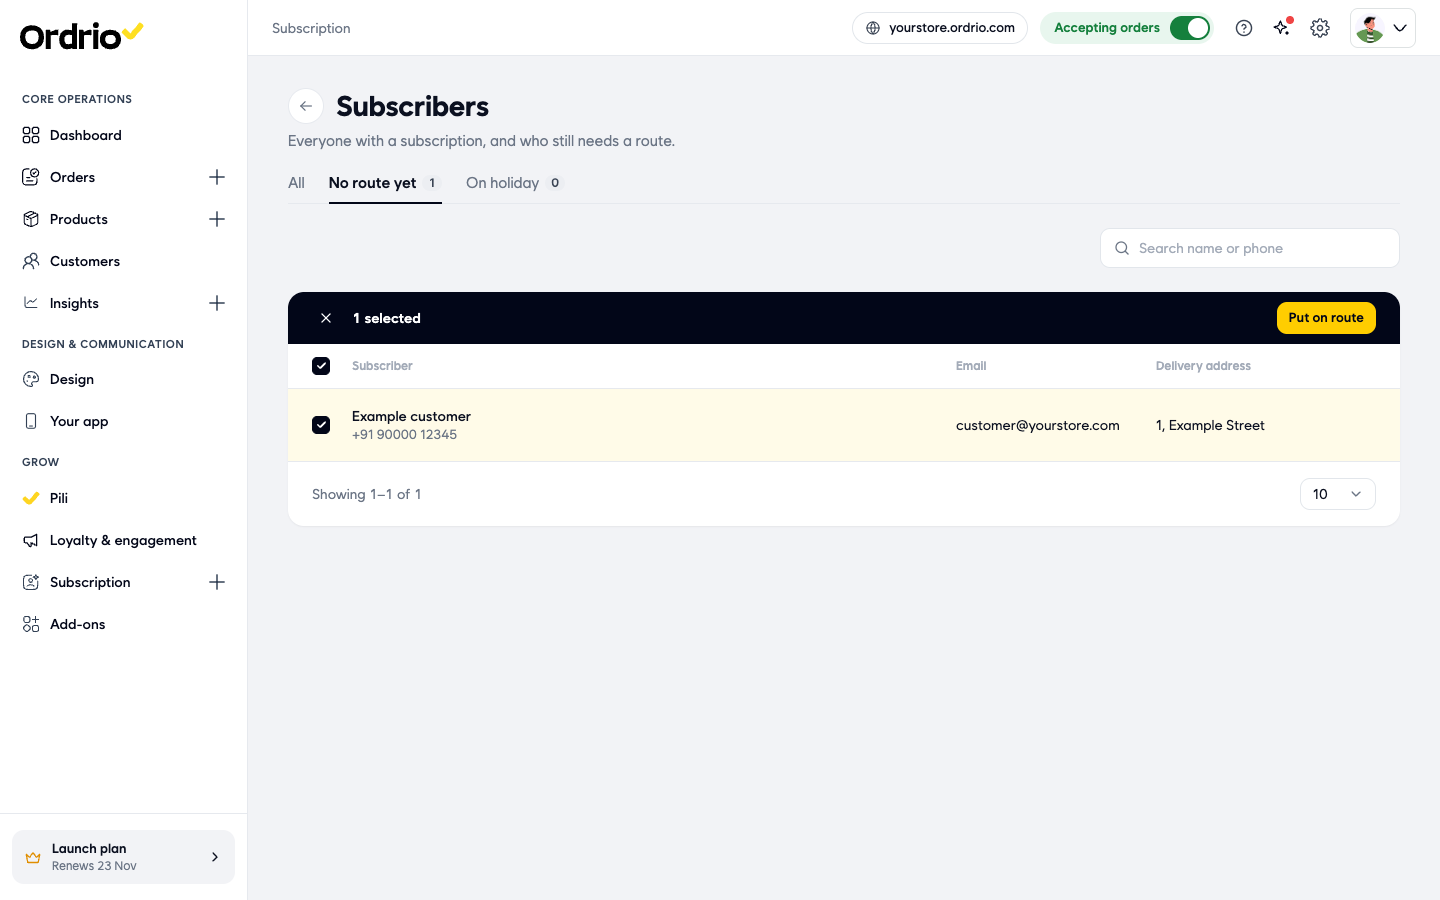
- In Route, choose the route. The rider on this route will deliver the selected subscriptions.
- Click Put on route.
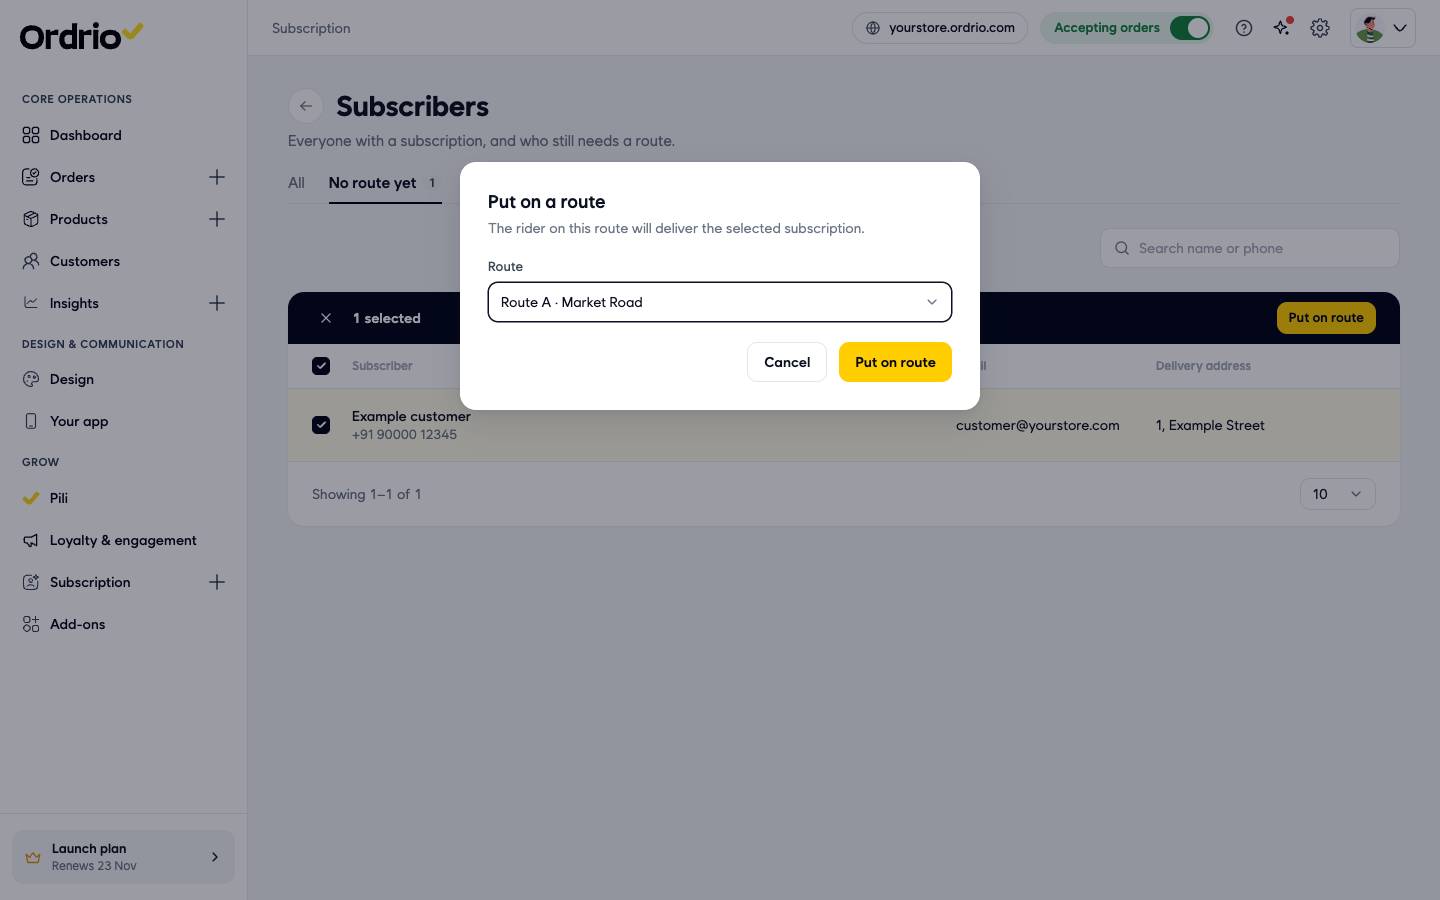
When everyone is placed, the No route yet tab shows Every subscription has a route.
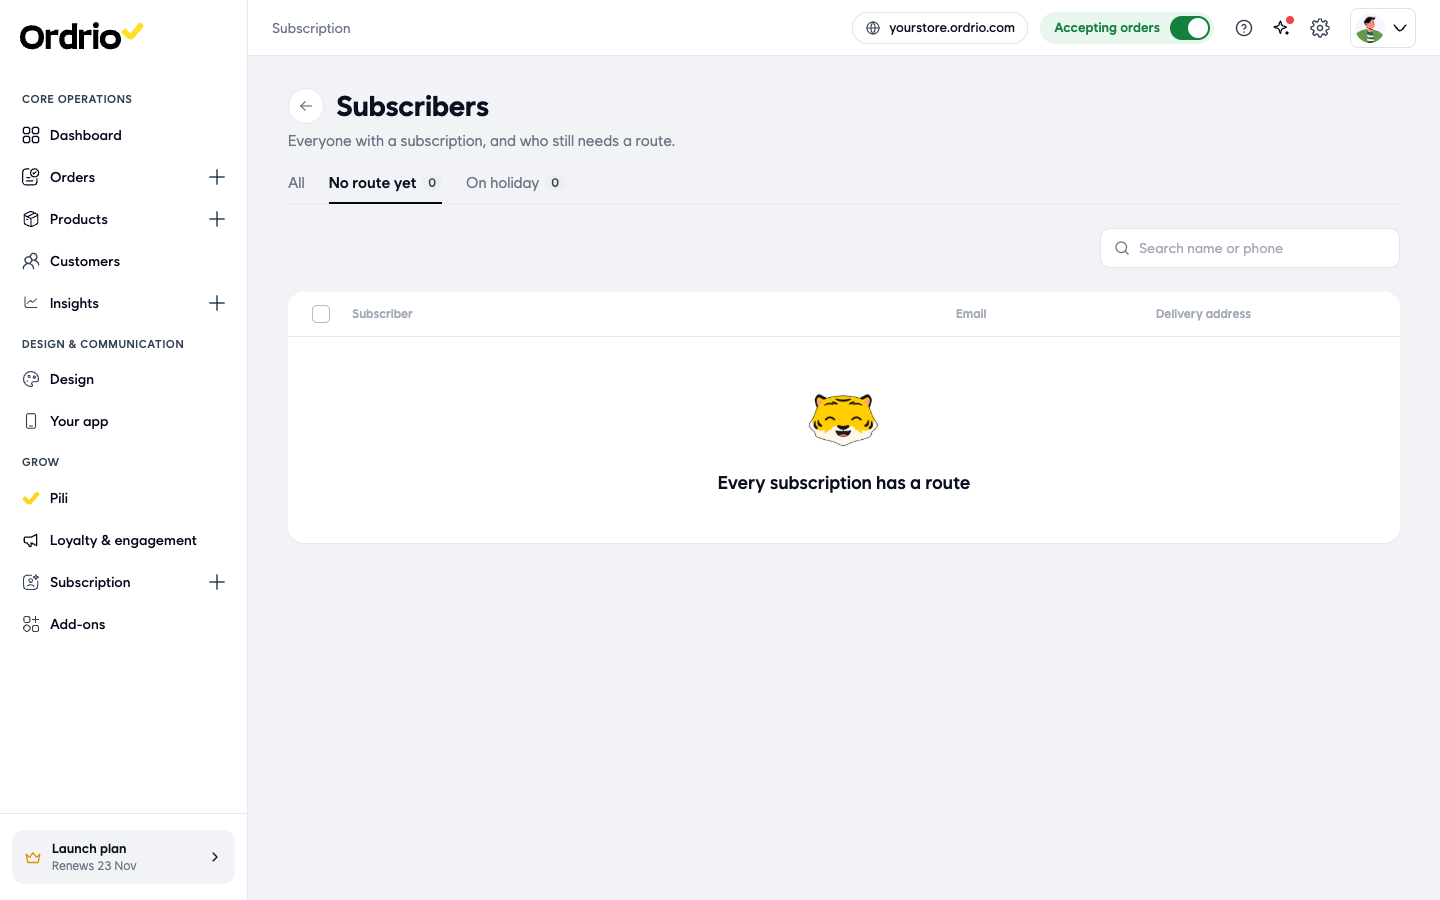
Back on Deliveries, the route's Addresses count goes up and its Slot shows the subscription's delivery slot, for example Lunch.
Make sure no route is left without a rider
- On the Deliveries page, look at Routes with no rider. If a route with subscribers has no rider, a message says its orders will not be made until you assign one.
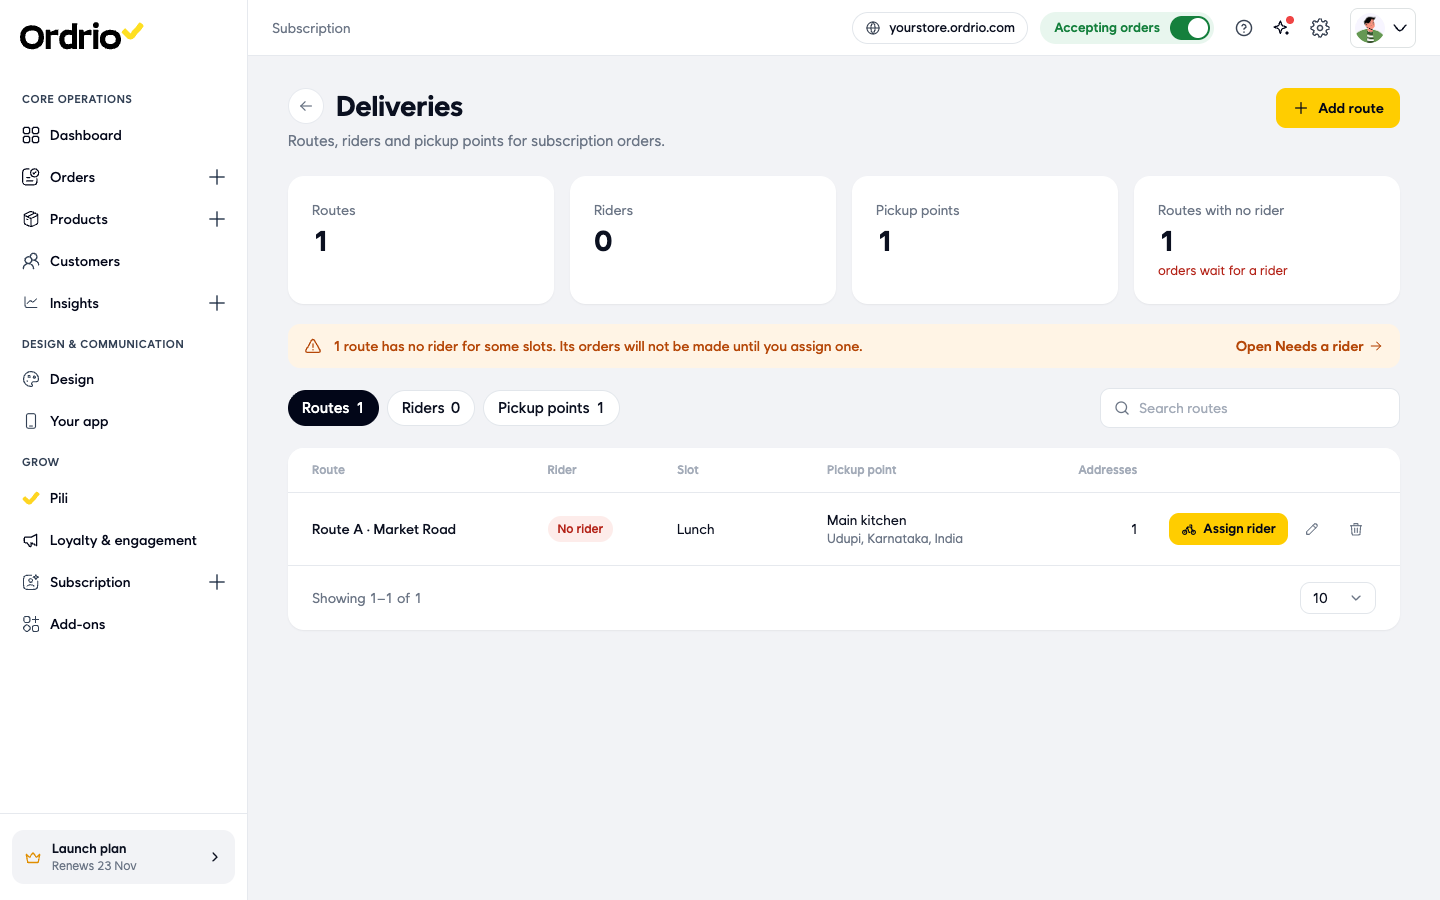
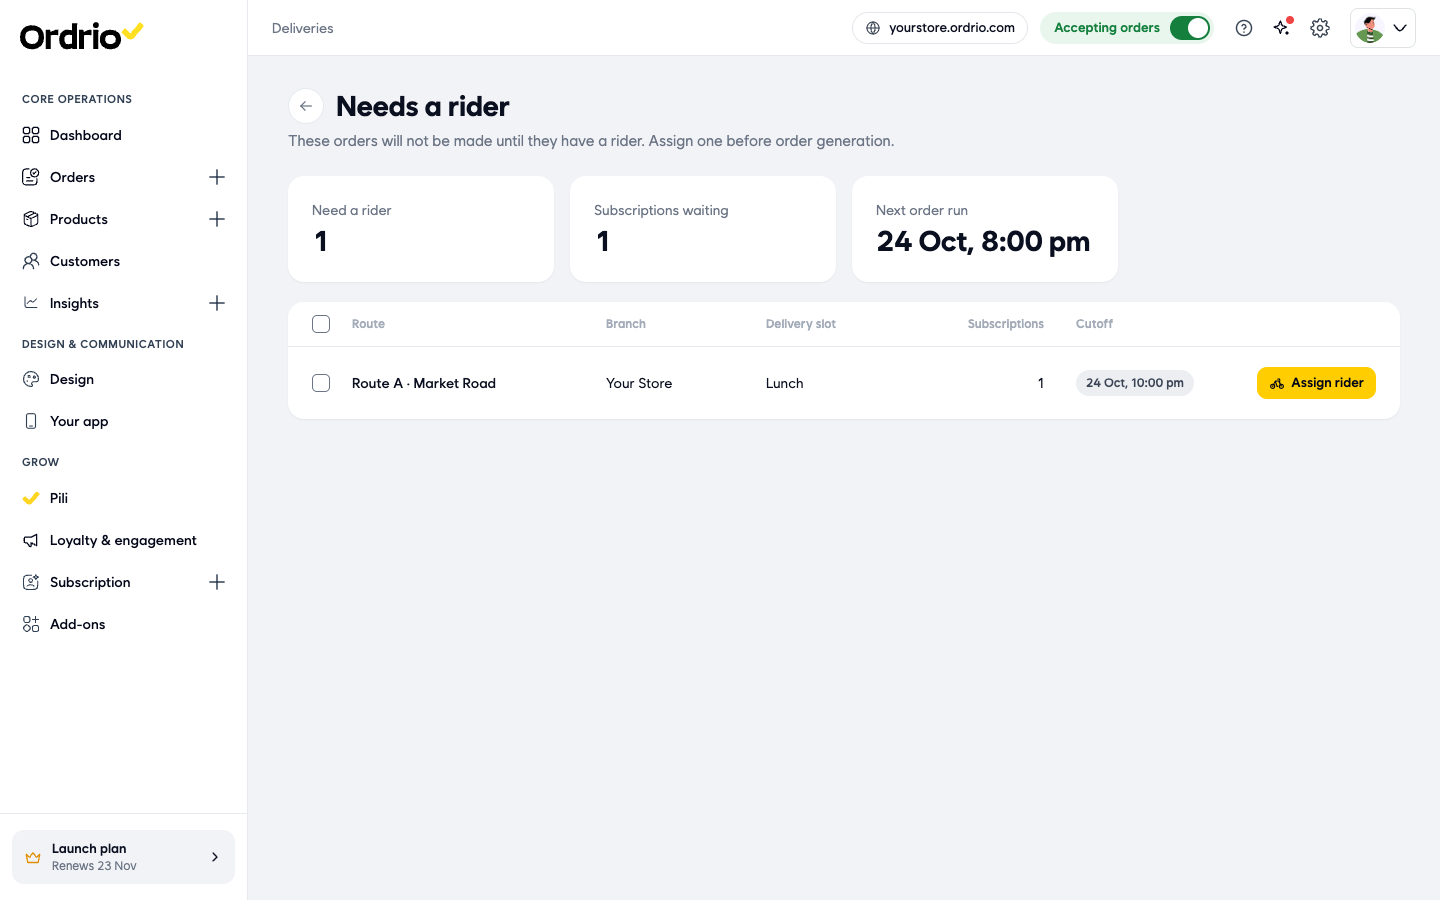
- Click Open Needs a rider. The list shows each route, its branch, Delivery slot, number of Subscriptions and the Cutoff time, plus Next order run at the top.
- Click Assign rider on each route and choose a rider before the next order run.
Good to know
- The names and addresses in the pictures are examples. Use your own pickup points, route names and riders.
- If a subscription order has no rider, no order is made until you set one, and Ordrio never picks one for you. Ordrio sends early warnings by email, push notification and in the app.
- Changing your theme changes how your website looks to customers. Your products and settings stay the same when you switch. Check your store after you switch.
- Bitebox is a paid theme. When you pick it in Design, you click Subscribe to theme to start using it.
- Routes are not the same as Route planning. Route planning is a switch in Delivery fleet settings that puts each rider's out-for-delivery orders in the shortest order. It needs a Google Maps key first.
Related
- Delivery settings
- Staff & roles