هذا المقال غير متوفر بالعربية بعد، لذلك نعرضه بالإنجليزية.
دليل استخدام
Plans and billing
Your Ordrio plan, billing cycle, invoices and usage limits.
Your Ordrio plan decides which features your store has and how much of each you can use. This article shows you where to see your plan, renewal date and invoices, how to change your plan or billing cycle, and how to turn on autopay.
Open your billing page
- Open nadi.ordrio.com (your Ordrio admin panel) and log in.
- At the bottom of the left menu, click the plan card. It shows your plan name and renewal date, for example Max plan and Renews 14 Nov. The Billing page opens.
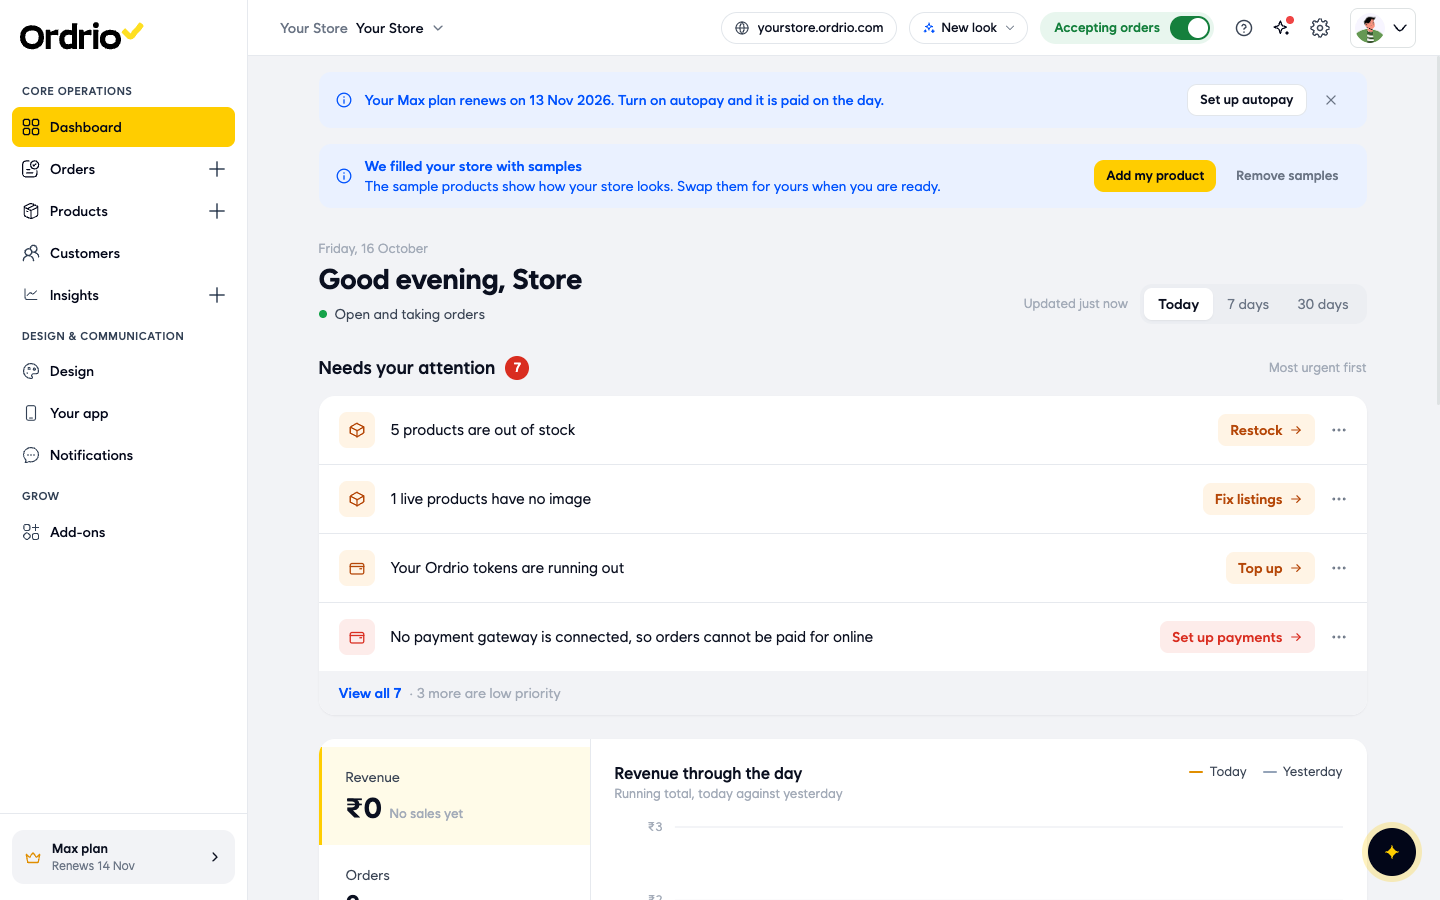
If you own more than one store, Billing first lists all your stores. Each store has its own plan and invoices. Click the store you want. If you own one store, its billing page opens straight away.
Check your plan and next renewal
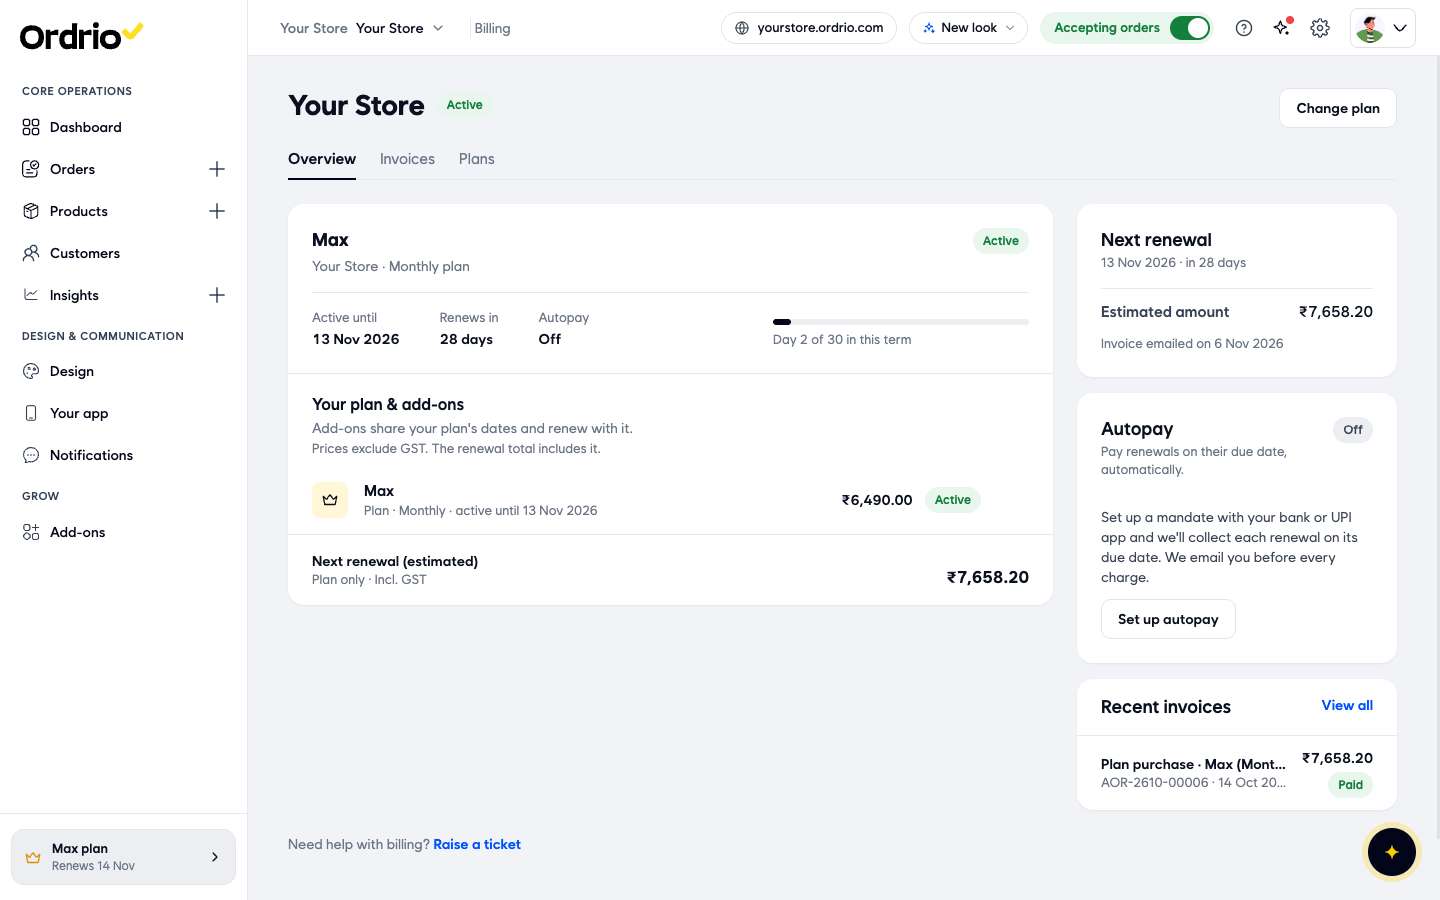
- Stay on the Overview tab. Here you see:
- Your plan: the plan name, the store it is for and the billing cycle (for example Monthly plan), with an Active label.
- Active until: the last day of the current term.
- Renews in: how many days are left until the renewal.
- Autopay: On or Off.
- A progress bar, for example "Day 2 of 30 in this term".
- Your plan & add-ons: your plan and any add-ons, each with its price. Add-ons share your plan's dates and renew with it. Prices here exclude GST.
- Next renewal (estimated): the total you will pay at renewal, including GST.
- Next renewal (on the right): the renewal date, the Estimated amount and the date the renewal invoice is emailed to you.
- Recent invoices: your latest invoices. Click View all to see the rest.
See and check your invoices
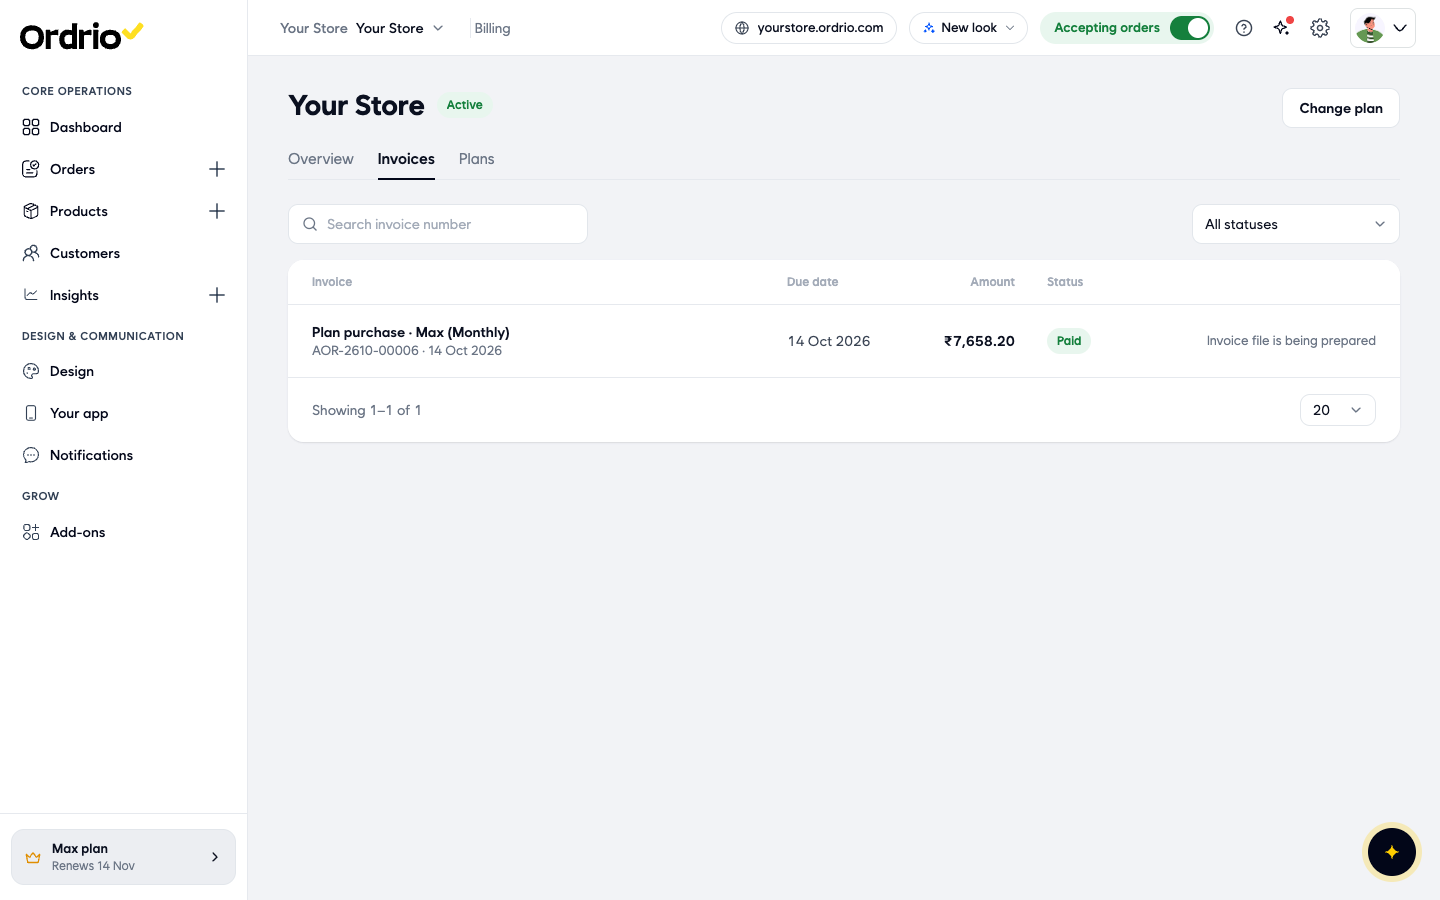
- Click the Invoices tab. Each row shows the invoice name and number (for example "Plan purchase · Max (Monthly)"), the Due date, the Amount and the Status.
- To find one invoice, type its number in Search invoice number.
- To filter the list, open All statuses and pick Due, Overdue, Partially paid, Awaiting confirmation, Paid or Cancelled.
- At the bottom, choose how many rows to show on each page.
- Click an invoice to open its details. You see the status and due date, the Items on the invoice, the Total, the amount Paid and the Balance due. Under Payments you see each payment made against it, with the method and date. While the invoice file is still being made, the panel shows "Invoice file is being prepared".
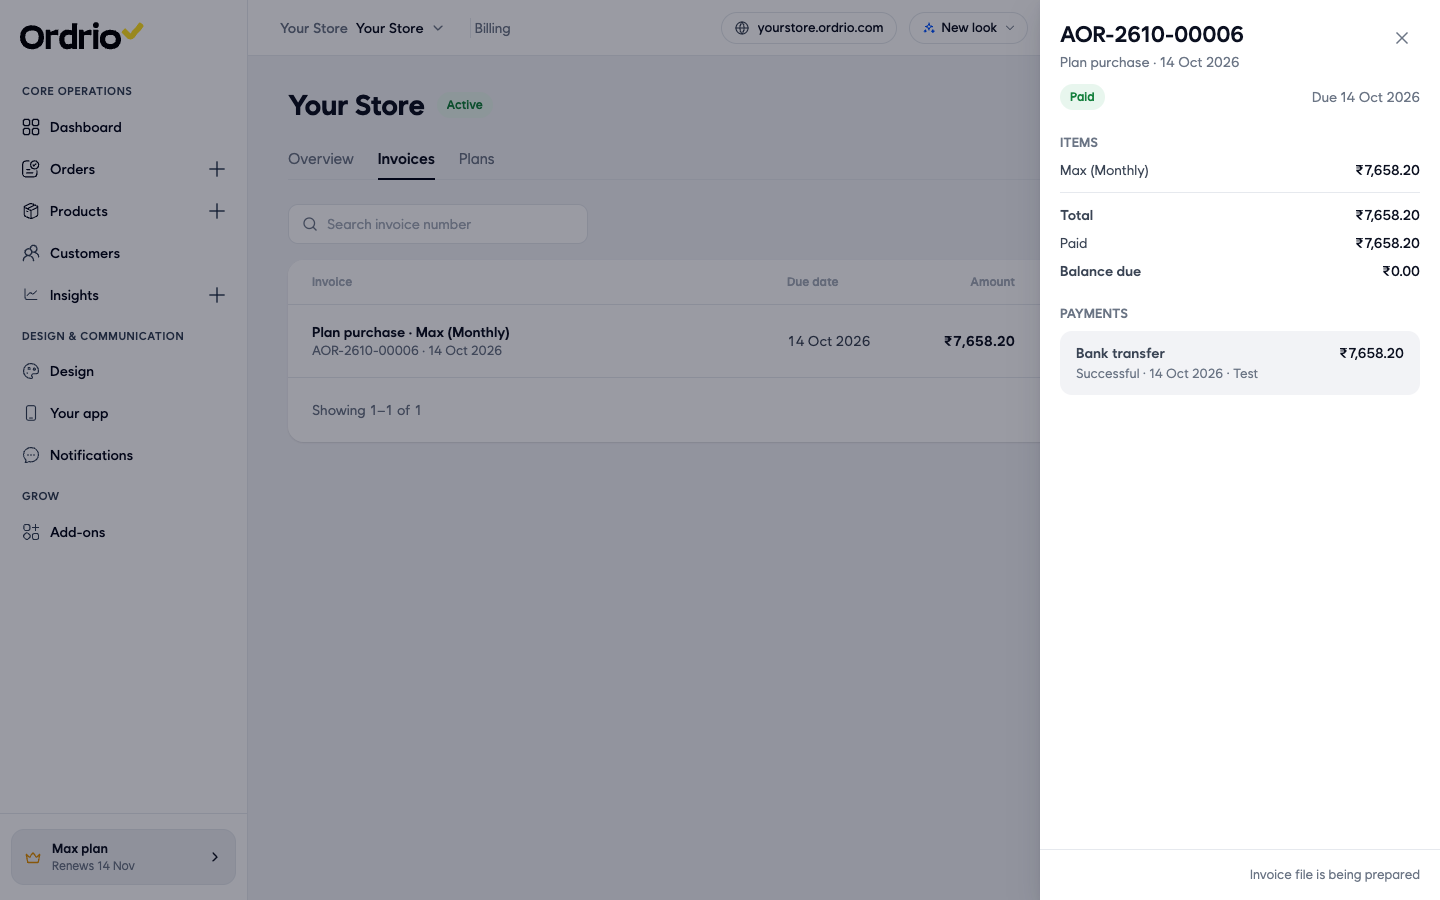
- Click the X at the top right to close the details.
Compare plans and their limits
- Click the Plans tab, or click Change plan at the top right of the page. The top shows your current plan and billing cycle (for example "Your plan: Max · Monthly") and its renewal date.
- Use the Monthly and Annually switch to see prices for each billing cycle. Prices exclude GST. Annual plans show the yearly price and what it works out to each month, and some show a Save label with the saving.
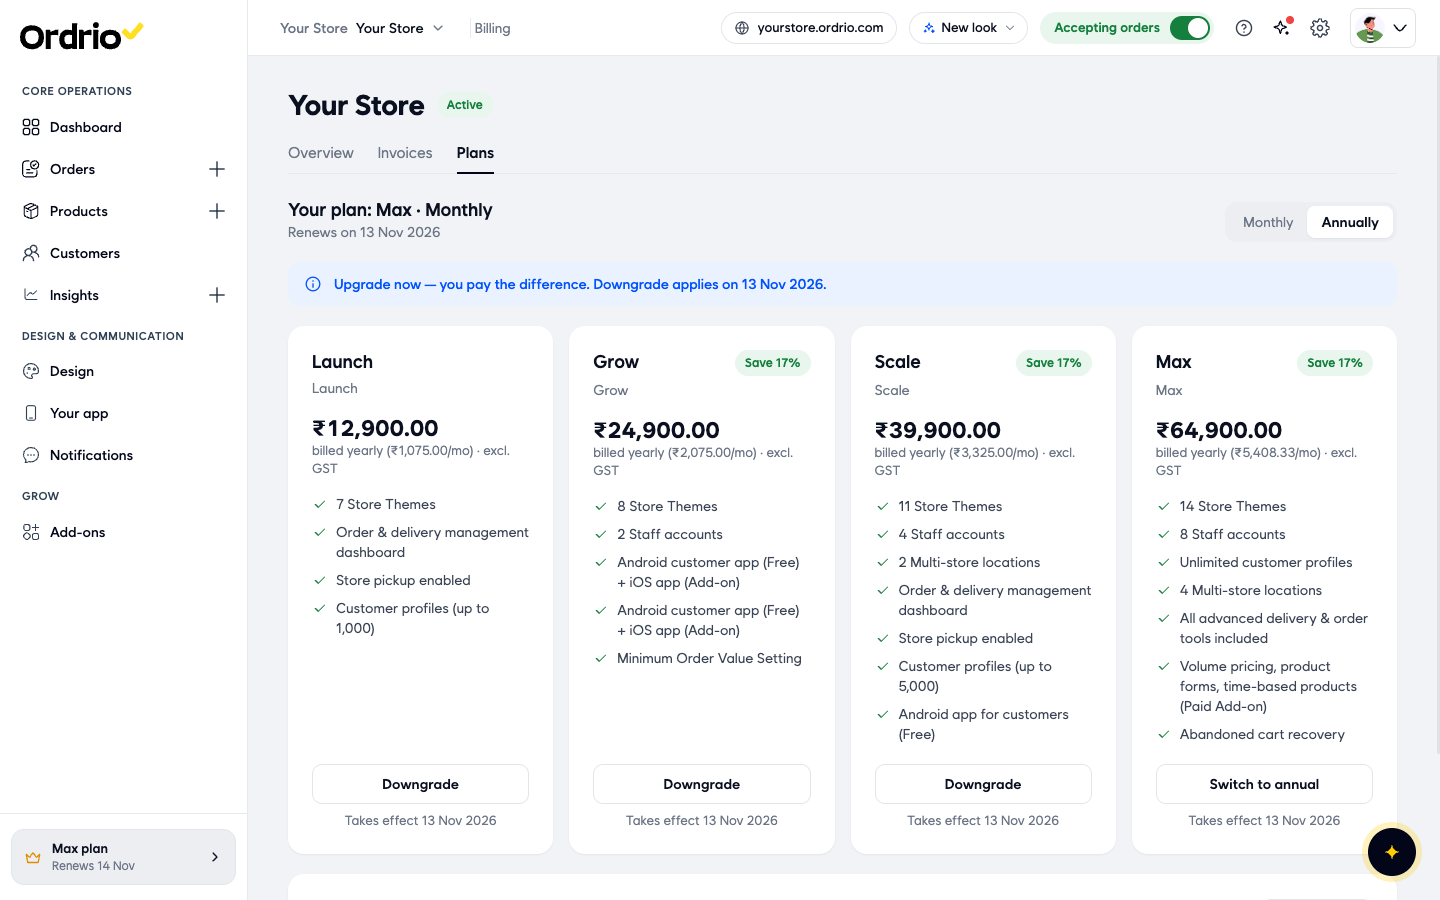
Each plan card lists what it includes and its usage limits, for example:
- Store themes: how many themes you can choose from.
- Staff accounts: how many team members can log in.
- Customer profiles: how many customers you can have, for example up to 1,000, up to 5,000, or unlimited.
- Multi-store locations: how many branches you can run.
- Apps and tools: for example the Android customer app, the iOS app as an add-on, store pickup and abandoned cart recovery.
Your current plan has a Current plan label. Check the plan cards in your own admin panel for the exact features and limits, as they can change.
Change your plan
- On the plan you want, click its button:
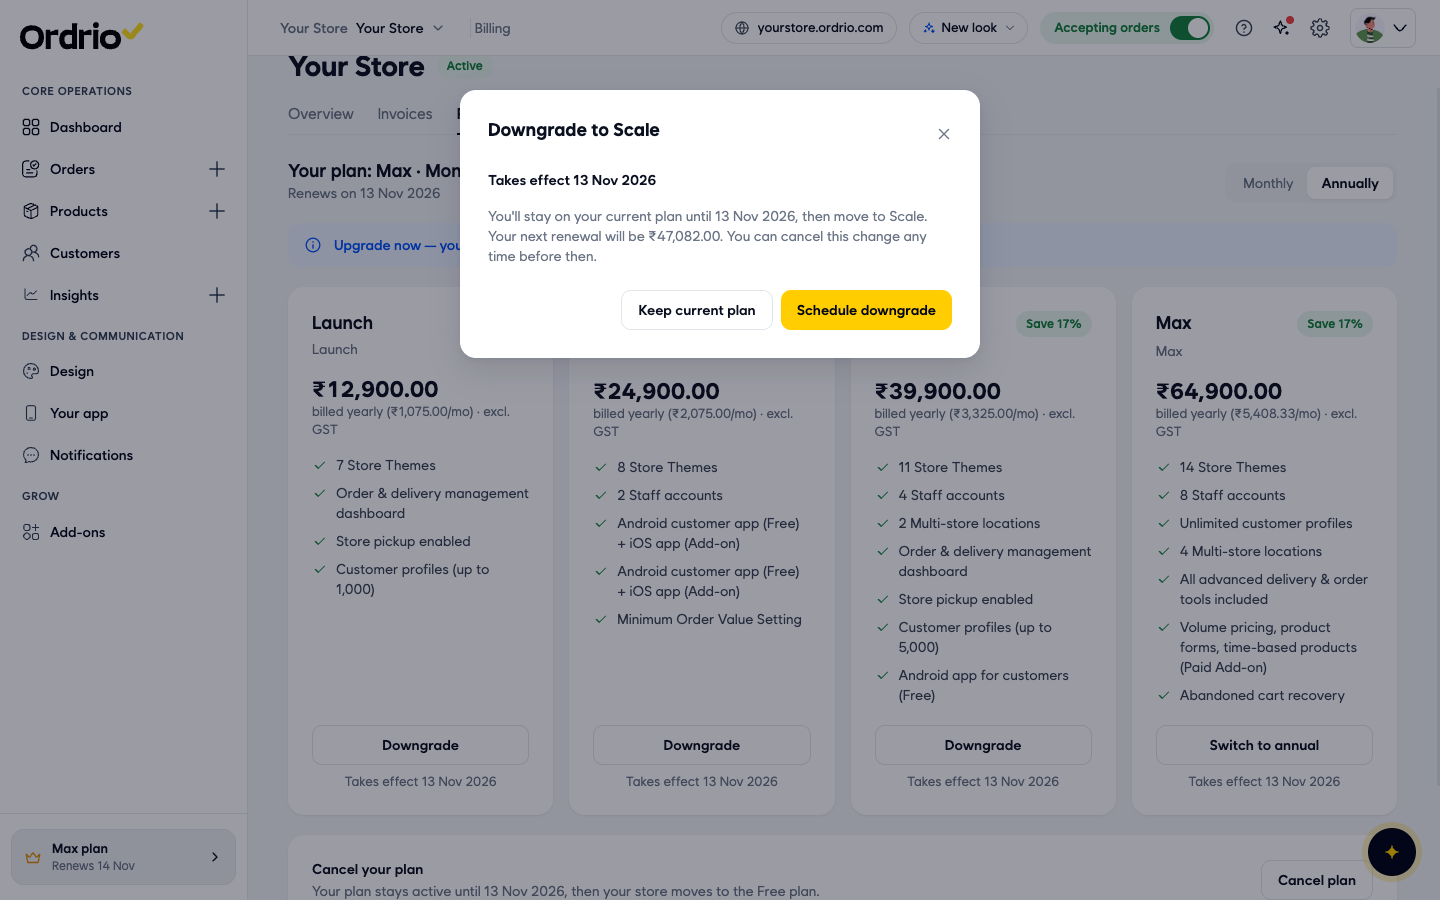
- Downgrade (a smaller plan): a window shows when the change takes effect and what your next renewal will be. Click Schedule downgrade to confirm, or Keep current plan to stay as you are. You stay on your current plan until the end of the term, then move to the new plan. You can cancel the change any time before then.
- A bigger plan: an upgrade starts now and you pay the difference.
Change your billing cycle
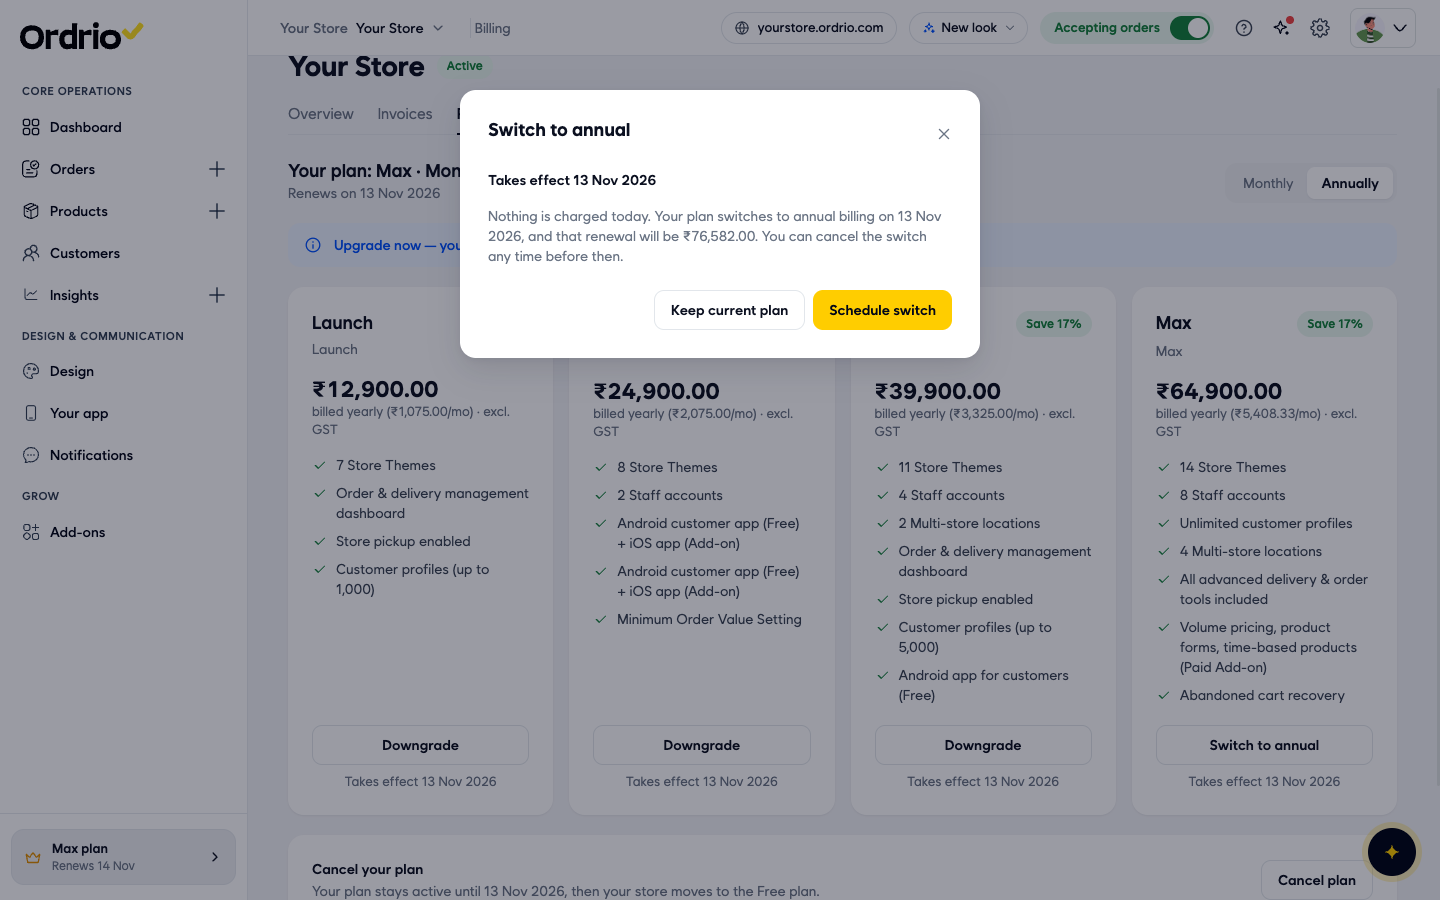
- To move from monthly to annual billing, select Annually, then click Switch to annual on your current plan.
- Read the window. Nothing is charged today. Your plan switches to annual billing on your renewal date, and the window shows what that renewal will cost. Click Schedule switch to confirm, or Keep current plan to cancel. You can cancel the switch any time before the renewal date.
Turn on autopay
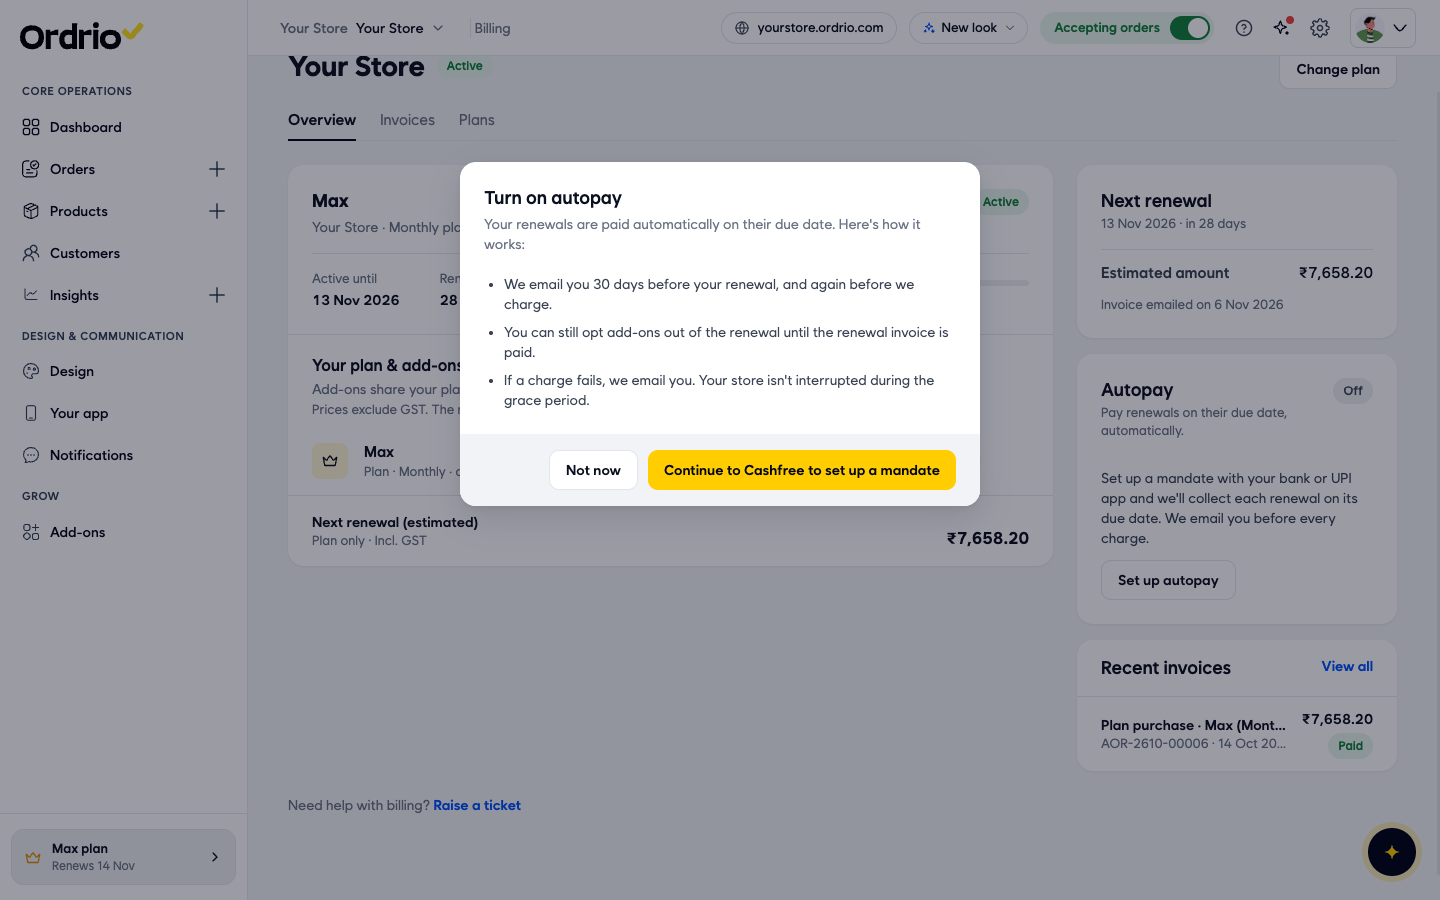
- Go back to the Overview tab and click Set up autopay in the Autopay box. You can also click Set up autopay in the renewal reminder at the top of your Dashboard.
- Read how it works:
- You get an email 30 days before your renewal, and again before you are charged.
- You can still take add-ons out of the renewal until the renewal invoice is paid.
- If a charge fails, you get an email. Your store keeps running during the grace period.
- Click Continue to Cashfree to set up a mandate and approve the mandate in your bank or UPI app. Click Not now if you want to do it later. Once it is set up, each renewal is collected on its due date.
Cancel your plan
- On the Plans tab, scroll to Cancel your plan and click Cancel plan.
- Read the window. Your plan stays active until the end of the current term. After that, your store moves to the Free plan and your paid features turn off. There is no refund or credit for the time left. Click Cancel plan to confirm, or Keep my plan to stay.
Good to know
- Downgrades and billing cycle changes wait for your renewal date. Upgrades start straight away.
- Plan prices exclude GST. The renewal total on the Overview tab includes it.
- Your renewal invoice is emailed before the renewal date. The Next renewal box shows the date.
- Ordrio tokens are separate from your plan. Tokens pay for messages and services sent for your store. If they run low, Needs your attention on your Dashboard shows "Your Ordrio tokens are running out". Click Top up to see your balance and buy more.
- Need help with billing? Click Raise a ticket at the bottom of the billing page.
Related
- Integrations and add-ons overview
- Enabling and managing add-ons
- Adding staff members
- Branches overview