How-to guide
Publishing on Play Store and App Store
Developer accounts, DUNS and what is needed to publish.
You can put your store's own app on Google Play and the App Store, with your name and icon on it. You set it up in Your app in your Ordrio admin panel, and Ordrio publishes the app for you.
Before you start
- A Google Play developer account. The app is published under your own account, so you stay the owner. Google charges $25 once and checks your identity, which usually takes a day or two. You can start the signup from the Create one link in the Google Play account step (step 10 below).
- A D-U-N-S number, if you sign up as a business. When you create a developer account as an organisation rather than as a person, Google and Apple ask for your business's D-U-N-S number. This is a nine-digit business ID from Dun & Bradstreet. Getting one can take several days, so apply early.
- Your app icon. A square PNG image, 1024 × 1024 px. Both stores reject JPG icons.
- A privacy policy link. A web page on your site that explains how you use customer data. Google Play asks for it.
The screenshots below show example values, such as com.yourstore.app and owner@yourstore.com. Use your own app ID, email and account ID.
Set up your app
- Open nadi.ordrio.com (your Ordrio admin panel) and log in.
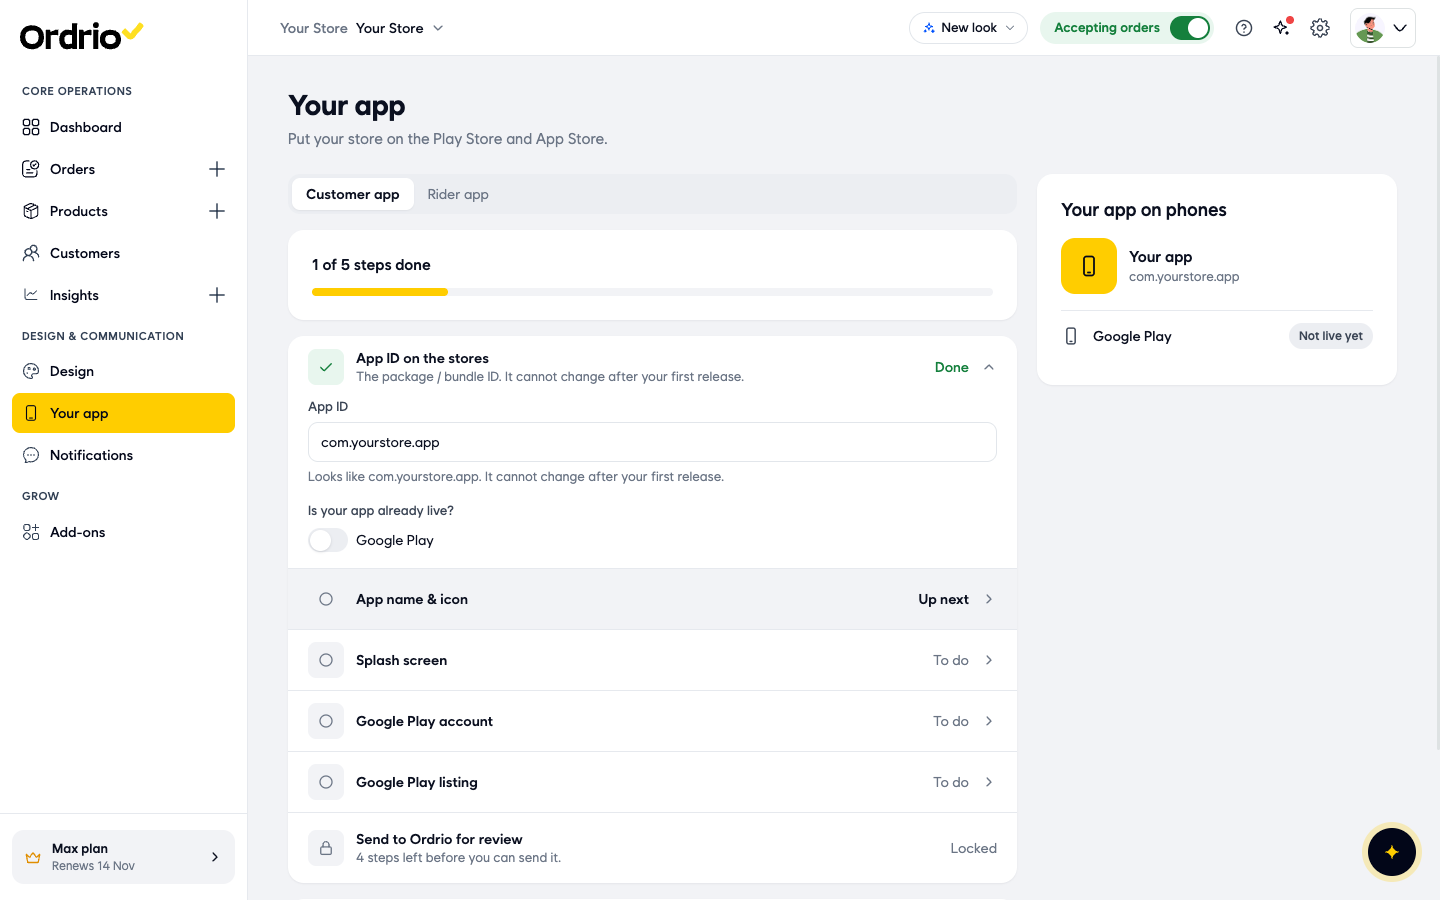
- In the left menu, under Design & Communication, click Your app. Keep the Customer app tab selected. You see a checklist of five steps and a progress bar, for example 0 of 5 steps done.
- Click App ID on the stores and type your App ID. This is the package or bundle ID that identifies your app on the stores. It looks like com.yourstore.app. It cannot change after your first release, so choose it carefully.
- Under Is your app already live?, leave the Google Play switch off if this is a new app. If your app is already on Google Play, turn the switch on and fill in the extra fields (see Good to know). Then click Save. The step now shows Done, and your App ID appears under Your app on phones on the right.
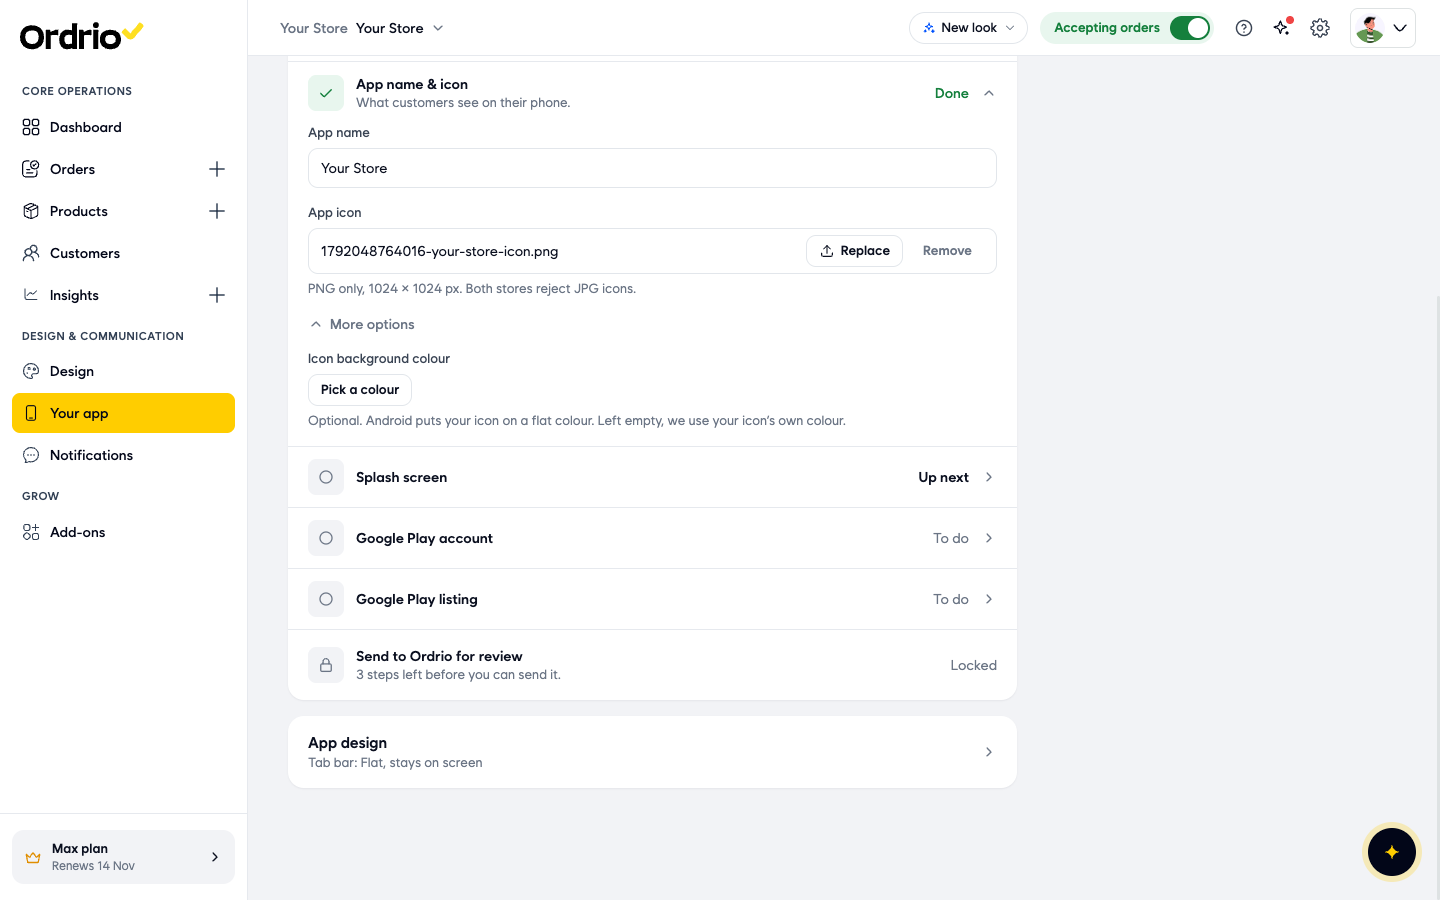
- Click App name & icon and type your App name. This is the name customers see under the icon on their phone.
- Next to App icon, click Choose. In Choose a picture, pick an image from your media library or click Upload to add a new one (up to 5 MB), then click Use this. The icon must be a PNG, 1024 × 1024 px.
- If you want, click More options and click Pick a colour under Icon background colour. Android puts your icon on this flat colour. If you leave it empty, Ordrio uses your icon's own colour. Click Save.
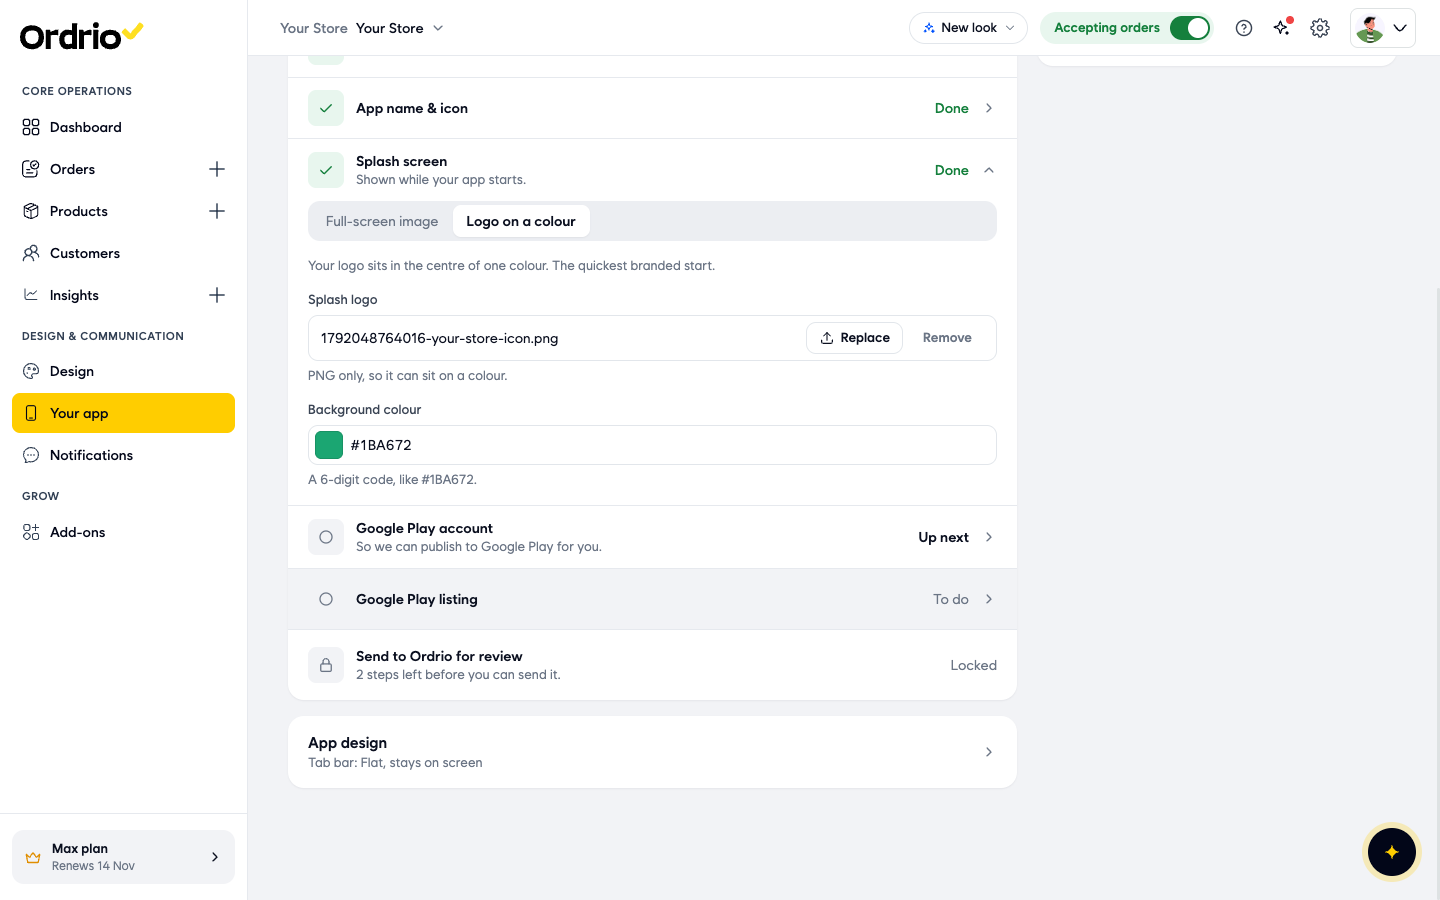
- Click Splash screen. This is the screen shown while your app starts. Choose a style:
- Full-screen image: your picture fills the whole start screen. Upload it in Splash image. PNG, JPG, GIF or Lottie (.json) files work, and 1080 × 2160 px works best. Ordrio picks the background colour from your picture.
- Logo on a colour: your logo sits in the centre of one colour. Upload a PNG in Splash logo, then set Background colour as a 6-digit code, like #1BA672.
- Click Save.
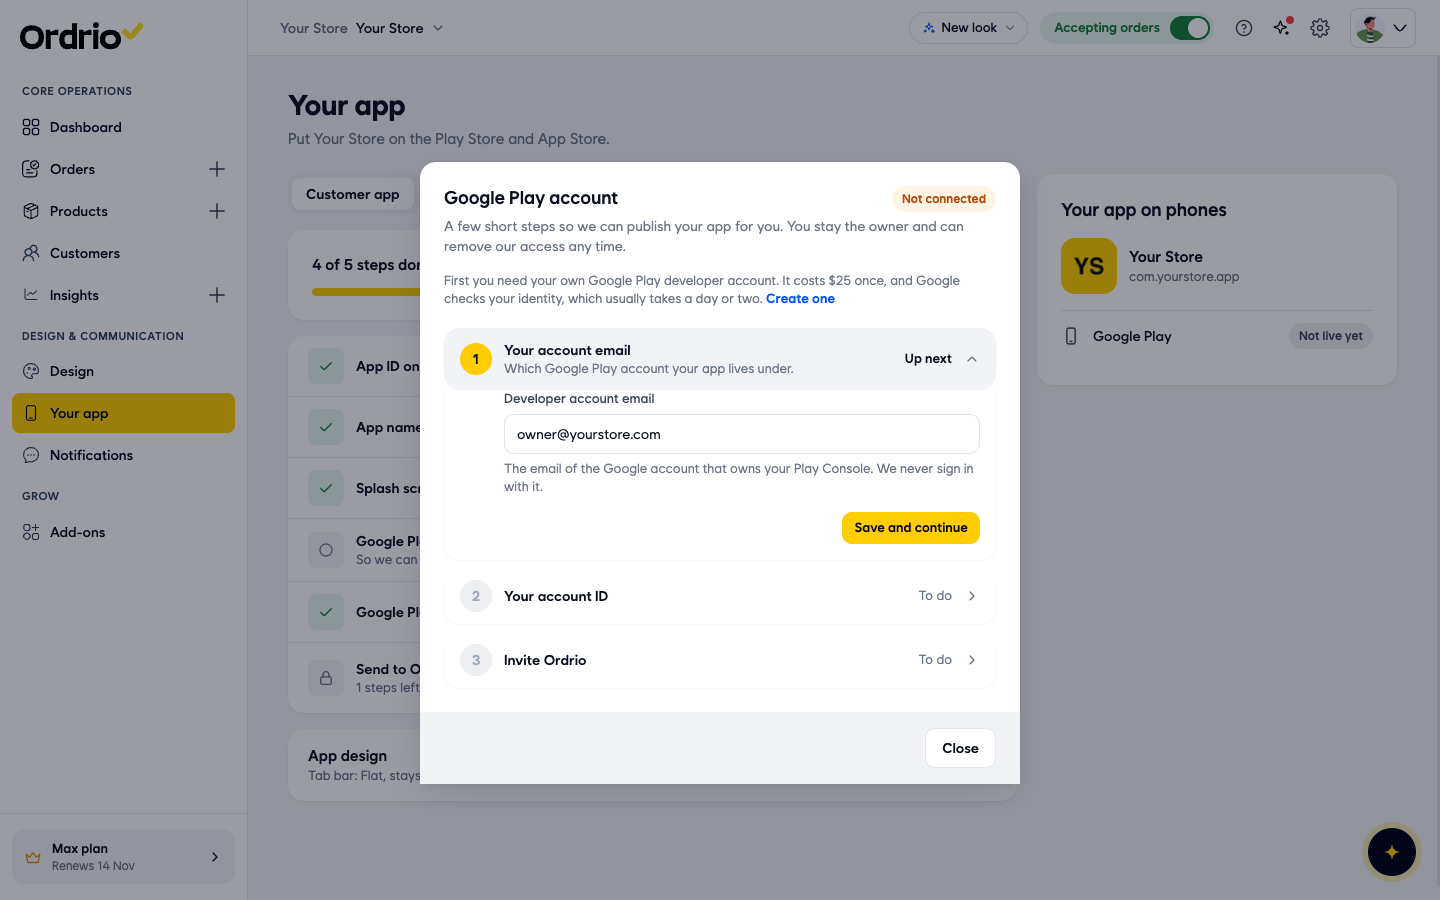
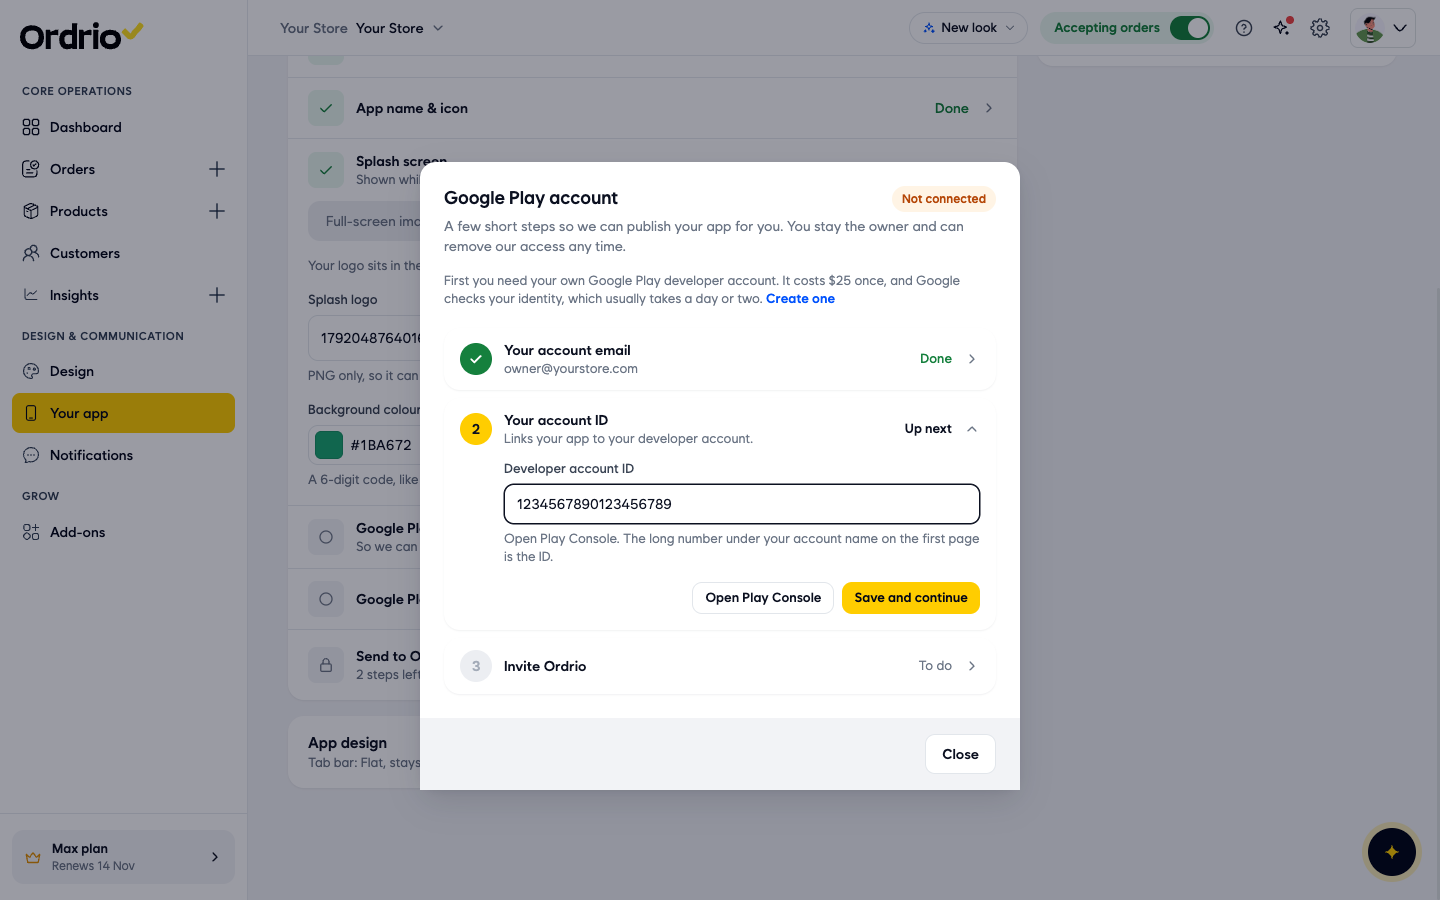
- Click Google Play account. A window opens with three short steps. The badge at the top shows Not connected until Ordrio can reach your account.
- Under Your account email, type your Developer account email. This is the email of the Google account that owns your Play Console. Ordrio never signs in with it. Click Save and continue.
- Under Your account ID, type your Developer account ID. To find it, click Open Play Console. The ID is the long number under your account name on the first page. Click Save and continue.
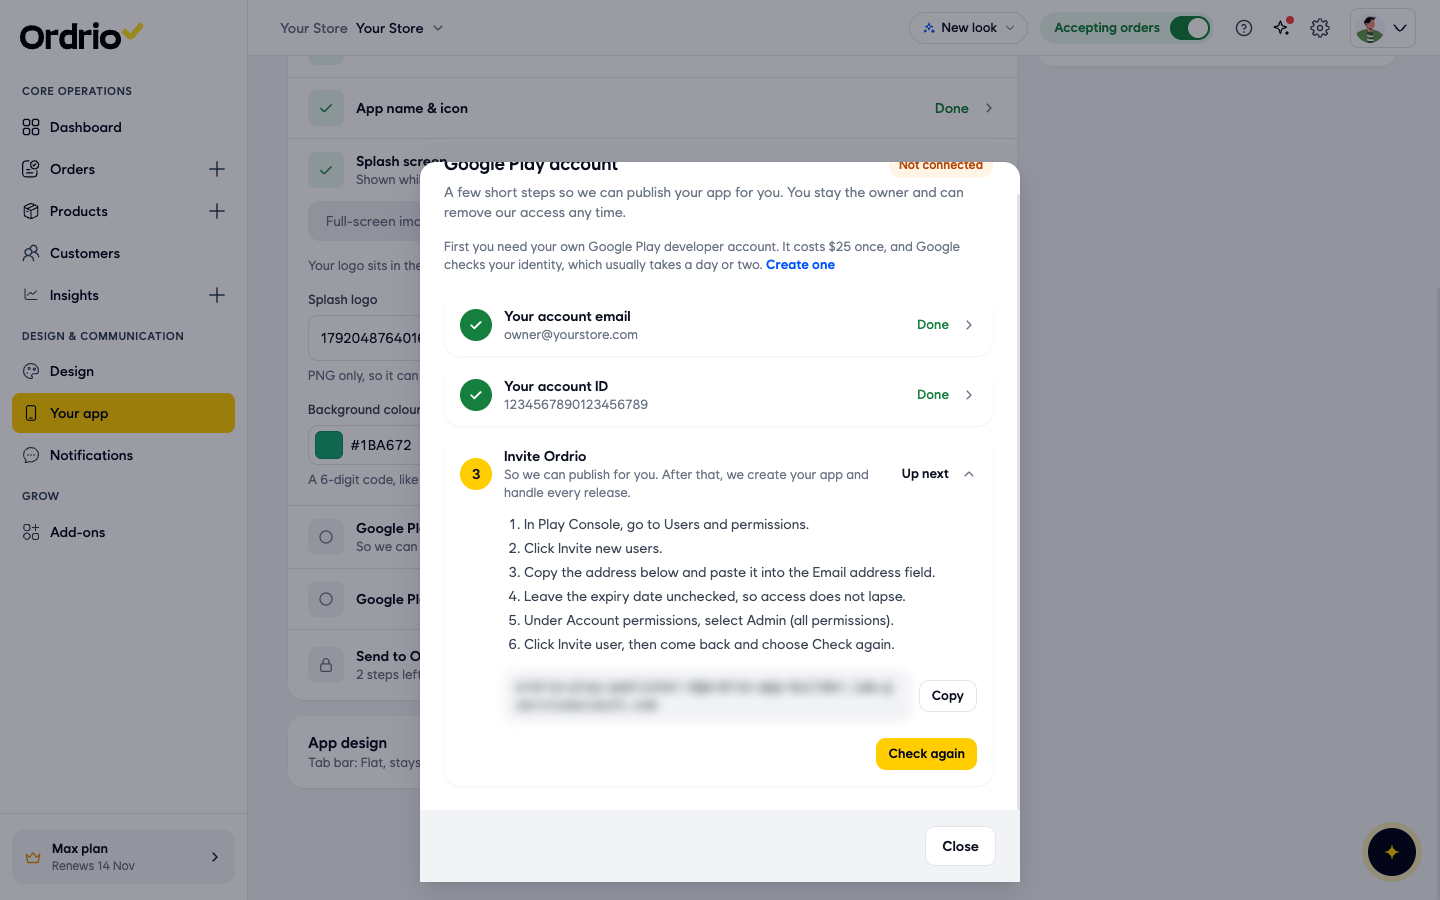
- Under Invite Ordrio, click Copy to copy the Ordrio address shown on screen.
- In Play Console, go to Users and permissions and click Invite new users.
- Paste the address into the Email address field. Leave the expiry date unchecked, so access does not lapse.
- Under Account permissions, select Admin (all permissions) and click Invite user.
- Come back to your Ordrio admin panel and click Check again. Ordrio checks that it can reach your account. If the badge still shows Not connected, make sure you invited the exact address you copied with Admin (all permissions), then click Check again. Click Close when you are done.
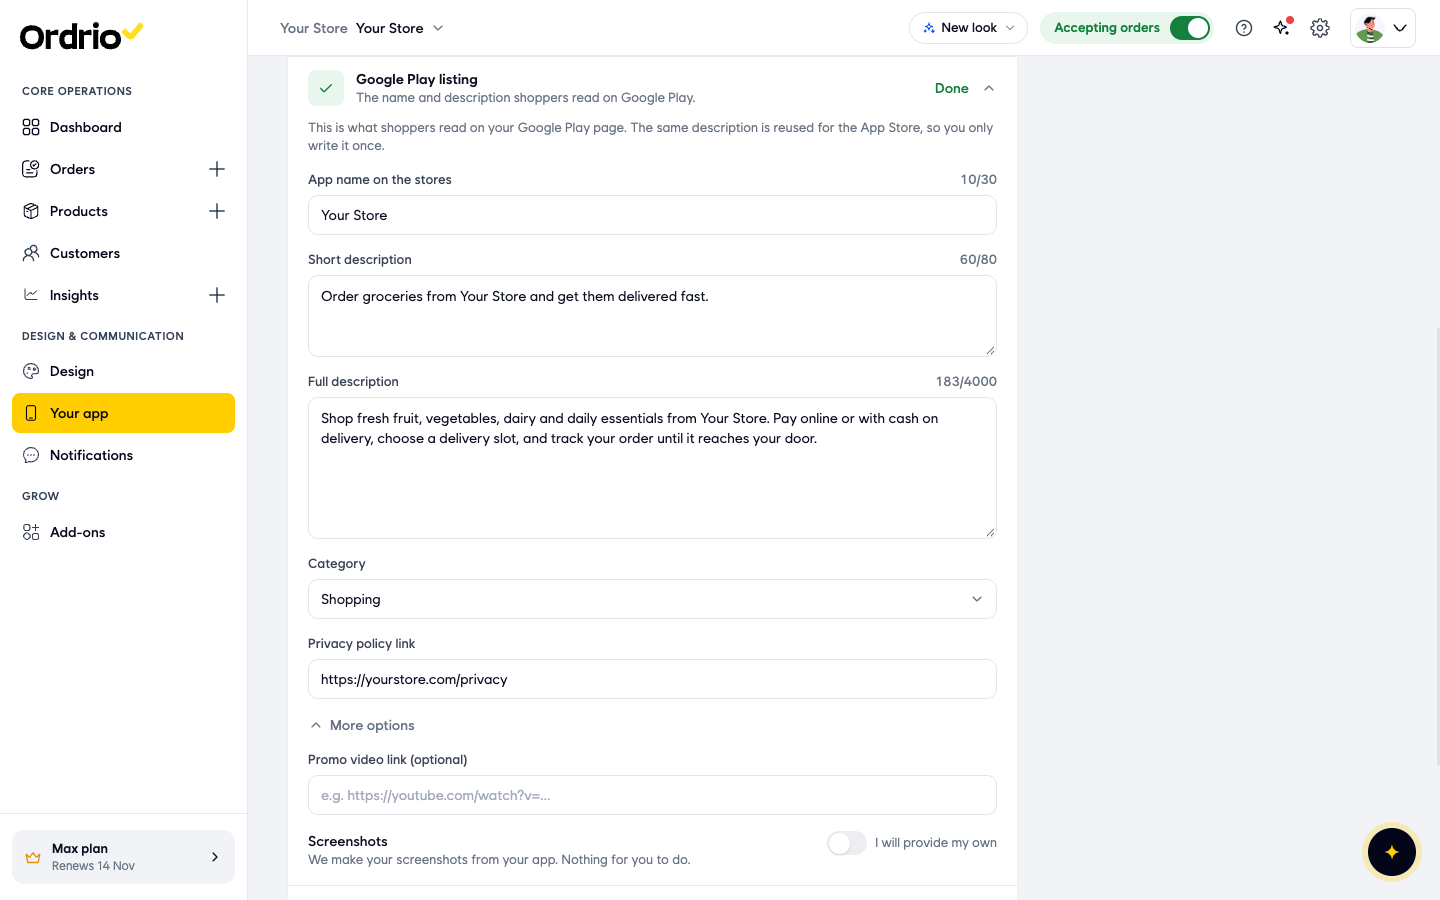
- Click Google Play listing. This is what shoppers read on your Google Play page. The same description is reused for the App Store, so you only write it once. Fill in:
- App name on the stores: the name shown on the store page, up to 30 characters.
- Short description: one line about your store, up to 80 characters.
- Full description: what customers can buy and how ordering works, up to 4000 characters.
- Category: pick the store category, for example Shopping or Food & Drink.
- Privacy policy link: the web address of your privacy policy, for example https://yourstore.com/privacy.
- If you want, click More options. Add a Promo video link (optional), for example a YouTube link. Under Screenshots, Ordrio makes your store screenshots from your app, so there is nothing for you to do. Turn on I will provide my own only if you want to upload your own. Click Save.
- When all five steps show Done, Send to Ordrio for review unlocks. Until then it shows Locked and how many steps are left. Click it to send your app to Ordrio. After that, Ordrio creates your app and handles every release.
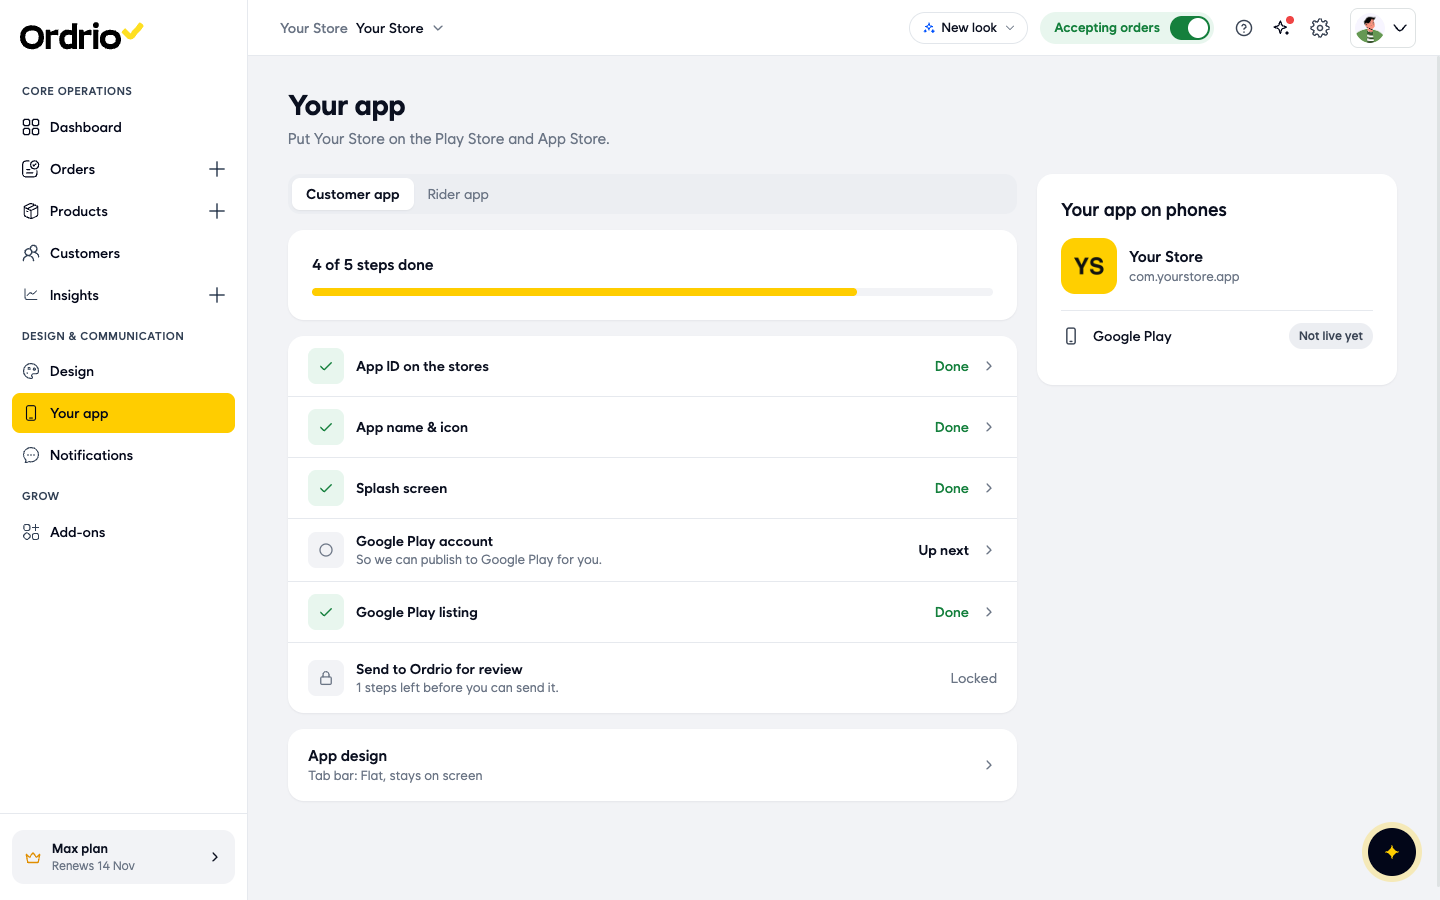
The Your app on phones panel on the right shows your app name, icon and App ID, and whether your app is live on Google Play. It shows Not live yet until your app is published.
The App Store
The setup steps in Your app are for Google Play. The description you write in Google Play listing is reused for the App Store. To publish on the App Store you also need an Apple developer account in your business's name. As a business, Apple asks for your D-U-N-S number. Contact Ordrio support from the Help and support button at the top of your admin panel to plan your App Store release.
Good to know
- Your App ID cannot change after your first release. If your app is already live, a different ID is treated as a new app.
- If your app is already live on Google Play, turn on the Google Play switch under Is your app already live? and use the ID your live app already has. Then add your Android signing key: upload your Keystore file, and type the Key alias, Keystore password and SHA-256 certificate fingerprint. Google only accepts updates signed with the same key.
- You stay the owner. Ordrio publishes under your developer account, and you can remove Ordrio's access in Play Console at any time.
- Use PNG for your icon and splash logo. Both stores reject JPG icons.
- Do not set an expiry date when you invite Ordrio in Play Console. If access lapses, Ordrio cannot publish your updates.
- The Rider app tab is for a separate app for your riders, with your name and icon. If it is not in your plan, the tab shows See plans.
Related
- Customising store branding
- Marketing notifications
- Connecting your store domain