How-to guide
Marketing notifications
Send offers and news to your customers as push notifications from your Ordrio admin panel.
Marketing messages let you send offers and news to your customers from your Ordrio admin panel. Use them to tell regular customers about a new product, a sale or a festival offer.
Before you start
- Today you can send marketing messages as push notifications only. A push message reaches customers who have your store's app on their phone. SMS, email and WhatsApp offers are not available yet (see Good to know).
- Your plan must include the Push notification add-on. On the Add-ons page, the card shows In your plan when your plan includes it. On the Free plan, the card shows Launch and Upgrade plan, so you need a Launch plan or above first. The add-on itself is free.
- You need your own store app and a Firebase project. Push messages go through your own Firebase project. You upload files from Firebase for Android (google-services.json) and for iPhone (GoogleService-Info.plist and an APN key). Until these files are uploaded, the message form does not open.
Switch on the Push notification add-on
- Open nadi.ordrio.com (your Ordrio admin panel) and log in.
- In the menu on the left, under Grow, click Add-ons. Type Push in the Search add-ons box. You see two cards: Google Firebase and Push notification ("Send push messages to customers who have your app").
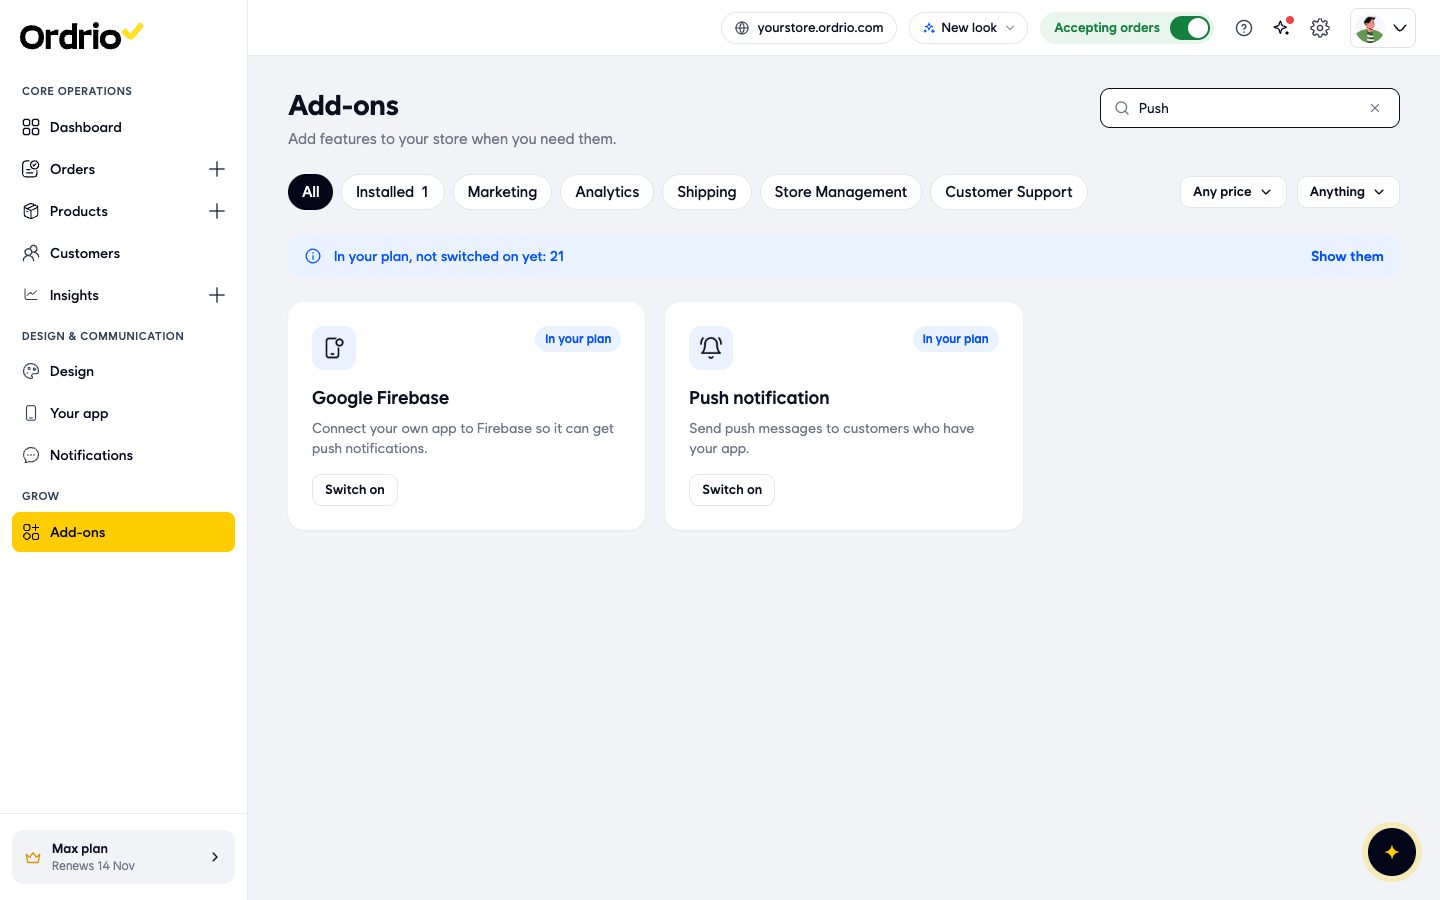
- On the Push notification card, click Switch on. The card now shows Installed and a Settings link, and the Installed count at the top goes up by one.
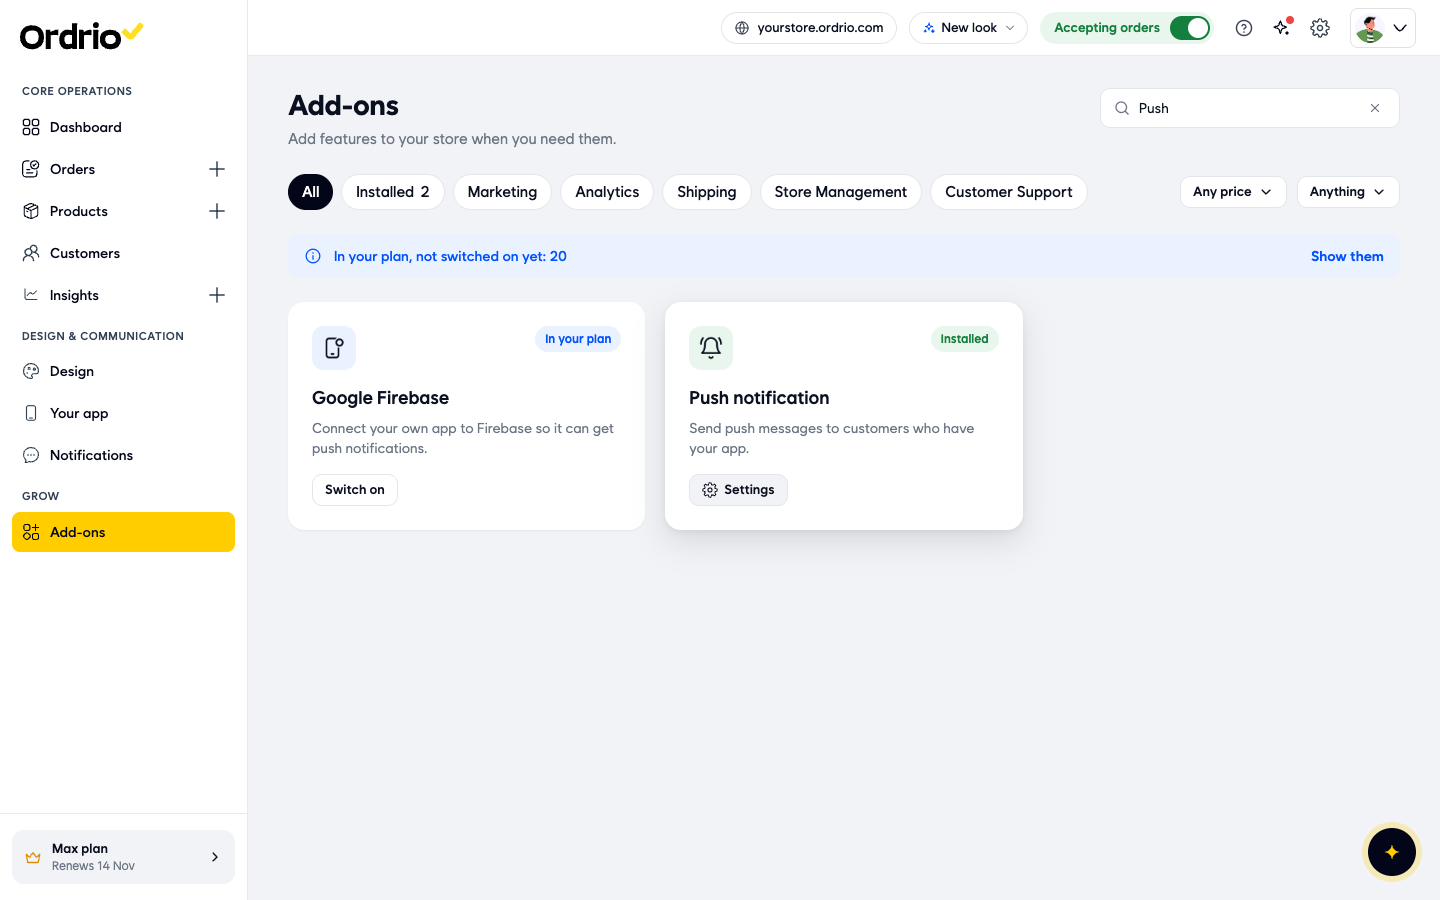
If you click the add-on name, its details show Category: Marketing and Billing: Free, and a Deactivate button to switch it off again.
Turn on App push
- In the menu on the left, under Design & Communication, click Notifications. The Messages page opens. It says "Send offers and news to your customers."
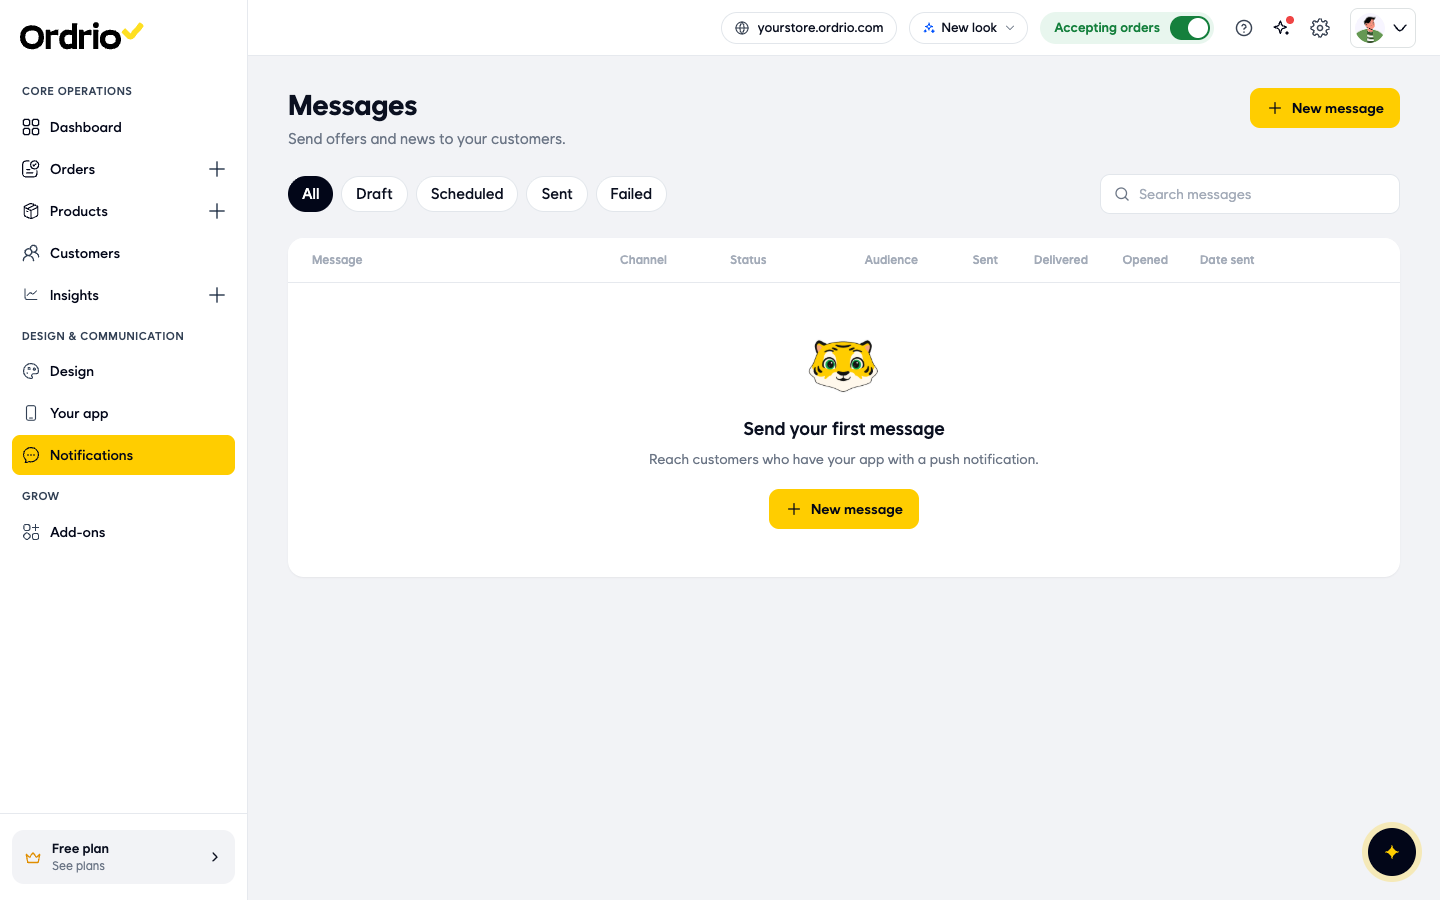
- Click New message at the top right. The New Push message page opens. If push is still switched off for your store, it shows "Turn on push notifications first" instead of the message form.
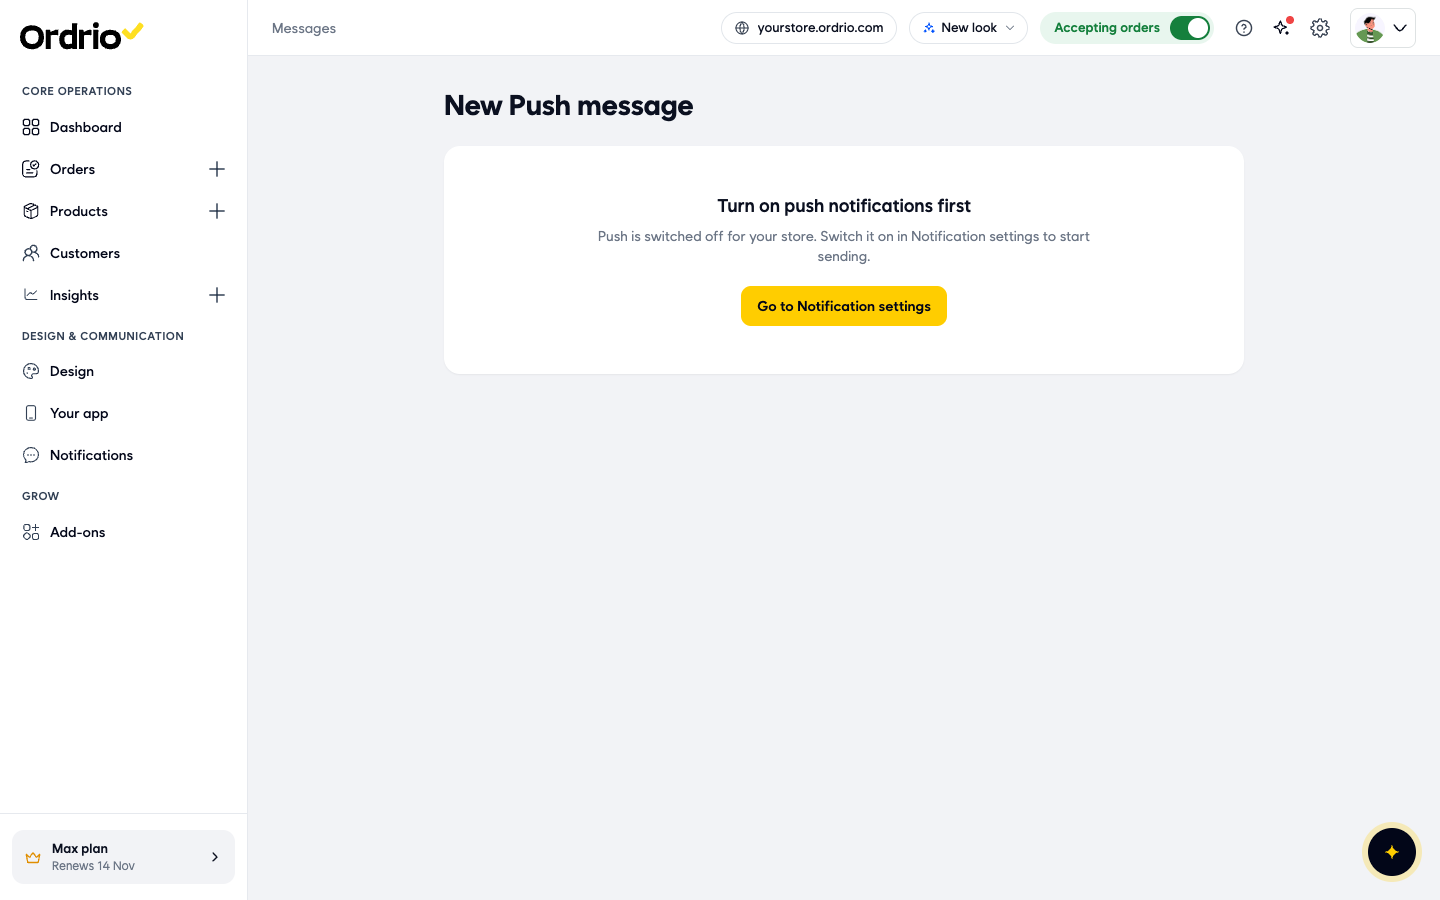
- Click Go to Notification settings. The Customer messages page opens. At the top, Sent through shows each channel and how it is sent: WhatsApp, SMS, Email and App push. You can also reach this page from Settings > Customer messages, or from the Settings link on the add-on card.
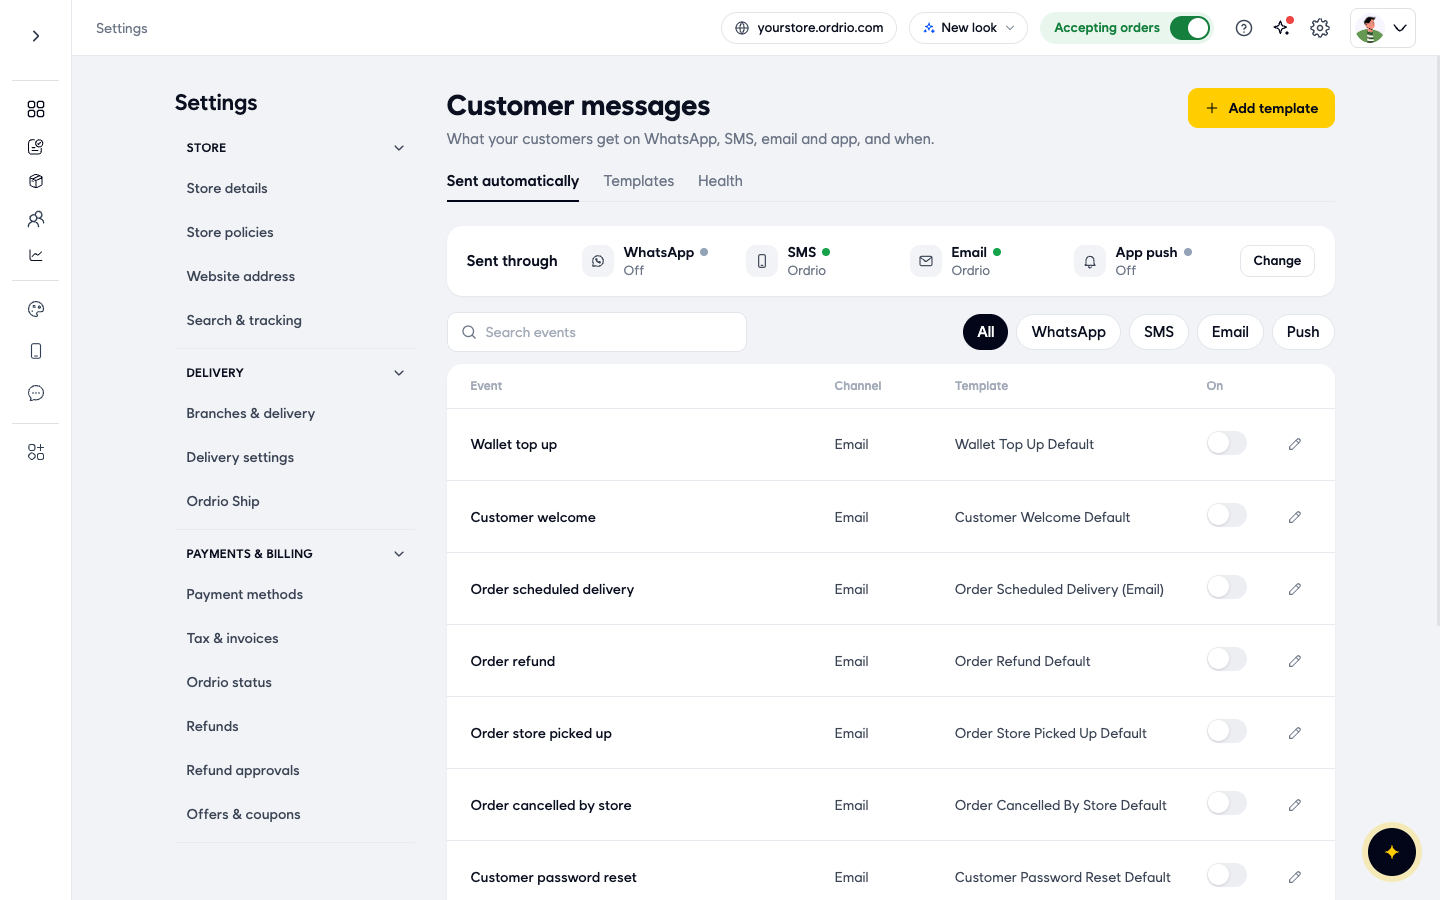
- Next to Sent through, click Change. The Message providers panel opens: "Send through Ordrio, or connect your own account for each channel." It has:
- WhatsApp, SMS and Email: choose Ordrio (send through Ordrio), Your own (connect your own account) or Off.
- App push: a switch. "Send push notifications to your app users."
- Turn on the App push switch. If Firebase is not connected yet, you see "Firebase is not set up, so pushes will not arrive." with a Set up Firebase link.
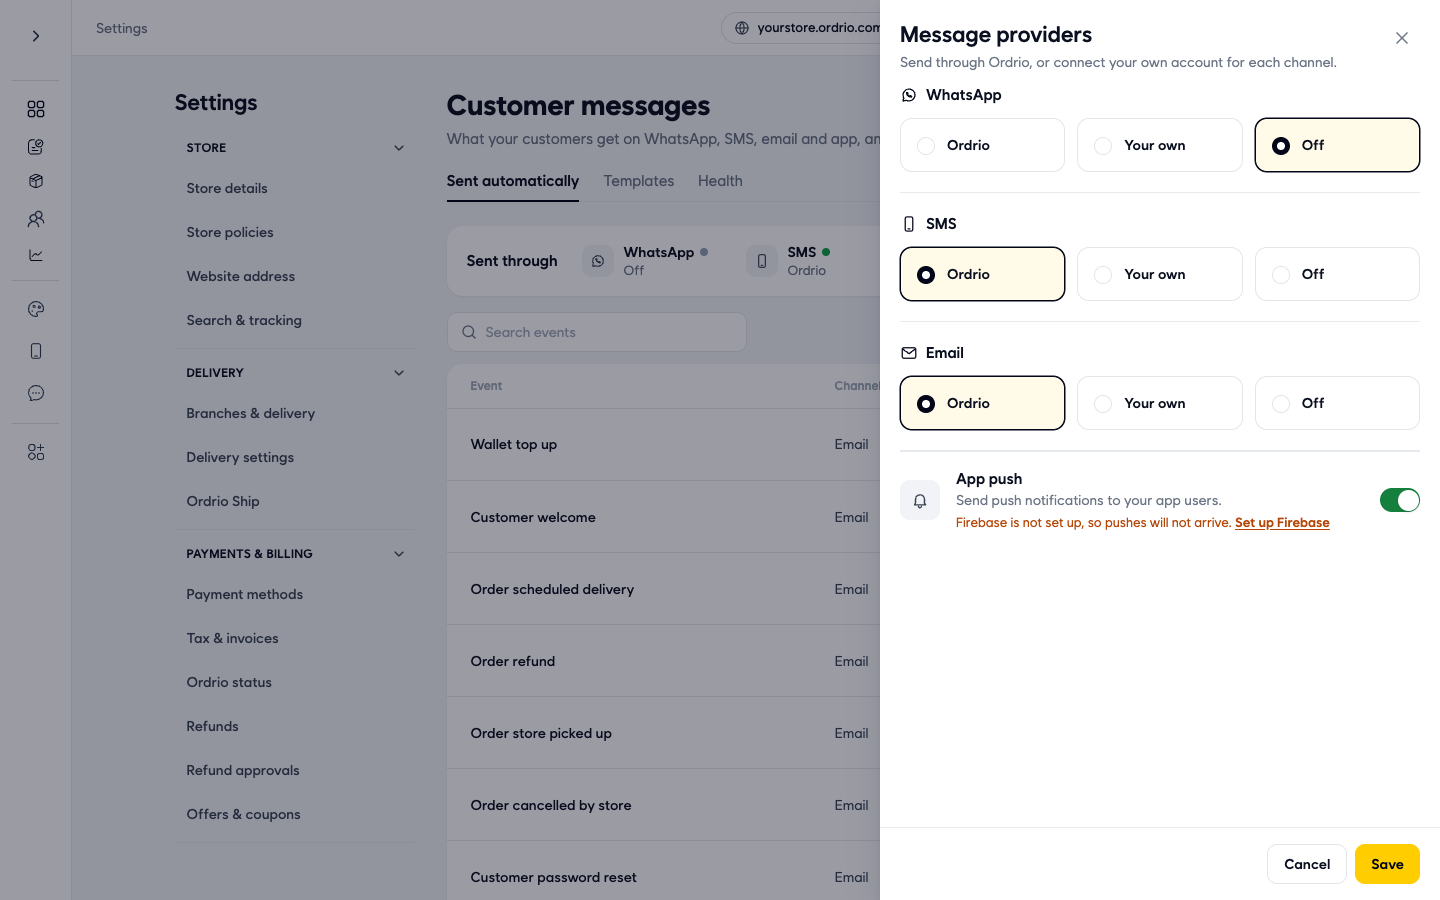
- Click Save. Under Sent through, App push now shows "Firebase not set up" until you connect Firebase.
Connect your Firebase project
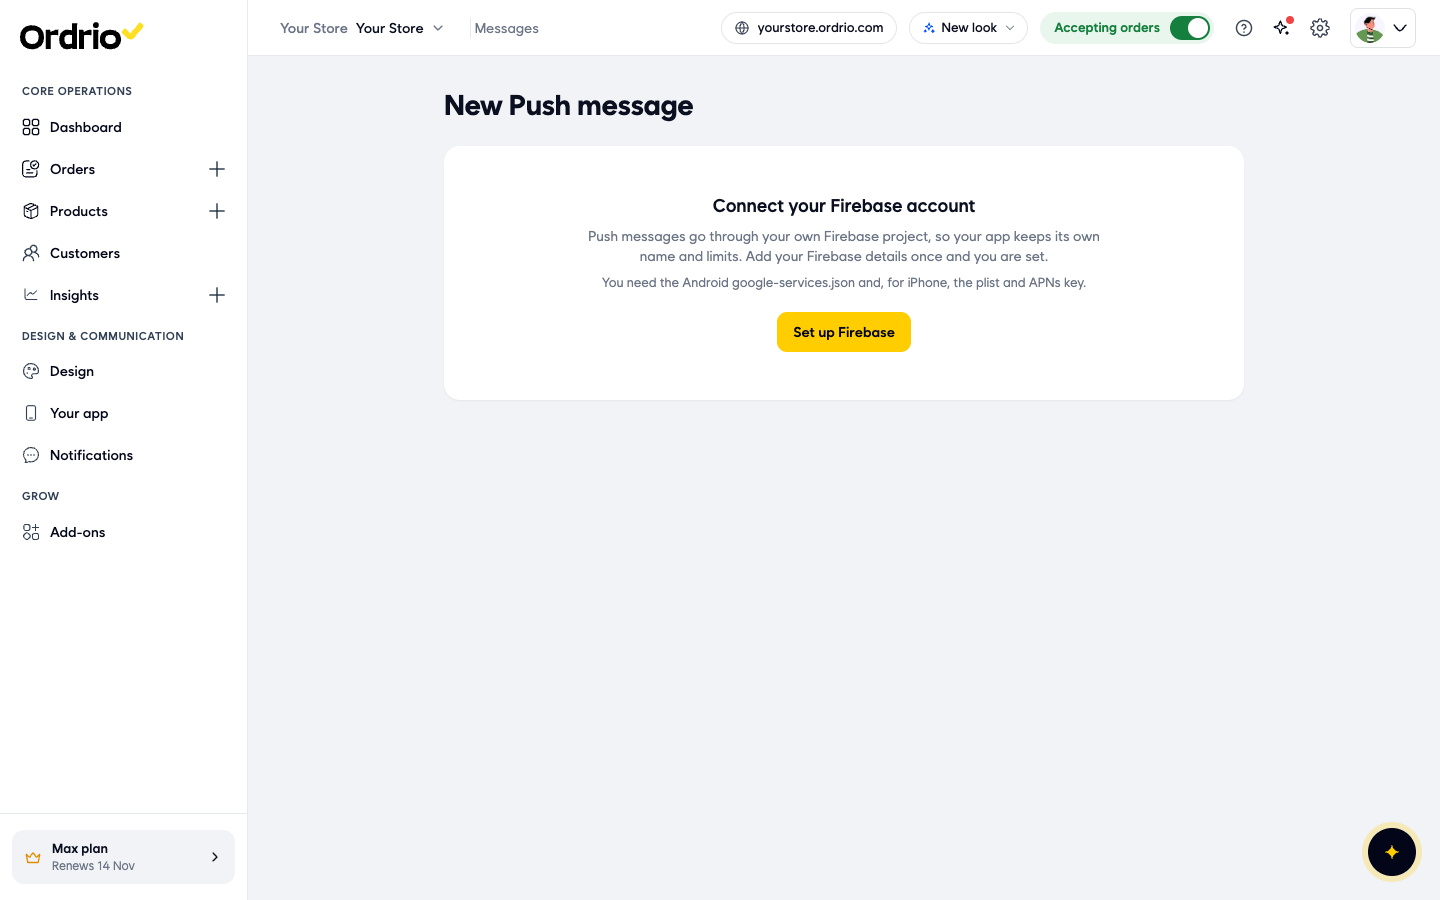
- Go back to Notifications and click New message. If Firebase is not connected, the page shows "Connect your Firebase account". It explains that push messages go through your own Firebase project, so your app keeps its own name and limits.
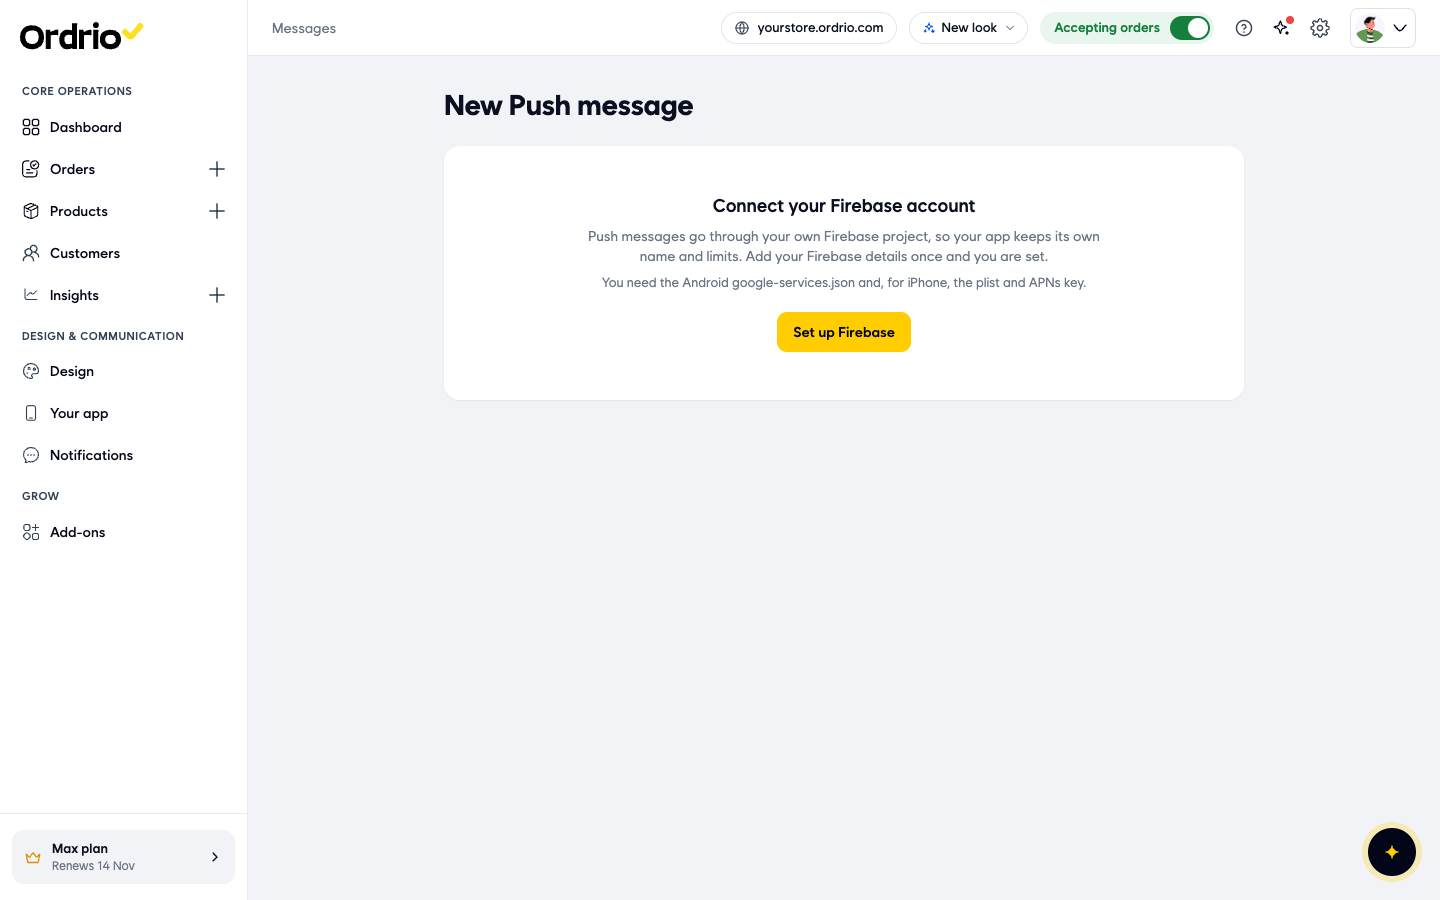
- Click Set up Firebase. The Firebase page opens ("Send push notifications from your app"). It has:
- Use your own Firebase: a switch. Keep it on to upload the files from your Firebase project for each app.
- Android: shows Not set up until you upload both files. Upload the Push notification file and google-services.json with Choose File. Until then it shows "Android customers don't get notifications."
- iPhone: shows Not set up until you upload both files. Upload GoogleService-Info.plist and the APN key with Choose File. Until then it shows "iPhone customers don't get notifications."
- App details for Firebase: click it to see Your app details: Android package name, SHA-1 certificate fingerprint (upload key), SHA-1 certificate fingerprint (Play App Signing), iOS bundle ID and Apple Team ID. Use these when you register your apps in the Firebase console, before you upload the files. The package name and bundle ID must match exactly, or push messages never arrive.
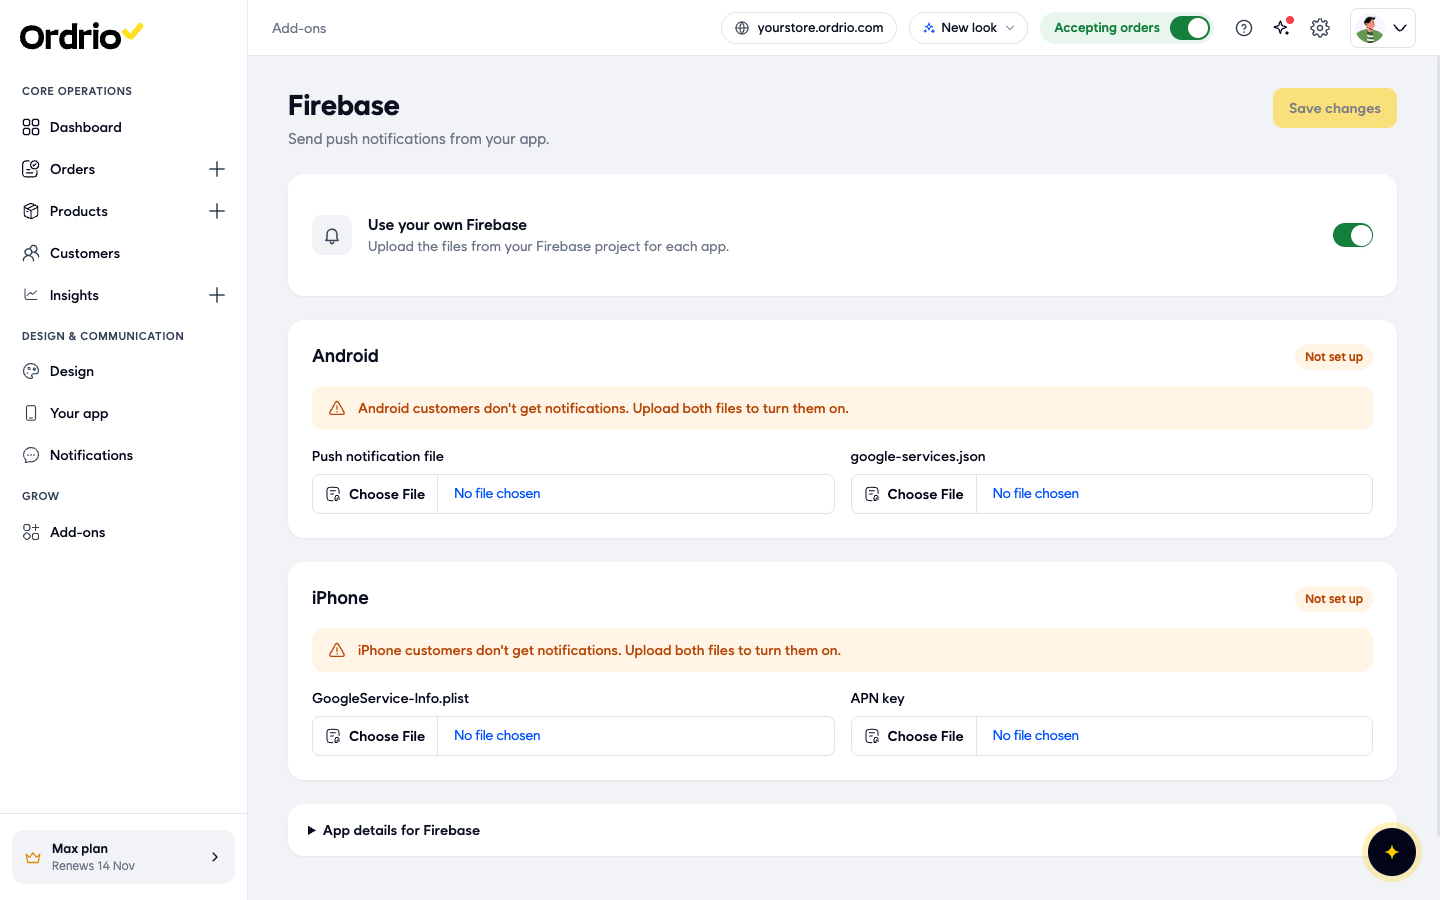
- Upload the files and click Save changes.
Write and send your message
The message form opens only after your Firebase files are uploaded. Until then, every time you click New message, the New Push message page shows "Connect your Firebase account" and a Set up Firebase button instead of the form. You cannot start a message or save a draft before that.
Once Firebase is connected:
- Go to Notifications and click New message. The form has five steps shown at the top: Name it, Who should get it?, What should it say?, When should it go out? and Check and send.
- In Name it, type a Message name, for example "Weekend flash sale". Use your own name for your offer. Only you see this name, your customers never do. It can be up to 100 characters. Use a name that helps you find the message later.
- Click Next: who gets it to go on (it works once the message has a name), or Save draft to finish it later. Cancel closes the form without saving.
- Go through Who should get it?, What should it say? and When should it go out?, then check your message in Check and send and send it.
Find your messages
The Messages page lists every message you have created. You can:
- Filter by status: All, Draft, Scheduled, Sent or Failed.
- Search messages by typing in the search box at the top right.
For each message, the list shows:
- Message: the message you created.
- Channel: how it was sent, for example push.
- Status: draft, scheduled, sent or failed.
- Audience: who the message was for.
- Sent, Delivered and Opened: how many customers it was sent to, how many received it and how many opened it.
- Date sent: when it went out.
- Actions: what you can do with the message.
When the list is empty, it shows "Send your first message" with a New message button.
Good to know
- SMS, email and WhatsApp offers are not available yet. The pages for these channels say "This channel is not available yet. It comes in a later update." They show this even on the Max plan. For now, push is the channel you can use for offers.
- The Message providers choices for WhatsApp, SMS and Email are for the messages Ordrio sends automatically, such as order updates. They do not unlock SMS, email or WhatsApp offers.
- Push messages only reach customers who have installed your store's app. Customers who order only on your website do not get them.
- Switching on App push is not enough on its own. Until you upload your Firebase files, push messages do not arrive and the message form does not open.
Related
- Announcement bars and banners
- Cash on delivery
- Setting up a payment gateway