How-to guide
Creating and managing branches
Add and edit branches under your business.
A branch is each place you sell from, like a second shop or a kitchen in another area. Add a branch so its orders, address and delivery settings are kept separate from your other branches, and edit it any time its details change.
Before you start
- You need to be able to log in to your Ordrio admin panel at nadi.ordrio.com.
- Keep the branch's address, phone number and email ready.
- The values in the screenshots below are examples. Use your own branch's details.
Open your branches
- Open nadi.ordrio.com (your Ordrio admin panel) and log in.
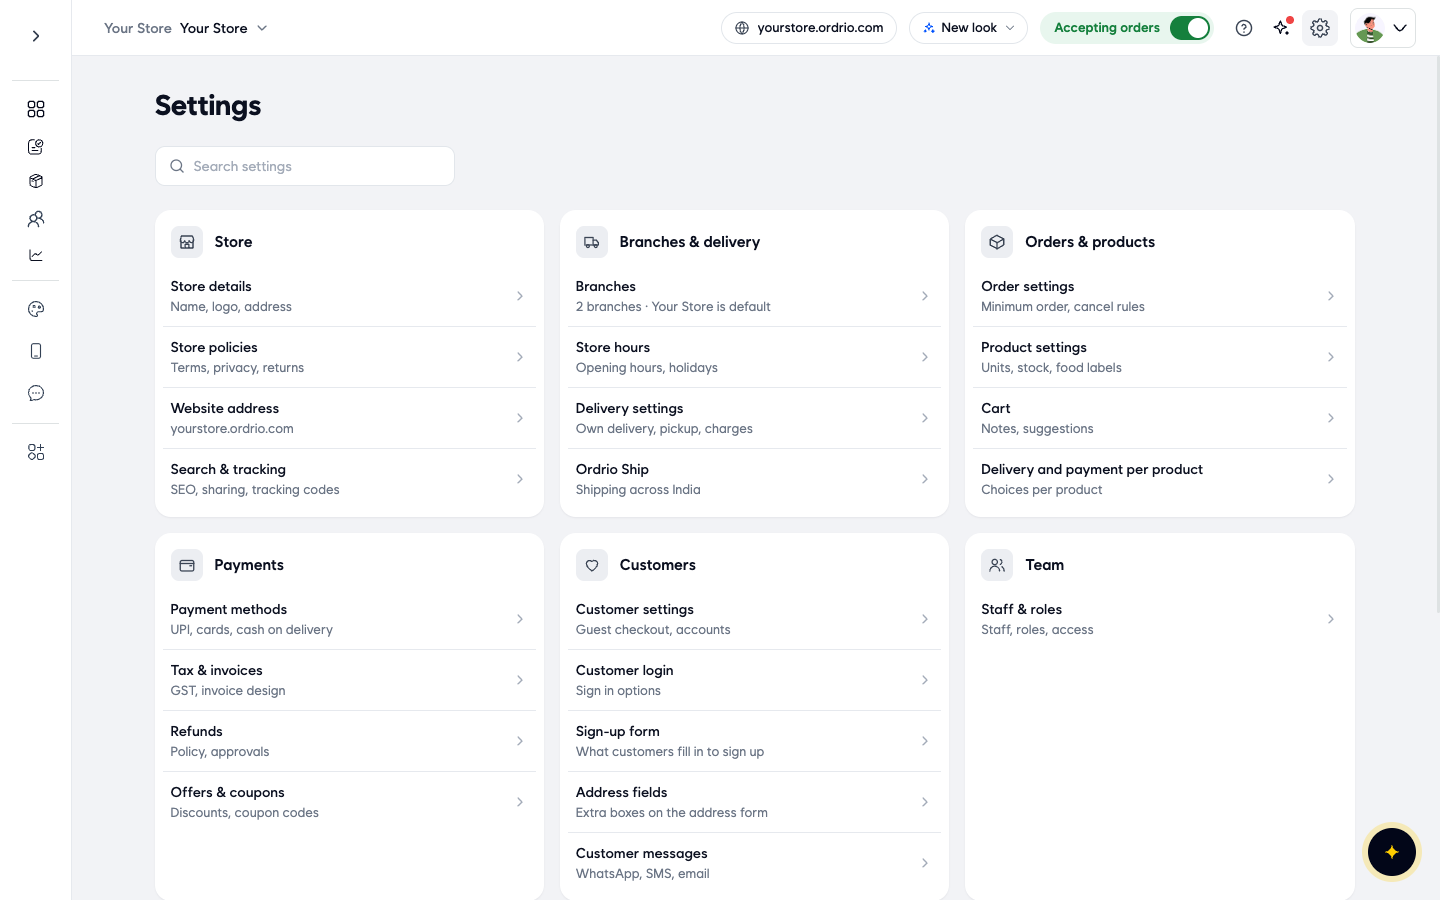
- Click the Settings icon (the gear) at the top right. The Settings page opens. The Branches & delivery box shows Branches with how many branches you have and which one is your default.
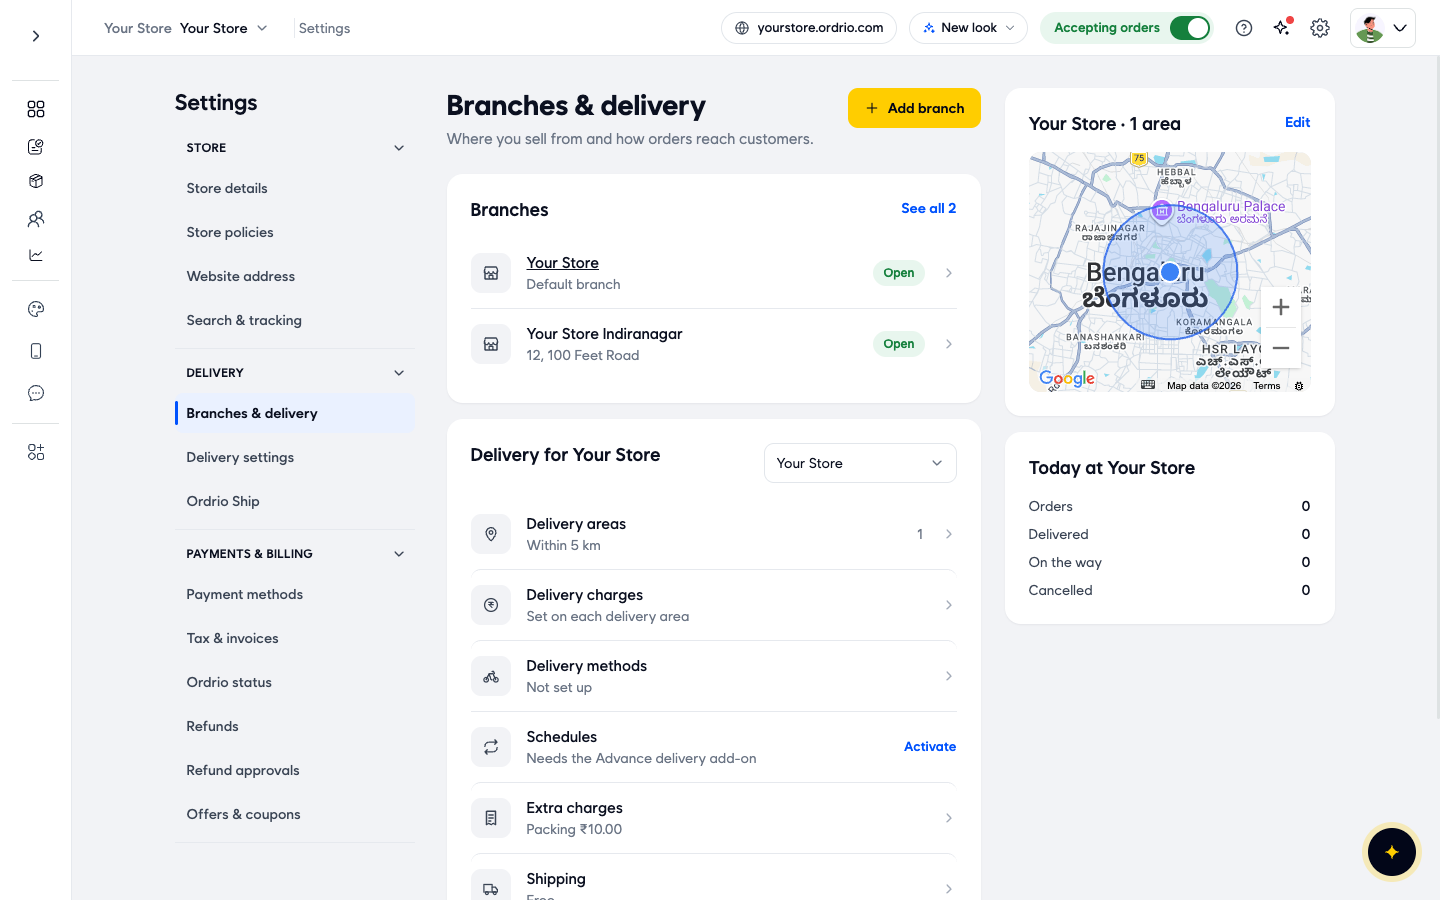
- Click Branches. The Branches & delivery page opens. It lists your branches with their address and whether each one is Open, and below that the delivery settings for the branch you pick in the Branch box.
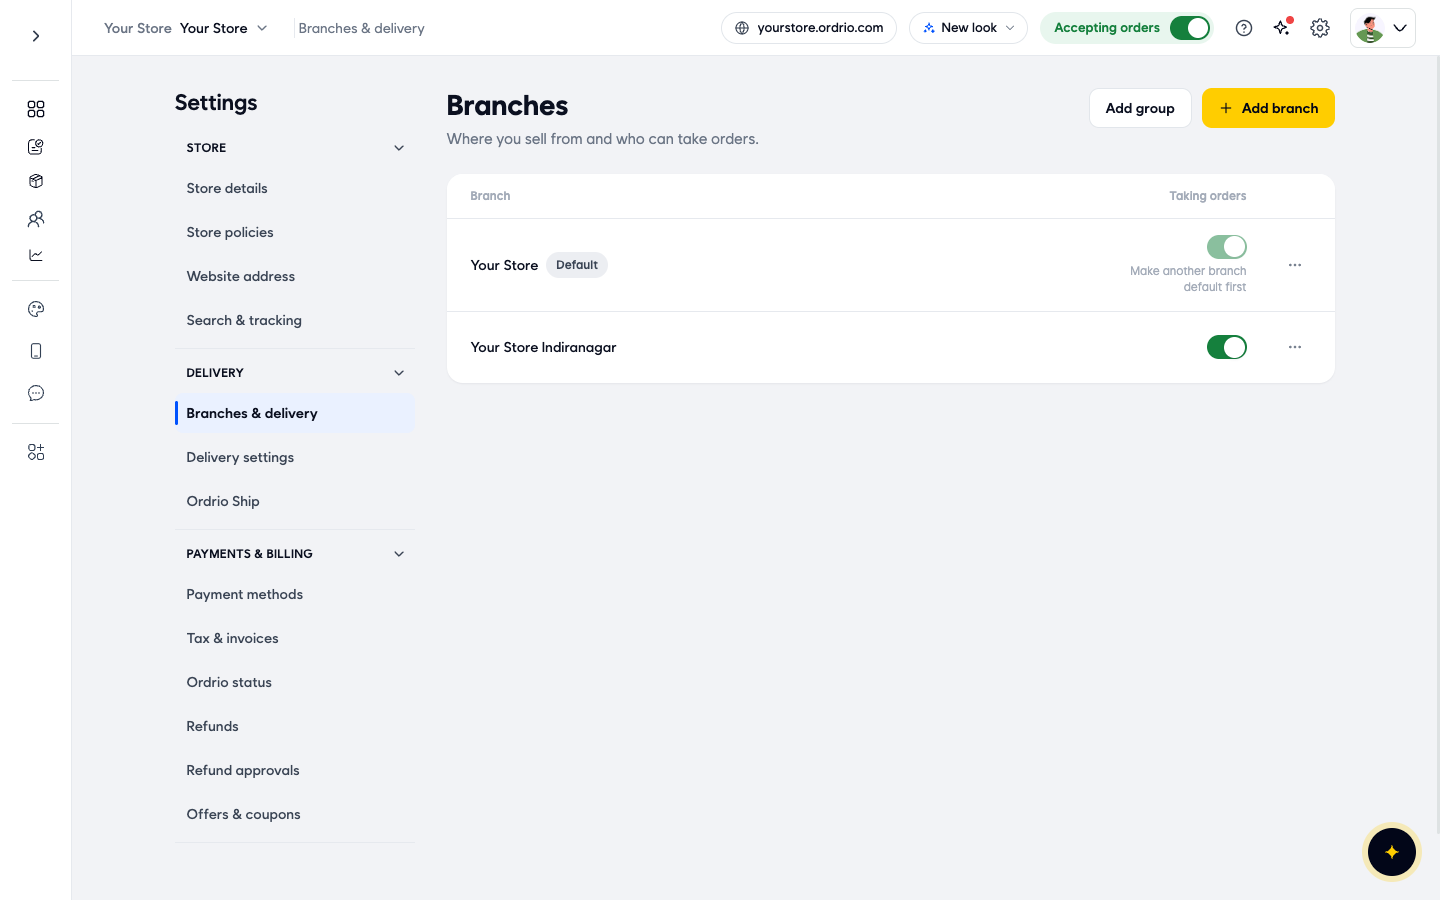
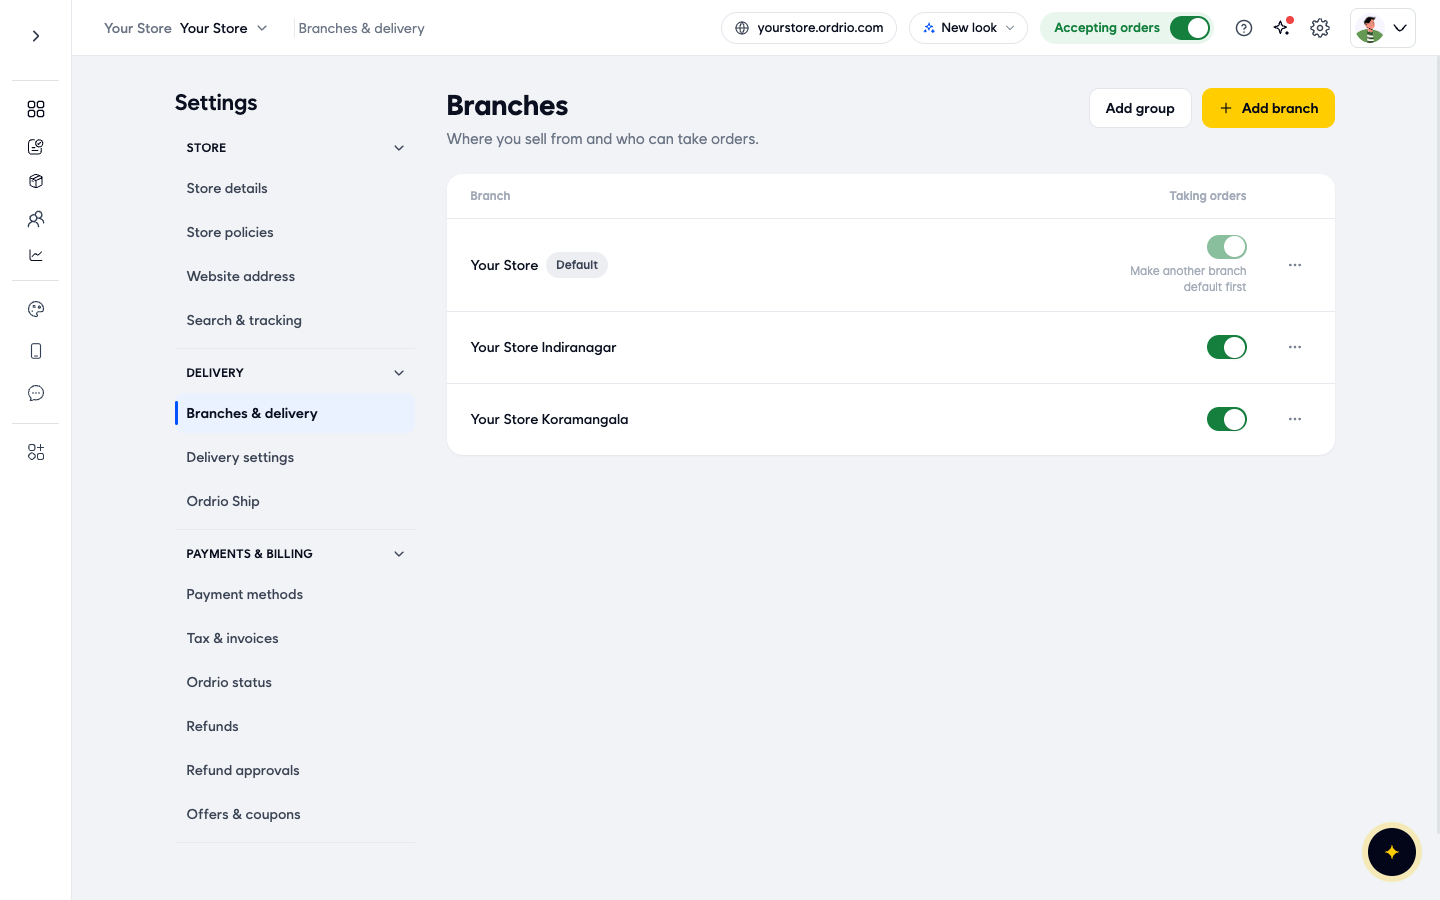
- Click See all next to Branches. The Branches page opens with every branch, a Taking orders switch for each one, and the Add group and Add branch buttons.
Add a branch
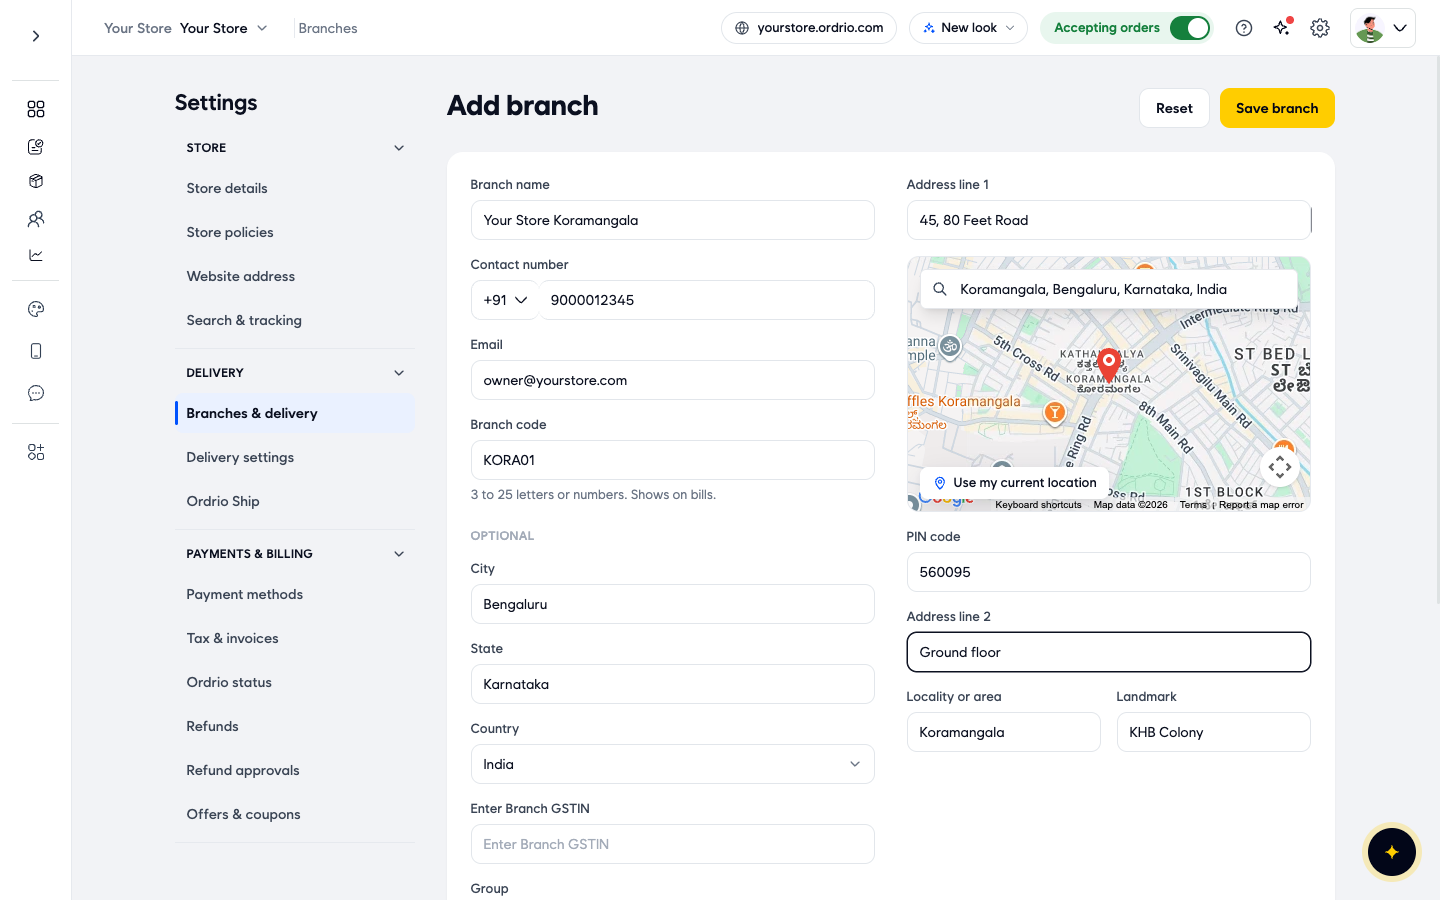
- Click Add branch. The Add branch page opens.
- In Branch name, type the name customers and your team will see, for example "Your Store Koramangala". This field is required.
- In Contact number, pick the country code (for example +91) and type the branch's phone number. Type your branch's own number, not the example shown. This field is required.
- In Email, type the email address for this branch. Type your own email, not the example shown. This field is required.
- Check Branch code. Ordrio fills in a code for you. You can change it to something shorter, for example "KORA01". It must be 3 to 25 letters or numbers, and it shows on bills.
- In Search for the branch on the map, type the branch's area and pick it from the list. The pin moves to that place. Ordrio also fills in City, State, PIN code, Locality or area and Landmark for you. You can drag the map to put the pin on the exact spot, or click Use my current location if you are at the branch. Picking a place on the map is required.
- Check Branch name again. Picking a place on the map can replace it with a map code. If it did, type your branch name again.
- In Address line 1, type the shop number and street, for example "45, 80 Feet Road". Picking a place on the map can put a map code here too, so check it. This field is required.
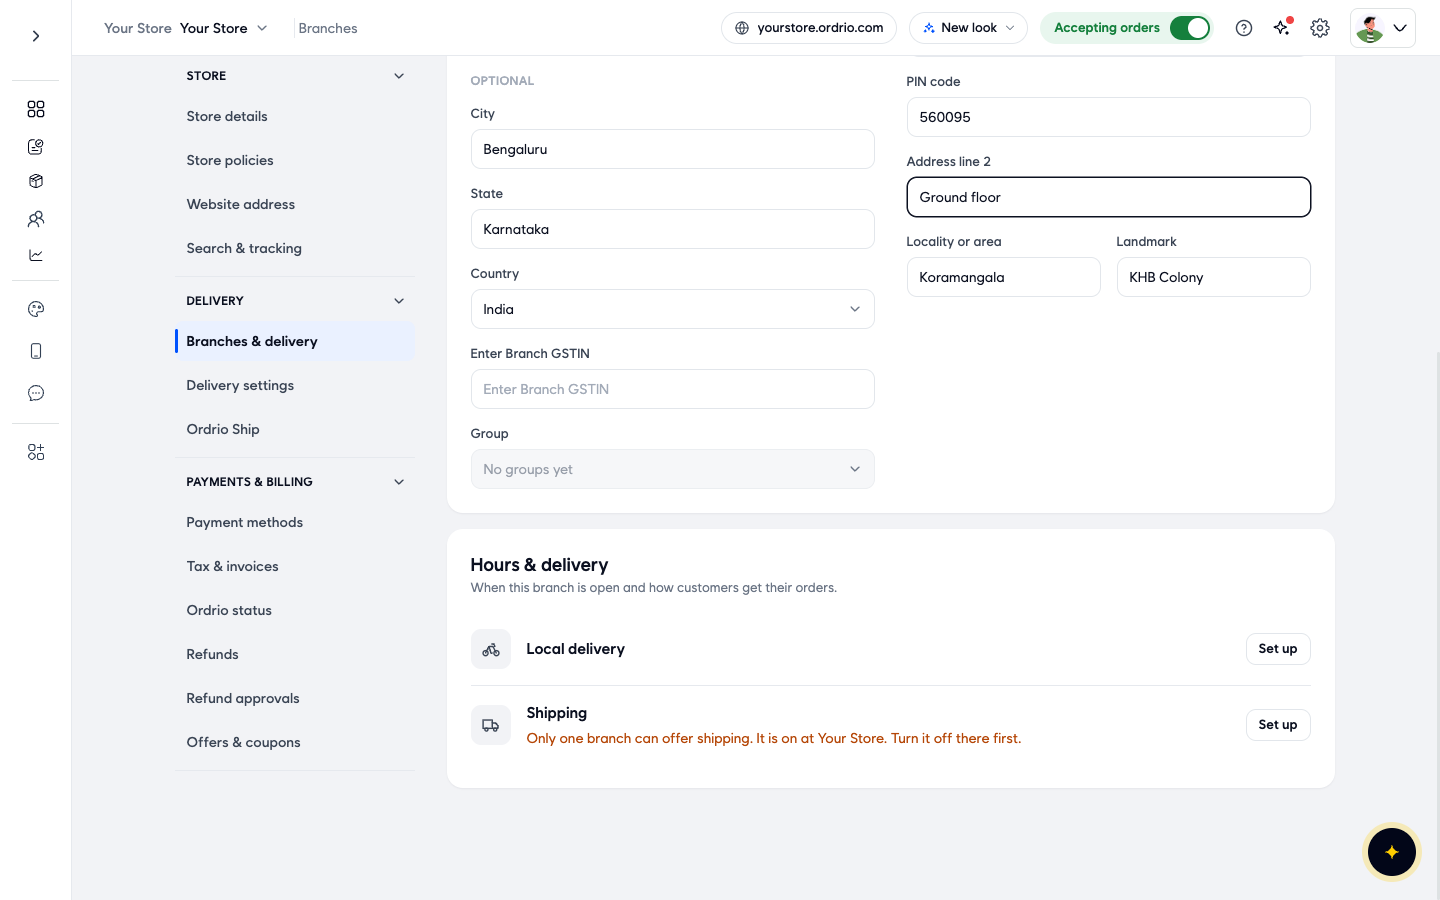
- In Address line 2, type the floor or building, if you need to. This field is optional.
- Check PIN code, Locality or area and Landmark, and correct them if needed. PIN code is required.
- Check the optional fields on the left:
- City and State: filled in from the map. Correct them if needed.
- Country: the country the branch is in, for example India.
- Enter Branch GSTIN: the GST number for this branch, if it has its own.
- Group: the branch group this branch belongs to. It shows No groups yet until you create a group with Add group on the Branches page.
- Scroll down to Hours & delivery. This is where you choose how customers at this branch get their orders:
- Local delivery: click Set up to choose the areas this branch delivers to and what it charges.
- Shipping: click Set up to ship orders from this branch. Only one branch can offer shipping. If another branch already offers it, you see a message telling you to turn it off there first.
- Click Save branch at the top right. If a required field is empty, you see a message under it, for example "Branch name is required". Fill it in and click Save branch again.
- When the branch is saved, you see "Branch created. You can now configure branch timings and delivery settings." The page changes to Edit branch, so you can set up Local delivery or Shipping under Hours & delivery straight away.
- Go back to Branches. Your new branch is in the list, and its Taking orders switch is on.
Edit a branch
- On the Branches page, click the ... button next to the branch. A menu opens with Edit branch, View delivery settings and Move to group….
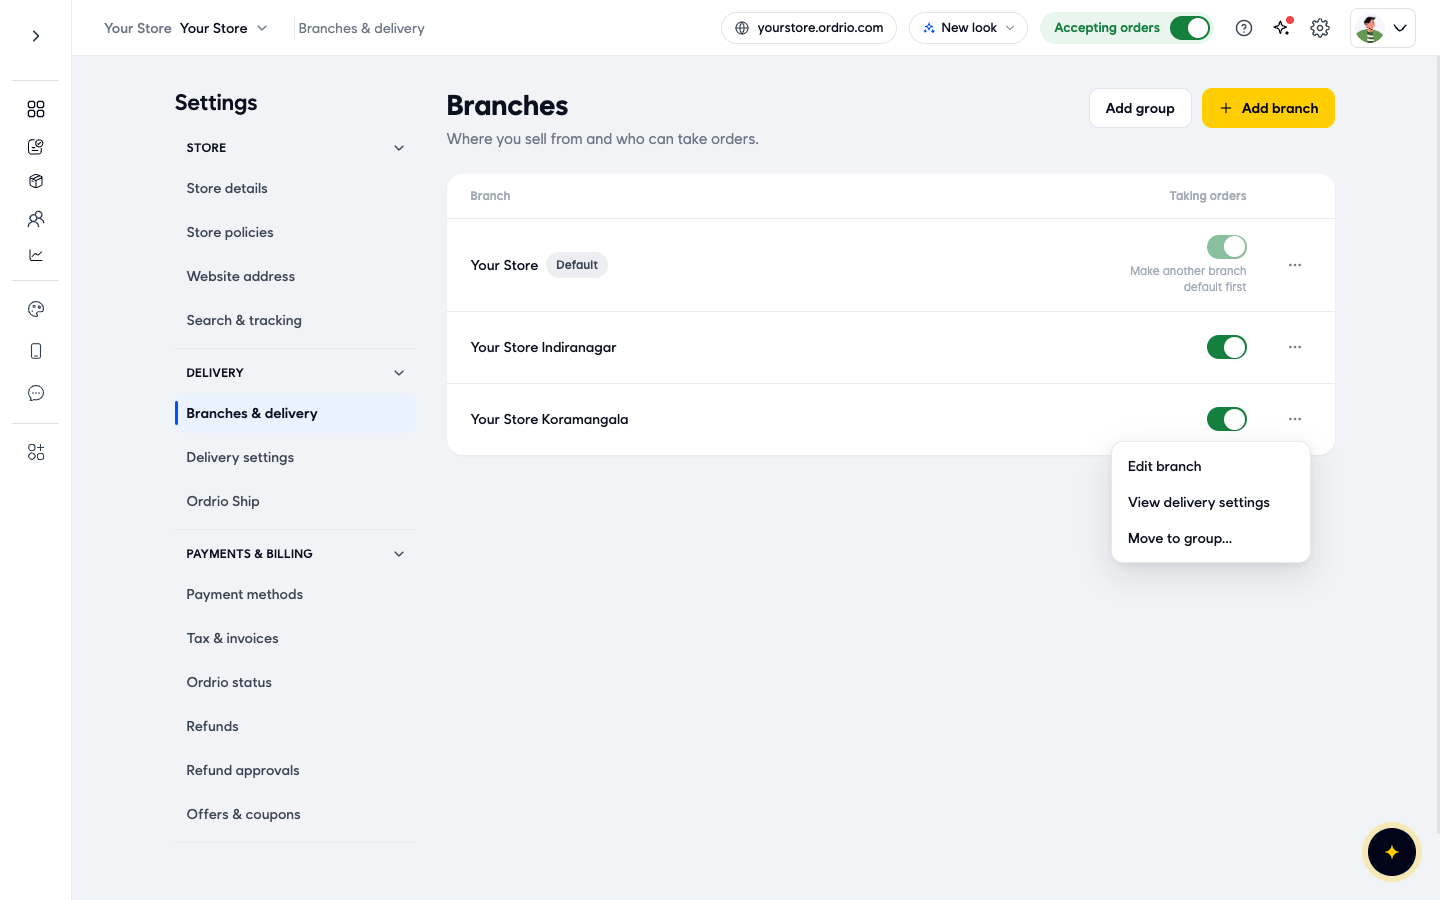
- Click Edit branch. The Edit branch page opens with the branch's saved details. You can also open it by clicking the branch's name on the Branches & delivery page.
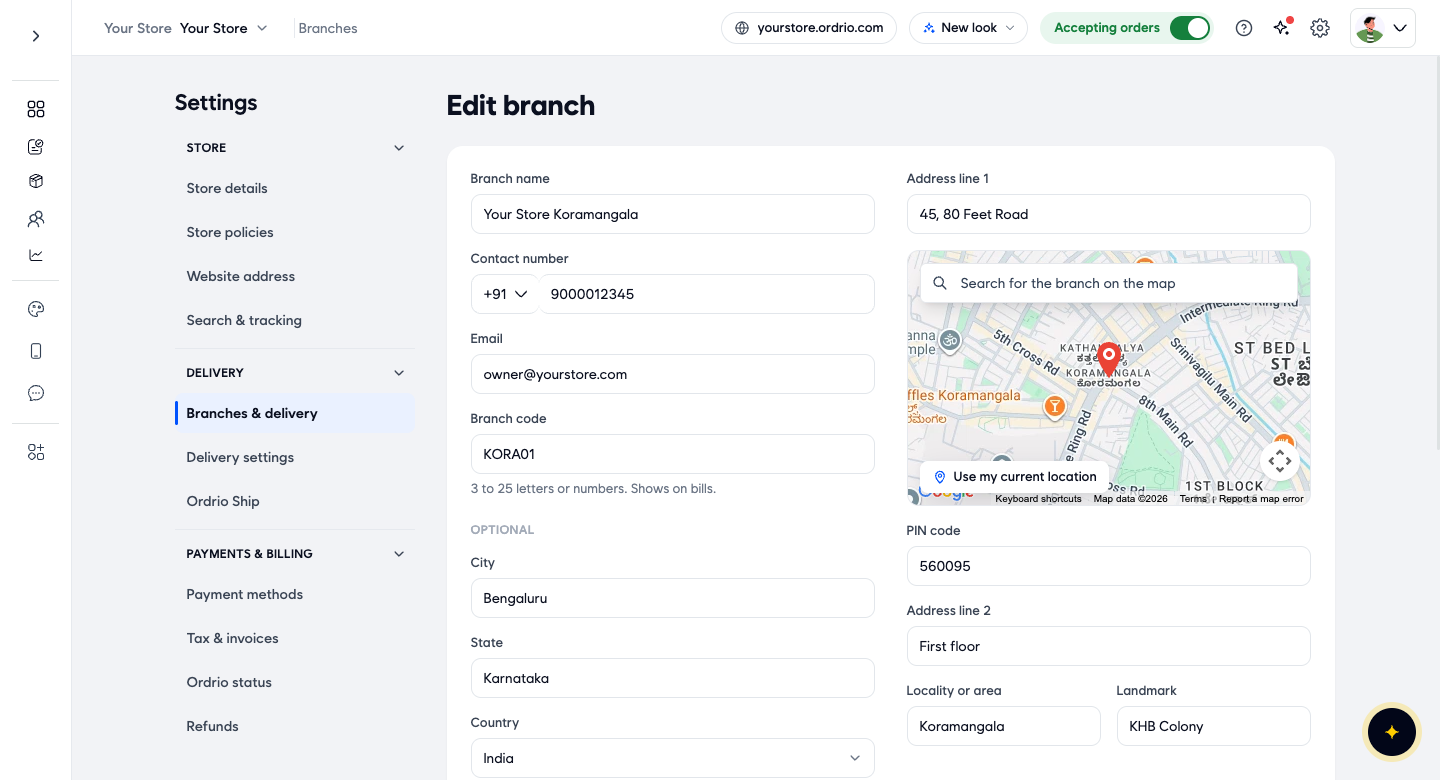
- Change the field you need, for example Address line 2 or Contact number. The fields are the same as on the Add branch page. A bar with "You have unsaved changes" appears at the bottom of the page.
- Click Save in that bar to keep your changes. To undo them, click Discard instead.
Other things you can do from the branch list
- Stop a branch taking orders: turn off its Taking orders switch on the Branches page. Turn it on again when the branch is ready.
- See a branch's delivery settings: click ... next to the branch and click View delivery settings.
- Put branches in groups: click Add group to create a group, then click ... next to a branch and click Move to group….
- Switch between branches: click the branch name at the top left of your admin panel and pick a branch. You then see that branch's details.
Good to know
- Your default branch has a Default label. You cannot turn off Taking orders for it. You see "Make another branch default first".
- Only one branch can offer Shipping. Turn it off at the branch that has it before you set it up at another branch.
- Branch code shows on bills, so pick something short your team will recognise.
- After you pick a place on the map, always check Branch name and Address line 1, because the map can replace them with a map code.
- On the Edit branch page there is no Save branch button. Your changes are saved only when you click Save in the "You have unsaved changes" bar.
- Schedules and Store hours for a branch need add-ons. You see an Activate link next to them on the Branches & delivery page if your store does not have them yet.
Related
- Delivery zones and geo mapping
- Branch operating hours and availability
- Limiting staff to branches
Was this article helpful?