How-to guide
Accessing Ordrio for the first time
Log in, find your credentials and what you see on first access.
Your Ordrio admin is where you run your store. This article shows you how to create your store the first time, what you see when you first get in, where to find your login details, and how to log in again with your mobile number or email.
Create your store with your mobile number
Signup has 5 short steps. You can see which step you are on at the top right of the screen.
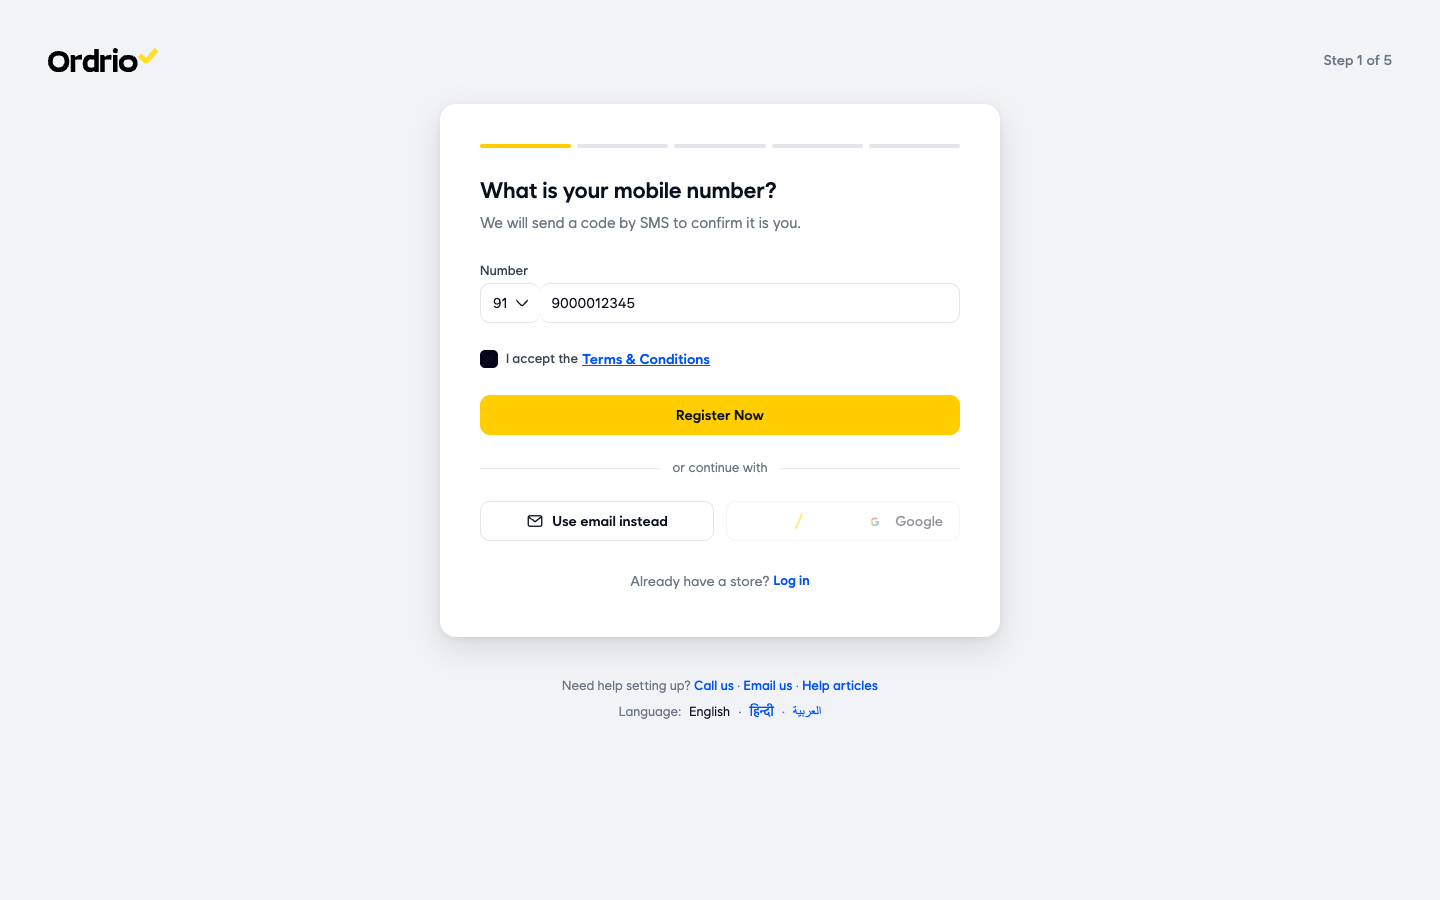
Step 1: Your mobile number
- Open nadi.ordrio.com (your Ordrio admin panel) and click Create a store.
- The signup screen asks for your email first. To use your mobile number, select Use mobile number instead.
- Type your mobile number in Number. The number on the screenshot is only an example, so type your own mobile number. Keep the country code as 91 for India, or select it to choose another one.
- Tick I accept the Terms & Conditions.
- Select Register Now. Ordrio sends a 6-digit code by SMS to confirm it is you.
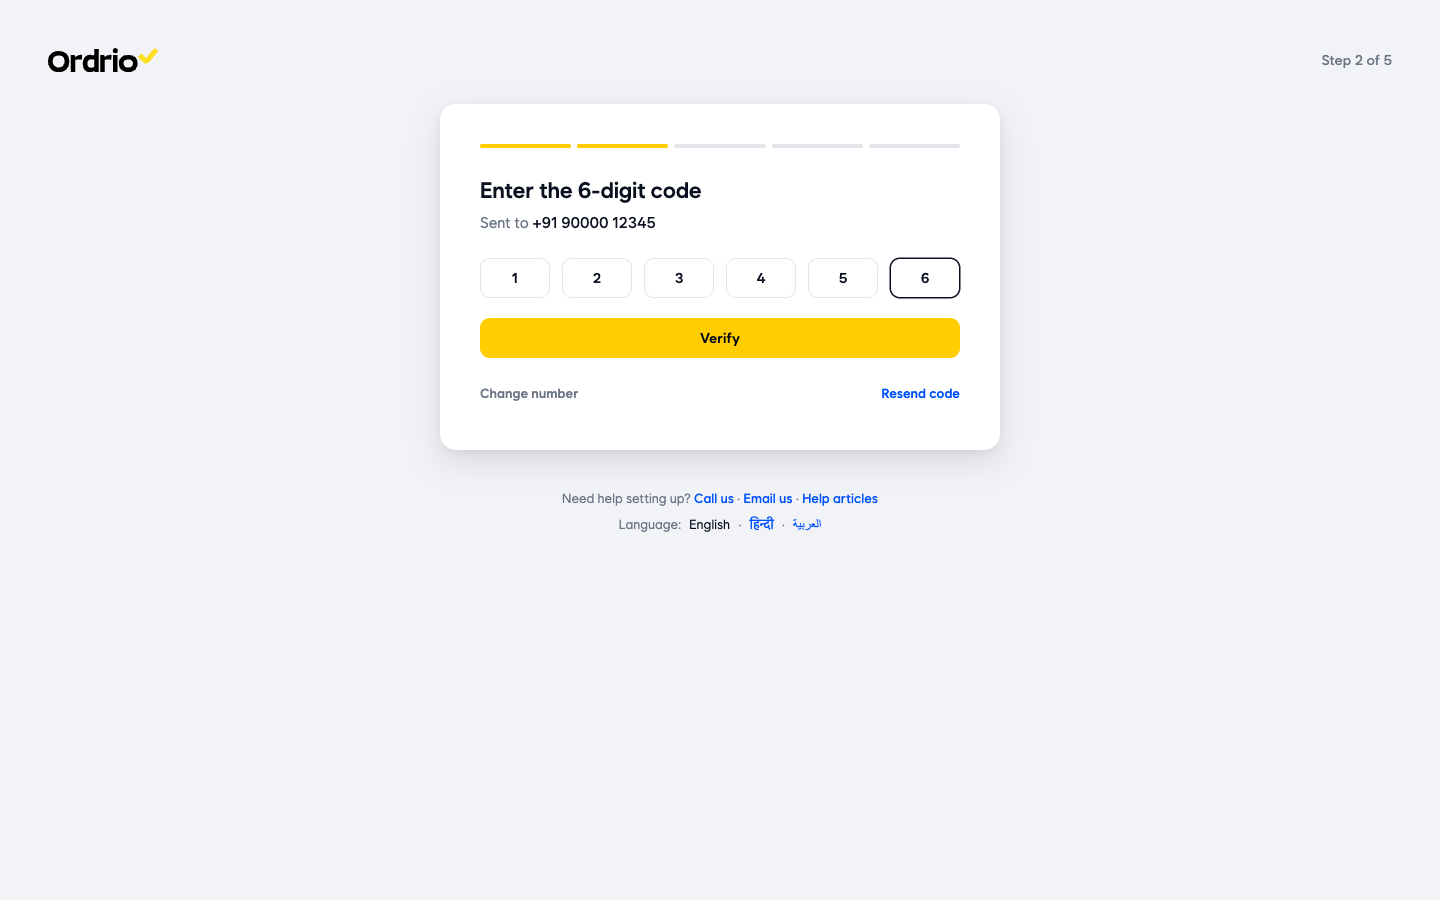
Step 2: The code
- On Enter the 6-digit code, type the code from the SMS. The code on the screenshot is only an example.
- Select Verify. If the code does not arrive, select Resend code. If you typed the wrong number, select Change number.
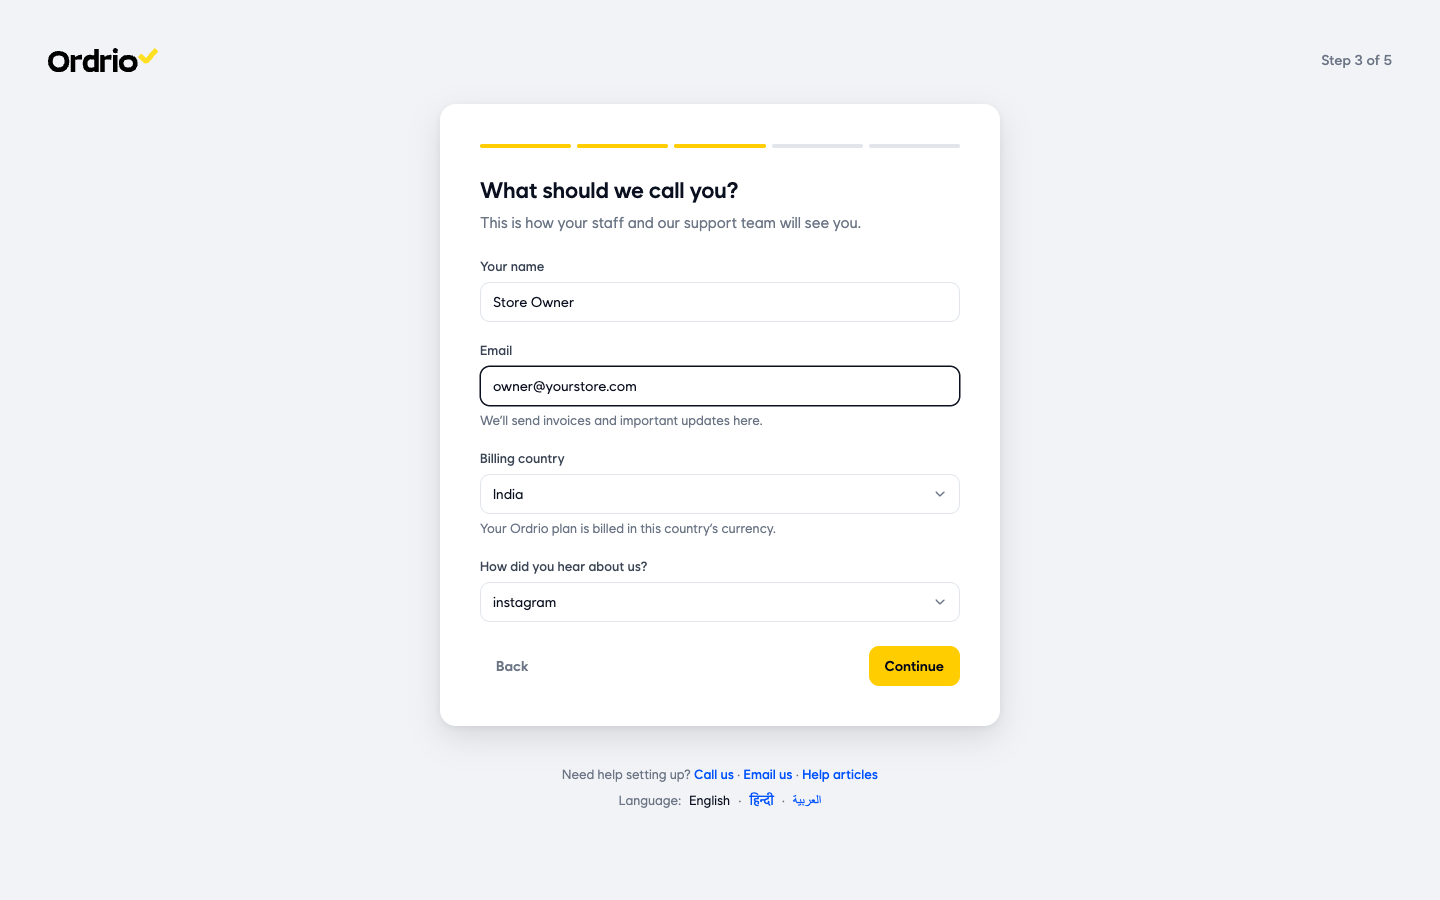
Step 3: Your details
On What should we call you?, fill in:
- Your name: how your staff and the Ordrio support team will see you.
- Email: Ordrio sends your invoices and important updates here. Type your own email. The email on the screenshot is only an example.
- Billing country: your Ordrio plan is billed in this country's currency.
- How did you hear about us?: choose one from the list.
- Select Continue. To go back to the previous step, select Back.
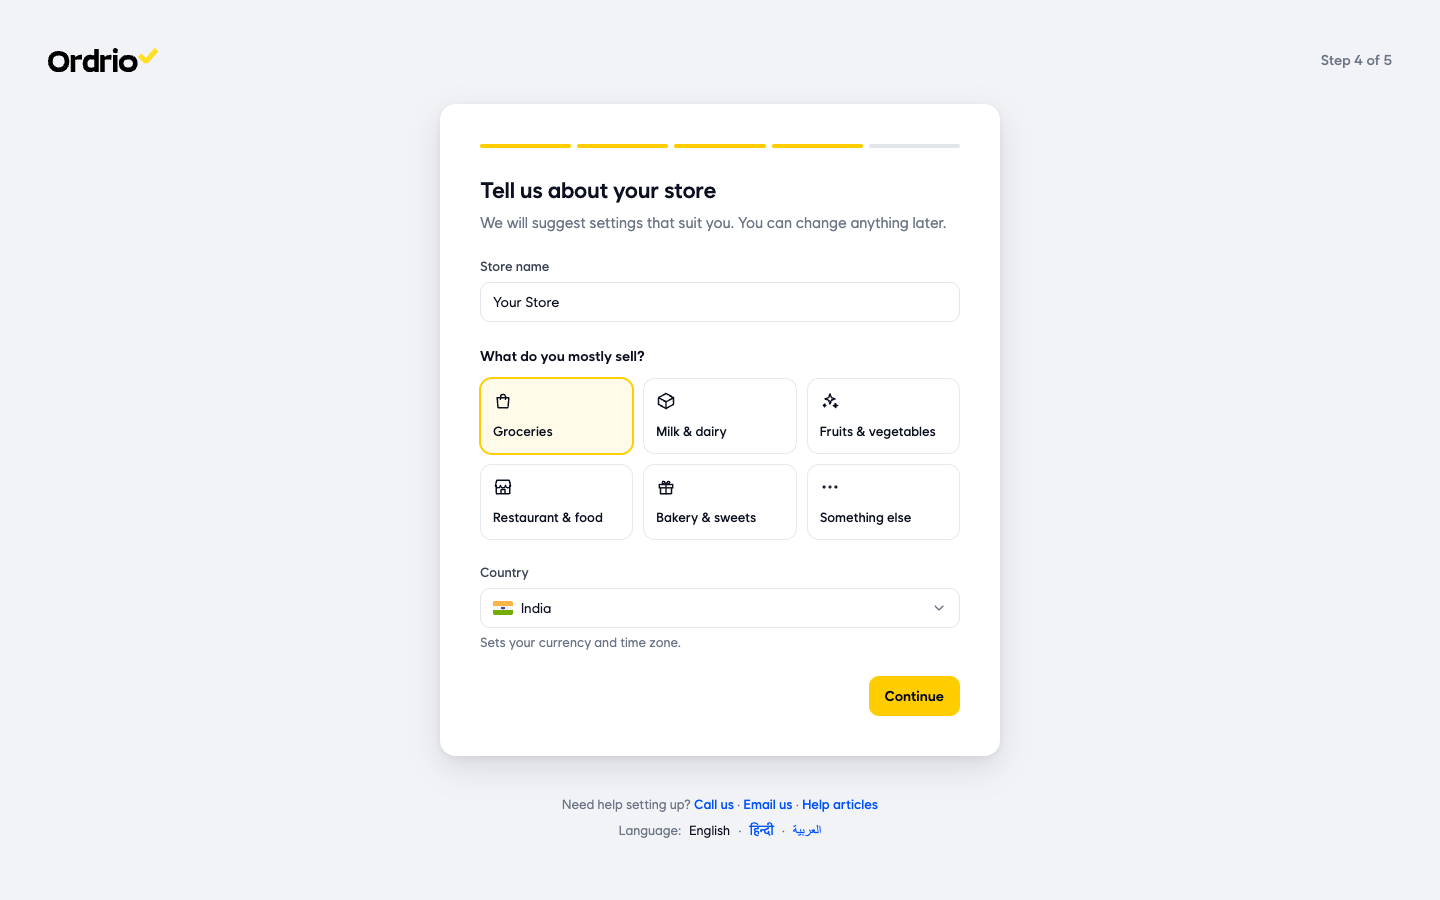
Step 4: Your store
On Tell us about your store, fill in:
- Store name: the name of your store.
- What do you mostly sell?: choose Groceries, Milk & dairy, Fruits & vegetables, Restaurant & food, Bakery & sweets or Something else. Ordrio uses this to suggest settings that suit you. You can change anything later.
- Country: sets your currency and time zone.
- Select Continue.
Step 5: Your business location
On Confirm business location, show customers and riders where to find you:
- In Search for your store address, select Choose and search for your address.
- Drag the pin on the map to the exact spot if you need to.
- Select Confirm Business Location.
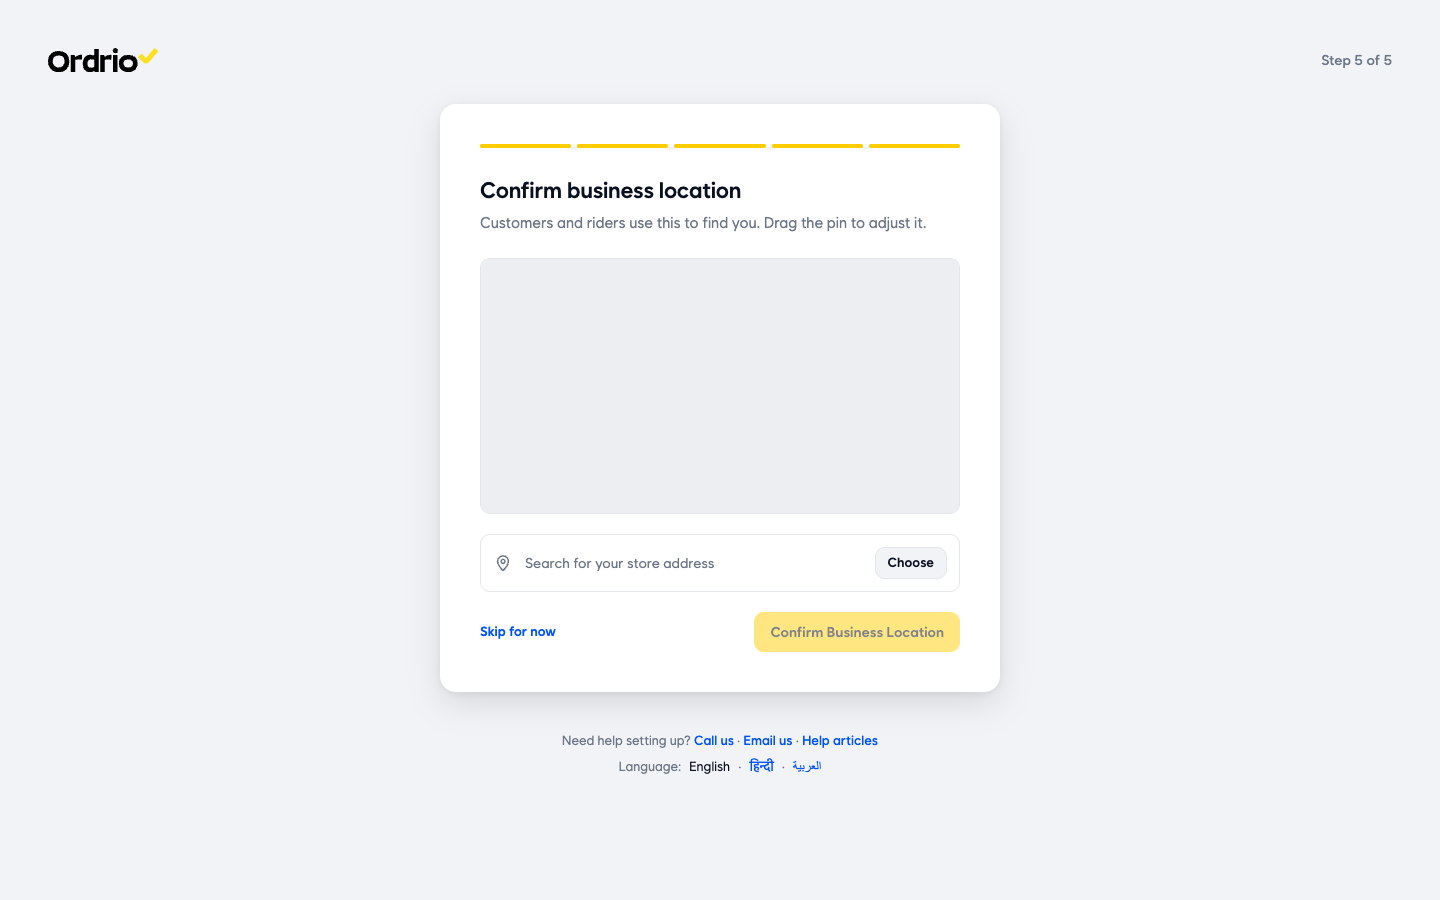
Not ready to add your address? Select Skip for now. Ordrio then opens your Dashboard.
Prefer to sign up with your email? On the first signup screen, type your email in Email and a password in Password, tick I accept the Terms & Conditions and select Register Now. Ordrio emails you a code to confirm it is you.
What you see first
Your Dashboard opens with everything you need to get ready for your first order.
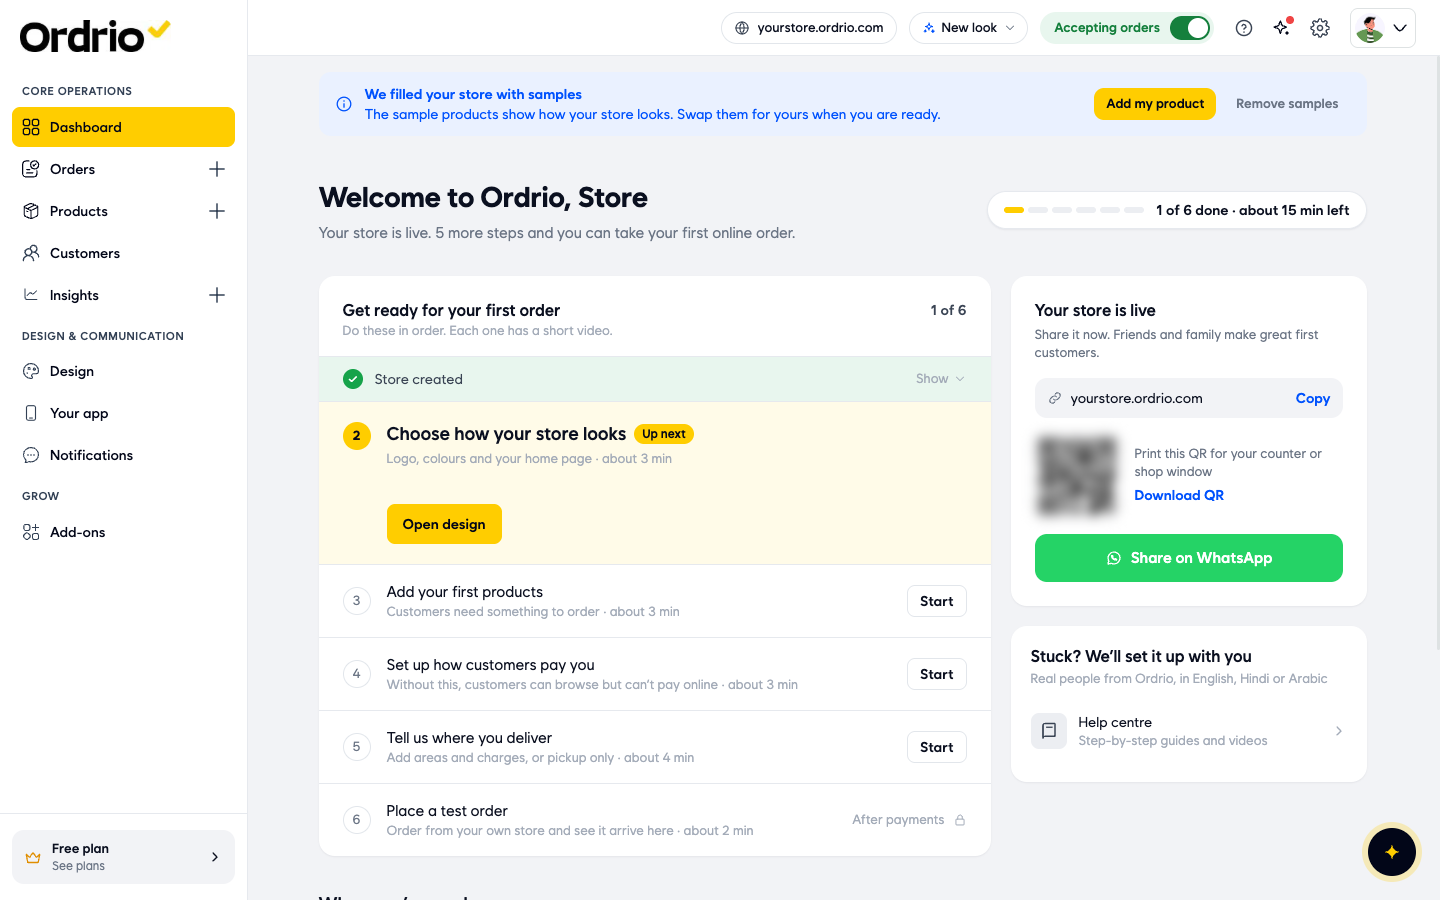
- We filled your store with samples. Ordrio adds sample products so you can see how your store looks. Select Add my product to add your own, or Remove samples to clear them.
- Welcome to Ordrio. Shows how many setup steps you have done, for example "1 of 6 done", and about how long the rest will take.
- Get ready for your first order. Six steps to do in order. Each one has a short video.
- Store created. Already done when you sign up.
- Choose how your store looks. Your logo, colours and home page. Select Open design.
- Add your first products. Customers need something to order. Select Start.
- Set up how customers pay you. Without this, customers can browse but can't pay online. Select Start.
- Tell us where you deliver. Add delivery areas and charges, or choose pickup only. Select Start.
- Place a test order. Order from your own store and see it arrive in your admin. This opens after you set up payments.
- When you're ready. Not needed for your first order, but they help you sell more: Set your opening hours, Create a welcome discount, Invite your staff and Use your own domain. Select Set up next to any of them.
- Your store is live. Your store link with a Copy button, a QR code you can print with Download QR, and Share on WhatsApp to send your link to friends and family.
- Stuck? We'll set it up with you. Opens the Help centre with step-by-step guides and videos.
- Accepting orders. The switch at the top shows whether your store is taking orders.
Find your login details later
- Select your profile picture at the top right.
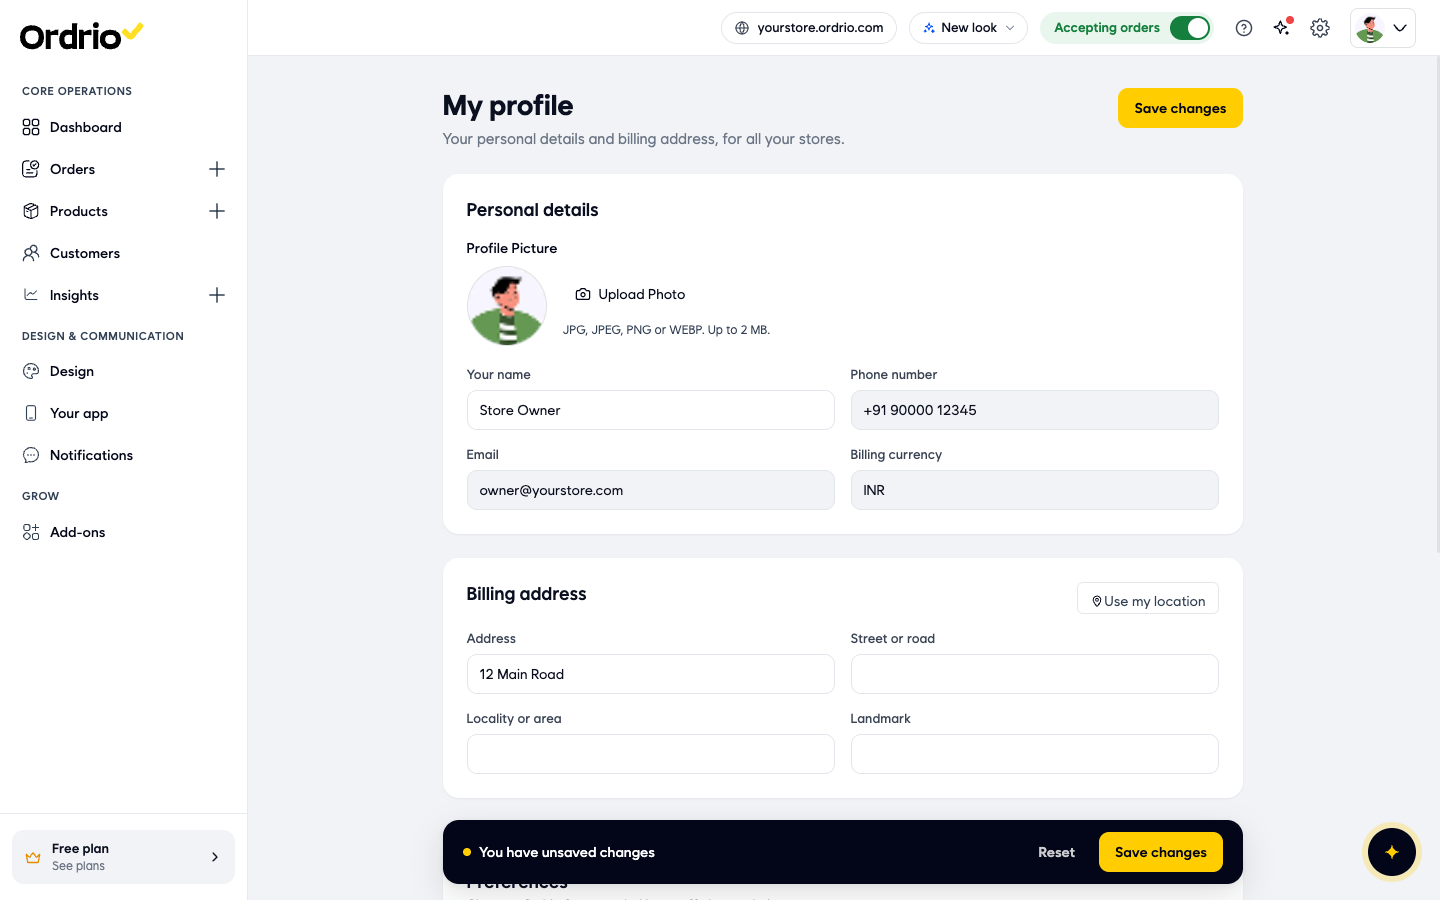
- Select My Account. The My profile page opens.
- Under Personal details, you can see Your name, Phone number, Email and Billing currency. You can change Your name here. Phone number, Email and Billing currency are shown greyed out, so you cannot change them on this page.
- Fill in your Billing address. Address is required. You can also add Street or road, Locality or area and Landmark, or select Use my location.
- Select Save changes.
To change your password, go to Security on the same page and select Change password. Type your Current password, then your New password, and type it again in Type it again. Select Save password.
Log in with your mobile number
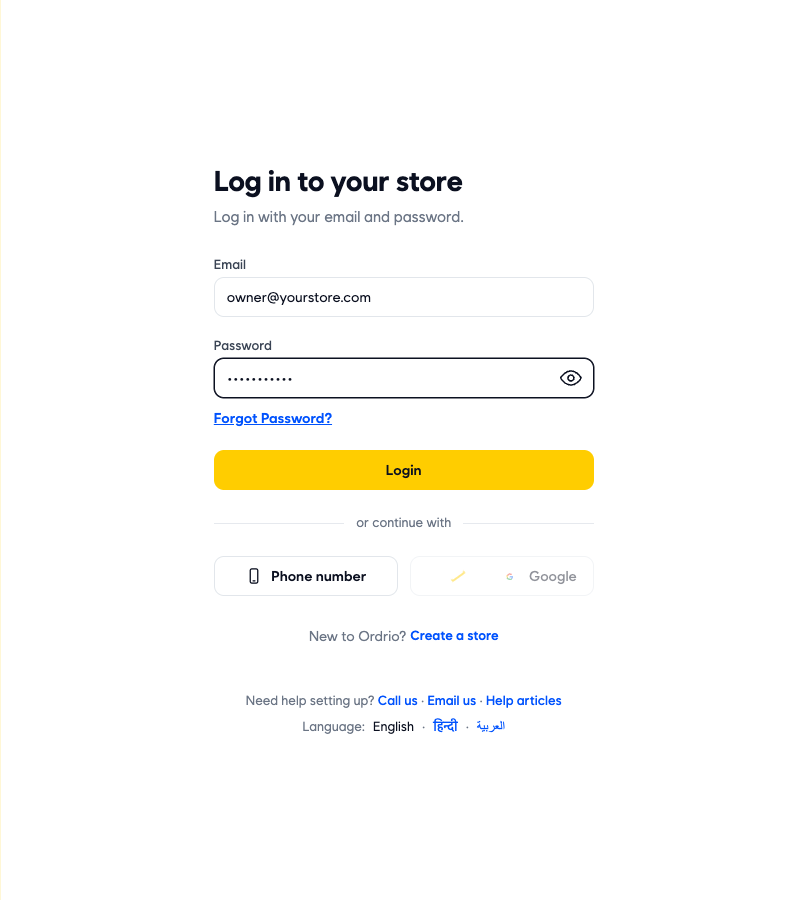
- Open nadi.ordrio.com (your Ordrio admin panel). You see Log in to your store.
- Under or continue with, select Phone number.
- Type your registered mobile number in Number. The number on the screenshot is only an example.
- Select Login. Ordrio sends a 6-digit code to your phone.
- Type the code and select Verify. Your Dashboard opens.
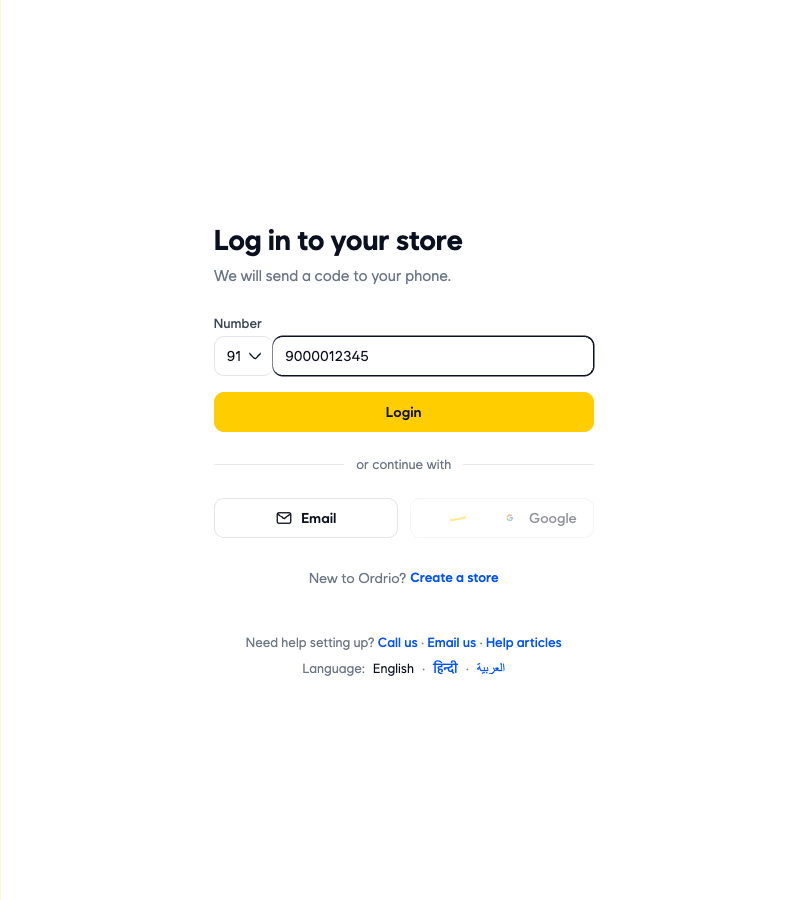
To go back to email, select Email under or continue with.
Log in with your email
- Open nadi.ordrio.com (your Ordrio admin panel). You see Log in to your store.
- Type your registered email address in Email. The email on the screenshot is only an example.
- Type your password in Password. Select the eye icon if you want to check what you typed.
- Select Login.
Forgot your password
- On the login page, select Forgot Password? below the password field.
- On Reset your password, type your registered email in Email. The email on the screenshot is only an example.
- Select Send code. Ordrio emails you a code, and then you can set a new password.
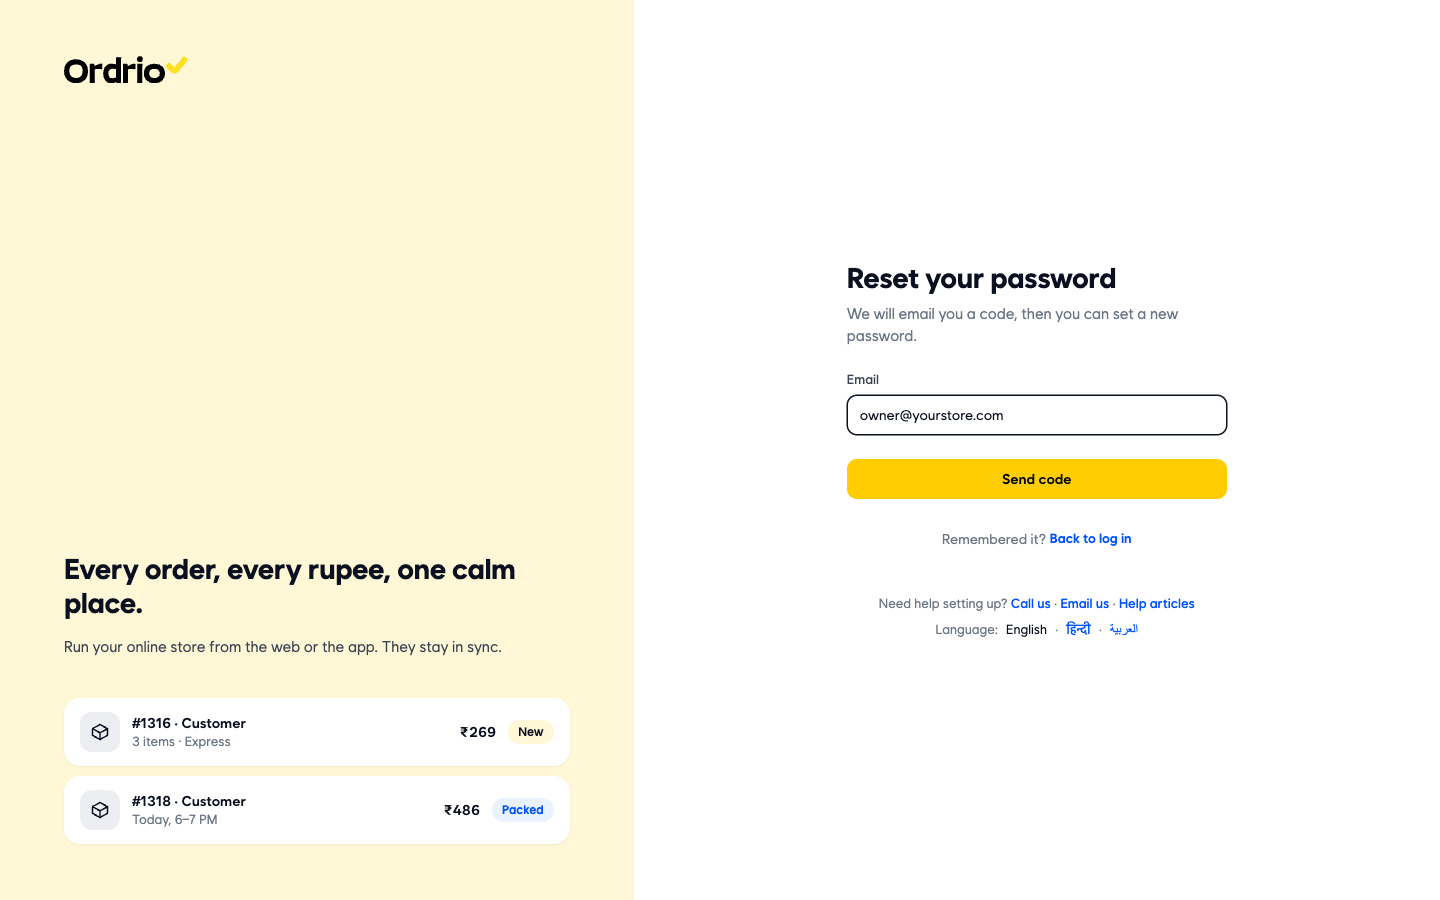
Remembered it? Select Back to log in.
Good to know
- Register Now, Login, Verify, Continue and Send code stay greyed out until you have filled in the fields.
- Log in with the same mobile number or email you used to create your store. If no account matches, Ordrio asks you to register instead.
- Each email can be used for only one account. If you see "Email already exists" in signup step 3, use a different email.
- Already have a store? On the signup screen, select Log in to go to the login page.
- To sign out, select your profile picture at the top right and select Sign out.
- A new password needs at least 8 characters, a capital and a small letter, a number and a symbol (@ $ ! % * ? & #).
- You can switch the screen language to English, हिन्दी or العربية at the bottom of the login and signup pages.
- Need help setting up? The bottom of the login and signup pages has Call us, Email us and Help articles.
Related
- What is Ordrio
- What you need before getting started
- Recommended setup order for new stores