Reference
Making your store live (go-live checklist)
What must be done before you share the store link: payments, delivery and visibility.
Your store link works as soon as your store is created, but customers can only order properly once a few things are set up. Use this checklist before you share your link, so the first customers who visit can pay you and get their order.
Where to find your checklist
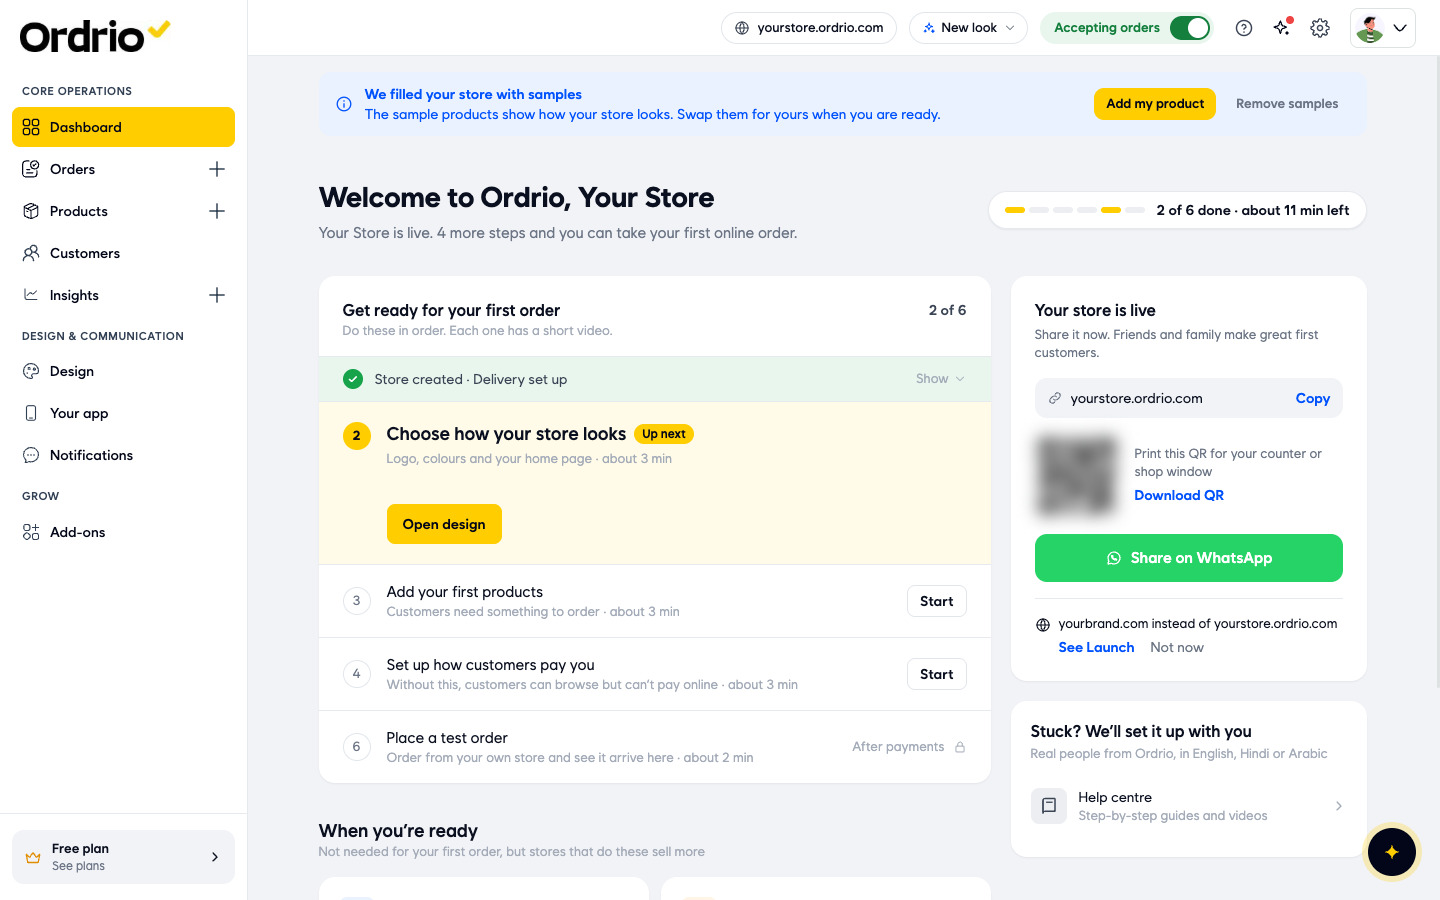
Open nadi.ordrio.com (your Ordrio admin panel) and log in. The Dashboard shows a list called Get ready for your first order, with your progress at the top (for example "2 of 6 done").
The six steps are:
- Store created. This is done for you when you sign up.
- Choose how your store looks. Your logo, colours and home page. Click Open design.
- Add your first products. Customers need something to order. Click Start.
- Set up how customers pay you. Click Start to open Payment methods.
- Tell us where you deliver. Add delivery areas and charges, or offer pickup only. Click Start to open Branches & delivery.
- Place a test order. Order from your own store and check that it arrives in your admin. This step shows After payments until the payment step is done.
Each finished step gets a green tick at the top of the list.
Payments
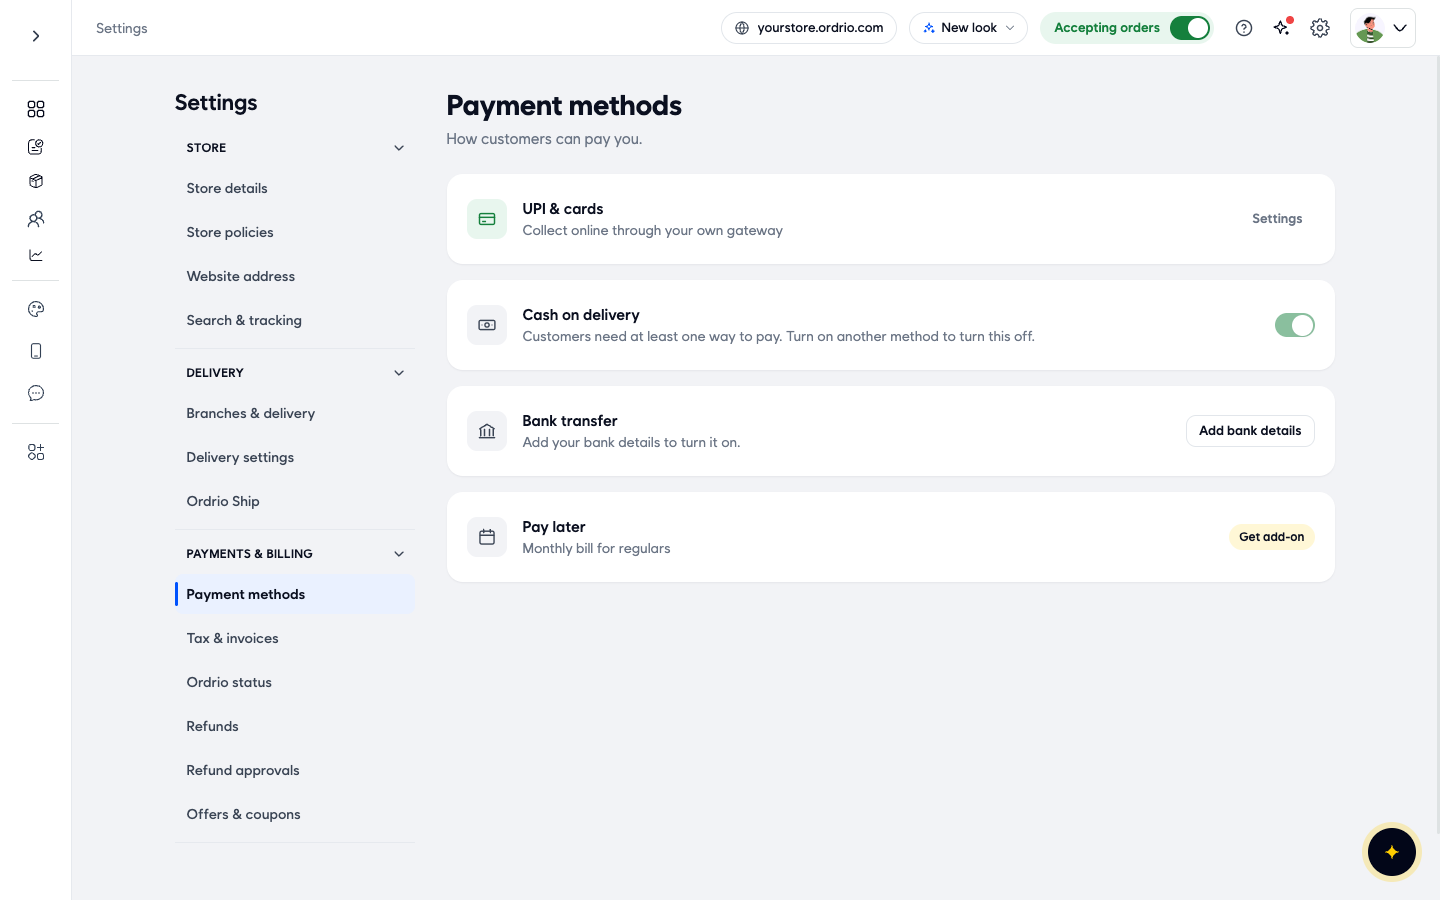
Customers need at least one way to pay. Go to Settings (the gear icon at the top), then Payment methods under Payments & billing. You see four options:
- UPI & cards. Collect online through your own payment gateway. Click Settings next to it.
- Cash on delivery. This is on for a new store. You can only turn it off after you turn on another method, because customers need at least one way to pay.
- Bank transfer. Click Add bank details to turn it on.
- Pay later. A monthly bill for regular customers. It needs an add-on, so it shows Get add-on.
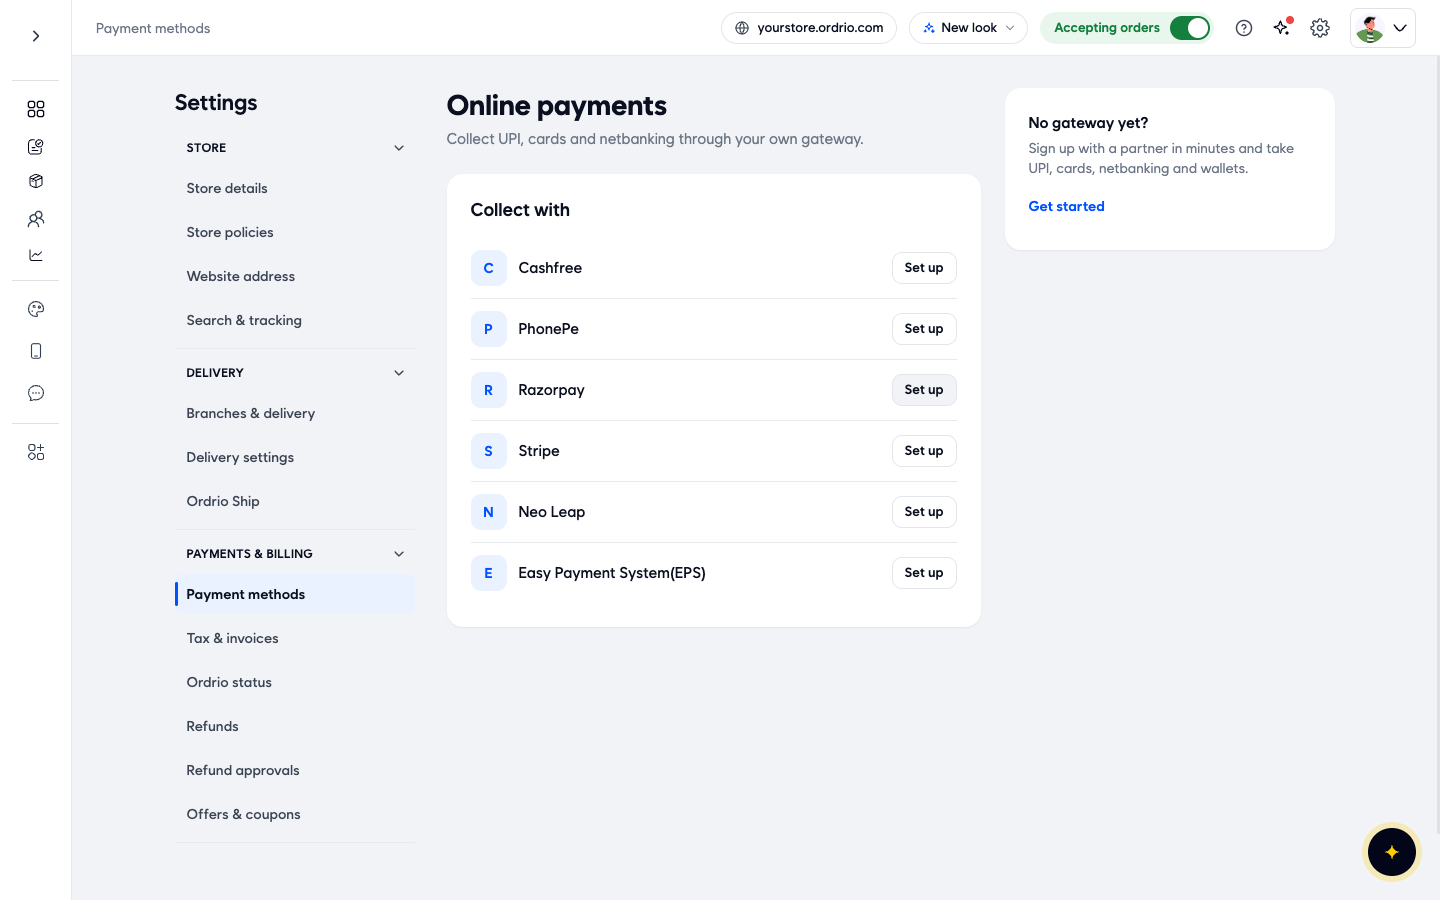
To take online payments, click Settings next to UPI & cards. Ordrio asks Do you have your own payment gateway?
- Click Yes, connect it if you already have one. Pick your provider from the Collect with list (Cashfree, PhonePe, Razorpay, Stripe, Neo Leap or Easy Payment System) and click Set up next to it.
- Click No, get one if you don't. You can also click Get started under No gateway yet? to sign up with a partner.
Delivery
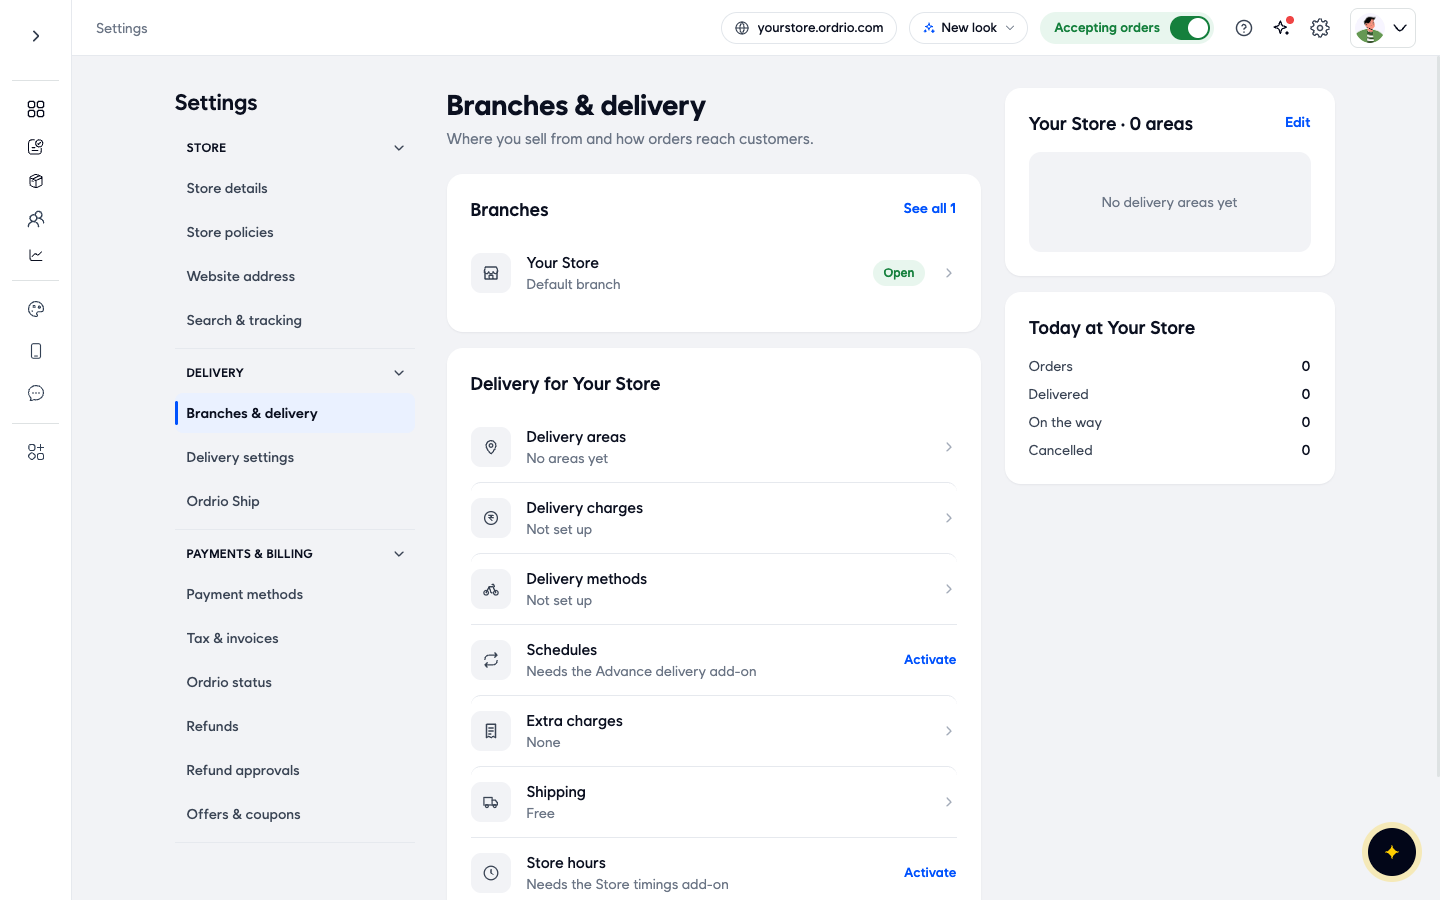
Customers need to know you deliver to them, and what it costs. Go to Settings, then Branches & delivery under Delivery. The Delivery for section of your branch shows what is set up:
- Delivery areas. Where you deliver.
- Delivery charges. What customers pay for delivery.
- Delivery methods. Your own delivery, customer pickup, or both.
- Extra charges. Packing or handling added to every delivery order.
- Shipping. Delivery to places further away.
- Schedules and Store hours. These need the Advance delivery and Store timings add-ons. Click Activate to get them.
Add a delivery area
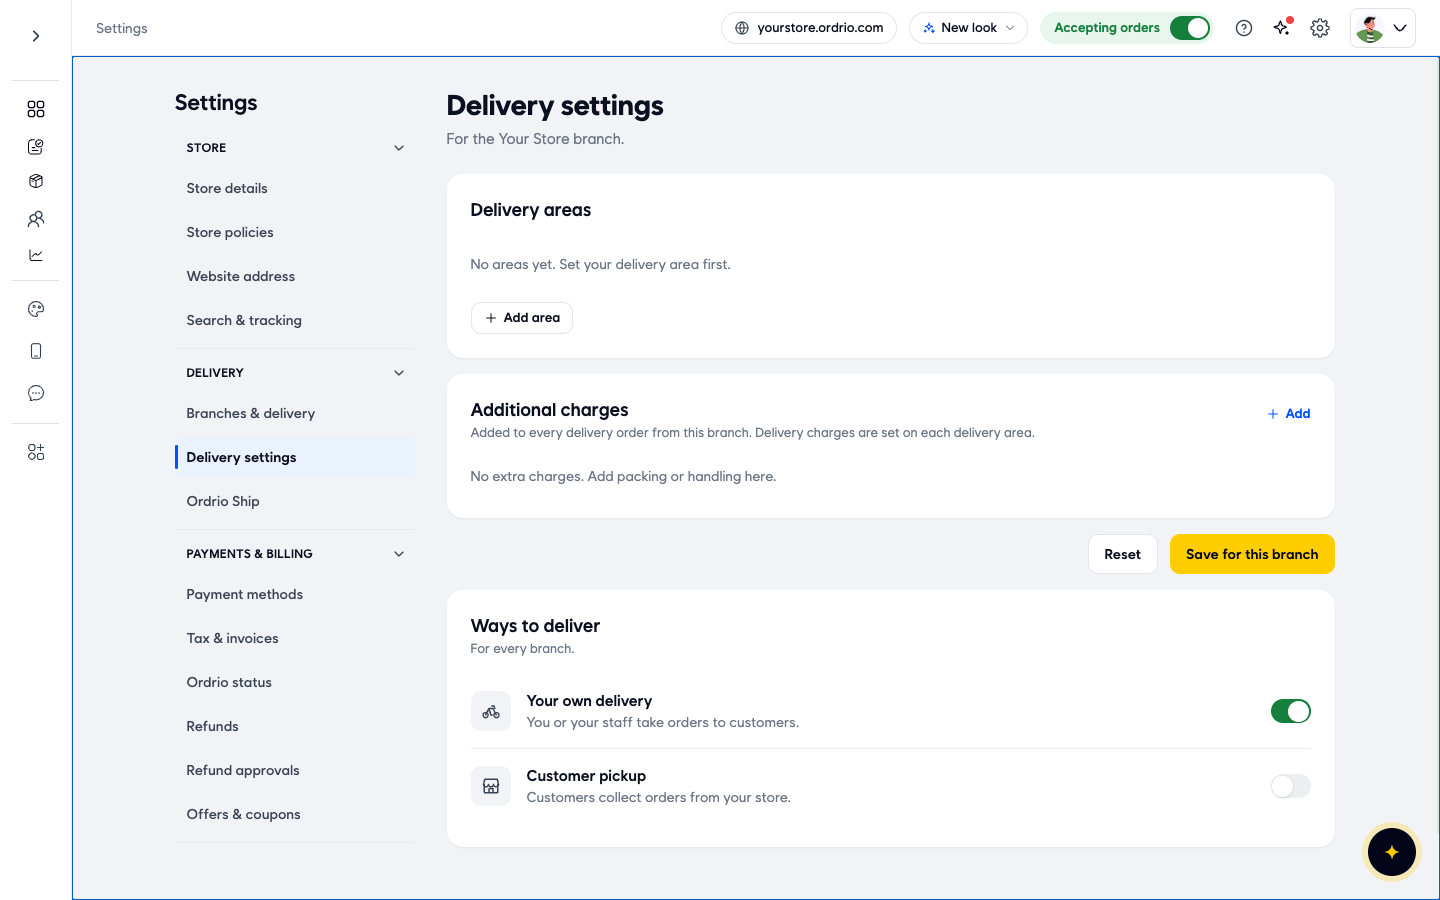
- Go to Settings, then Delivery settings.
- Under Delivery areas, click Add area.
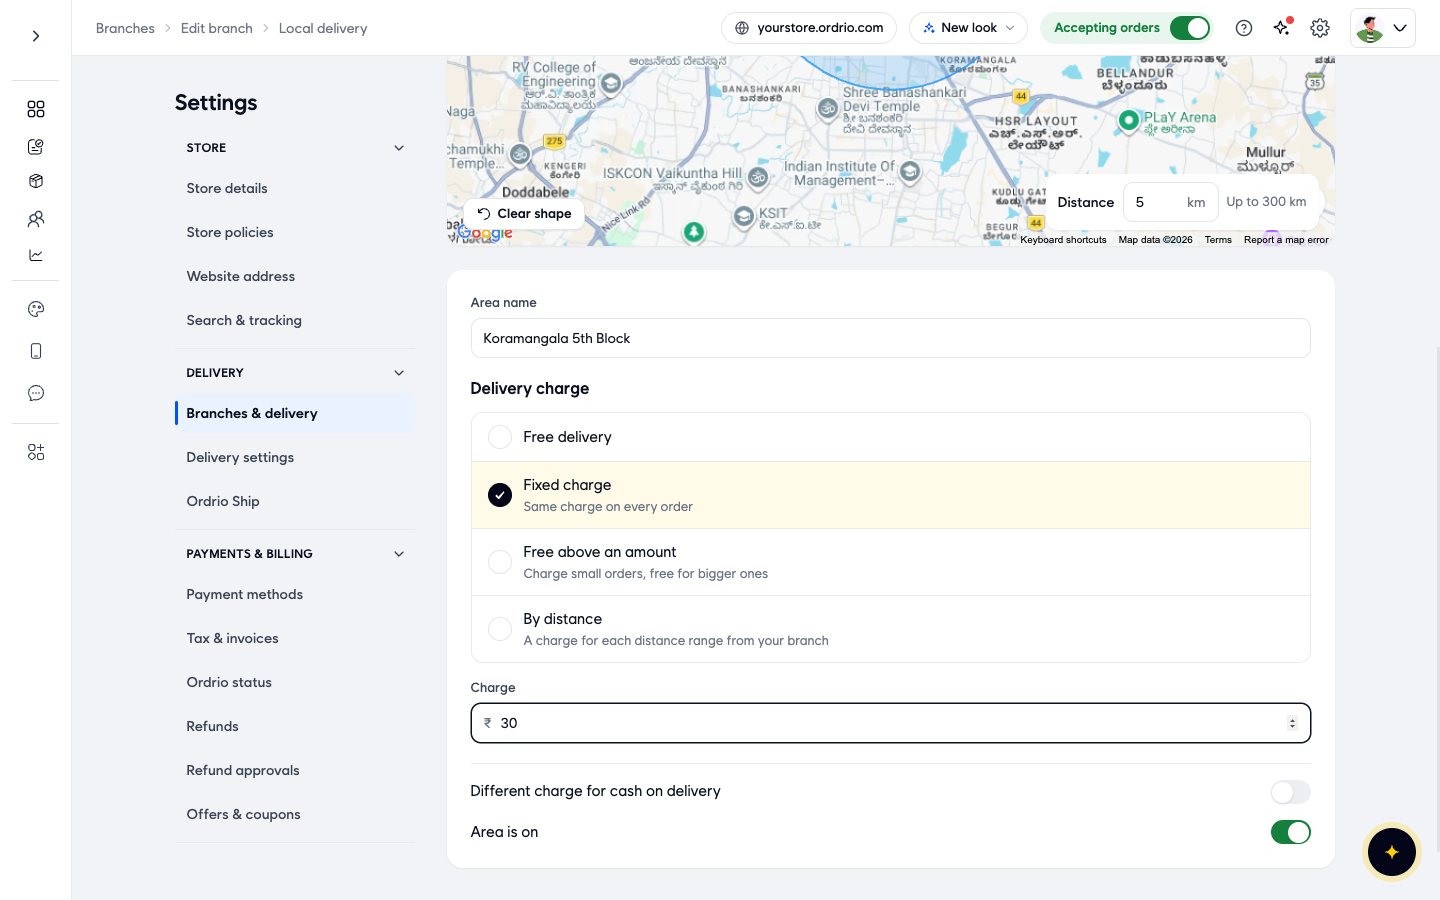
- Choose the area type: Distance (a circle around your branch) or Custom shape (draw it on the map). You can find a place with Search a place or Use my location.
- For Distance, type how many km you deliver to. The limit is 300 km.
- Type an Area name, for example "Koramangala 5th Block". Use your own area name.
- Choose a Delivery charge: Free delivery, Fixed charge (the same charge on every order), Free above an amount (charge small orders, free for bigger ones) or By distance (a charge for each distance range from your branch). For a fixed charge, type the amount in Charge.
- Turn on Different charge for cash on delivery if cash orders should cost a different amount.
- Keep Area is on turned on so customers can order in this area.
- Click Save area. You see the message "Delivery block created", and the delivery step on your Dashboard gets its tick.
Choose how orders reach customers
On the Delivery settings screen, under Ways to deliver:
- Your own delivery. You or your staff take orders to customers. This is on for a new store.
- Customer pickup. Customers collect orders from your store. Turn it on if you offer pickup.
Use Additional charges and click Add for packing or handling charges that apply to every delivery order. Click Save for this branch when you change these charges.
Visibility
These things decide whether customers can find your store and order from it.
- Accepting orders. The switch at the top of every page in your admin. Keep it on. If you turn it off, Ordrio asks Close Store? Customers can't place orders until you reopen the store. Click Confirm to close or Cancel to keep it open.
- Sample products. A new store is filled with sample products so you can see how it looks. Before you share your link, click Add my product to add your own, and click Remove samples so customers don't see products you don't sell.
- Your store link. It is shown at the top of your admin and in the Your store is live card on the Dashboard. Click Copy to copy it, Download QR to print a QR code for your counter or shop window, or Share on WhatsApp to send it.
- Your own domain. You can use your own web address instead of your free subdomain. Go to Settings, then Website address. Custom domains are supported on Launch plans and above. Free subdomains end with .ordrio.com.
Good to know
- Place a test order yourself before you share the link. It is the quickest way to check payments and delivery work.
- The test order step stays locked until your payment step is done.
- You can add more areas later, each with its own delivery charge.
- Opening hours, a welcome discount, staff and your own domain are under When you're ready on the Dashboard. They are not needed for your first order.
- Stuck? The Stuck? We'll set it up with you card on the Dashboard connects you with the Ordrio team, in English, Hindi or Arabic.
Related
- Recommended setup order for new stores
- Adding your first products
- Setting up payment methods
- Setting up delivery areas and charges
- Placing a test order