Overview
Understanding the Ordrio dashboard
A quick tour of the main parts of your Ordrio admin and what each one is for.
The Dashboard is the first screen you see when you log in to your Ordrio admin. It shows what is left to set up before your first order, gives you your store link to share, and has the menu that takes you to every part of your admin.
How to get to your Dashboard
- Open nadi.ordrio.com (your Ordrio admin panel) and log in. New owners click Create a store there.
- On Log in to your store, type your registered email in Email and your password in Password, then click Login. The screen shows example values. Use your own.
- To log in with your phone instead, click Phone number, type your registered mobile number in Number and click Login. Type the 6-digit code you get and click Verify.
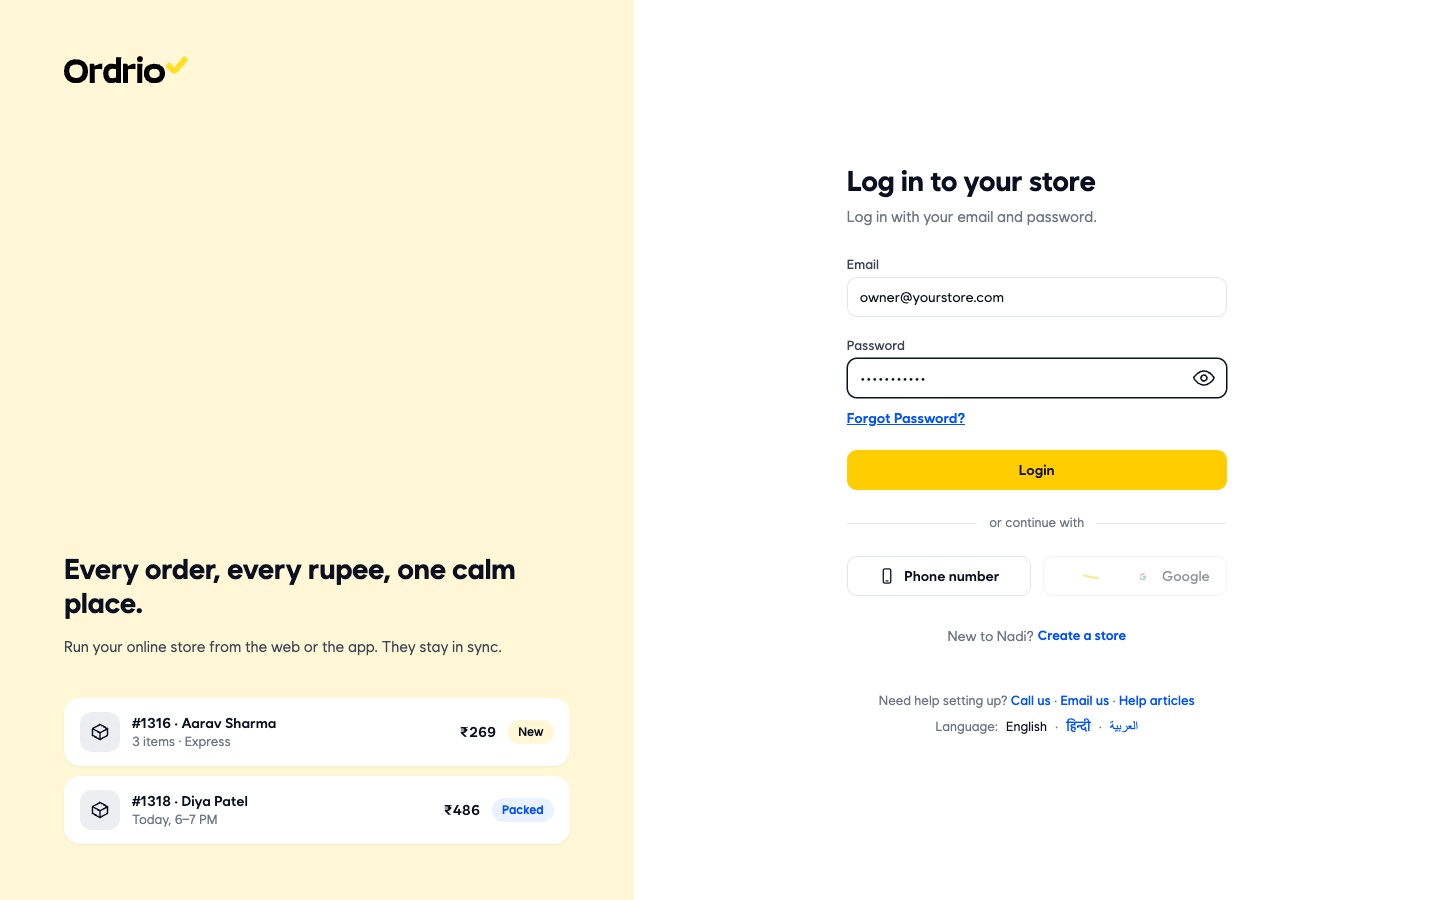
Your Dashboard opens.
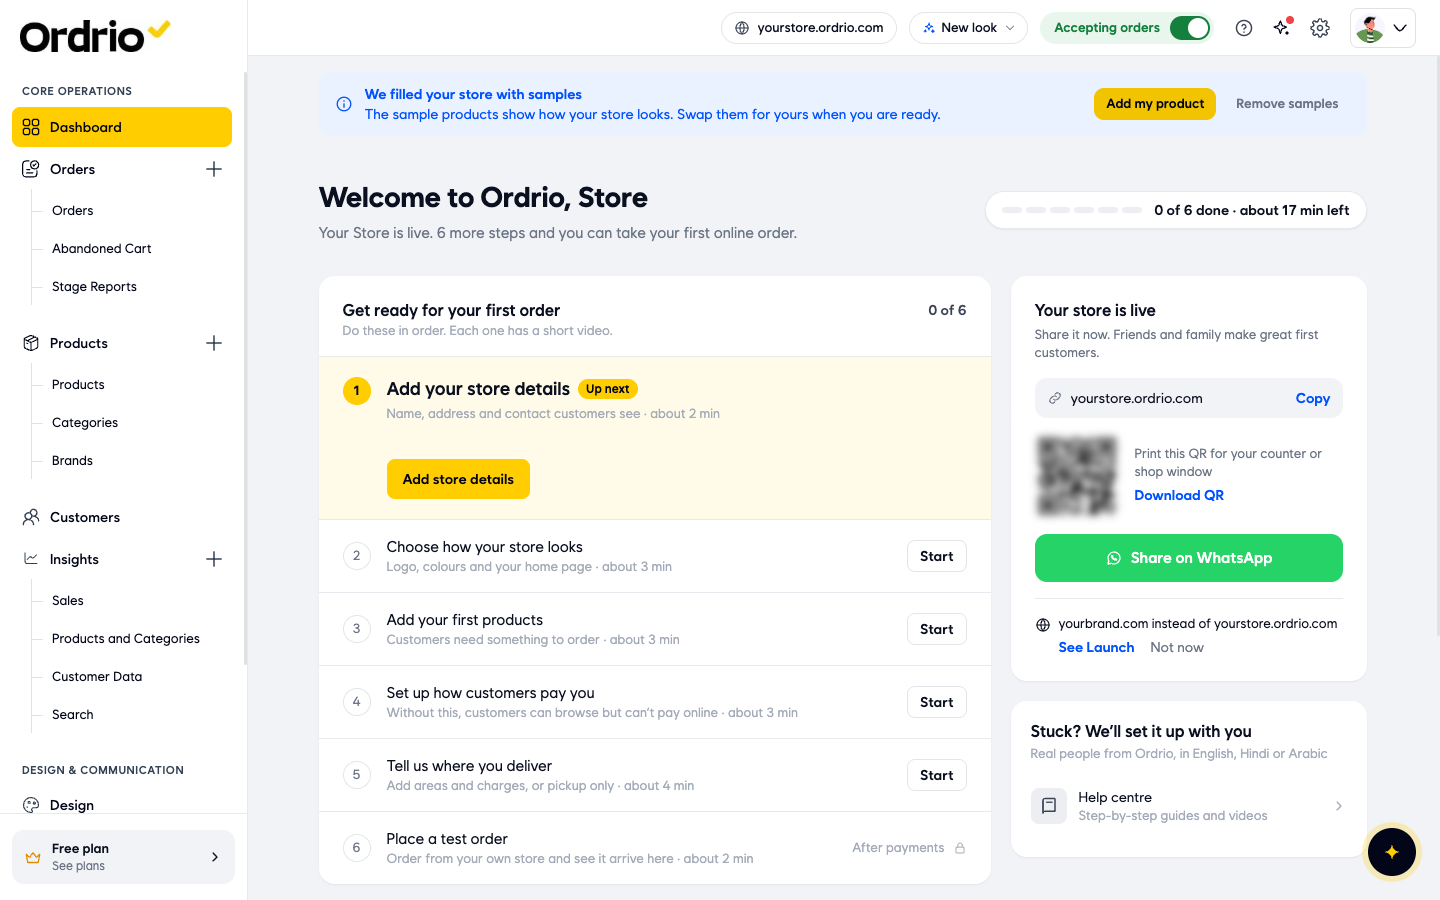
We filled your store with samples
A new store starts with sample products, so you can see how your store looks to customers before you add anything. The blue banner at the top tells you this.
- Add my product opens the form to add your own product.
- Remove samples takes the sample products out of your store.
Swap the samples for your own products when you are ready.

Get ready for your first order
This checklist lists the 6 things to do before you can take your first online order. Do them in order. Each one has a short video and shows about how long it takes. The count at the top right (for example 0 of 6) shows how many you have done.
- Add your store details. The name, address and contact details your customers see.
- Choose how your store looks. Your logo, colours and home page.
- Add your first products. Customers need something to order.
- Set up how customers pay you. Without this, customers can browse but cannot pay online.
- Tell us where you deliver. Add your delivery areas and charges, or choose pickup only.
- Place a test order. Order from your own store and see it arrive in your admin. This step opens after you set up payments.
Up next marks the step to do now. It is highlighted and has its own button (for example Add store details). The other steps have a Start button.
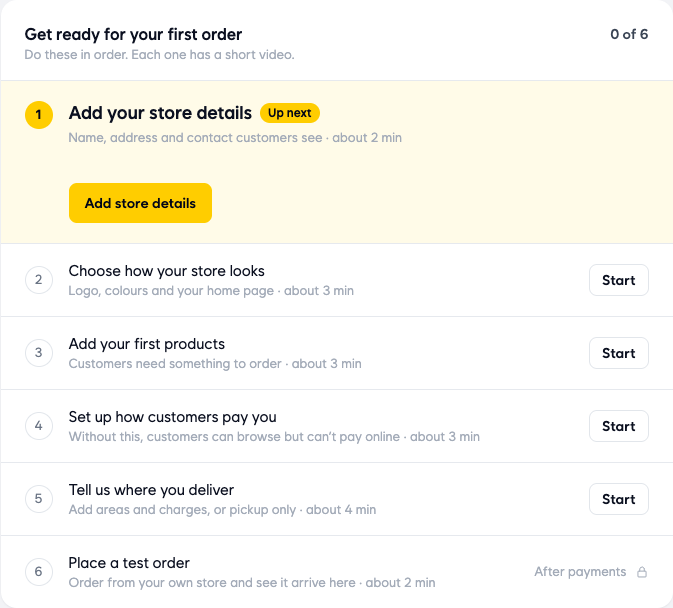
Below the checklist, When you're ready lists extra steps you do not need for your first order: Set your opening hours, Create a welcome discount, Invite your staff and Use your own domain.
Your store is live
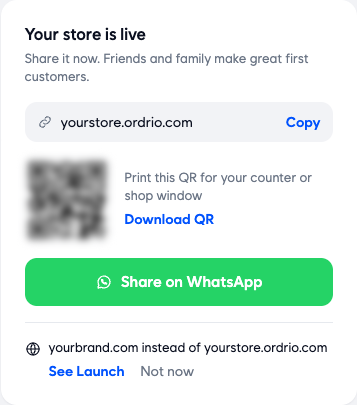
Your store is online from the start. This card helps you share it.
- Store link. Your store's web address. Click Copy to copy it.
- Download QR. Saves a QR code of your store link. Print it for your counter or shop window.
- Share on WhatsApp. Opens WhatsApp with a message and your store link, ready to send.
- To use your own web address (like yourbrand.com), click See Launch to see the plan for it, or Not now to hide this.
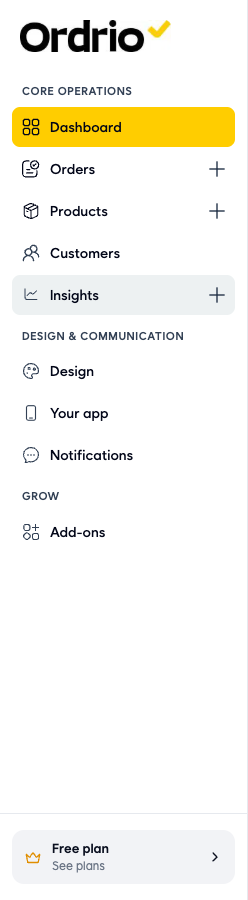
The left menu
Core Operations
- Dashboard. This home screen.
- Orders. Your orders, plus Abandoned Cart and Stage Reports.
- Products. Your products, Categories and Brands.
- Customers. The people who buy from you.
- Insights. Reports on Sales, Products and Categories, Customer Data and Search.
Design & Communication
- Design. How your store looks.
- Your app. Your customer app.
- Notifications. The messages your customers get.
Grow
- Add-ons. Extra features you can add to your store.
At the bottom, Free plan shows your current plan. Click See plans to compare plans.
Help when you are stuck
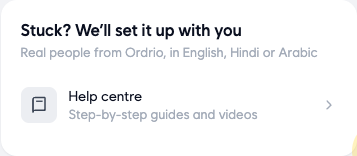
The Stuck? We'll set it up with you card connects you with real people from Ordrio, in English, Hindi or Arabic. Click Help centre for step-by-step guides and videos.
Good to know
- The checklist and the samples banner are there to help a new store get set up. The count at the top of the Dashboard shows how many steps are done and about how many minutes are left.
- Your store settings are under the gear icon (Settings) at the top right.
- Staff members only see the parts of the admin you give them access to.
Related
- What is Ordrio
- Accessing Ordrio for the first time
- Recommended setup order for new stores