How-to guide
Enabling and managing add-ons
Turn add-ons on or off based on your plan.
Add-ons are extra features you can add to your store when you need them, like Wallet, Loyalty, Food Labels or Live Order Tracking. Some come with your plan, some are free and some are paid. This article shows you how to find them, switch them on, set them up and switch them off again.
Before you start
- You need to log in to your Ordrio admin panel as the store owner.
- For a paid add-on, have your UPI or bank app ready. You pay for it before it switches on.
Open the Add-ons page
- Open nadi.ordrio.com (your Ordrio admin panel) and log in.
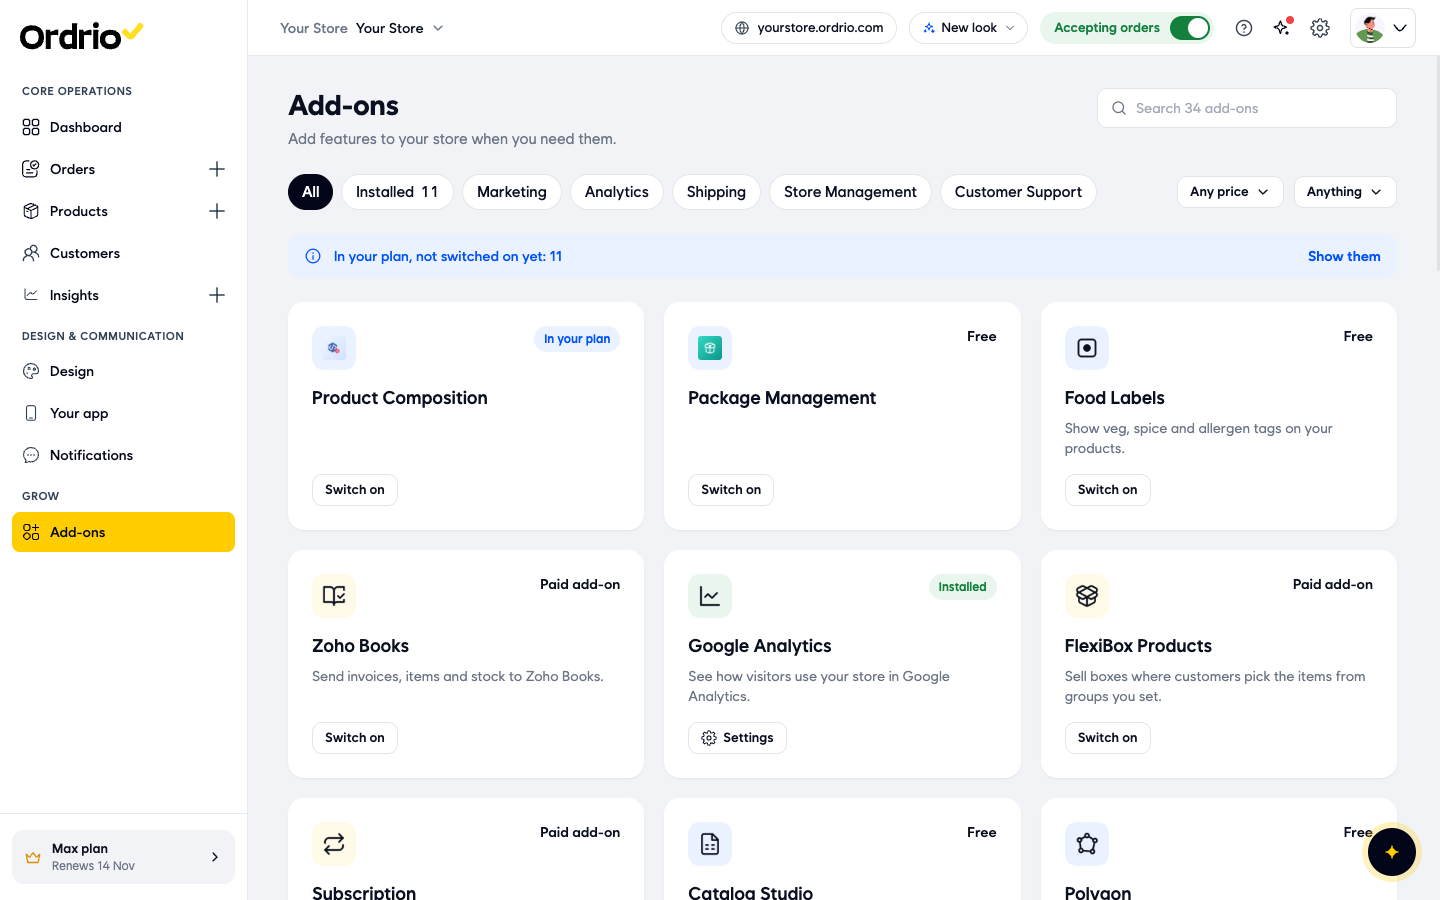
- In the left menu, under Grow, click Add-ons. The Add-ons page opens with the line "Add features to your store when you need them." Every add-on has its own card with a name, a short description and a label in the top corner:
- In your plan: your plan already includes it. Switching it on costs nothing extra.
- Free: free for every store.
- Paid add-on: a monthly charge on top of your plan.
- Installed: it is already switched on in your store.
Find the add-on you want
- Narrow the list with the controls at the top of the page:
- Search add-ons: type part of a name, for example "wallet".
- The category buttons: All, Installed, Marketing, Analytics, Shipping, Store Management and Customer Support. The number next to Installed tells you how many add-ons you have switched on.
- Any price: choose Free or Paid to see only those add-ons.
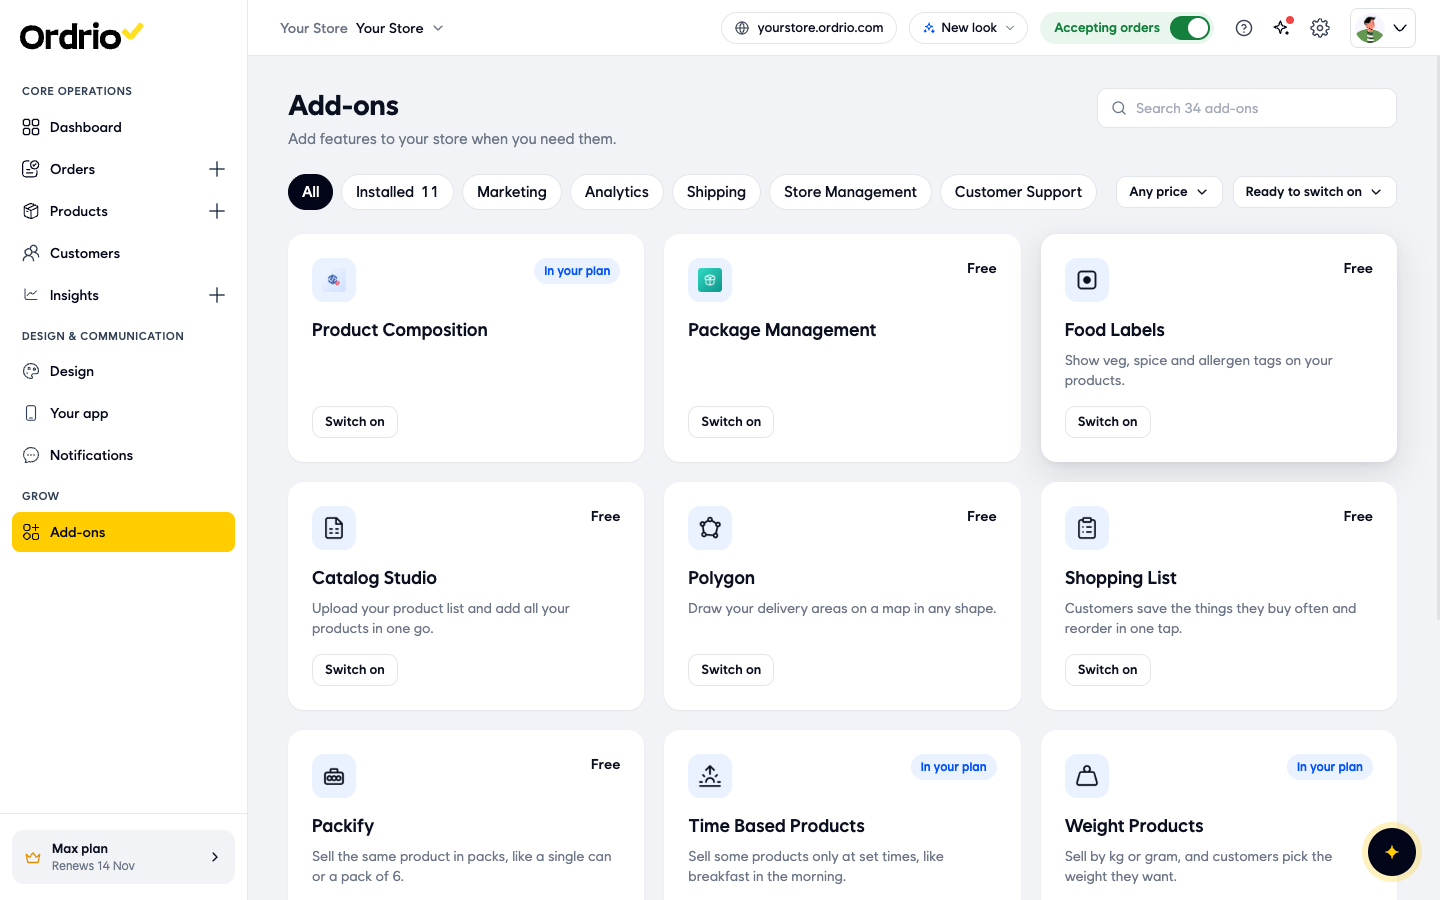
- Anything: choose Ready to switch on (included in your plan or free), Available to buy (paid add-ons) or Needs a plan upgrade (not part of your current plan).
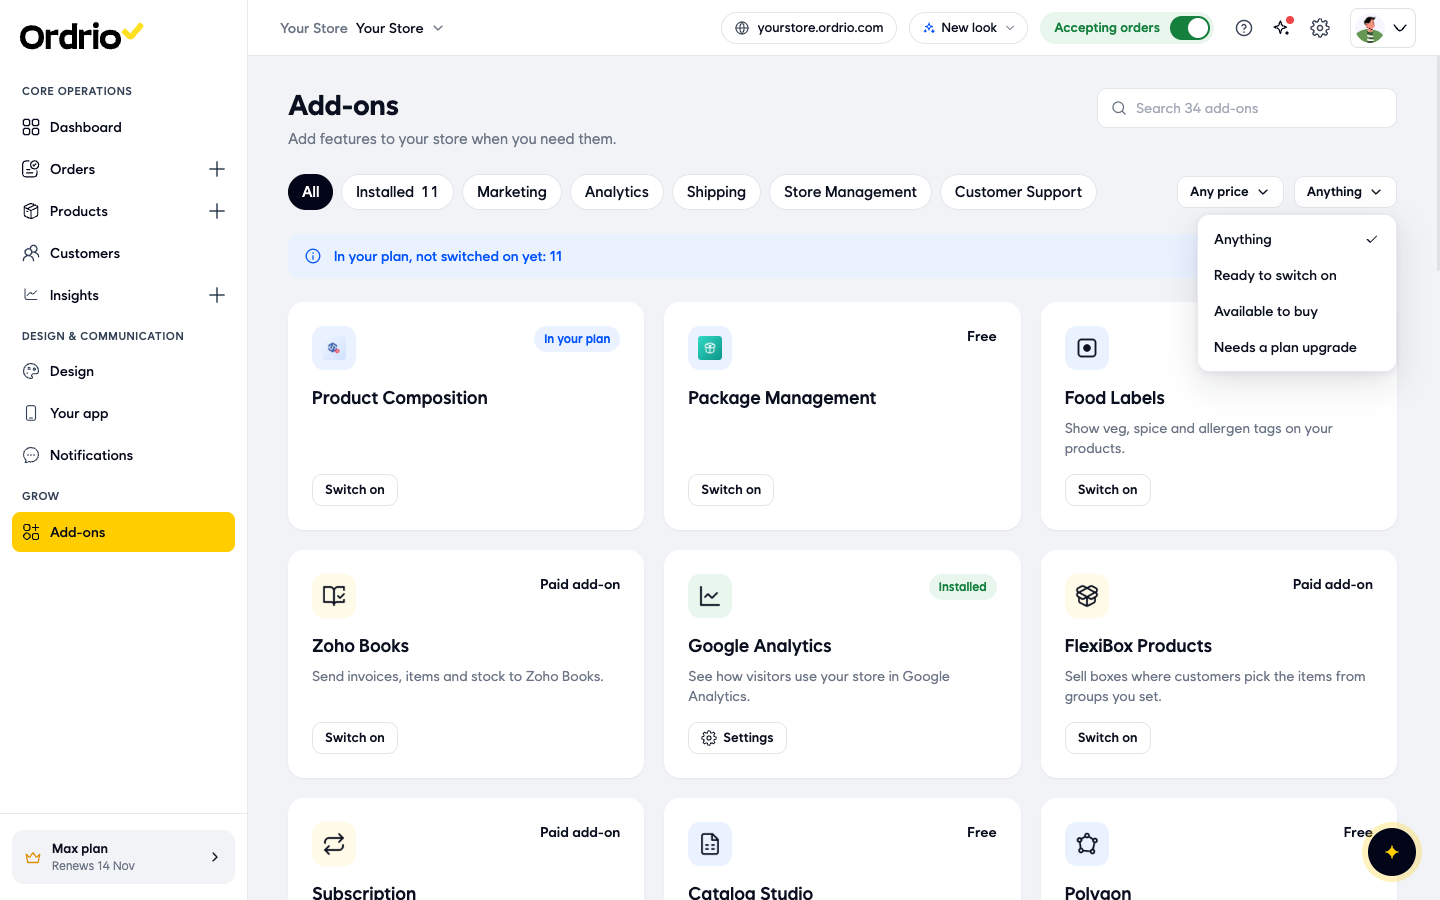
- To see what your plan already gives you, look at the blue bar under the filters. It says "In your plan, not switched on yet:" with a number. Click Show them to list only those add-ons. If nothing matches your filters, the page says "No add-ons match". Click Clear filters to see everything again.
Switch on a free or included add-on
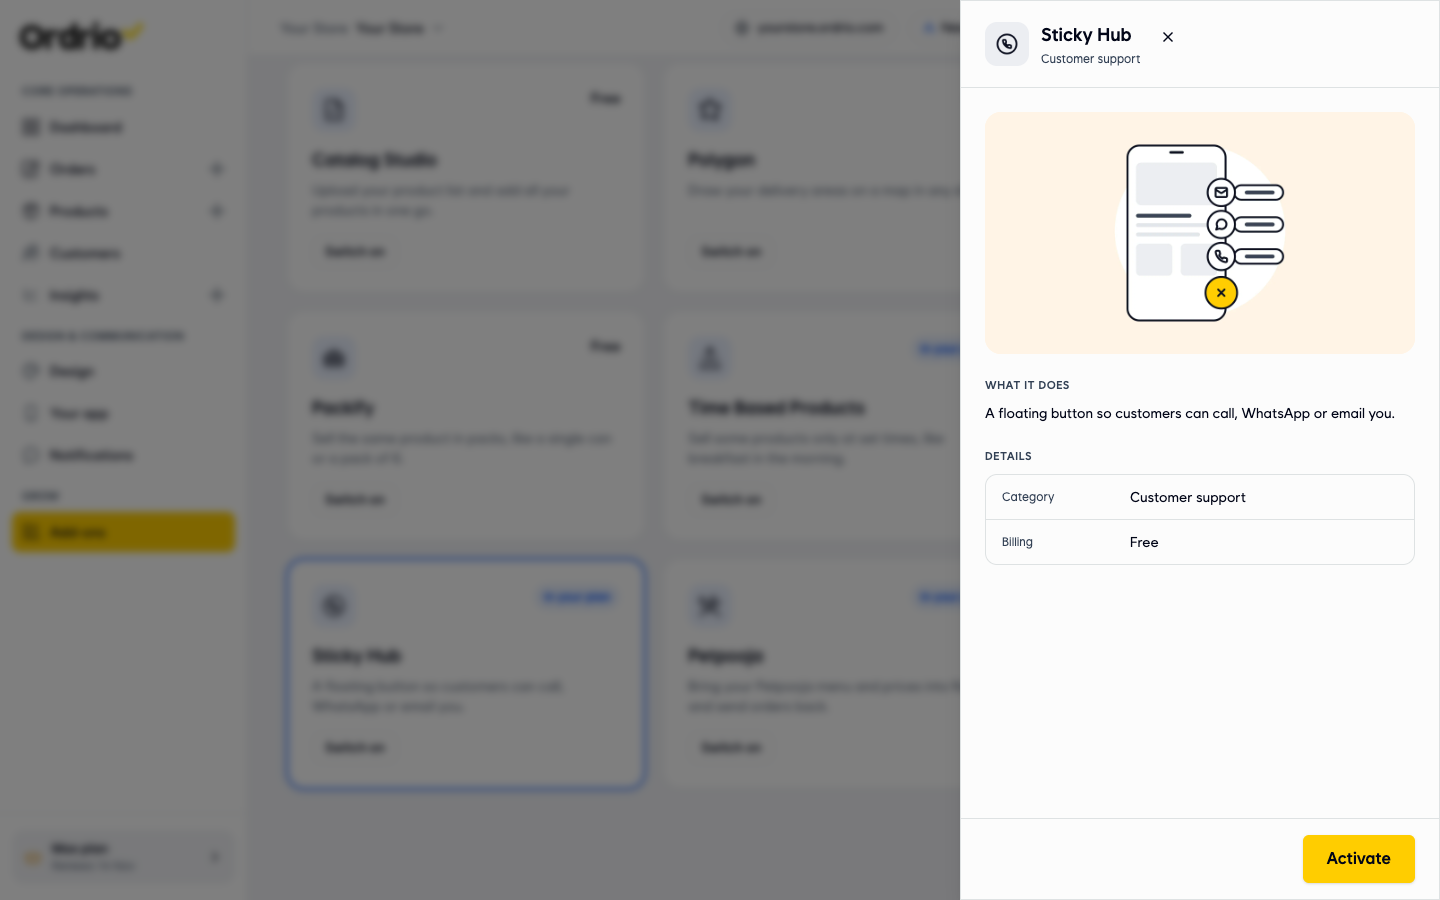
- Click the add-on's name to read about it. A panel opens on the right with:
- What it does: a short description of the feature.
- Details: the Category and the Billing (for example Free or Paid add-on).
- Click Activate. The add-on switches on straight away and the panel closes. You can also click Switch on on the card itself to skip the panel.
- Check the result. The card label changes to Installed, and a Settings button appears where Switch on was. The number next to Installed at the top goes up by one.
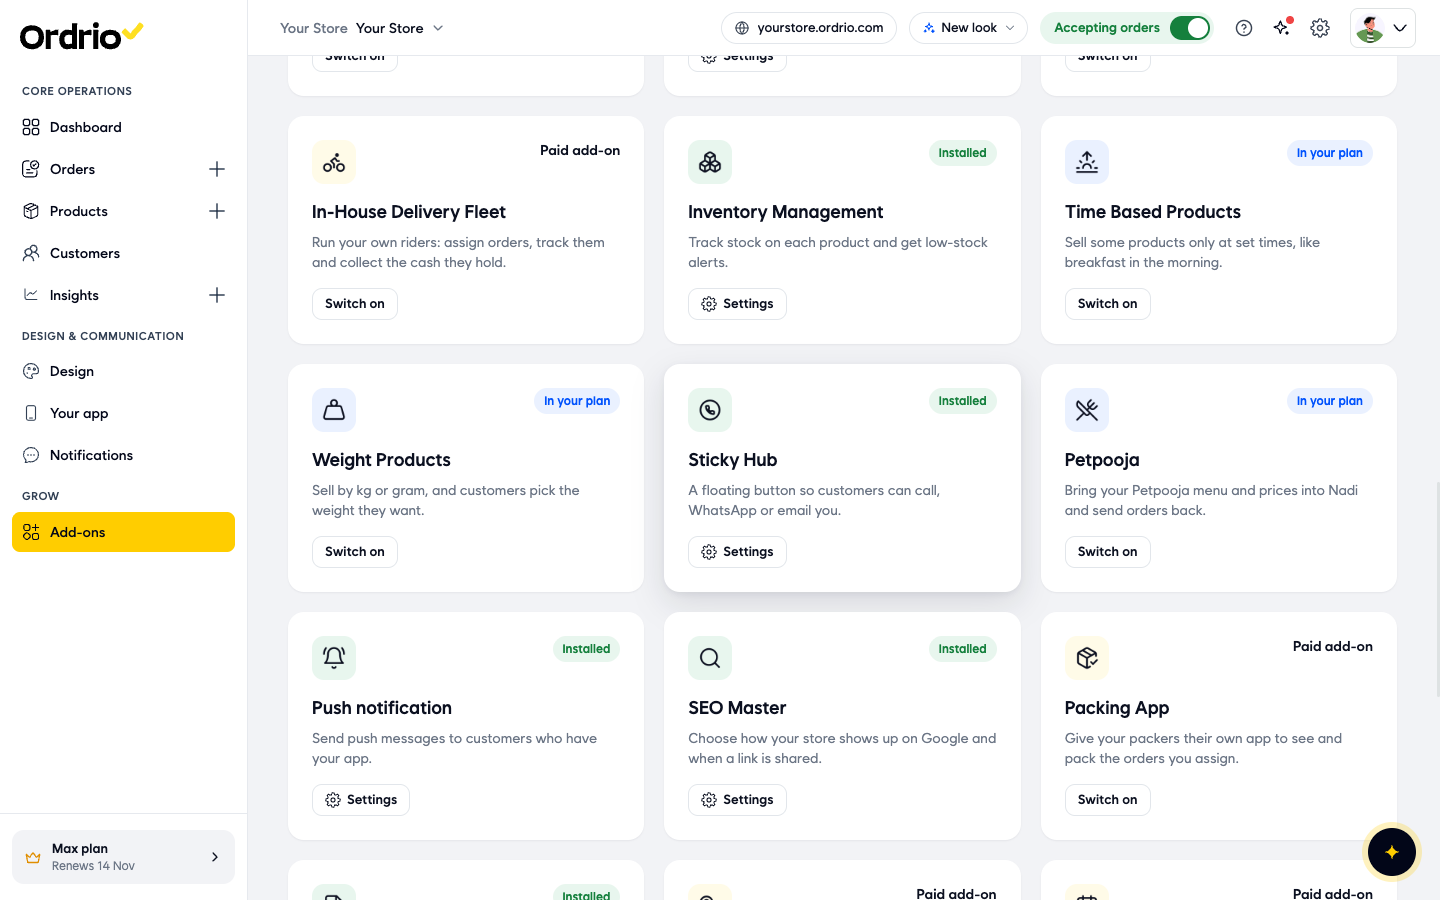
- Click Settings on the card to set the add-on up. Each add-on has its own settings page with its own fields. Some add-ons, like Store timings, show View details instead of Settings.
Switch on a paid add-on
- Click the name of an add-on with the Paid add-on label. The panel shows What it does and Details, with Billing set to Paid add-on.
- Click Subscribe.
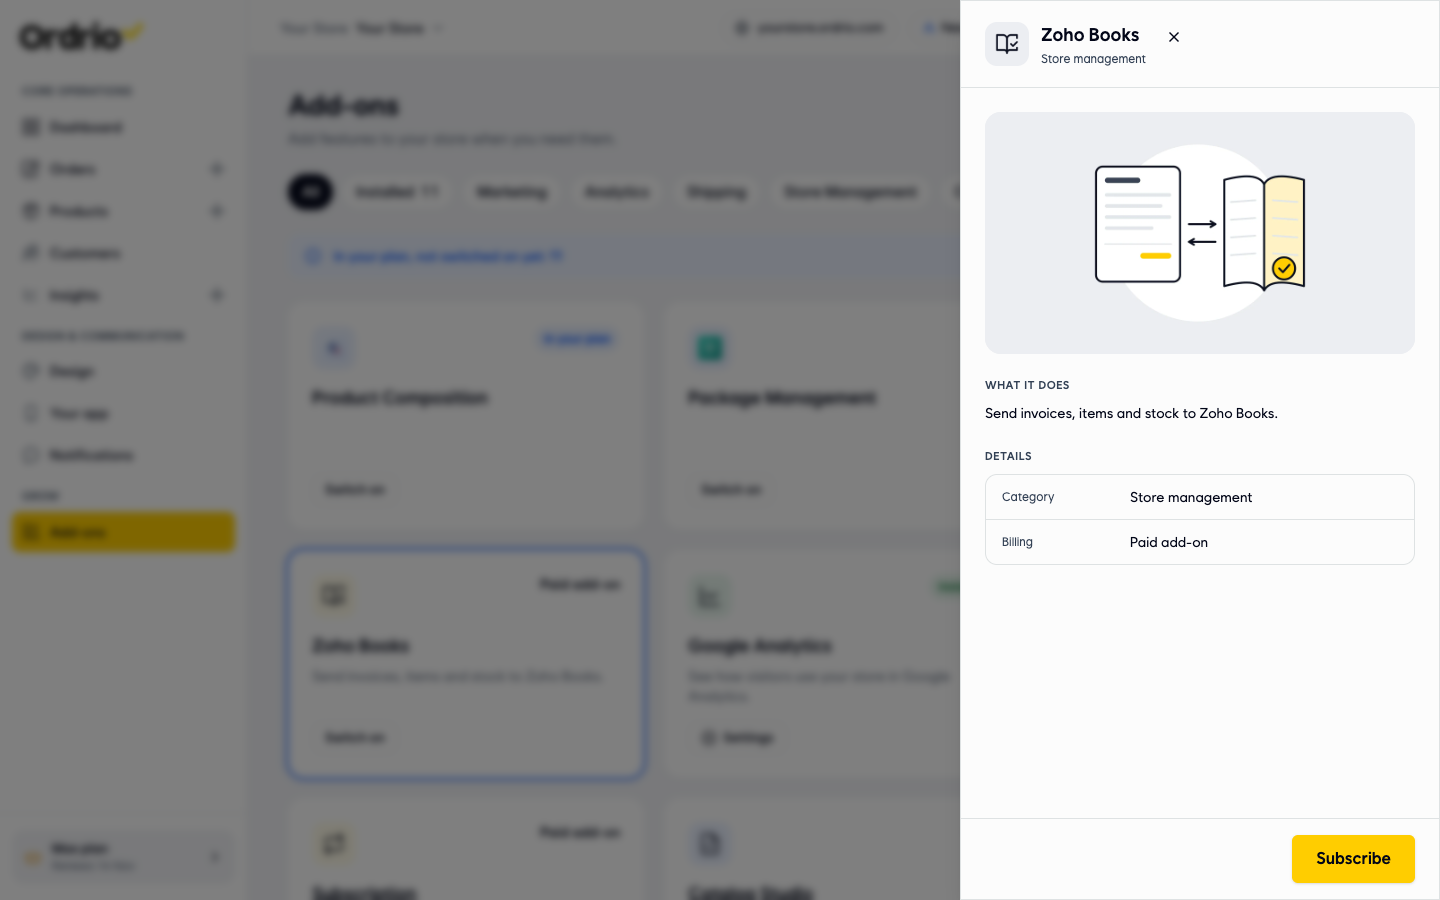
- Check the price in the Add window. It shows:
- The add-on's price per month and the Subtotal.
- Today, till your renewal: you only pay for the days left until your plan renews, not a full month.
- GST at 18%.
- Pay now: the total you pay today.
- From your next renewal you pay the full monthly price.
- Under how to pay, choose one:
- Pay and turn on autopay: renewals are charged on their due date, and you get a reminder 3 days before. After you pay, you approve autopay in your UPI or bank app.
- Pay this invoice only: autopay stays off, and you pay future invoices yourself.
- Click the Pay button (it shows the amount) and finish the payment. To stop without paying, click Cancel. After you pay, click Settings on the add-on's card to set it up, the same way as for a free add-on.
Switch an add-on off
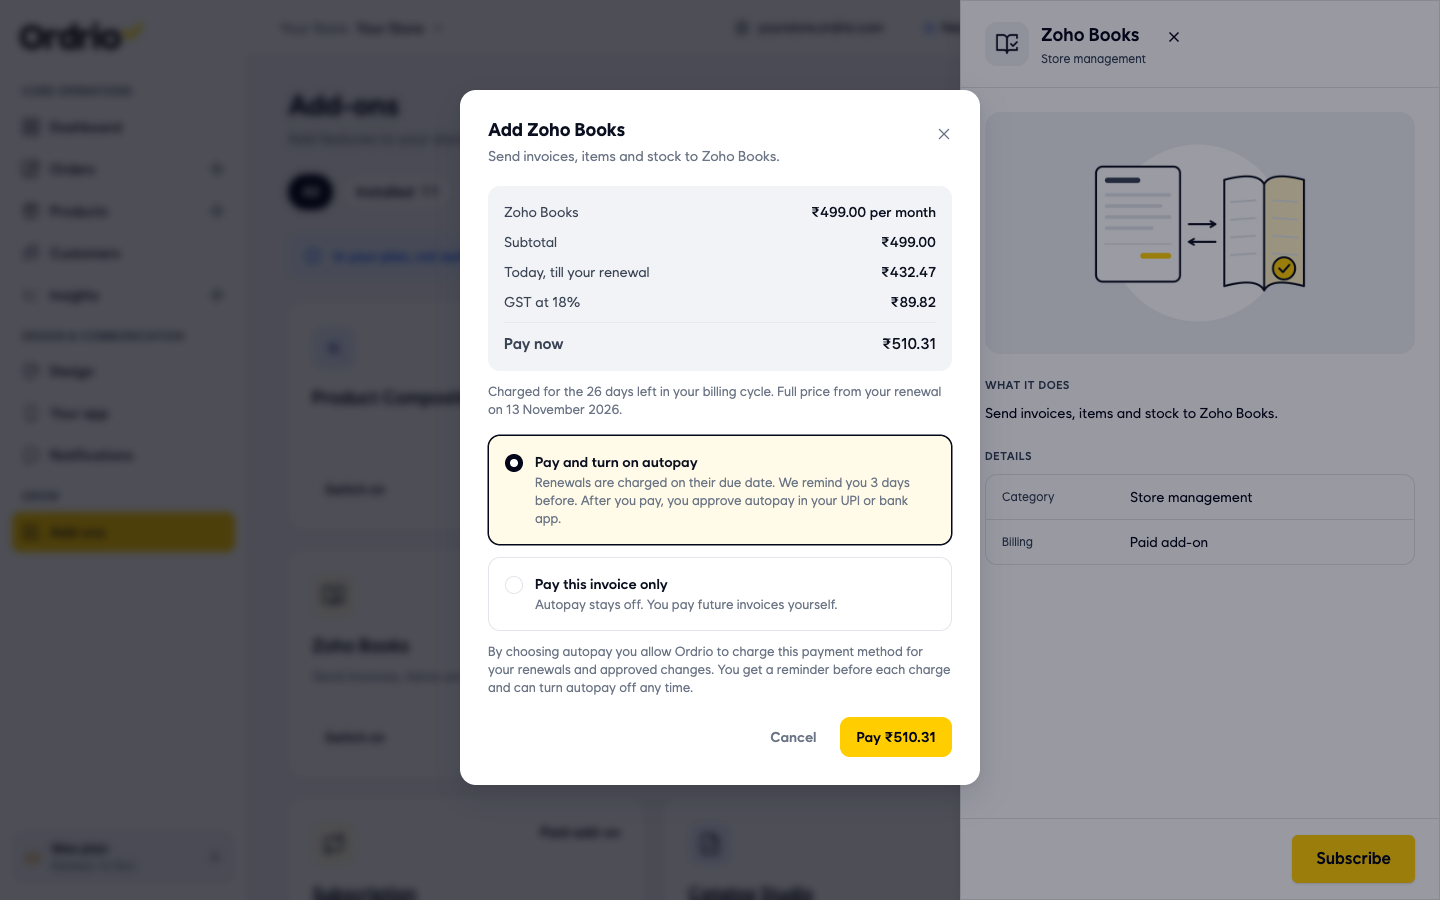
- On the Add-ons page, click Installed. You see a list of every add-on that is on, with its Category, Status, Billing and a Settings link.
- Click the Status switch next to the add-on so it is no longer On. It switches off straight away, with no extra question, and leaves the Installed list. To use it again, find it under All and switch it on again.
Check your plan and paid add-ons
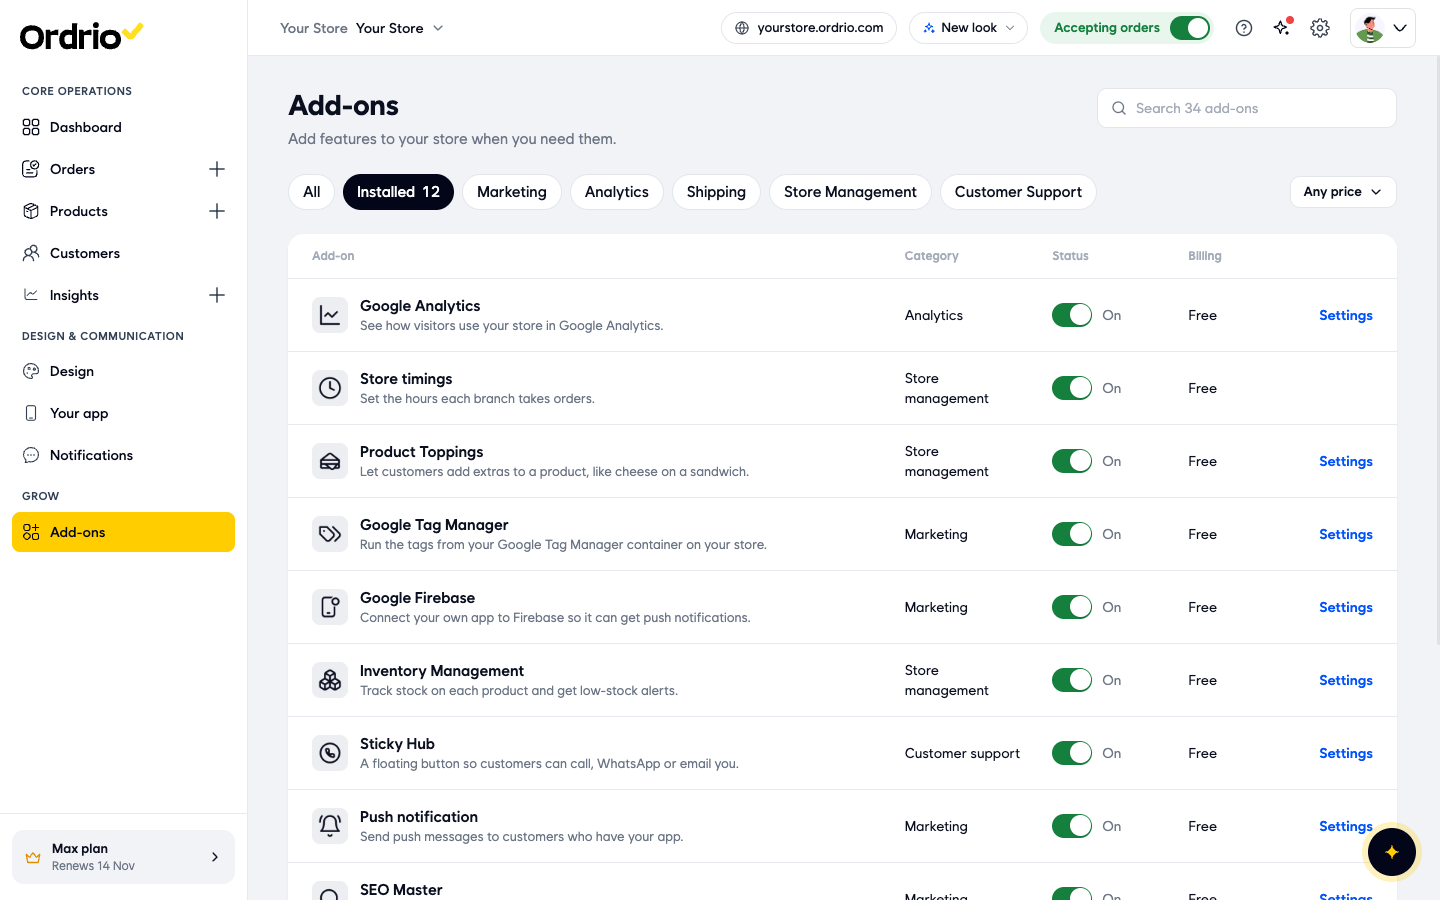
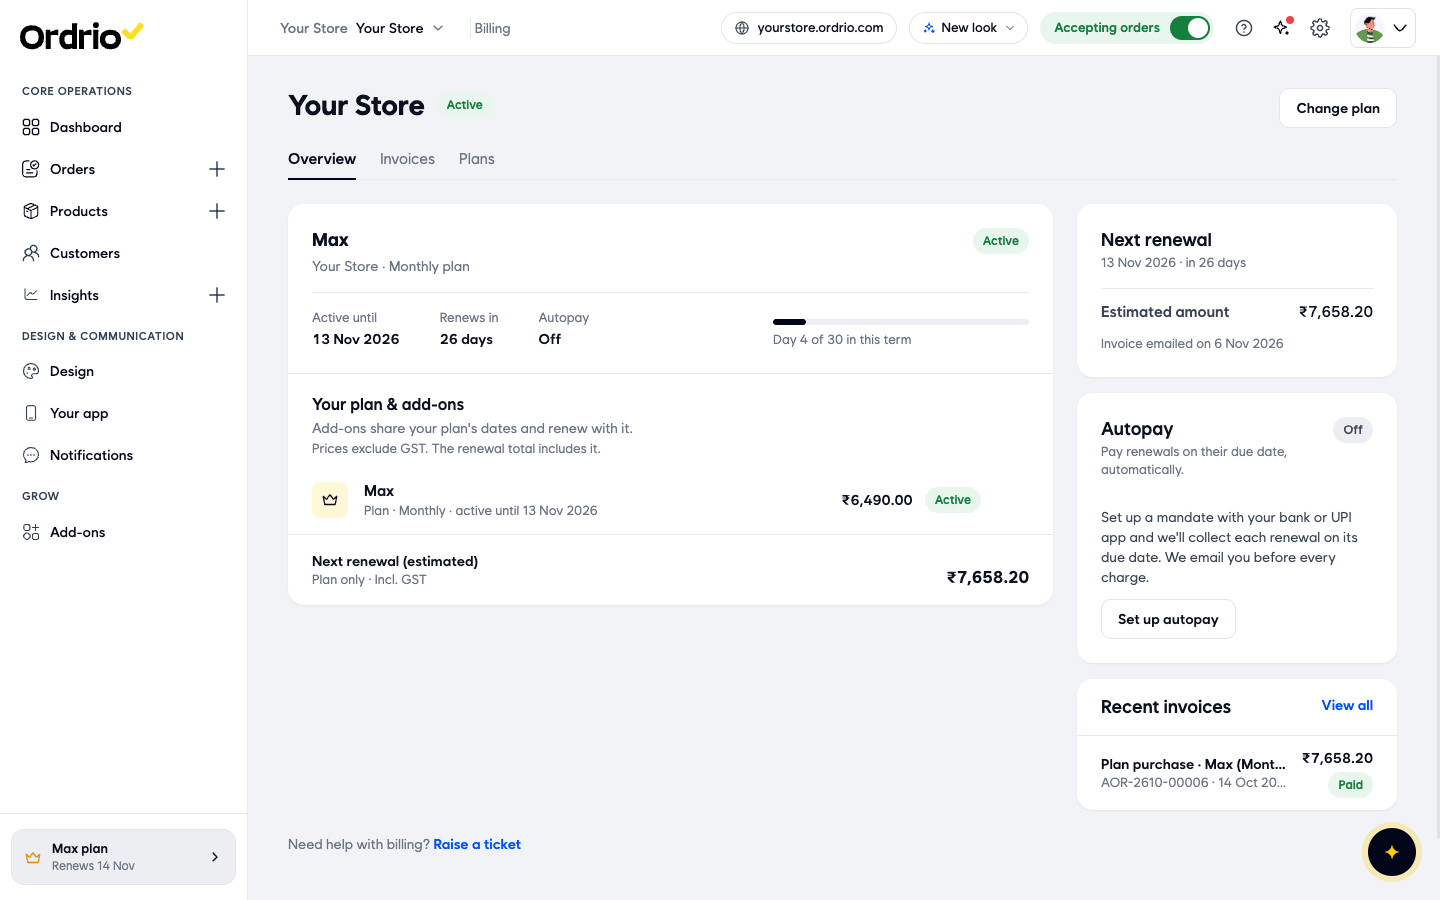
- At the bottom of the left menu, click your plan name (for example Max plan). The Billing page opens. Under Your plan & add-ons you see your plan and any paid add-ons, with their price and status. Add-ons share your plan's dates and renew with it. Prices there do not include GST, but the renewal total does.
- If an add-on you want shows under Needs a plan upgrade, your current plan does not include it. Click Change plan on this page to look at other plans.
Good to know
- Which add-ons are labelled In your plan depends on your plan, so your labels may differ from the screenshots here.
- Free and In your plan add-ons switch on as soon as you click Activate or Switch on. Paid add-ons switch on only after you pay.
- Many add-ons need setup after you switch them on. Open their Settings before you rely on them.
- Switching an add-on off happens straight away, without asking you to confirm. Check you picked the right switch.
- Paid add-ons renew together with your plan, so you get one renewal date for everything.
- The prices in the screenshots are only examples. Always check the price shown in your own admin panel before you pay.
Related
- Integrations and add-ons overview
- Plans and billing
Was this article helpful?