How-to guide
Flexi Box in practice: channels, bulk upload, menu and calendar
How to sell a Flexi Box on the right channels, add and update boxes in bulk with a CSV, change what is inside a box, and plan menus with the calendar.
Once your first Flexi Box is live, you can do more with it. Choose where each box is sold, add and change many boxes at once with a CSV file, edit what goes inside a box, and plan what your boxes hold on each day with the time-bound calendar.
Before you start
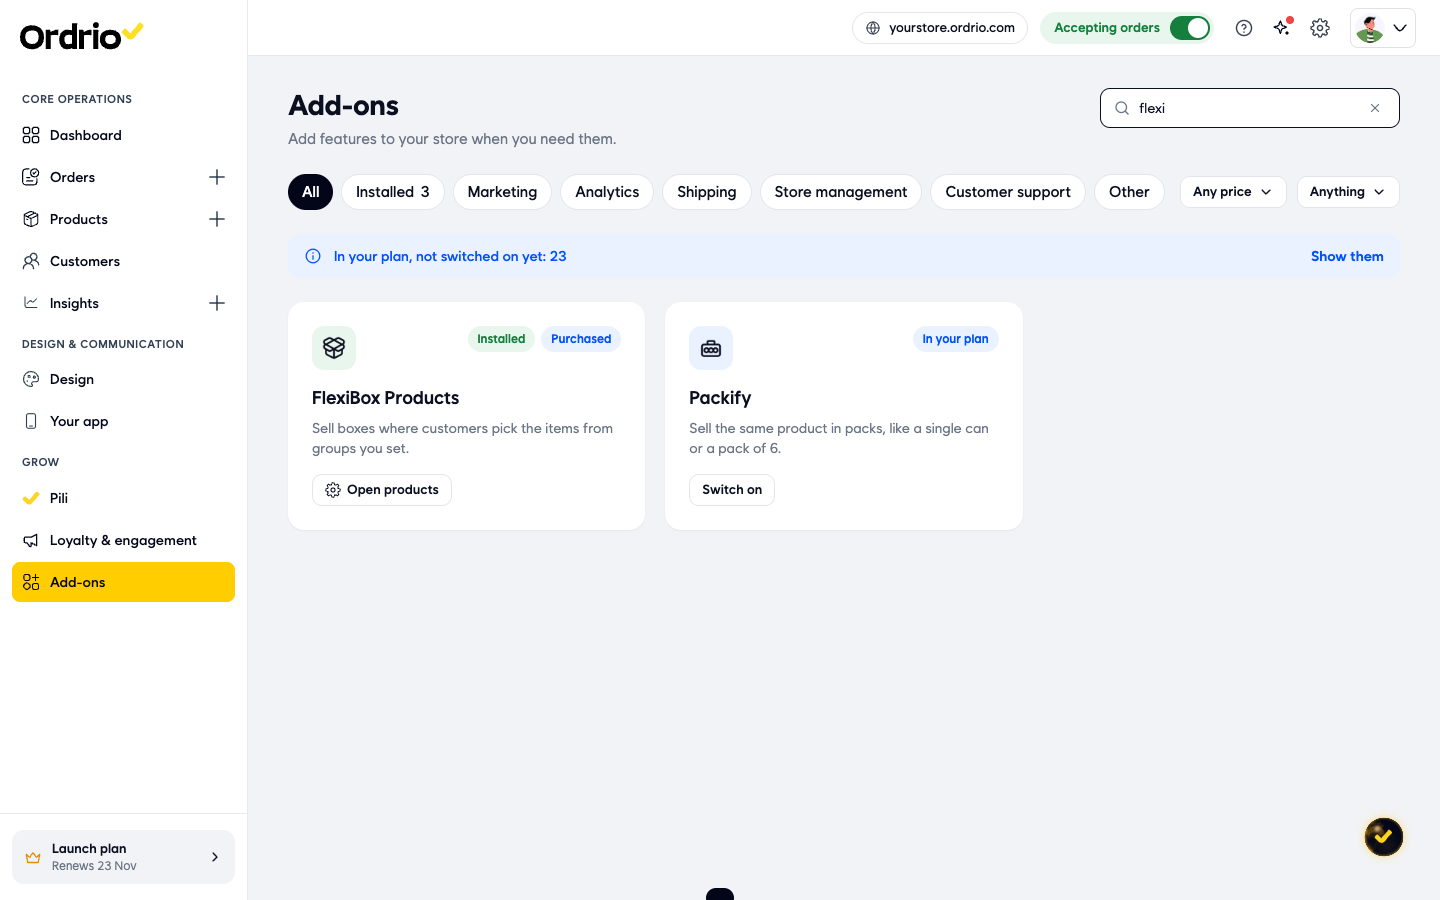
- The FlexiBox Products add-on must be switched on. Open manage.ordrio.com (your Ordrio admin panel) and log in. Go to Add-ons, type "flexi" in the search box, click FlexiBox Products and click Activate. The card then shows Installed and an Open products button.
- The time-bound calendar only shows Flexi Boxes and products that are in your subscription plans. To plan box menus by day, you need subscriptions in your store and at least one Flexi Box in a plan.
- Keep a spreadsheet app ready (for example Excel or Google Sheets) to edit CSV files.
Choose where a Flexi Box is sold (channels)
- Go to Products and click the pencil icon next to your Flexi Box.
- Under More options, click Sell on. The line under it shows where the box is sold now, for example "Website, app, regular and subscription orders".
- In the panel that opens, use the Regular Order switch to sell or stop selling the box in normal orders.
- Under Regular Order, tick Website to sell the box on your website, and tick App to sell it in your customer app. Untick one to hide the box there.
- Click Done.
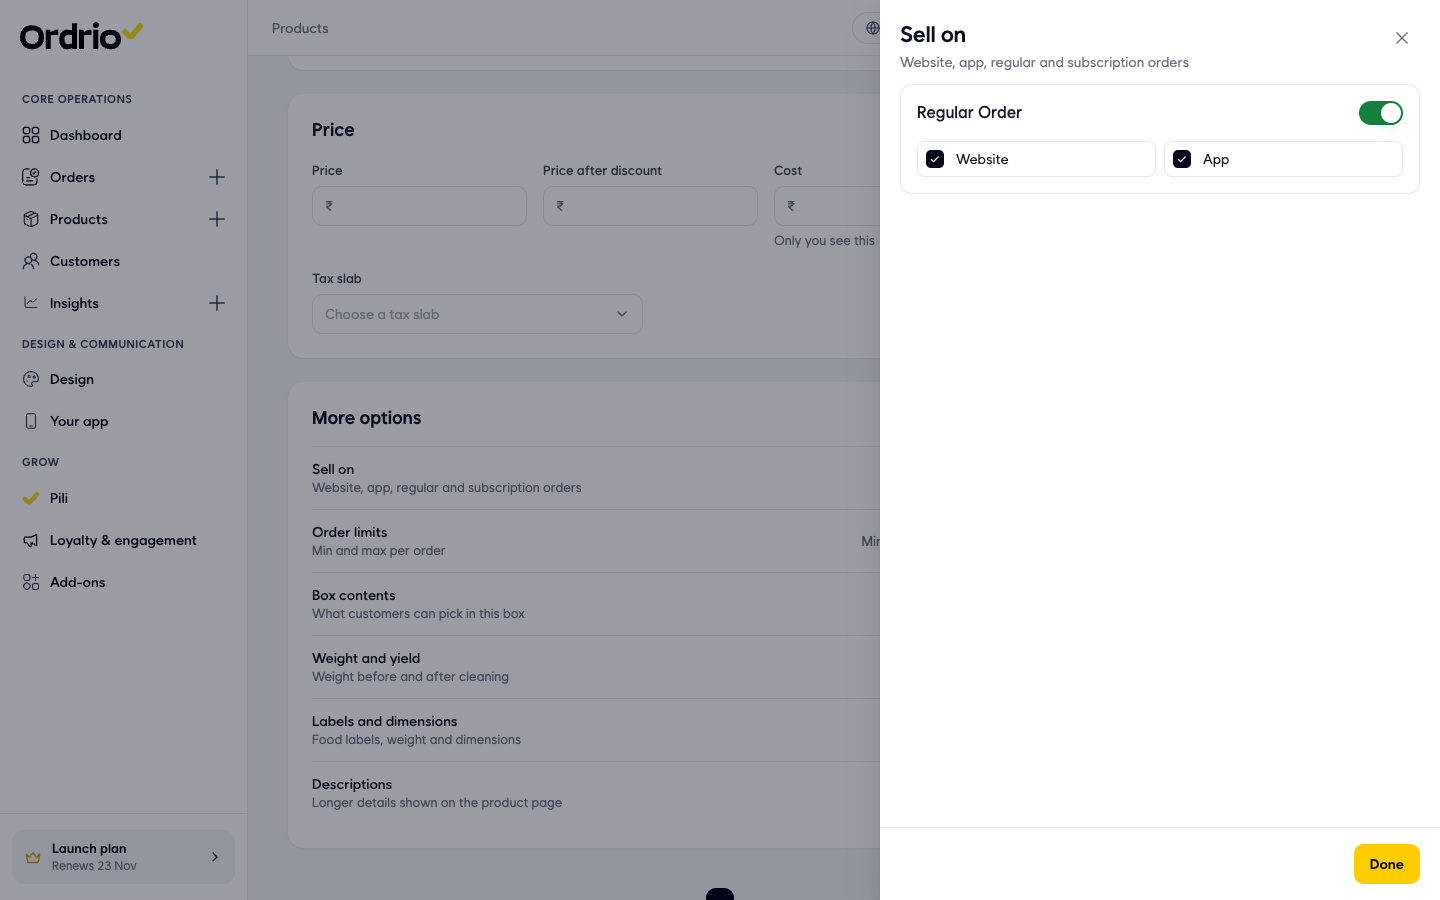
You can also change channels for many boxes at once in the bulk update sheet. It has two channel columns: Product Channel - Regular Order (for example website|app) and Product Channel - Subscription Order (none when the box is not sold in subscription orders).
Add Flexi Boxes in bulk with a CSV
Use this when you want to create many boxes at once, or when you build your boxes in a spreadsheet.
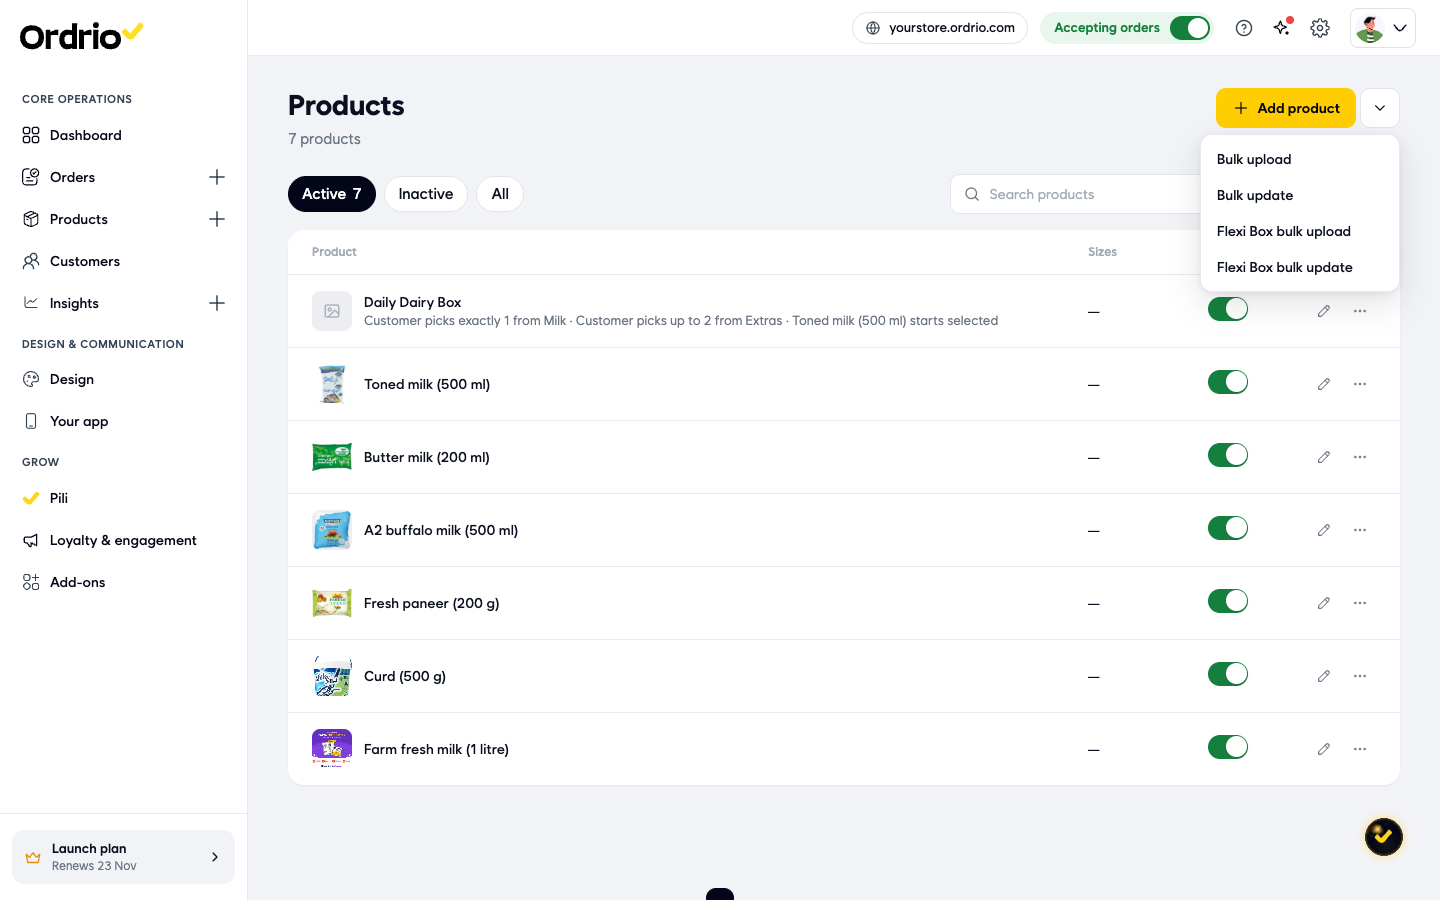
- Go to Products.
- Click the arrow next to Add product to open More ways to add, then click Flexi Box bulk upload.
- Under 1. Download a sheet, click Blank sheet to start from an empty sheet, or My current boxes to start from the boxes you have now.
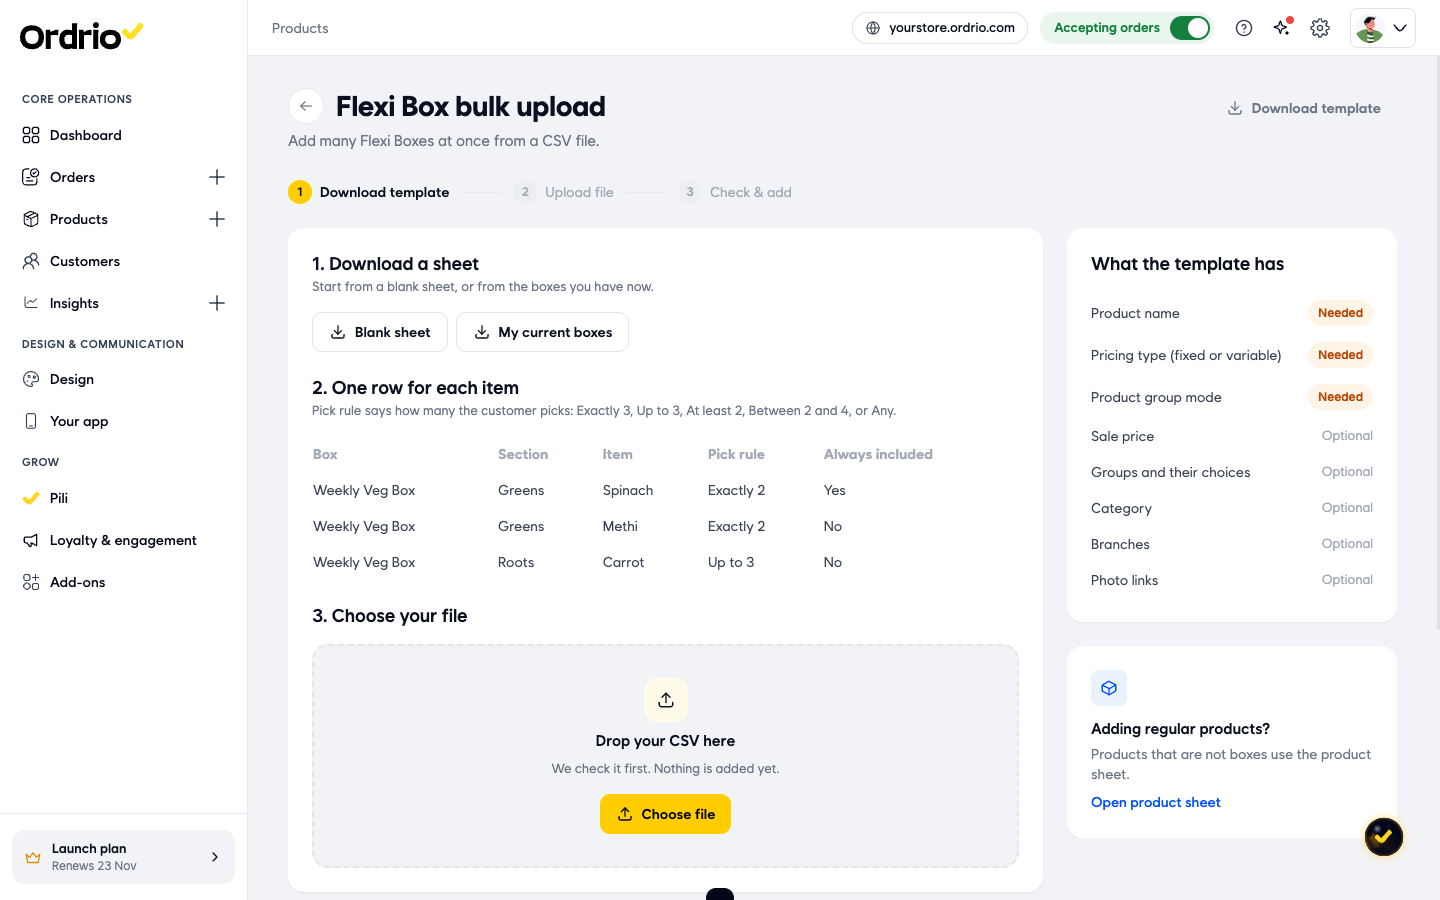
- Open the file and add one row for each item a customer can pick. The columns are:
- Box: the name of the Flexi Box, for example "Daily Dairy Box". Use the same name on every row of that box.
- Section: the group the item belongs to inside the box, for example "Milk" or "Extras".
- Item: the product the customer can pick, for example "Curd (500 g)". Type the name exactly as it appears in Products.
- Pick rule: how many items the customer picks from that section. Use one of: Exactly 3, Up to 3, At least 2, Between 2 and 4, or Any (change the numbers to suit your box). Use the same rule on every row of a section.
- Always included: Yes or No.
- Variation: the size or variant of the item, if it has one. Leave it empty if not.
- Price: the item's price in the box, for example 45.
- Starts selected: Yes if the item is already picked when the customer opens the box, No if not.
- Save the file as a CSV.
- Under 3. Choose your file, drag your CSV onto Drop your CSV here, or click Choose file and pick it. Ordrio checks the file first. Nothing is added yet.
- Read the message at the top. It tells you how many rows are ready, how many boxes are new and how many are updated, for example "4 rows are ready: 1 new boxes and 0 updated". If a box name in your file matches a box you already have, that box is updated instead of added again. To fix the file and try again, click Choose another file.
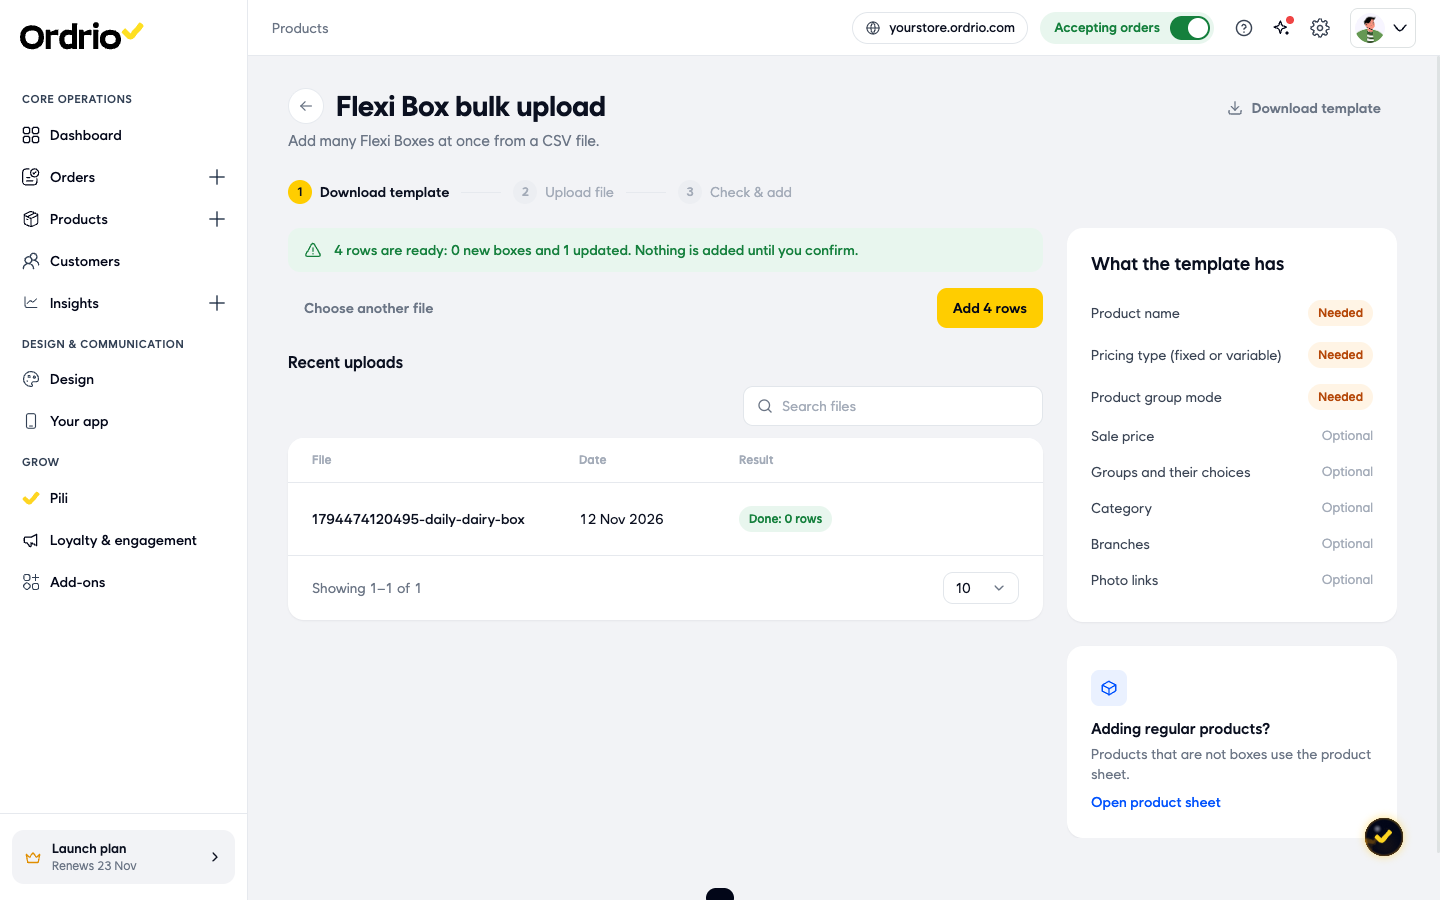
- Click Add 4 rows (the button shows your number of rows) to confirm.
- Your file appears under Recent uploads with its date and result. Go to Products to see the new box. Under its name, Ordrio shows what customers can pick, for example "Customer picks exactly 1 from Milk · Customer picks up to 2 from Extras".
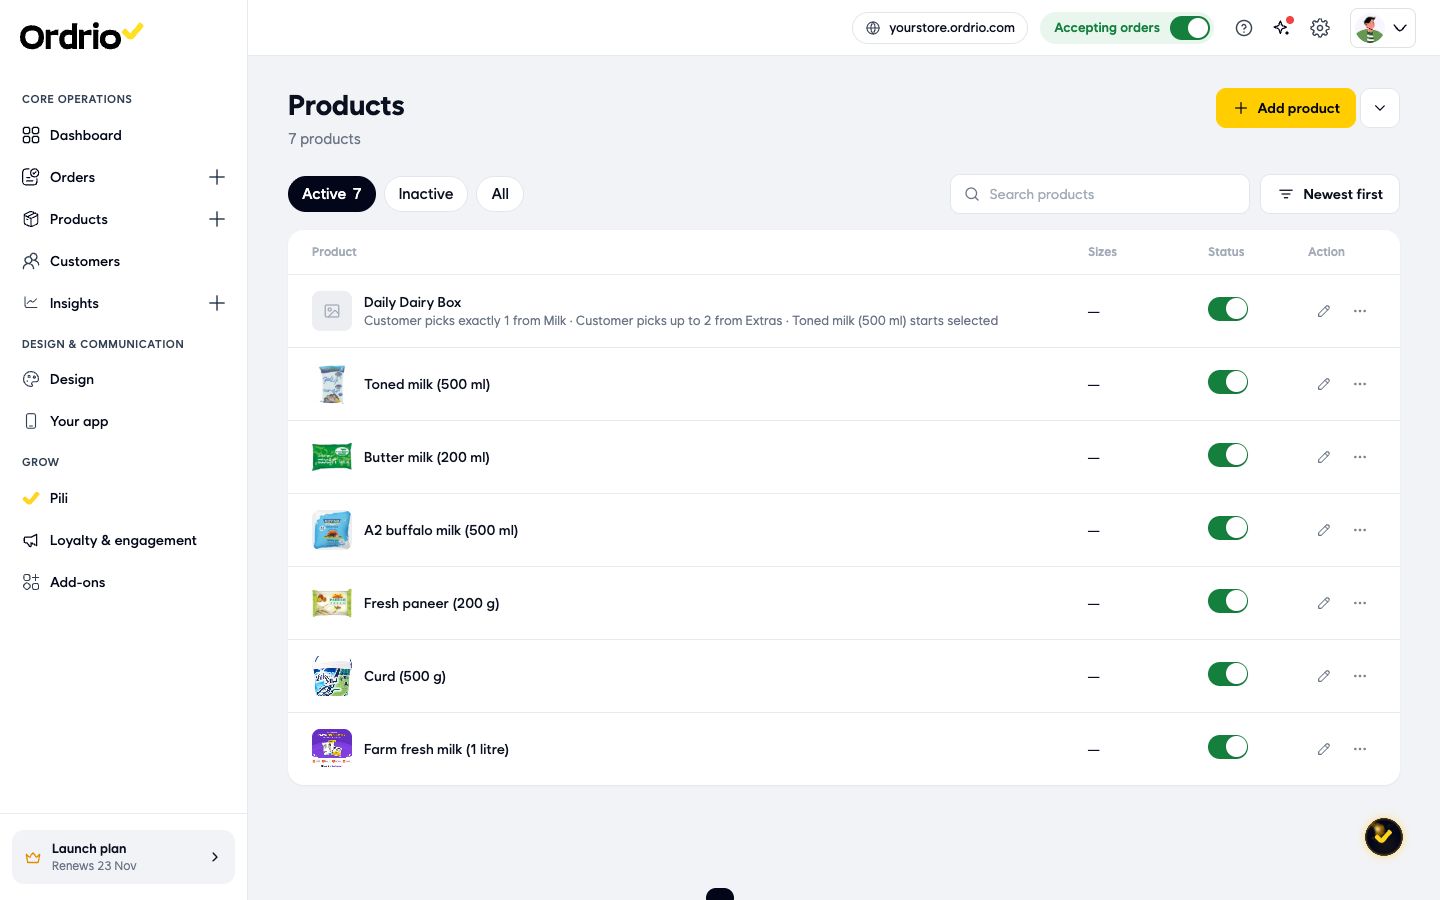
The names, items and prices in this article are examples. Use your own boxes, products and prices.
Update Flexi Boxes in bulk with a CSV
Use this to change many existing boxes at once, for example their channels, groups or item prices.
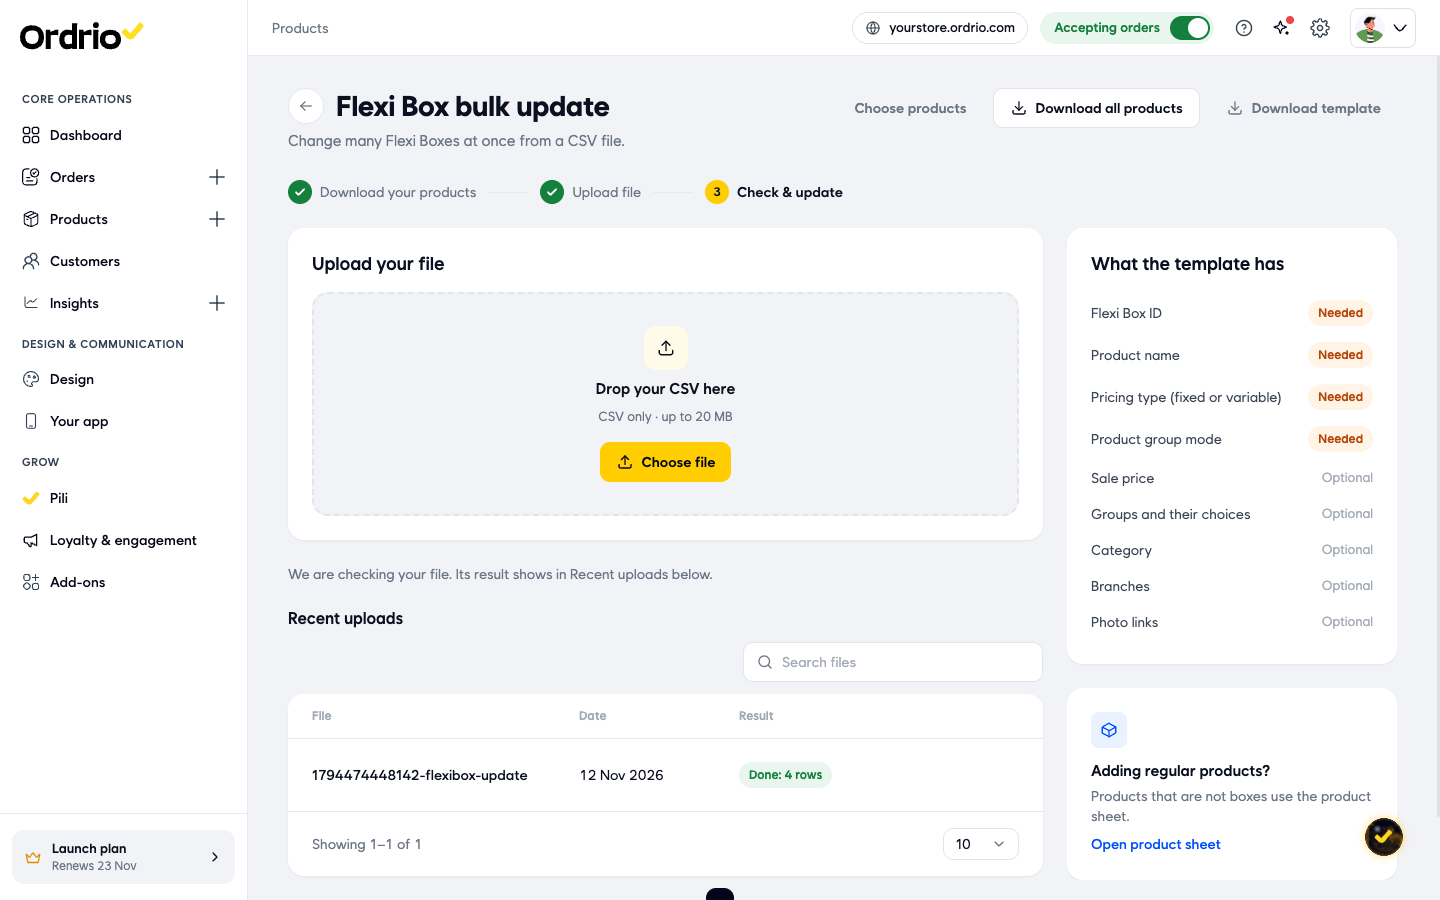
- Go to Products, click the arrow next to Add product and click Flexi Box bulk update.
- Download your boxes. You have three choices:
- Download all products: a sheet with every Flexi Box you have.
- Choose products: tick the boxes you want in the list, then click Export CSV.
- Download template: an empty sheet with the right columns.
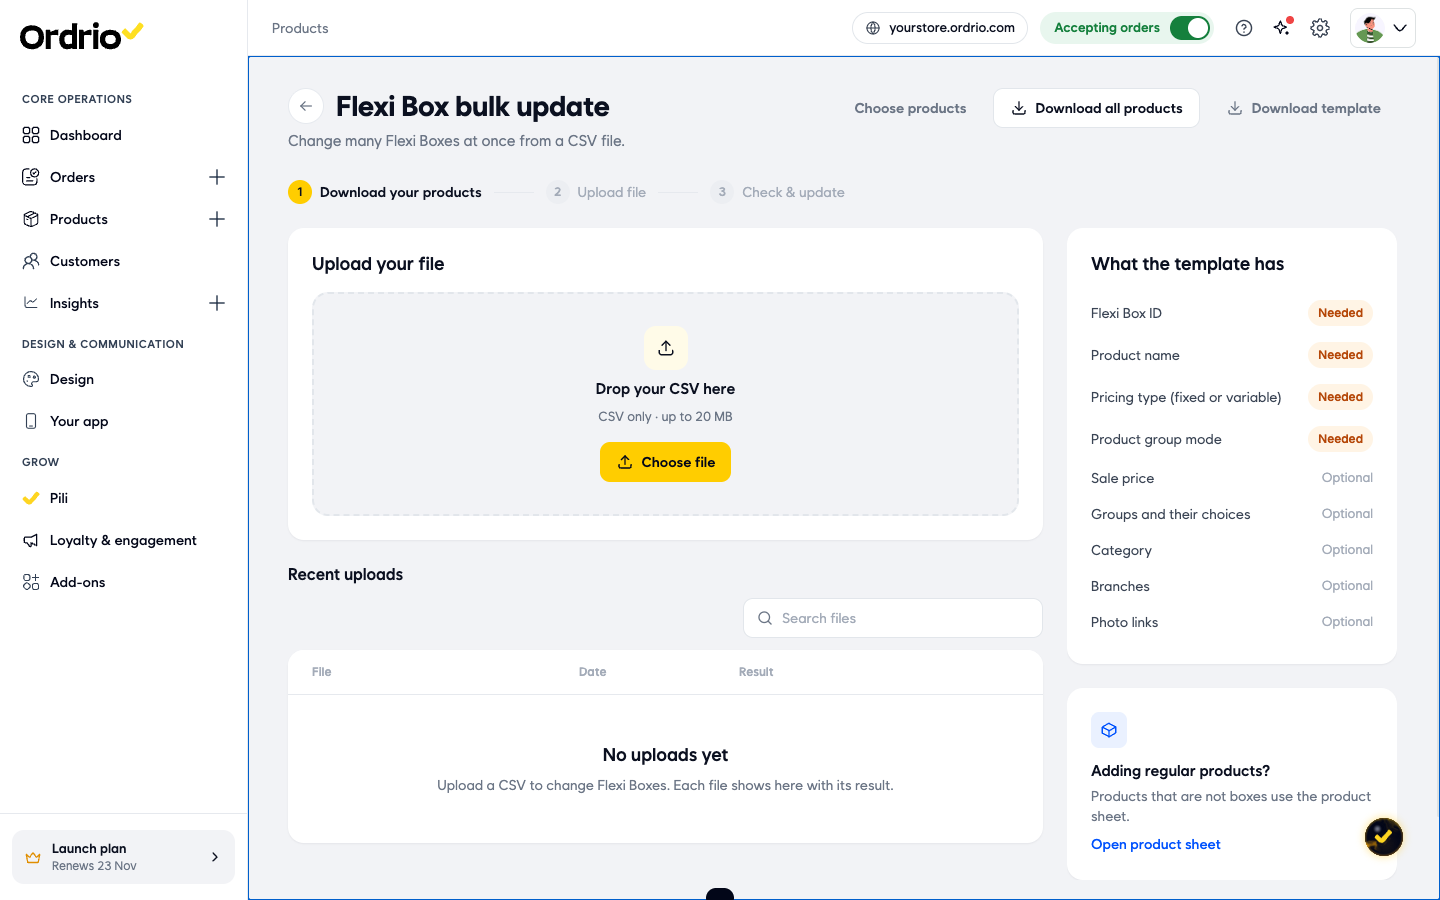
- Open the file. It has one row for each item in each box. The main columns are:
- Flexi Box ID, Group ID and Item ID: how Ordrio finds the box, section and item. Do not change them.
- Product Name: the box name.
- Pricing Type: Fixed or Variable.
- Product Group Mode, Sale Price, Discounted Price, Tax Slab, Category and Available Branches.
- Product Channel - Regular Order and Product Channel - Subscription Order: where the box is sold.
- Group Name, Minimum Product Selection and Maximum Products Selection: the section name and how many items customers pick from it.
- Product, Price, Min Qty, Max Qty, Mark as Default and Subscription Default: the item, its price and its settings.
- Description, food label and photo columns, if you use them.
- Change the values you need and save the file as a CSV.
- Drag the file onto Drop your CSV here, or click Choose file. The file name appears under the drop area.
- Click Update CSV.
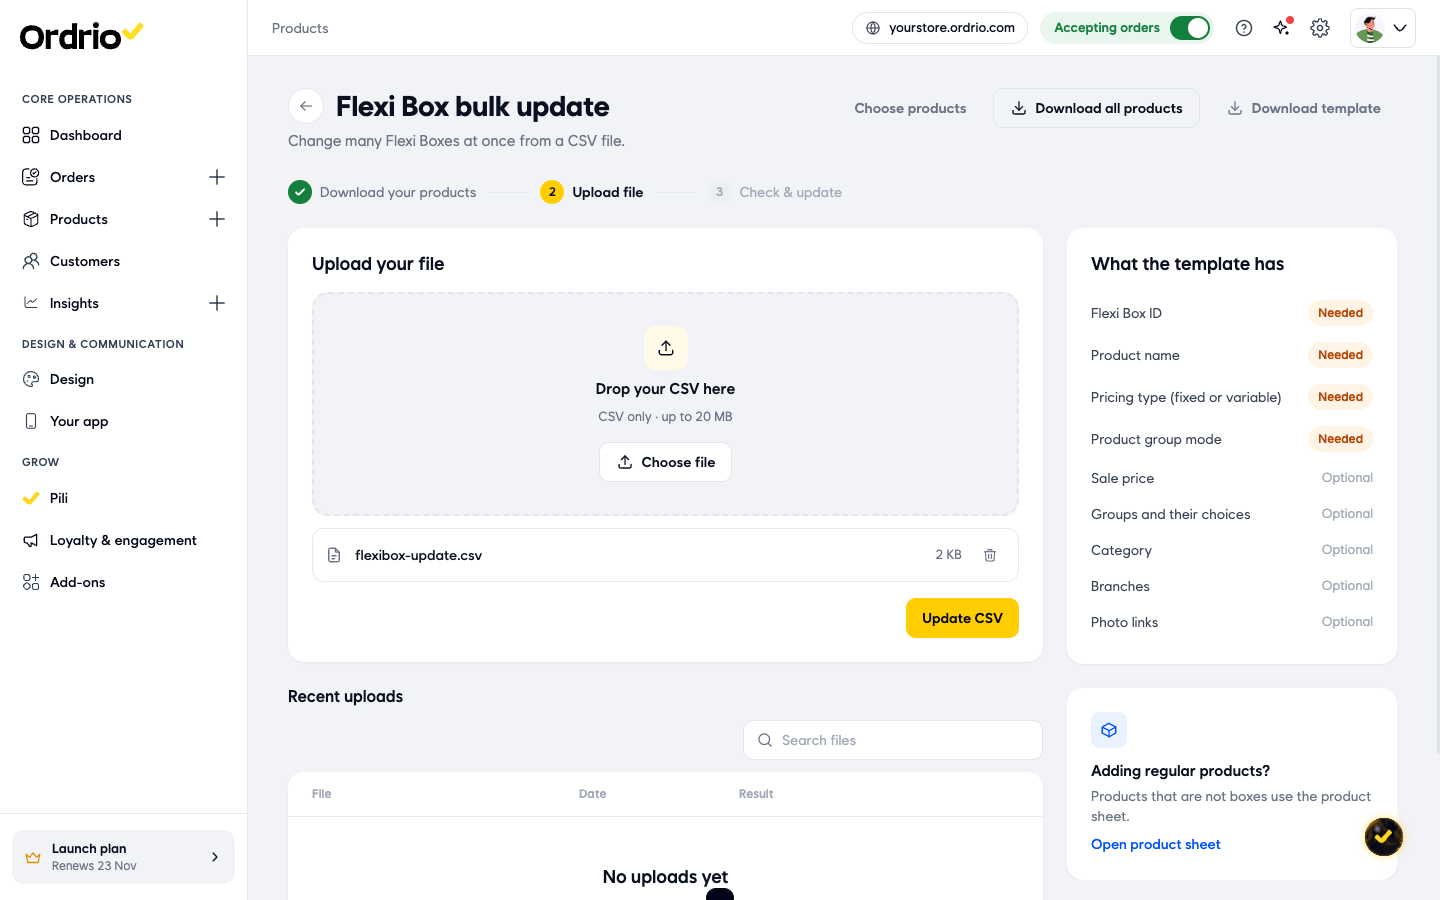
- Ordrio checks the file. The result shows under Recent uploads, for example "Done: 4 rows".
Change what is inside a box
- Go to Products and click the pencil icon next to your Flexi Box.
- Under More options, click Box contents.
- Under What customers see, check the summary, for example "Customer picks exactly 1 from Milk" and which item starts selected.
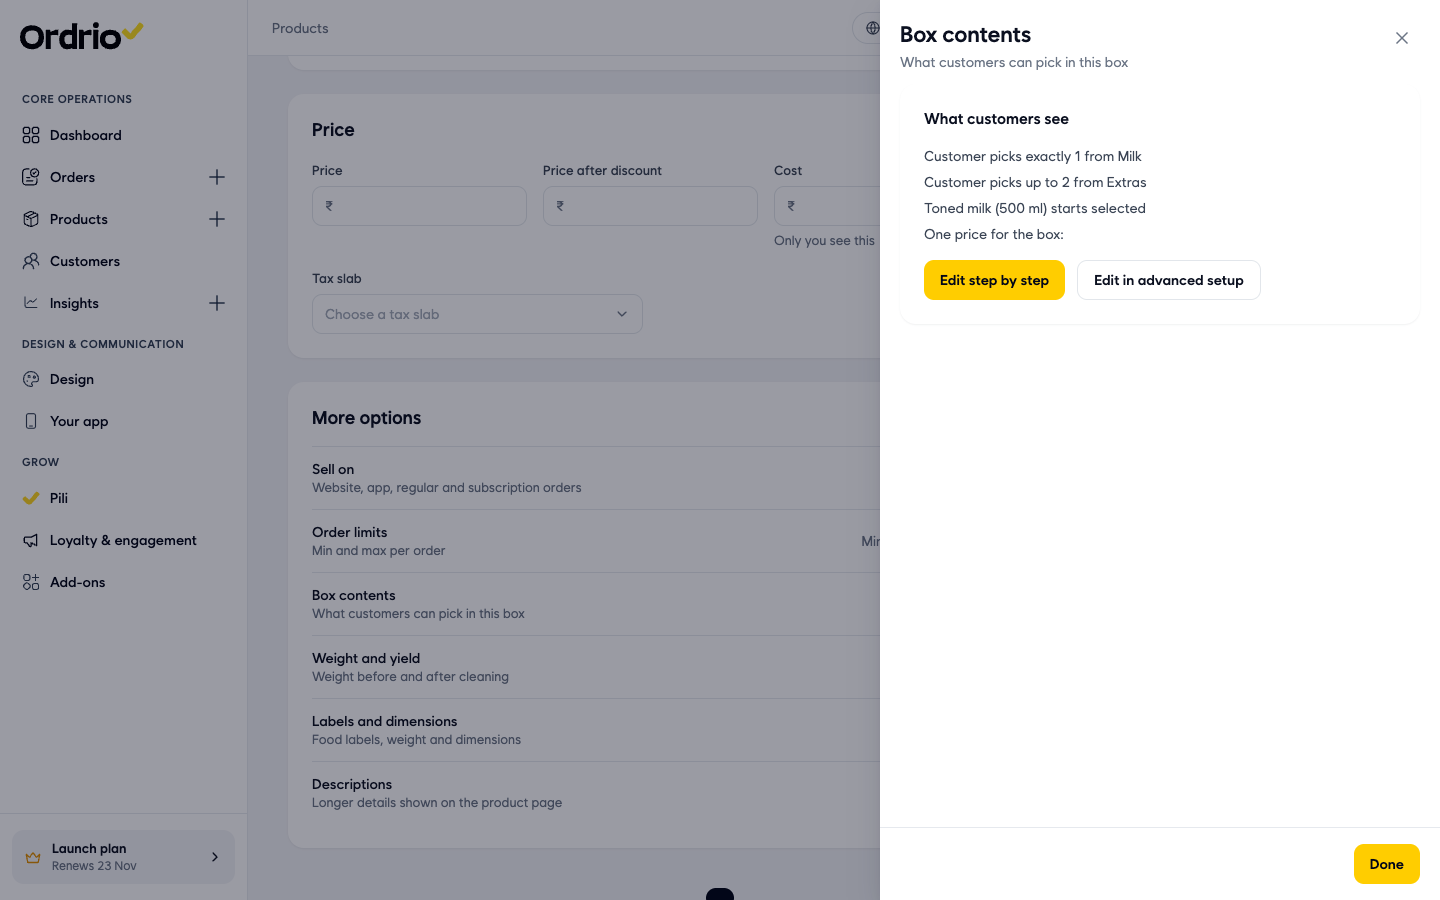
- Click Edit step by step for a guided setup, or Edit in advanced setup to see every setting on one screen.
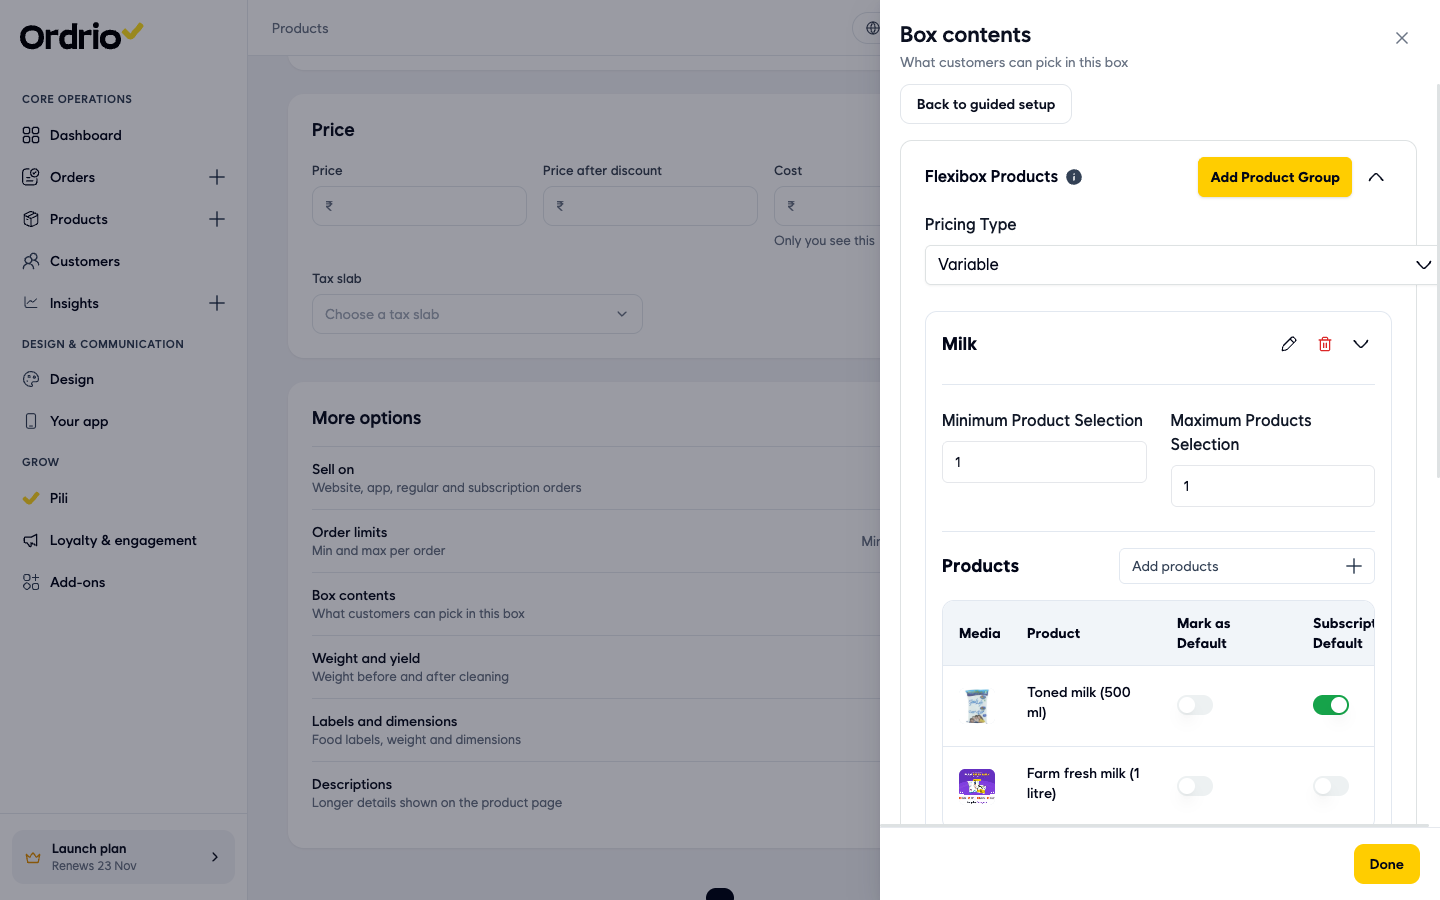
- In the advanced setup, click the arrow next to Add Product Group to open your groups. You can change:
- Pricing Type: Fixed or Variable.
- Each group (for example "Milk"): use the pencil icon to edit it and the bin icon to delete it.
- Minimum Product Selection and Maximum Products Selection: how many items customers pick from the group.
- Add products: add more items to the group.
- For each item: Mark as Default, Subscription Default, Price, Min Qty and Max Qty.
- Add Product Group: add a new group to the box.
- Click Done. To go back to the guided setup, click Back to guided setup.
Plan box menus with the time-bound calendar
The time-bound calendar shows what your Flexi Boxes hold on each day, and notes on single products. Use it when your box changes from day to day, like a tiffin menu.
- Go to Subscription > Time-bound. The Product availability screen opens.
- Choose how you plan:
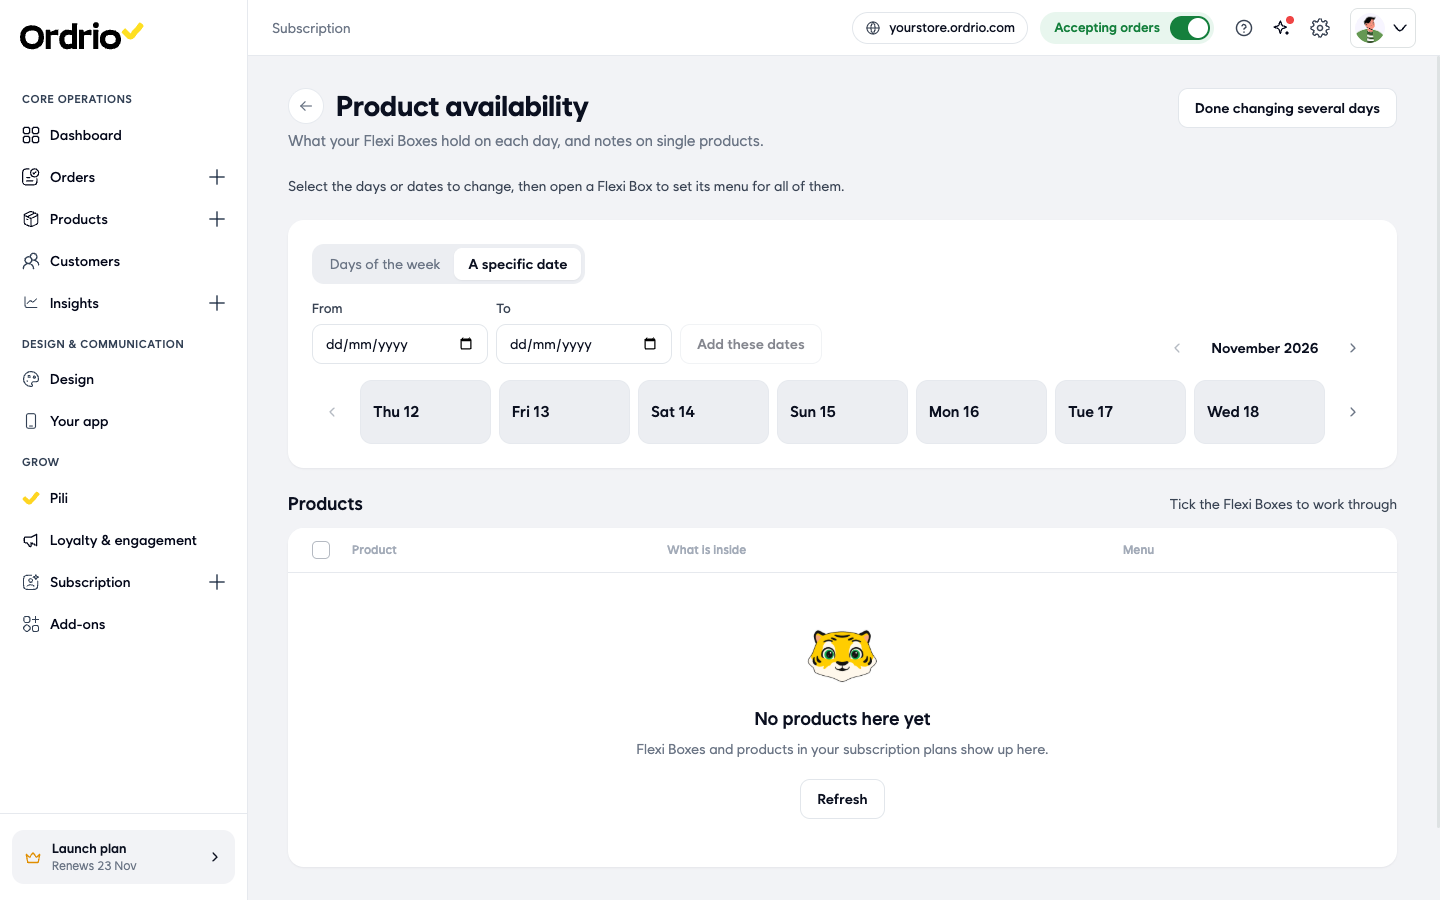
- A specific date: pick a date with Go to date, or use the arrows next to the month and the week to find it, then click the day.
- Days of the week: click a weekday (Mon to Sun) to set a menu that repeats every week.
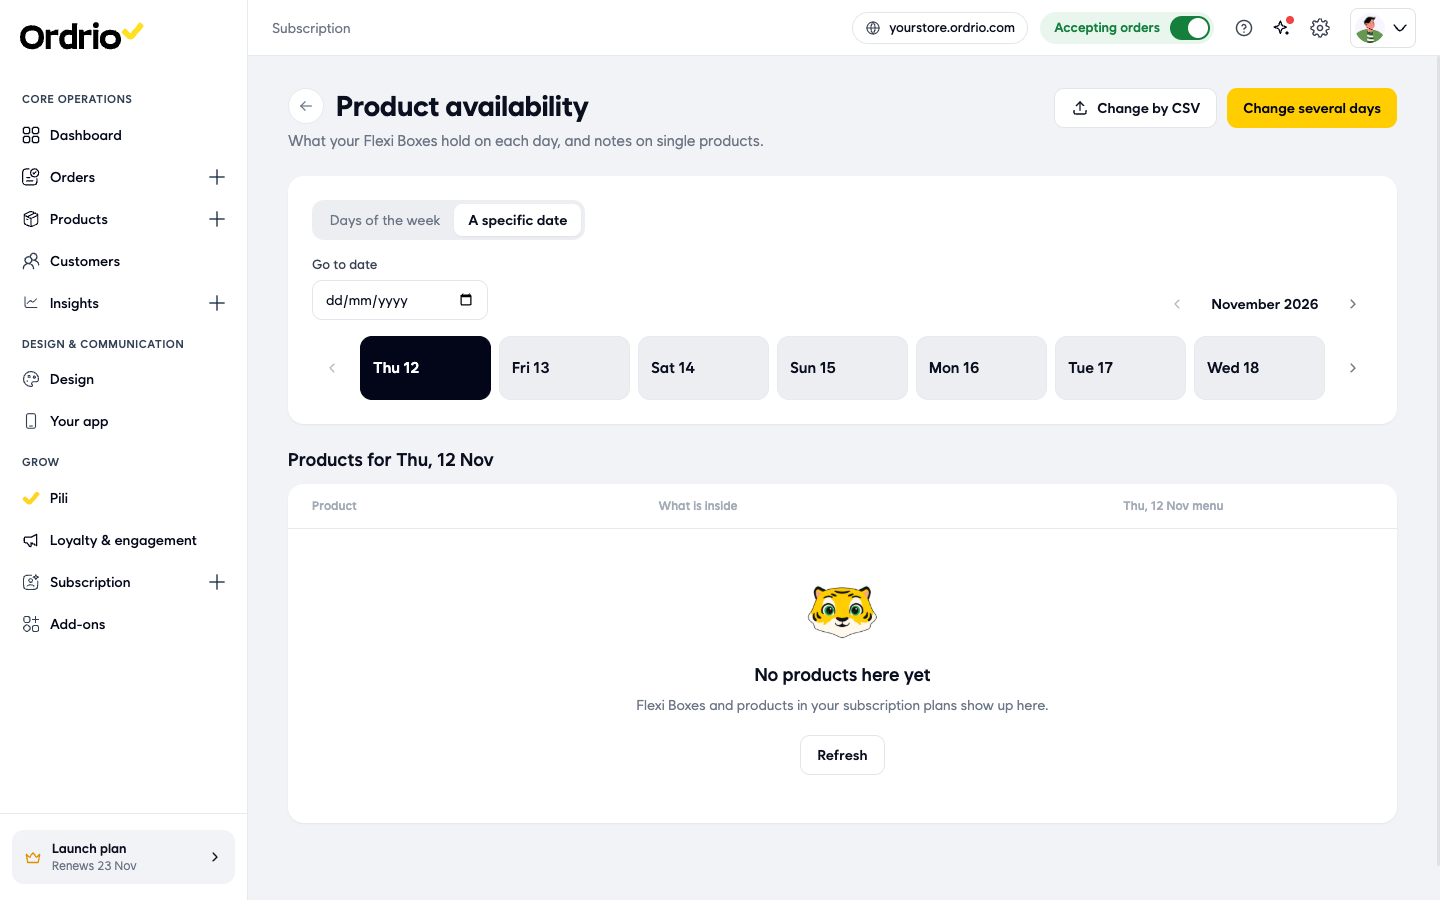
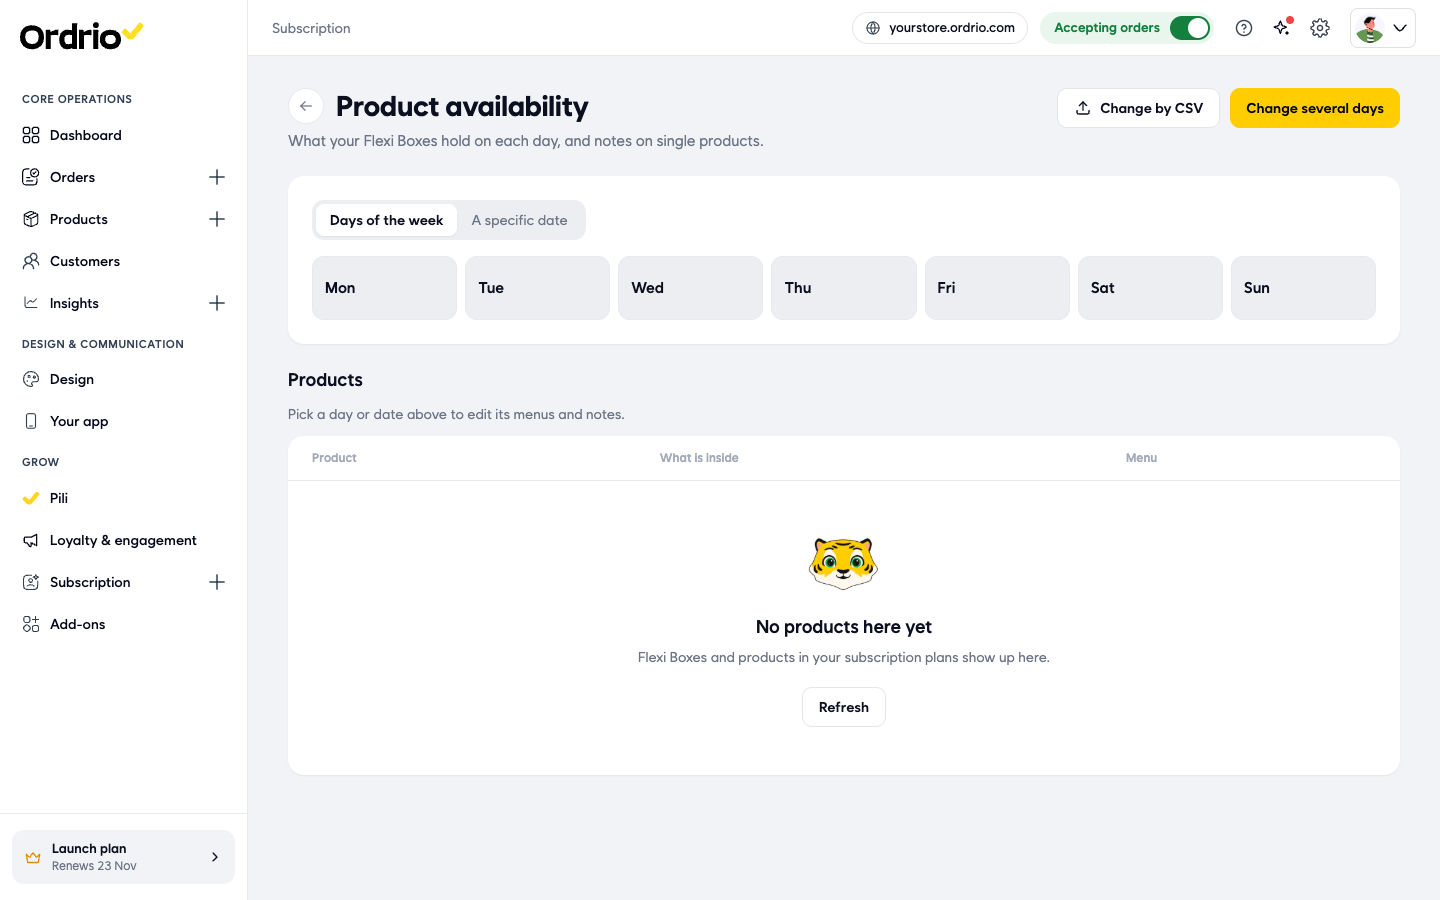
- Under Products for the day you picked, you see each product, What is inside it and that day's menu, with Actions to edit it.
- To set the same menu on many days at once, click Change several days. Pick the days, or choose a From and To date and click Add these dates. Tick the Flexi Boxes to work through, then open a Flexi Box to set its menu for all the days you picked. Click Done changing several days when you finish.
Change menus with a CSV
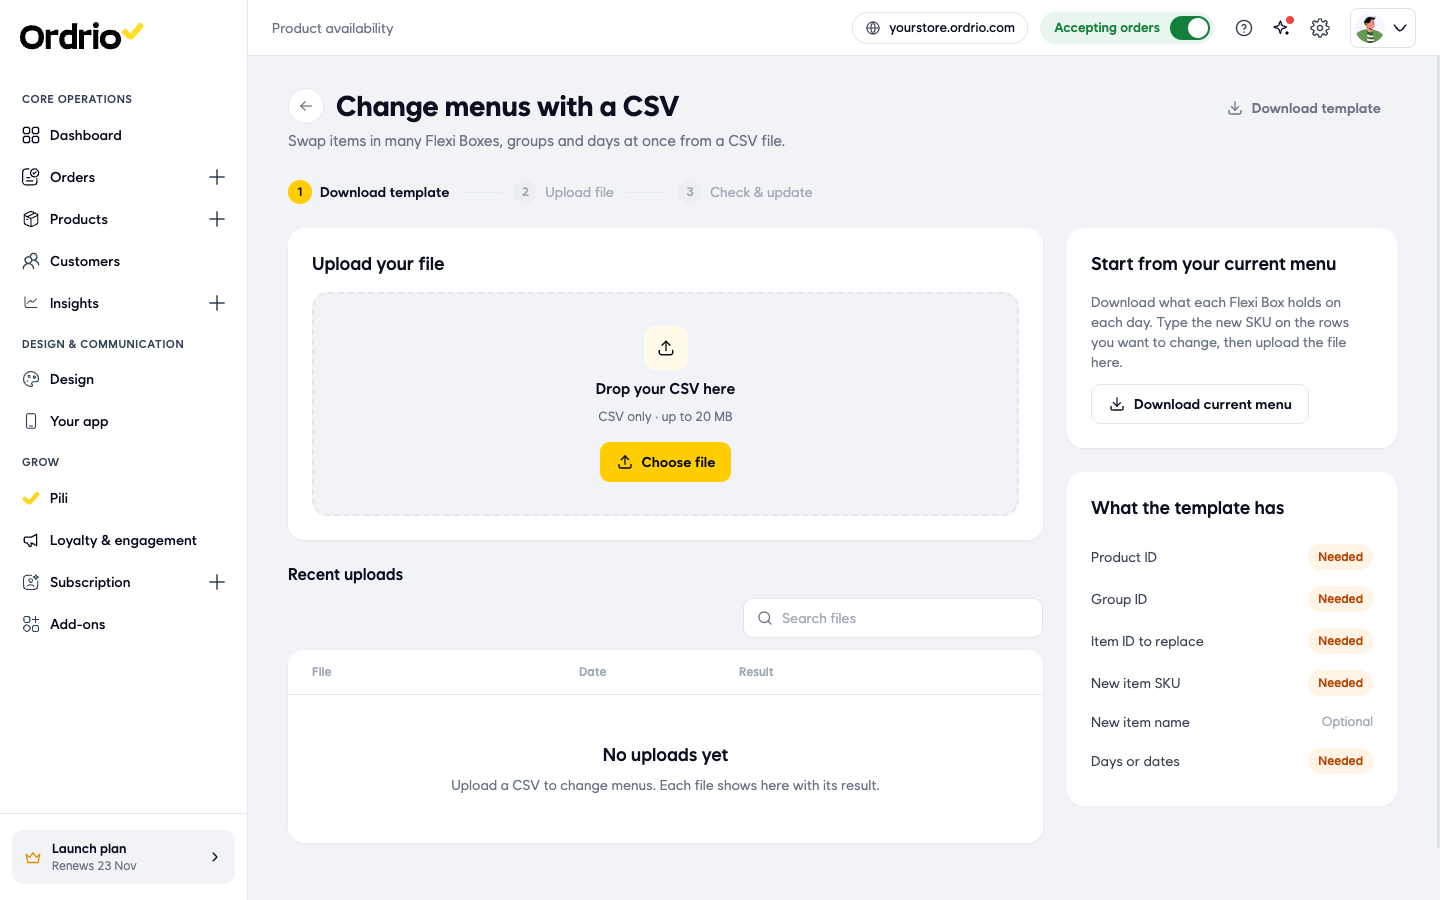
- On Product availability, click Change by CSV. The Change menus with a CSV screen opens.
- Click Download current menu to get what each Flexi Box holds on each day. You can also click Download template for an empty sheet.
- In the file, type the new SKU on the rows you want to change. The columns are:
- Product ID: the Flexi Box.
- Group ID: the section in the box.
- Item ID to replace: the item you are swapping out.
- New item SKU: the SKU of the item you are swapping in.
- New item name: optional.
- Days or dates: when the change applies.
- Save the file as a CSV (up to 20 MB).
- Drag it onto Drop your CSV here, or click Choose file.
- Ordrio checks the file. Your file and its result appear under Recent uploads.
Good to know
- Bulk upload checks your file before anything is added. Nothing changes until you click the Add button.
- If a box name in your upload file matches a box you already have, that box is updated, not added twice.
- The upload sheet uses the columns Box, Section, Item, Pick rule, Always included, Variation, Price and Starts selected. The update sheet uses IDs, so always start an update from Download all products or Choose products.
- Regular products, that are not boxes, use the product sheet. Click Open product sheet on the Flexi Box upload screen to go there.
- The time-bound calendar is empty until you have Flexi Boxes or products in a subscription plan. Click Refresh after you add them.
- To hide a box from customers without deleting it, turn off its switch in the Products list.
Related
- Selling Flexi Boxes
- Adding products in bulk with a CSV
- Setting up subscription plans