How-to guide
Product channels and pricing control
Different availability and prices for online, offline, web and app.
You can choose where each product is sold: on your website, in your app, and in which of your branches. You can also give a product a different price in each branch. Use this when a product should only be on one channel, or when one branch sells it at a different price.
Before you start
- The product must already be added in Products.
- To choose branches or set branch prices, your store needs more than one branch. You can see your branches in Settings > Branches.
The screenshots show example products, branches and prices. Use your own products and prices.
Choose where a product is sold
- Open nadi.ordrio.com (your Ordrio admin panel) and log in. In the menu on the left, click Products, then Products. You see the list of your products.
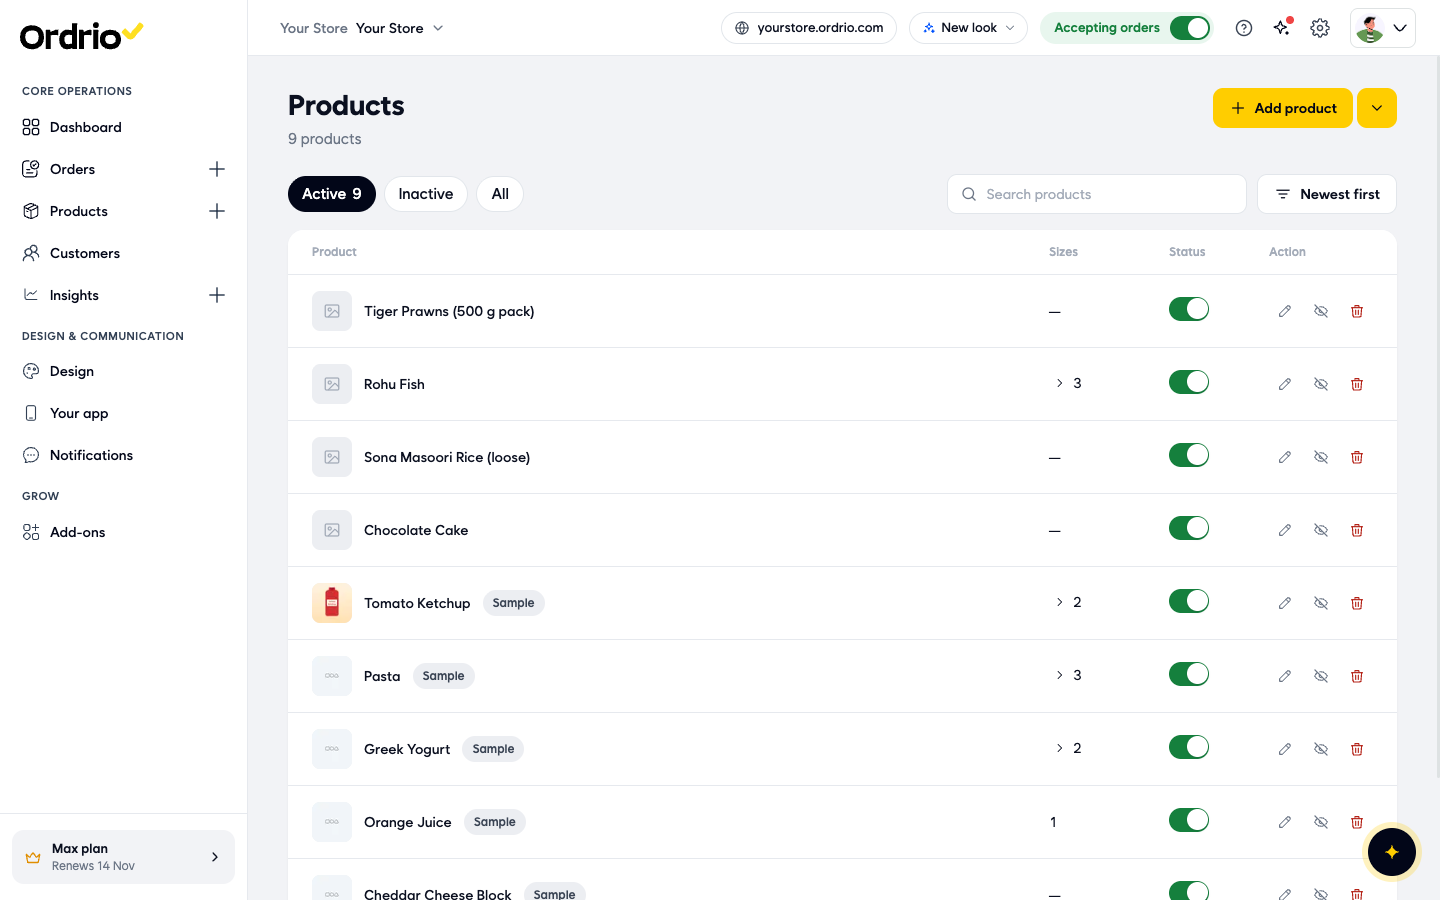
- Click the product you want to change, or click the pencil icon in its Action column. The product page opens.
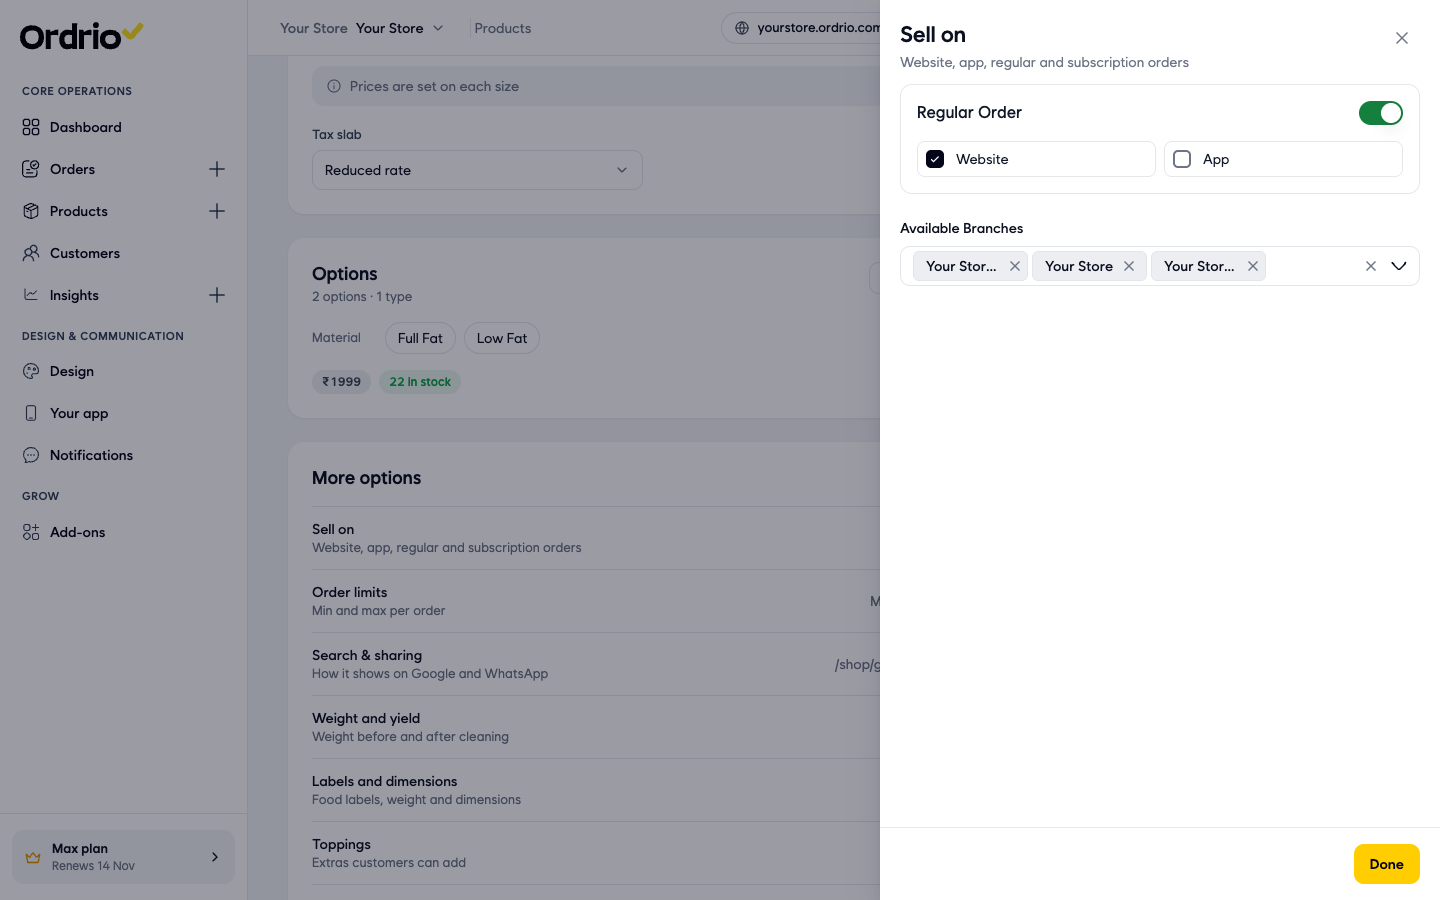
- Scroll down to More options and click Sell on. Its summary reads "Website, app, regular and subscription orders".
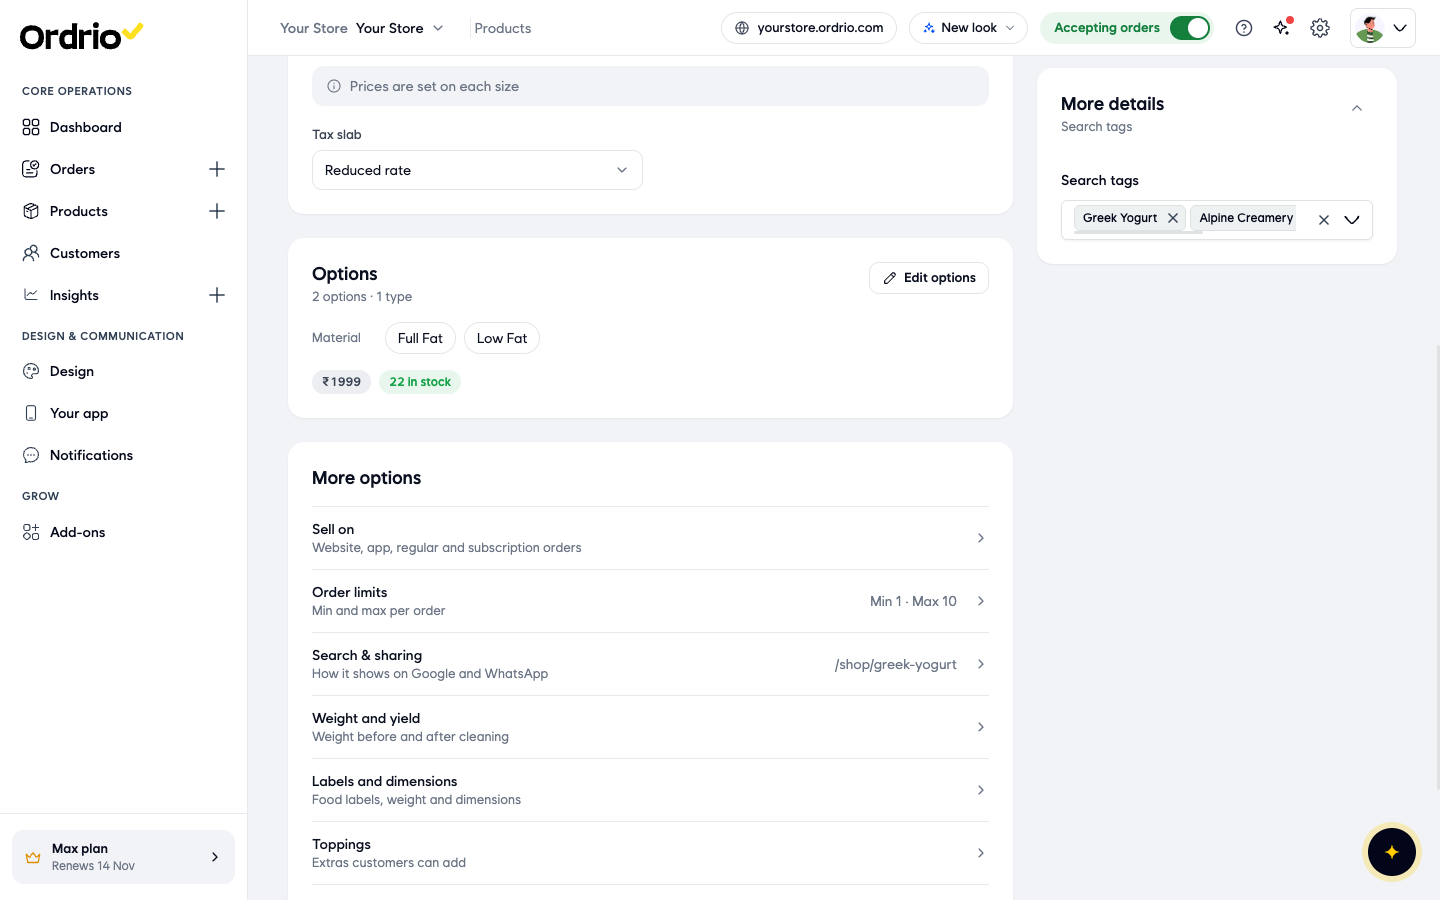
- The Sell on panel opens on the right. It has these settings:
- Regular Order: the switch at the top. When it is on, you can choose the channels below it. When you turn it off, the Website and App choices are hidden.
- Website: tick it to sell the product on your website.
- App: tick it to sell the product in your customer app.
- Available Branches: the branches that sell this product. Each branch shows as a chip in the box.
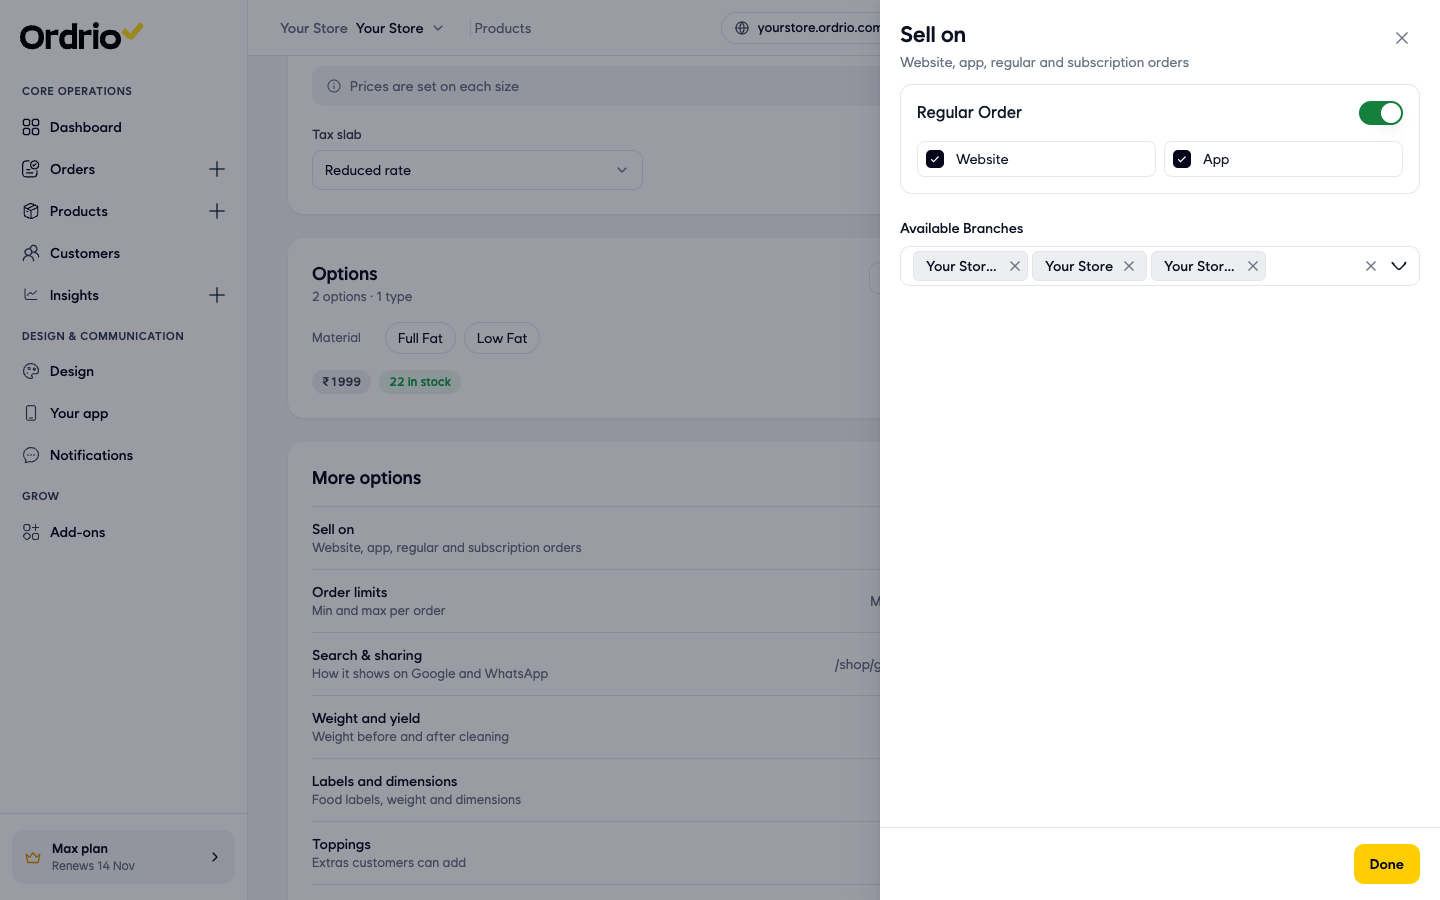
- Tick or untick Website and App. For example, untick App to sell the product only on your website.
- To change the branches, click the Available Branches box. A list of your branches opens, with a Search options... box at the top. Tick the branches that should sell the product and untick the ones that should not. You can also click the × on a branch chip to remove it, or click the × at the end of the box to clear all branches.
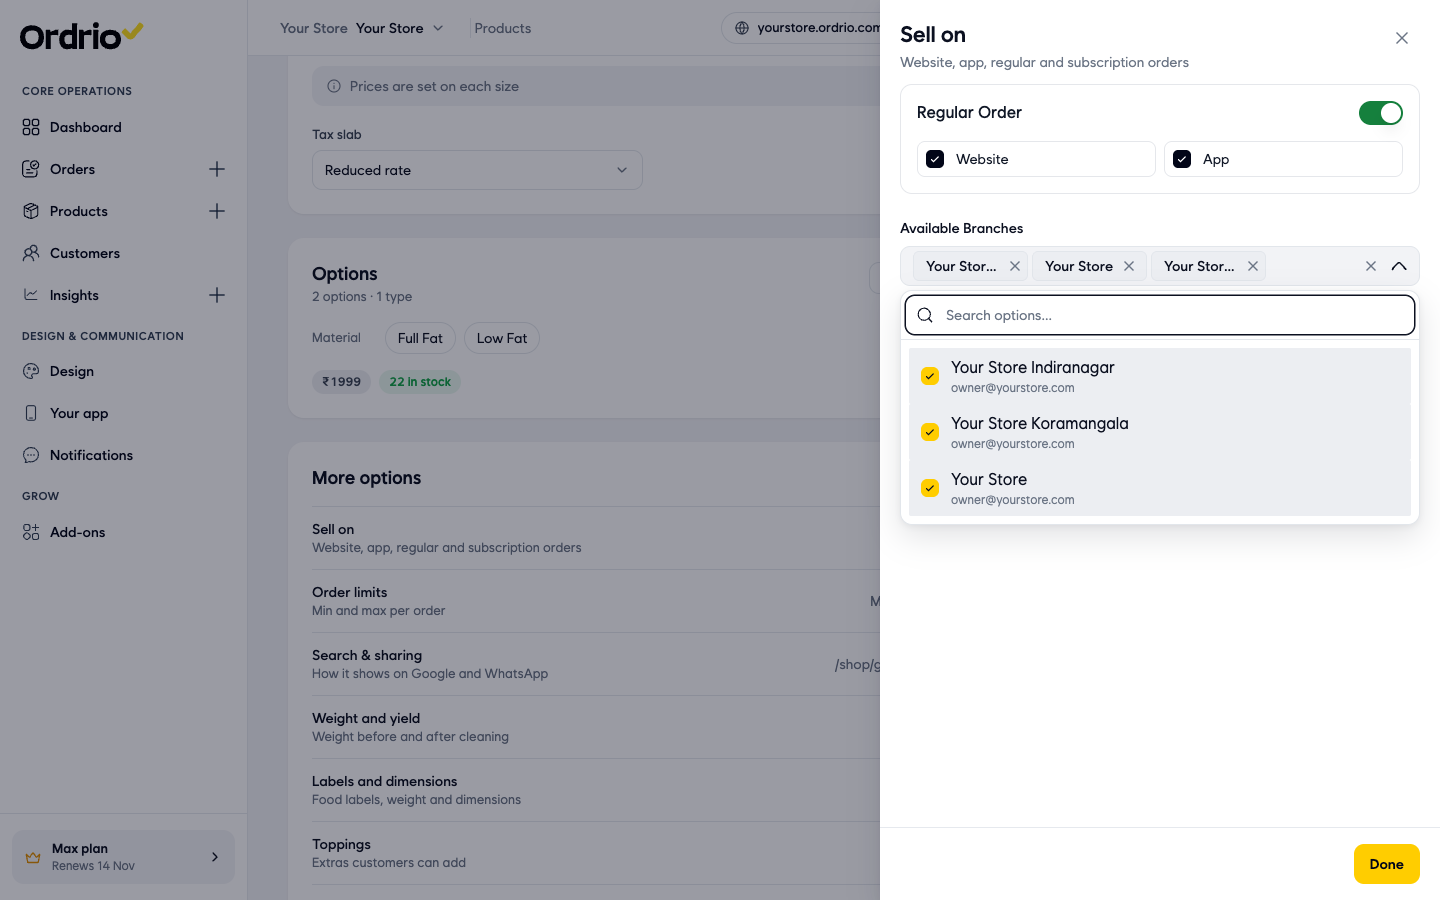
- Click Done at the bottom of the panel. The panel closes and an Unsaved changes bar appears at the bottom of the page.
- Click Save product in that bar. Your change is saved and you go back to the Products list.
- To check your change, open the product again and click Sell on. The panel shows the channels and branches you saved.
Set a different price in each branch
Prices are set on each option of a product (for example each size or type). You can keep one price for all branches, or give each branch its own price.
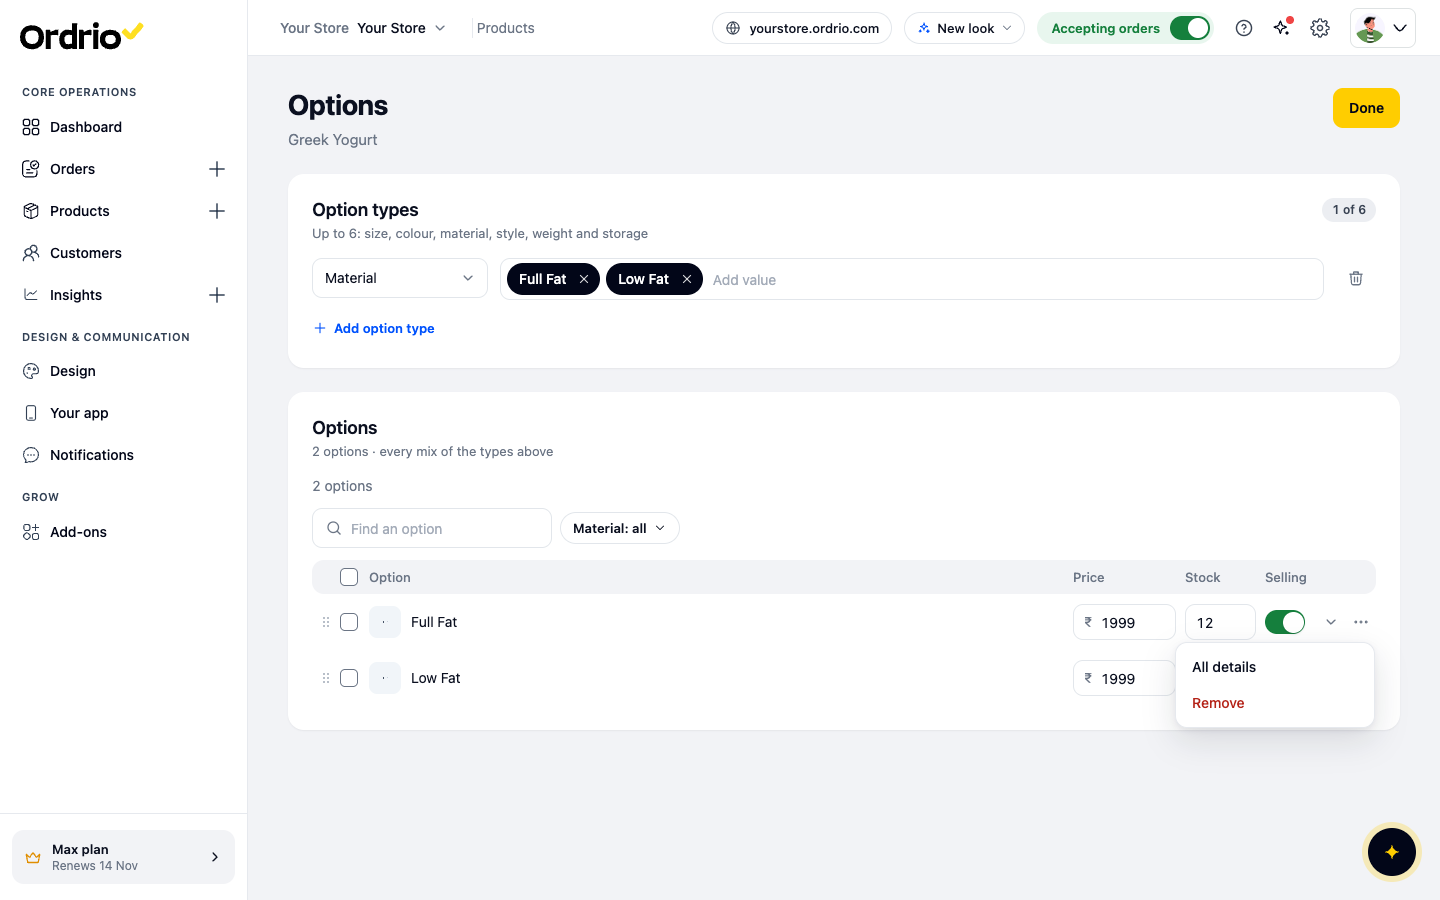
- Open the product from Products. In the Options section, click Edit options. The Options page opens with a list of the product's options, and each one shows its Price, Stock and Selling switch.
- Click the ... button at the end of the option's row and choose All details.
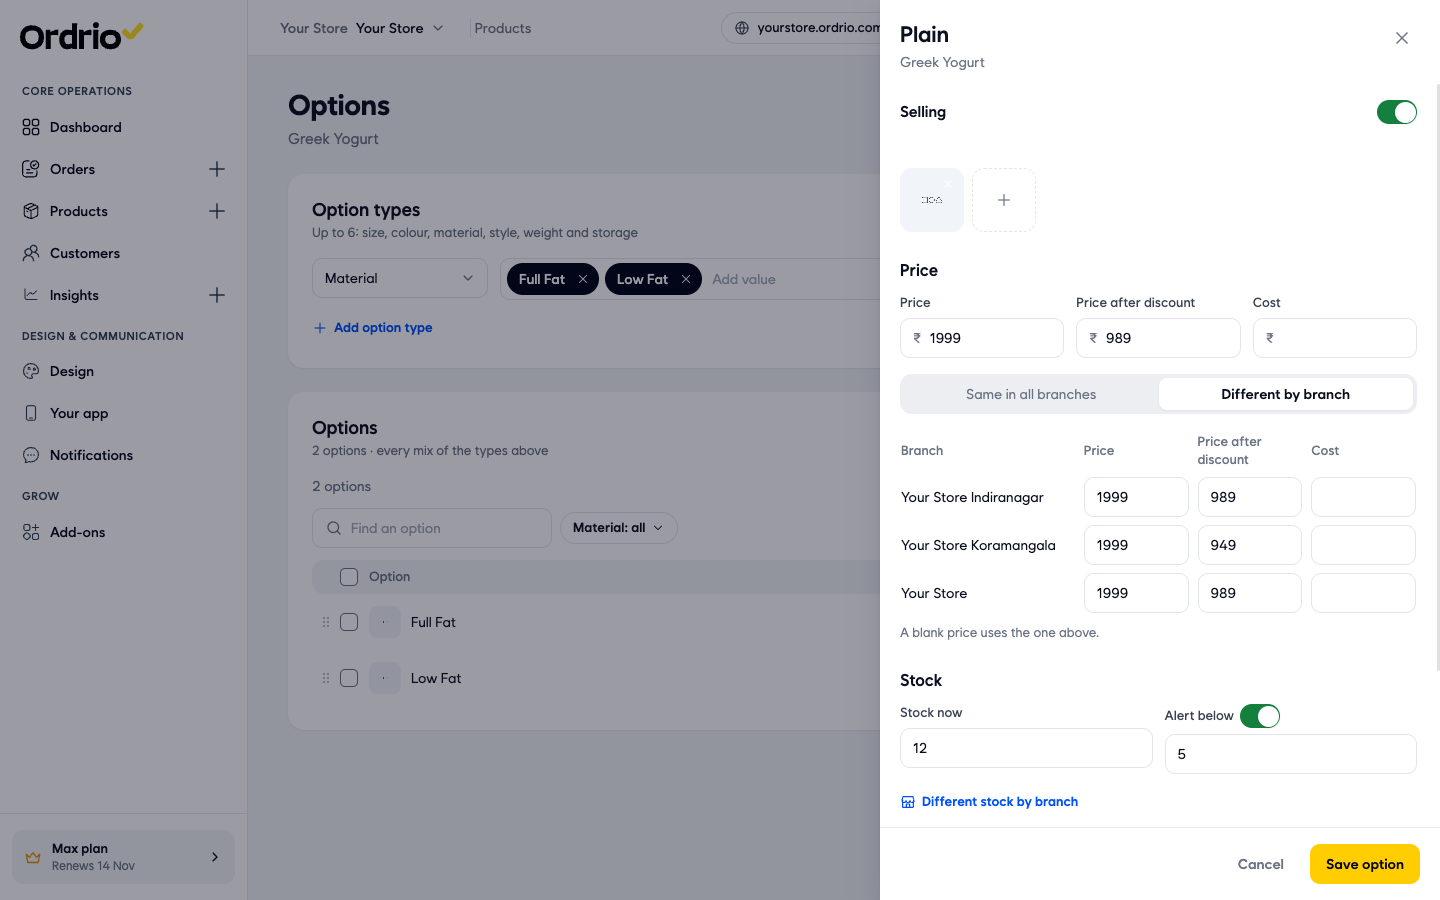
- A panel opens for that option. In Price you see:
- Price: the normal price of the option.
- Price after discount: the lower price, if the option is discounted.
- Cost: what the option costs you.
- Under the prices, click Different by branch. A list of your branches appears, each with its own Price, Price after discount and Cost.
- Type the prices for each branch. If you leave a branch's price blank, it uses the price above. To go back to one price everywhere, click Same in all branches.
- Click Save option. The panel closes and the option shows "Changed, not saved yet".
- Click Save product in the Unsaved changes bar at the bottom of the page. The new prices are saved.
- To check, open the option again with ... > All details. Different by branch is selected and each branch shows the price you saved.
Good to know
- Your changes only count after you click Save product. Done and Save option only close their panels.
- Before you save, you can click Reset in the Unsaved changes bar to undo your changes.
- Prices are set for each branch, not for each channel. The Sell on panel only controls where the product is sold.
- Stock can also be different in each branch. In the option's All details panel, click Different stock by branch under Stock.
- To stop selling one option in one branch only, open Edit options and click the arrow at the end of the option's row. You see each branch with its Stock and a Selling switch.
- To hide a product everywhere, use the switch in the Status column of the Products list instead.
Related
- Adding your first product
- Product variations and options
- Branch-level inventory
- Creating and managing branches
Was this article helpful?