How-to guide
Smart inventory controls
Advanced stock rules beyond basic tracking.
Basic stock tracking tells you how many of each product you have. Smart inventory controls go further: you can limit how much a customer can buy in one order, update stock for many products at once, and show sold-out products at the end of your store.
For low-stock warnings, see Low stock alerts. For separate stock in each branch, see Branch-level inventory.
Before you start
- Add your products in Products. See Adding your first product.
- Turn on Track stock for each product you want to control. You find it in the Stock box when you edit a product.
The numbers in the screenshots below are examples. Use your own limits and stock levels.
Set order limits for one product
Order limits control how much of a product a customer can put in one order.
- Open nadi.ordrio.com (your Ordrio admin panel) and log in.
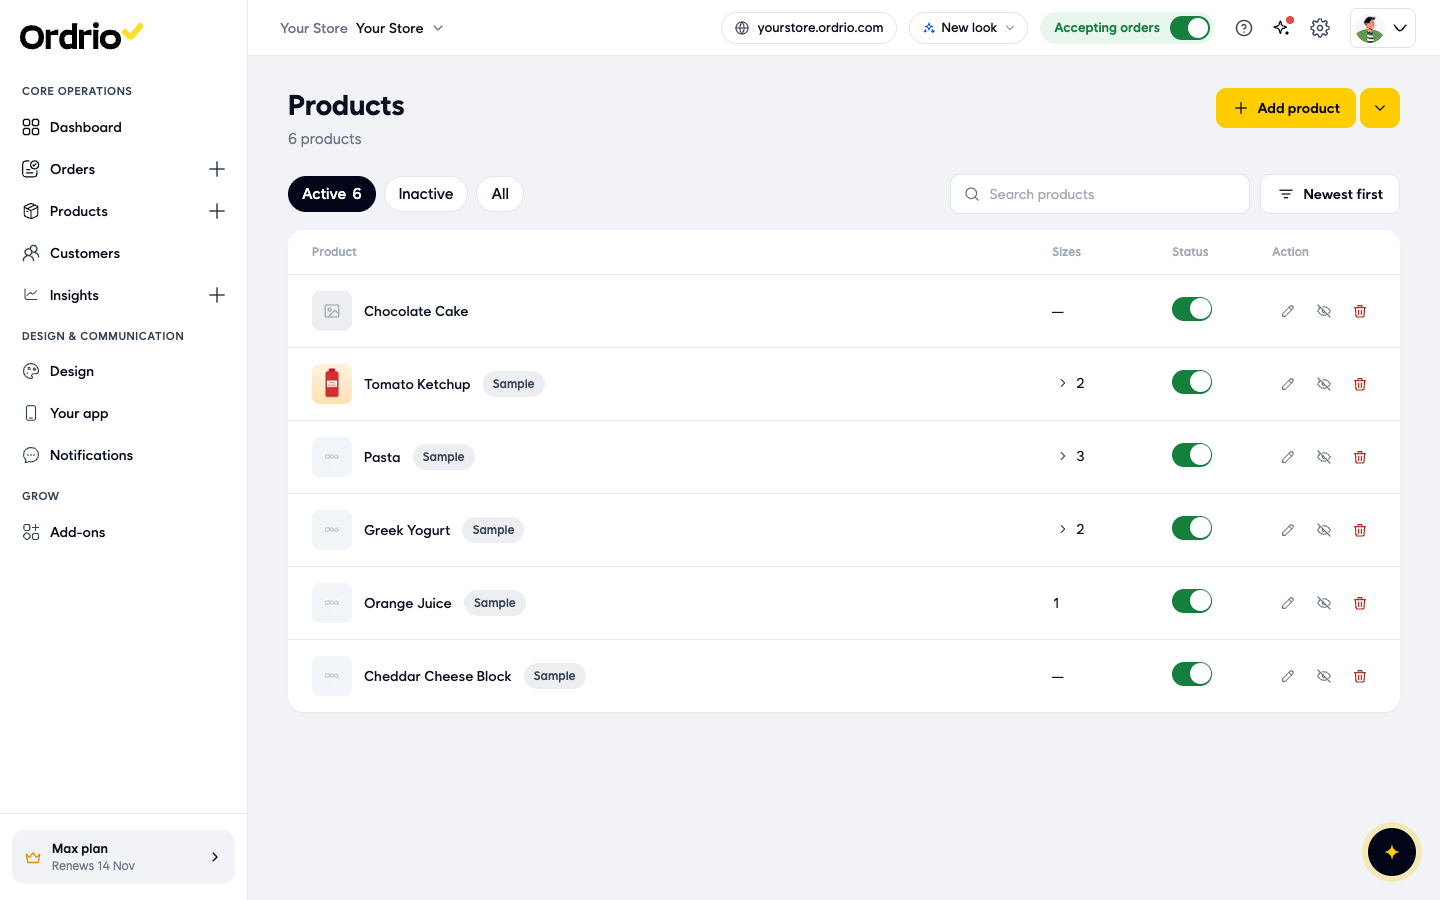
- In the menu on the left, click Products, then Products.
- Click the pencil (edit) button on the row of the product you want to change.
- Scroll down to More options and click Order limits (Min and max per order). The Order limits window opens.
- Fill in the four fields:
- Base Quantity: the starting quantity for one unit of this product, for example 1, or 0.25 for loose items.
- Incremental Quantity: how much the quantity goes up each time the customer adds one more.
- Minimum Selling Quantity: the smallest amount a customer can have in one order.
- Maximum Selling Quantity: the largest amount a customer can have in one order.
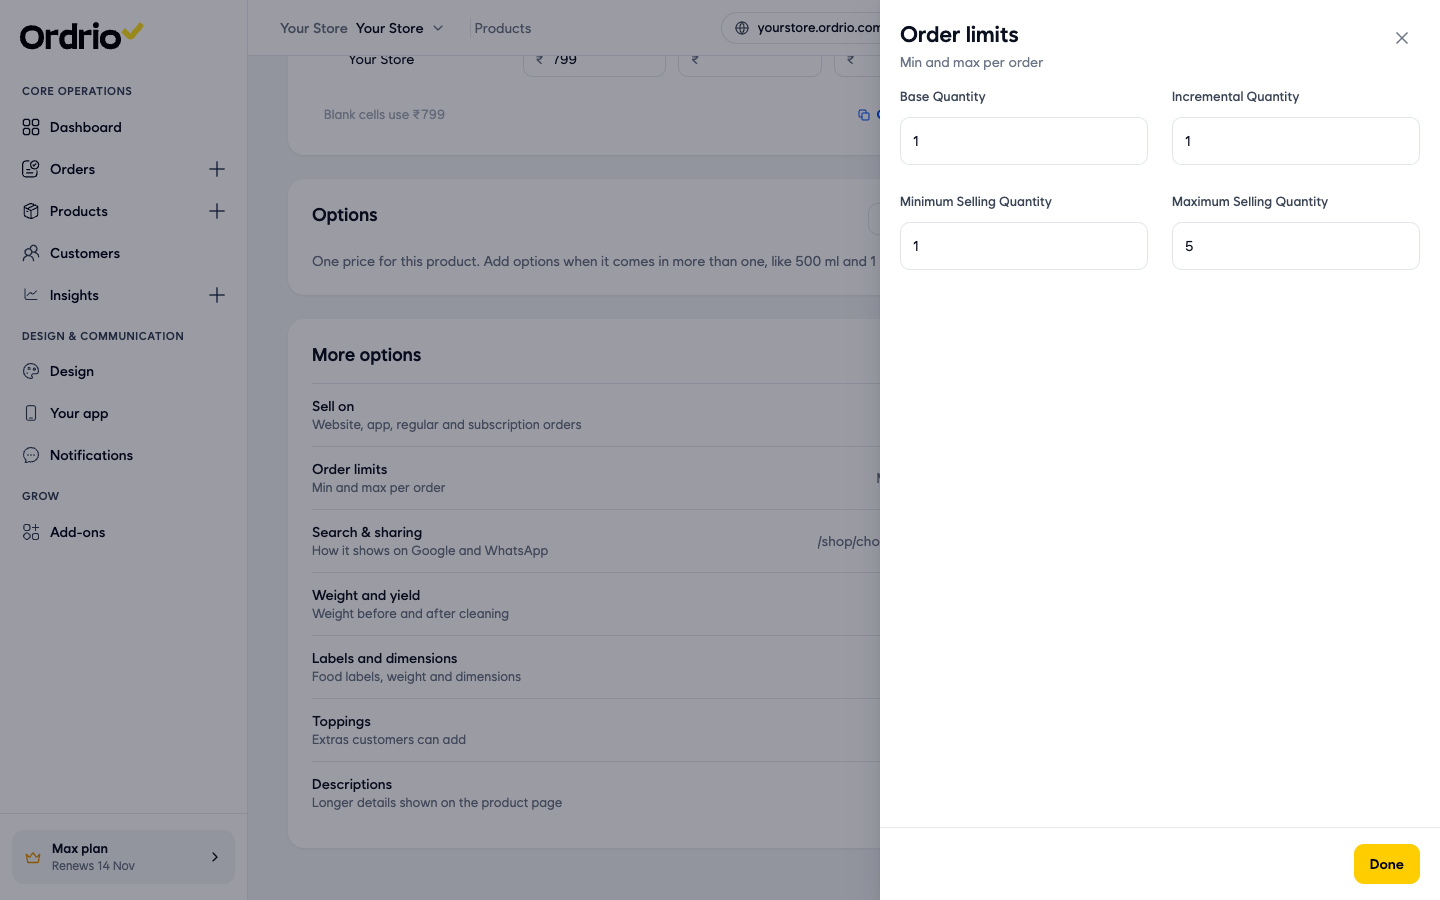
- Click Done. The Order limits row now shows your numbers, for example "Min 1 · Max 5".
- Click Save product in the Unsaved changes bar at the bottom of the screen. Ordrio saves the product and takes you back to Products.
Update stock for many products at once
- In the menu on the left, click Products, then Products.
- Click the arrow next to Add product and choose Bulk update.
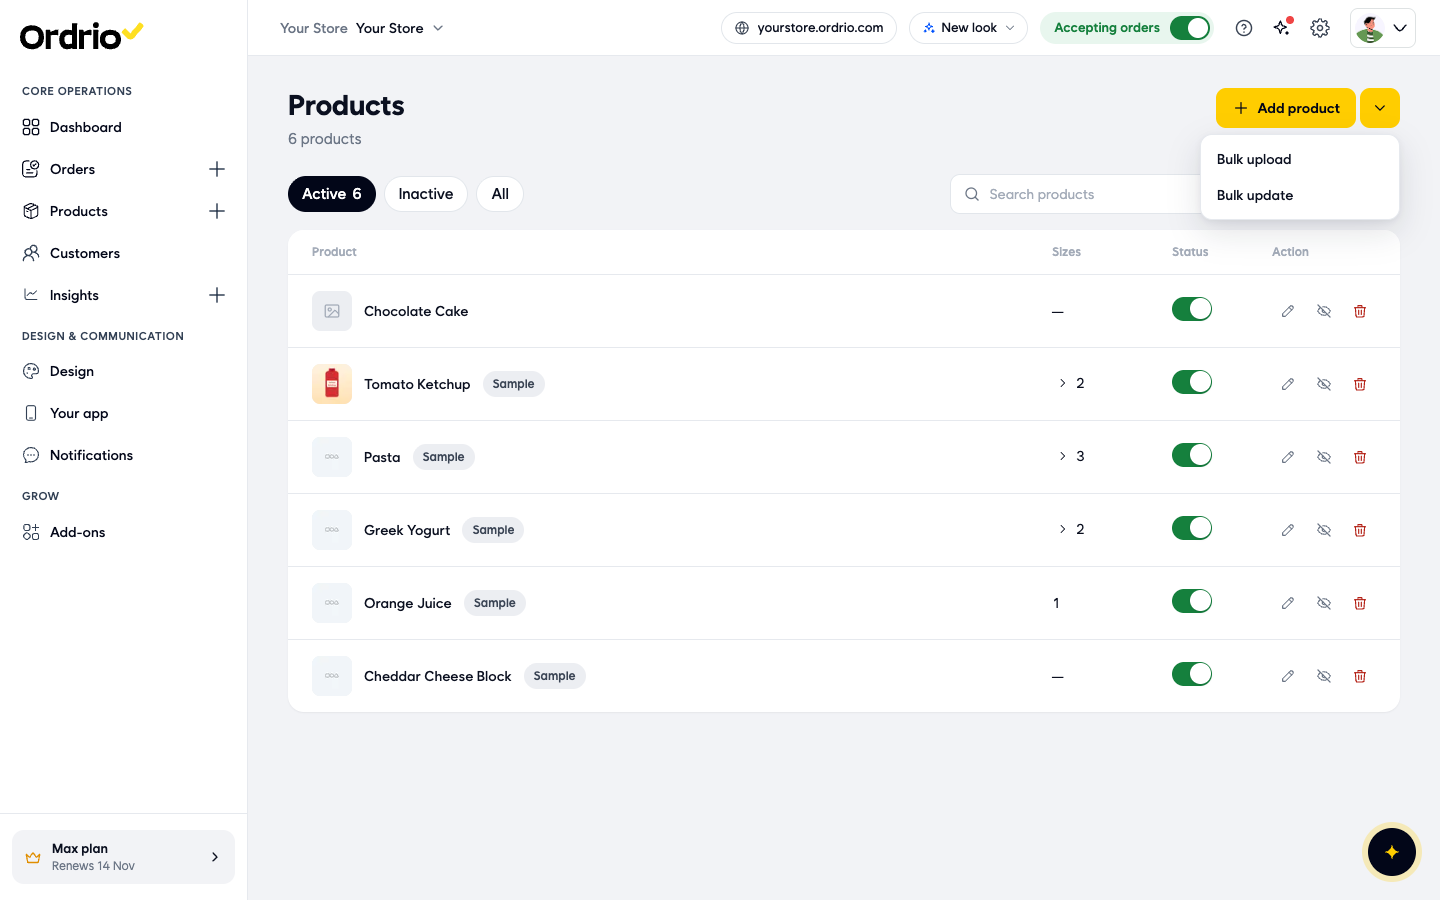
The Bulk update page opens. It shows three steps at the top: Download your products, Upload file and Check & update.
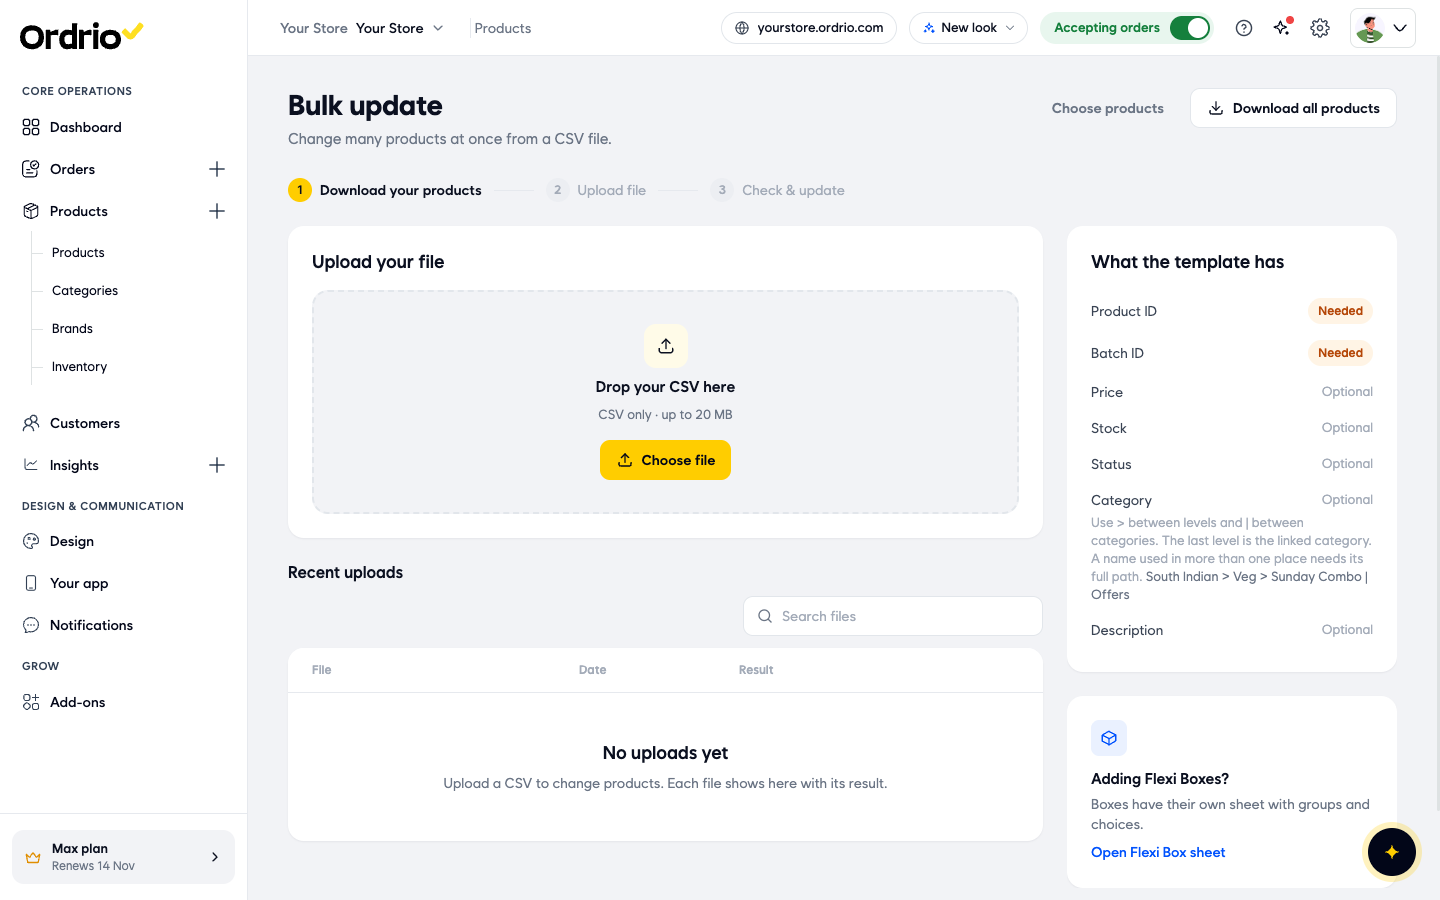
- Download a file to fill in. Do one of these:
- Click Download all products to get every product.
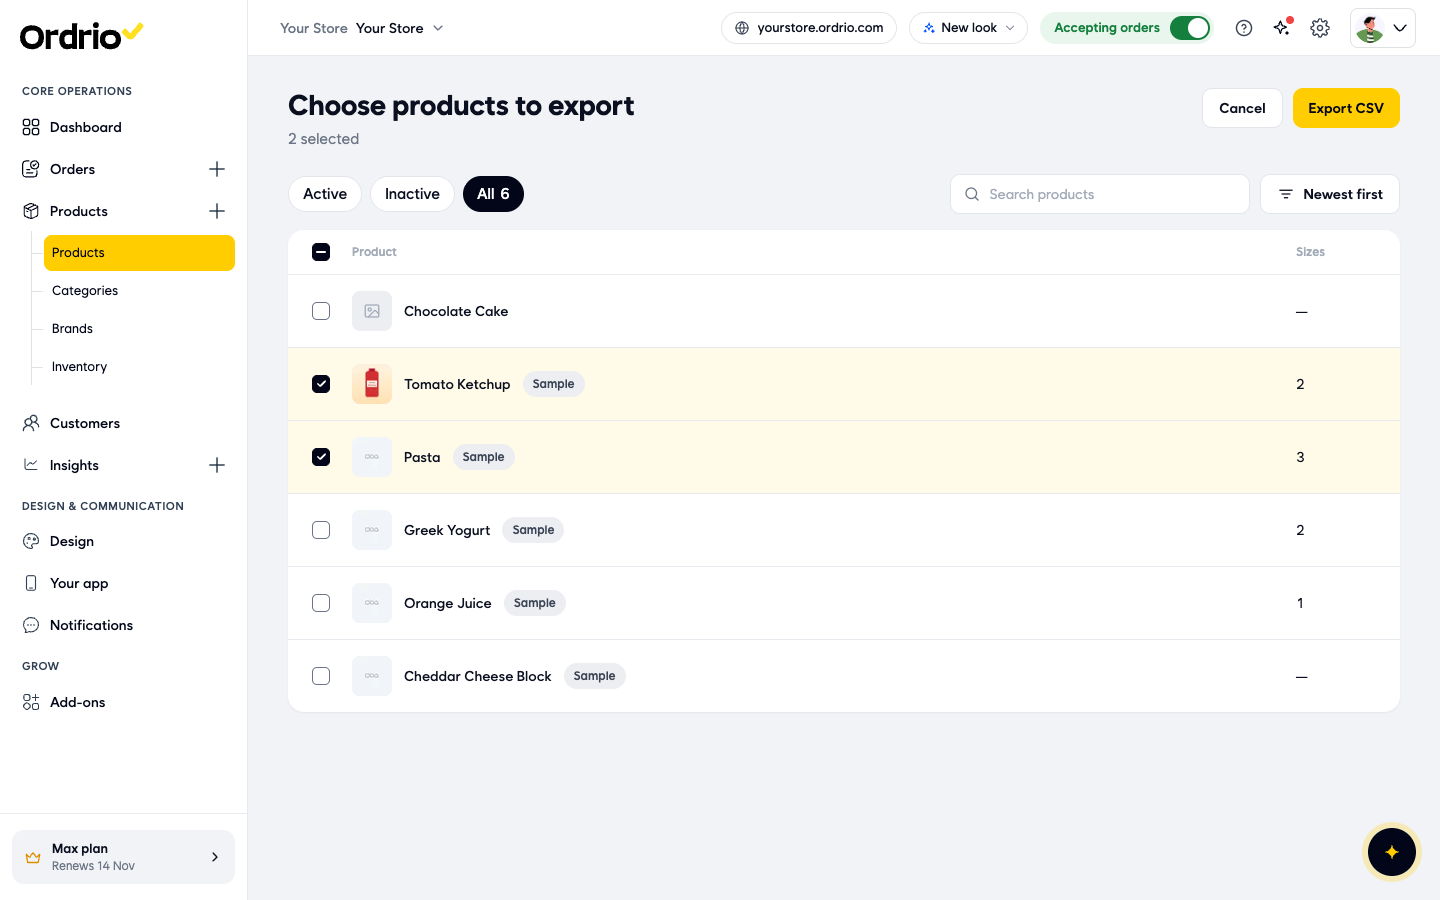
- Or click Choose products. On the Choose products to export page, tick the products you want and click Export CSV. Click Cancel to go back without exporting.
- Open the file and change the columns you need. The box What the template has lists them:
- Product ID and Batch ID: needed. Do not change these.
- Stock: the new stock level. Optional.
- Price: the new price. Optional.
- Status: the product's status, active or inactive. Optional.
- Category: optional. Use > between levels and | between categories, for example "South Indian > Veg > Sunday Combo | Offers". The last level is the category the product is linked to.
- Description: optional.
- Back on the Bulk update page, click Choose file (or drop the file into the Drop your CSV here box) to upload it. Only CSV files up to 20 MB are accepted.
- Each upload is listed under Recent uploads with its file name, date and result. Use Search files to find an older upload.
Show sold-out products at the end of your store
When this is on, customers see what is in stock first, on top of the sort they choose.
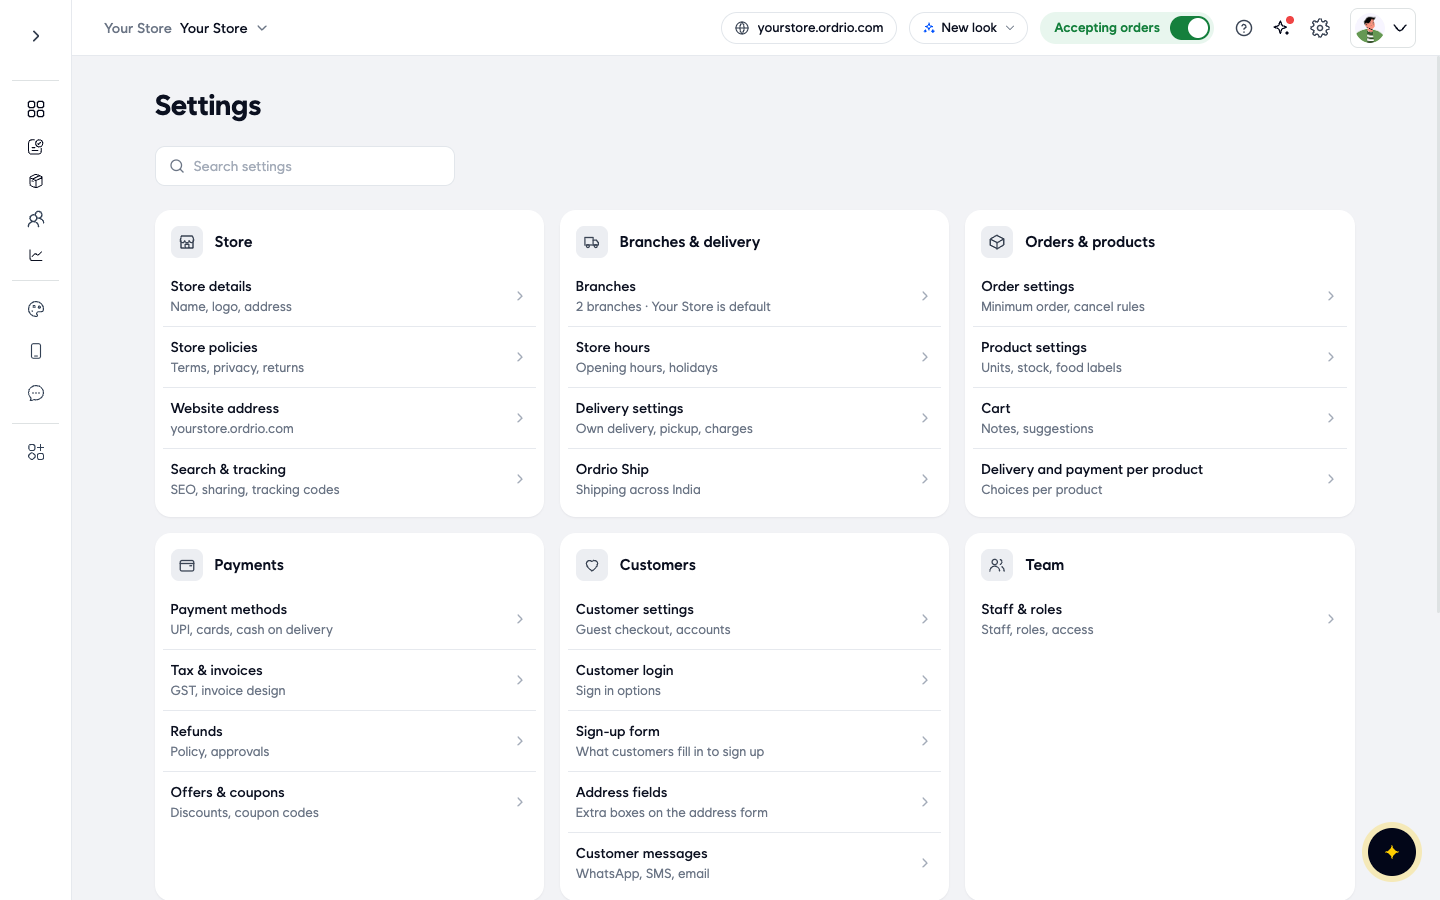
- Click Settings (the gear icon at the top right of your admin panel).
- Under Orders & products, click Product settings.
- Under Listing, turn on Show sold-out products at the end. It saves at once and a Done message shows. You do not need to click a save button.
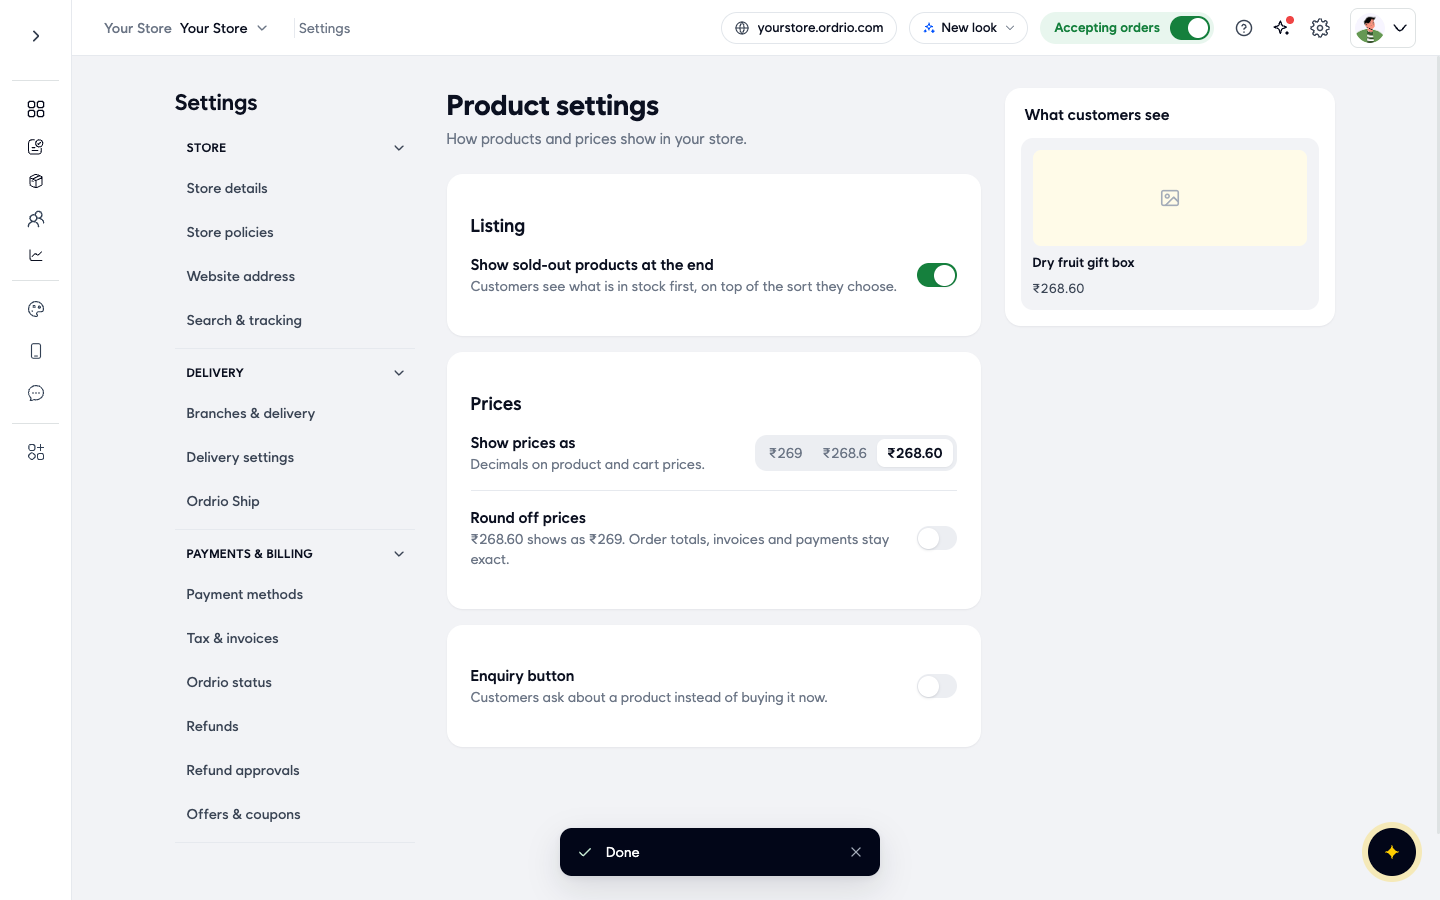
To go back to the normal order, turn the switch off again.
Good to know
- Products with options (sizes) have their own stock for each option. Edit them with Edit options on the product page, or on the Inventory screen where each size has its own row.
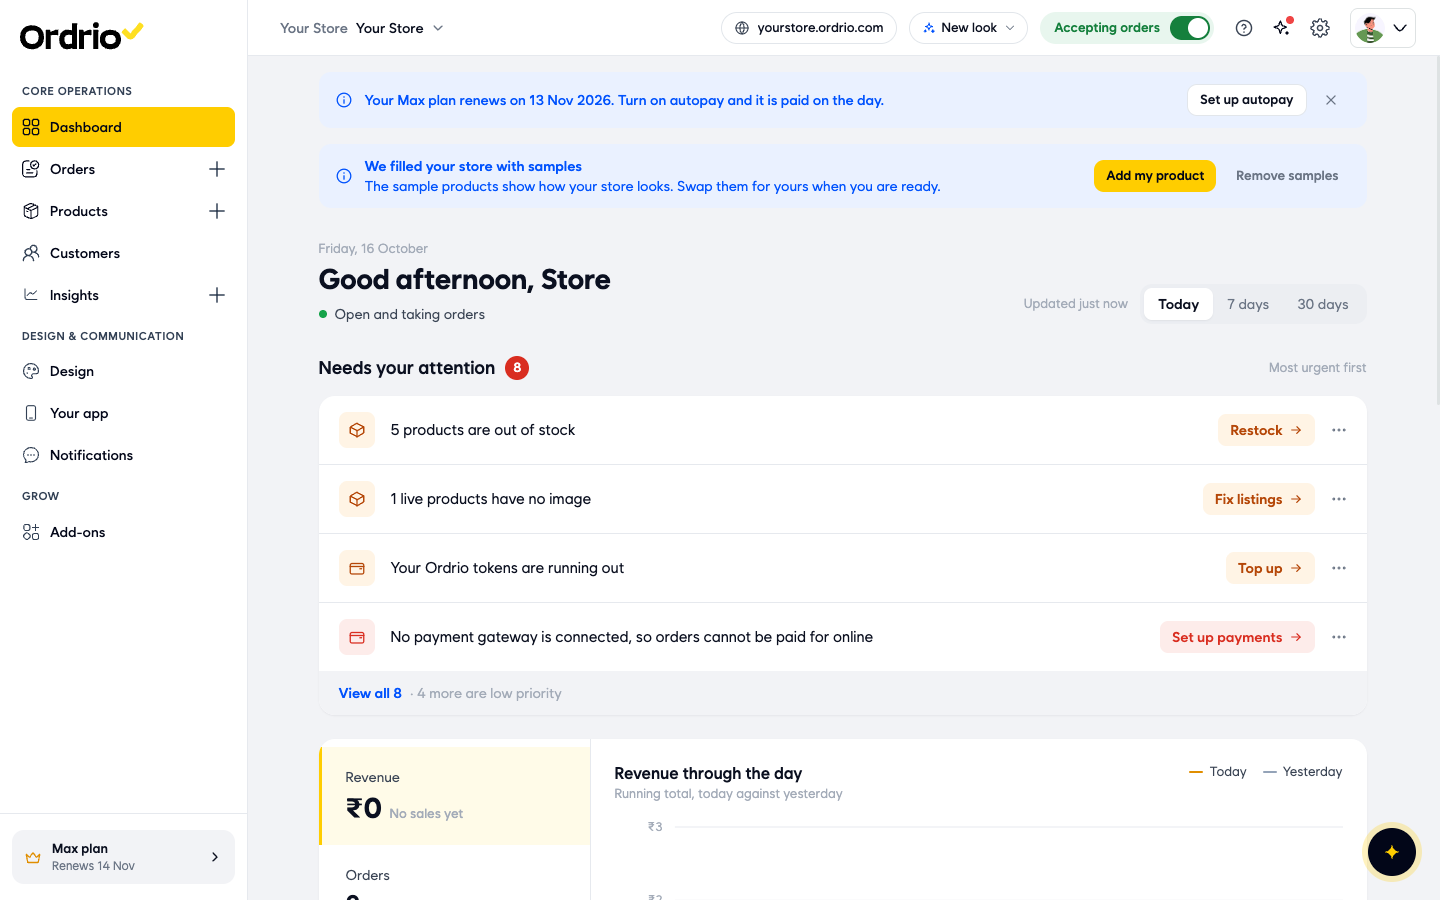
- Your Dashboard shows how many products are out of stock under Needs your attention. Click Restock to go to the Inventory screen.
- Changes on a product page are not saved until you click Save product.
- In Bulk update, keep Product ID and Batch ID as they are in the downloaded file. They are needed for every row.
Related
- Adding your first product
- Product variations and options
- Bulk product upload
- Branch-level inventory