How-to guide
Setting up your store profile
Add your store name, address, contact details and basic settings.
Your store profile is your store's name, logo, address and contact details, plus a few basic settings like your business type and currency. Customers see these details on your website and app, so set them up first.
The screenshots show example values such as "Your Store", 90000 12345 and owner@yourstore.com. Type your own store's details, not the examples.
Steps
- In your Ordrio admin, click the Settings icon (the gear) at the top right. Settings opens on Store details. You can also get here from Settings, then Store and then Store details in the menu on the left.
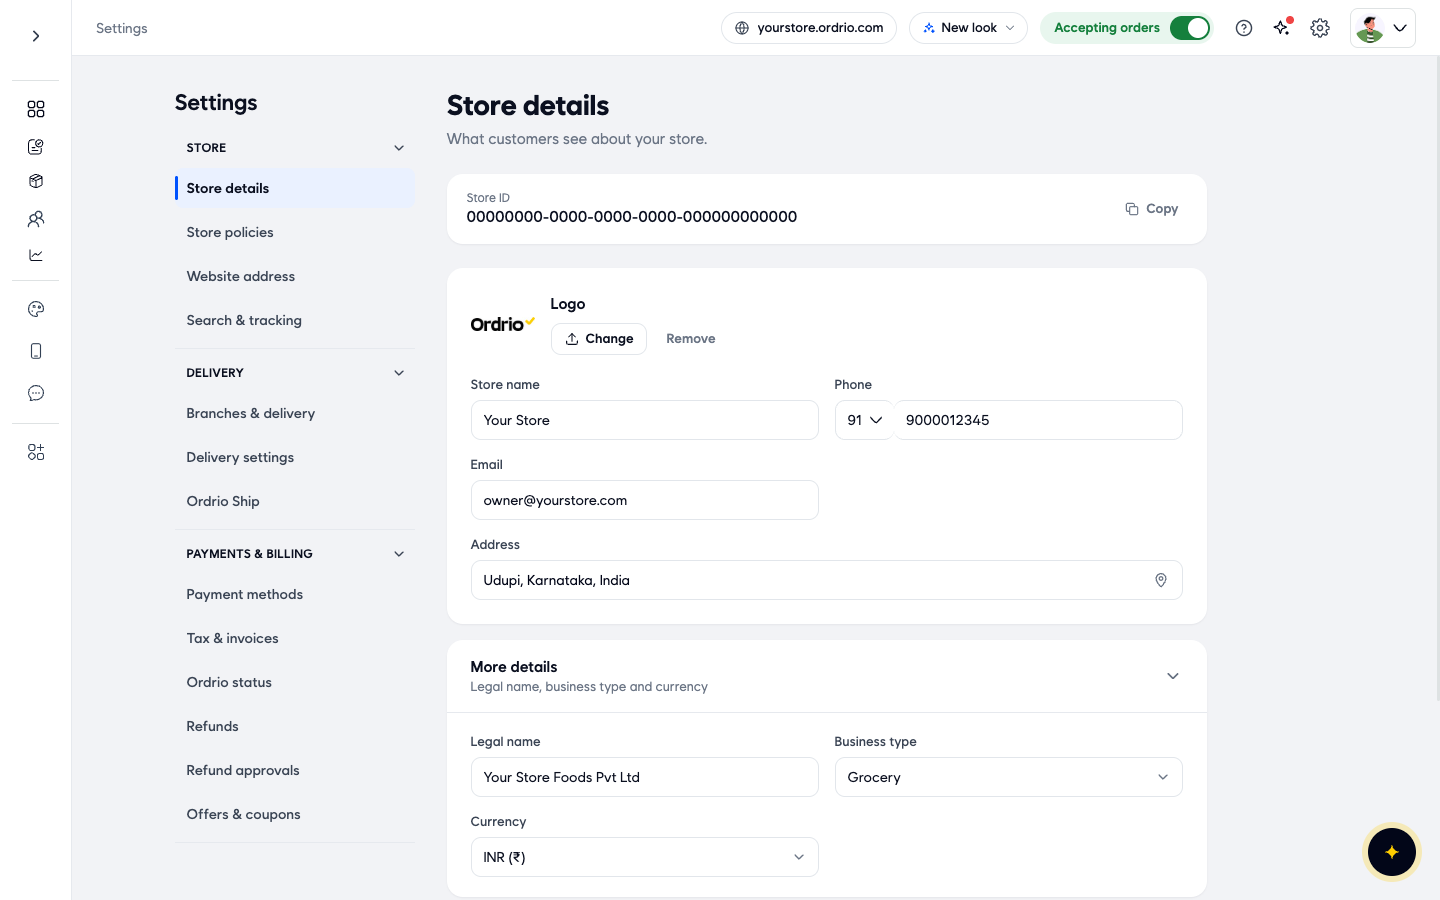
- Look at Store ID at the top. This is your store's unique ID. You don't need to change anything here. Click Copy if you ever need it.
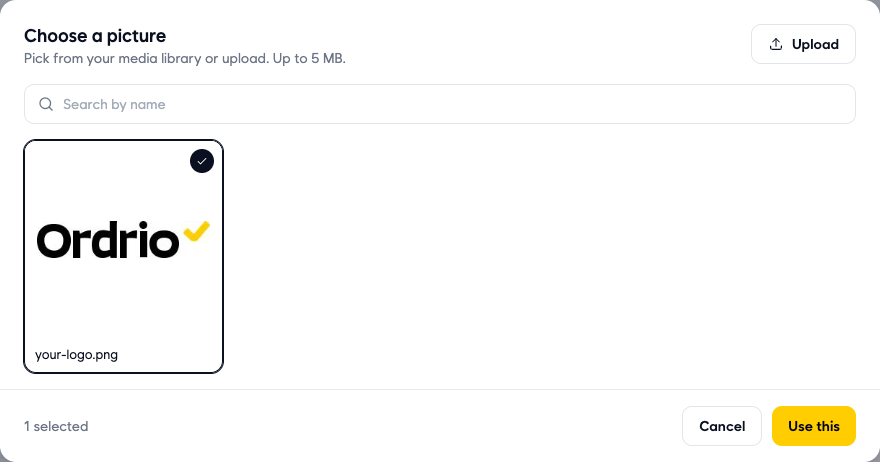
- Next to Logo, click Change. The Choose a picture window opens. Pick a picture from your media library, or click Upload to add a new one from your computer (up to 5 MB). Use Search by name to find a picture you uploaded before. Click Use this to put it on your store, or Cancel to close the window without changing anything. To take a logo off, click Remove.
- In Store name, type the name customers know your store by, for example "Your Store".
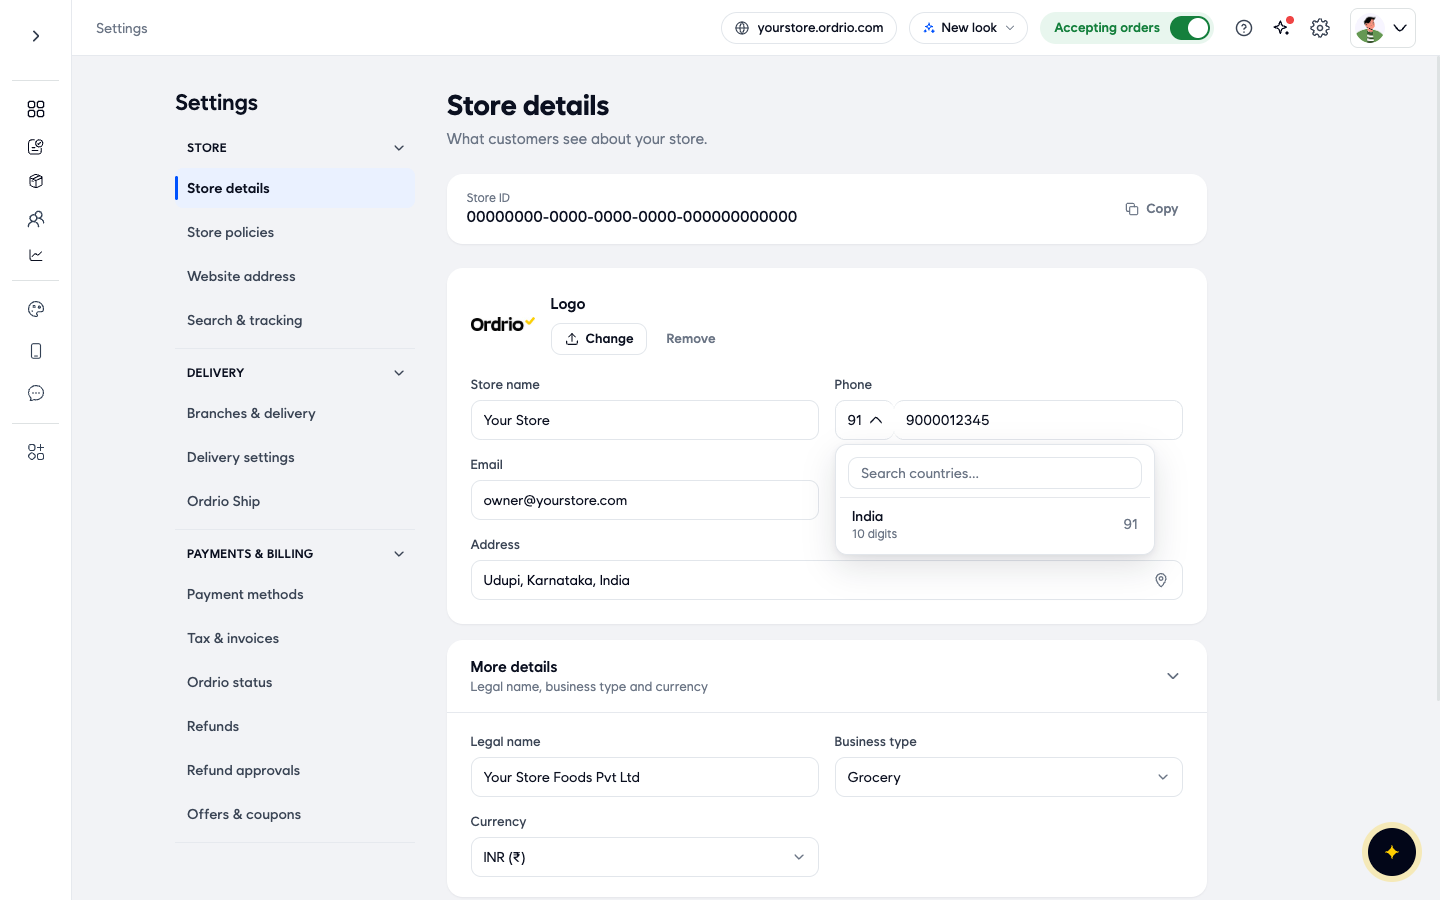
- In Phone, check the country code and type your store's contact number. Click the country code to search for your country. Each country shows how many digits its number needs (for India, 91 and 10 digits). Type your own store number, not the example shown.
- In Email, type the email address customers can contact you on. Use your own store email, not the example shown.
- Click the Address field. The Select Business Location window opens. Click Current Location to use where you are now, or click Change to search for your shop's location. When the right place shows, click Confirm.
- Open More details (Legal name, business type and currency) and fill in:
- Legal name: your registered business name, for example "Your Store Foods Pvt Ltd".
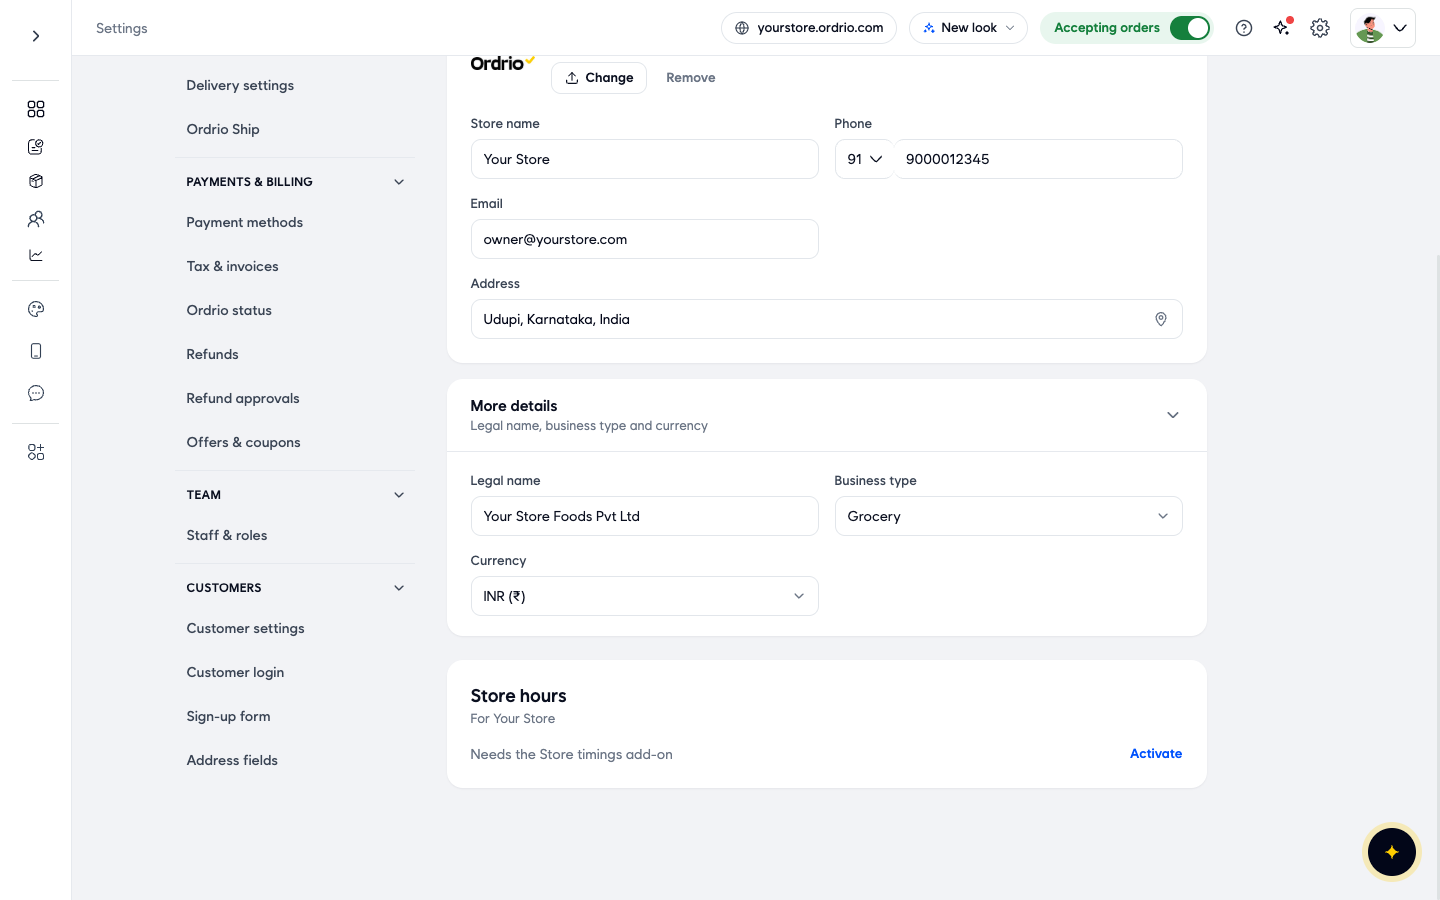
- Business type: choose what you sell, for example Grocery, Restaurant, Pharmacy, Supermarket & Grocery Store or Others.
- Currency: choose the currency you sell in, for example INR (₹). The list also has AED, AUD, BDT, GBP, JOD, SAR and USD.
- When you change anything, a bar saying You have unsaved changes appears at the bottom. Click Save. To undo your changes instead, click Discard.
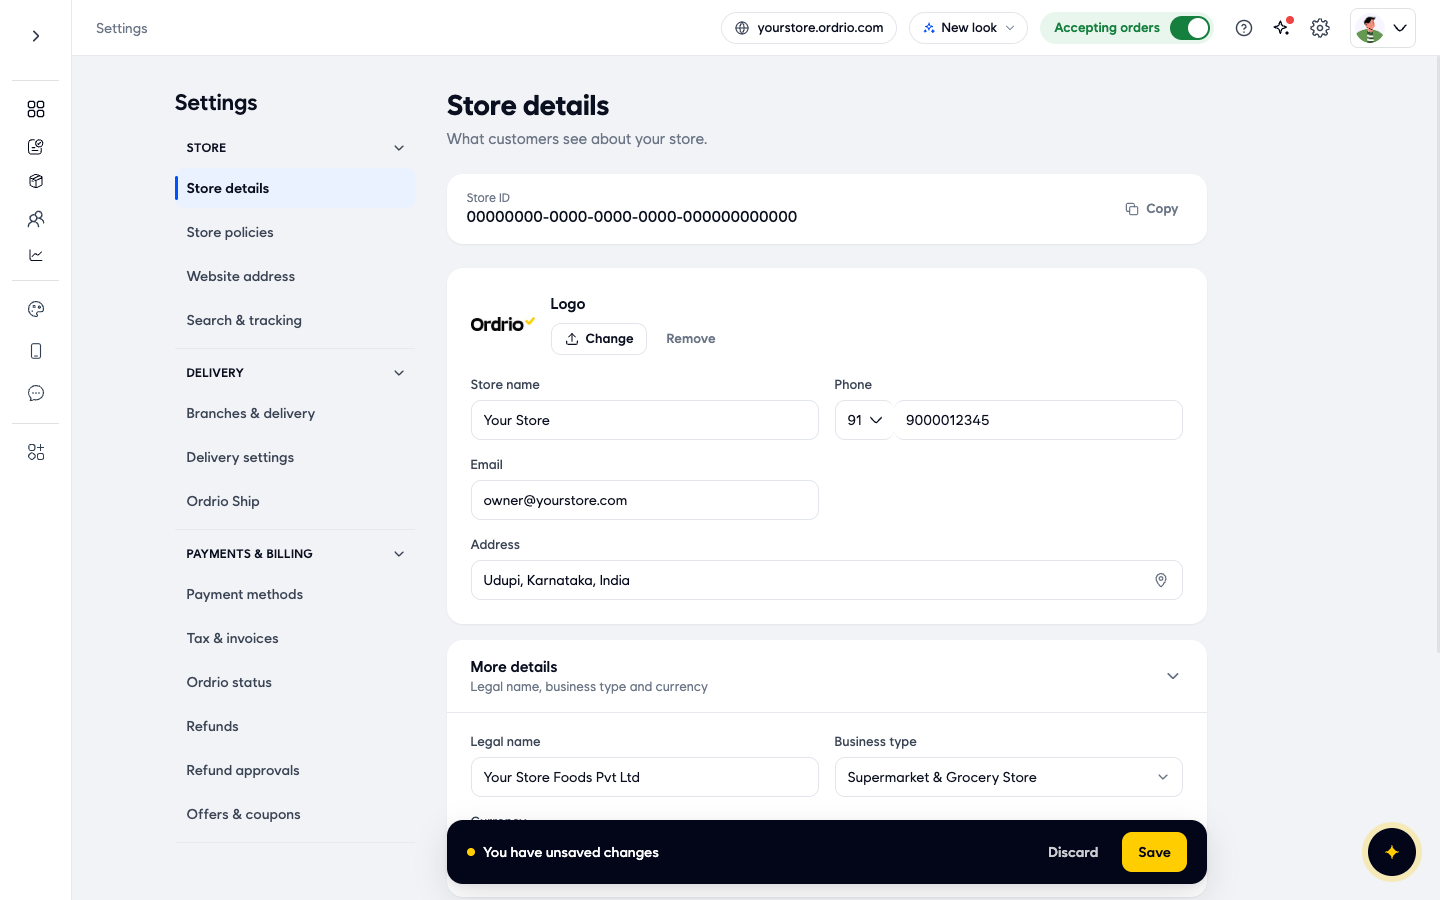
Once your details are saved, the bar goes away and the page shows your saved details. They are still there when you come back to the page.
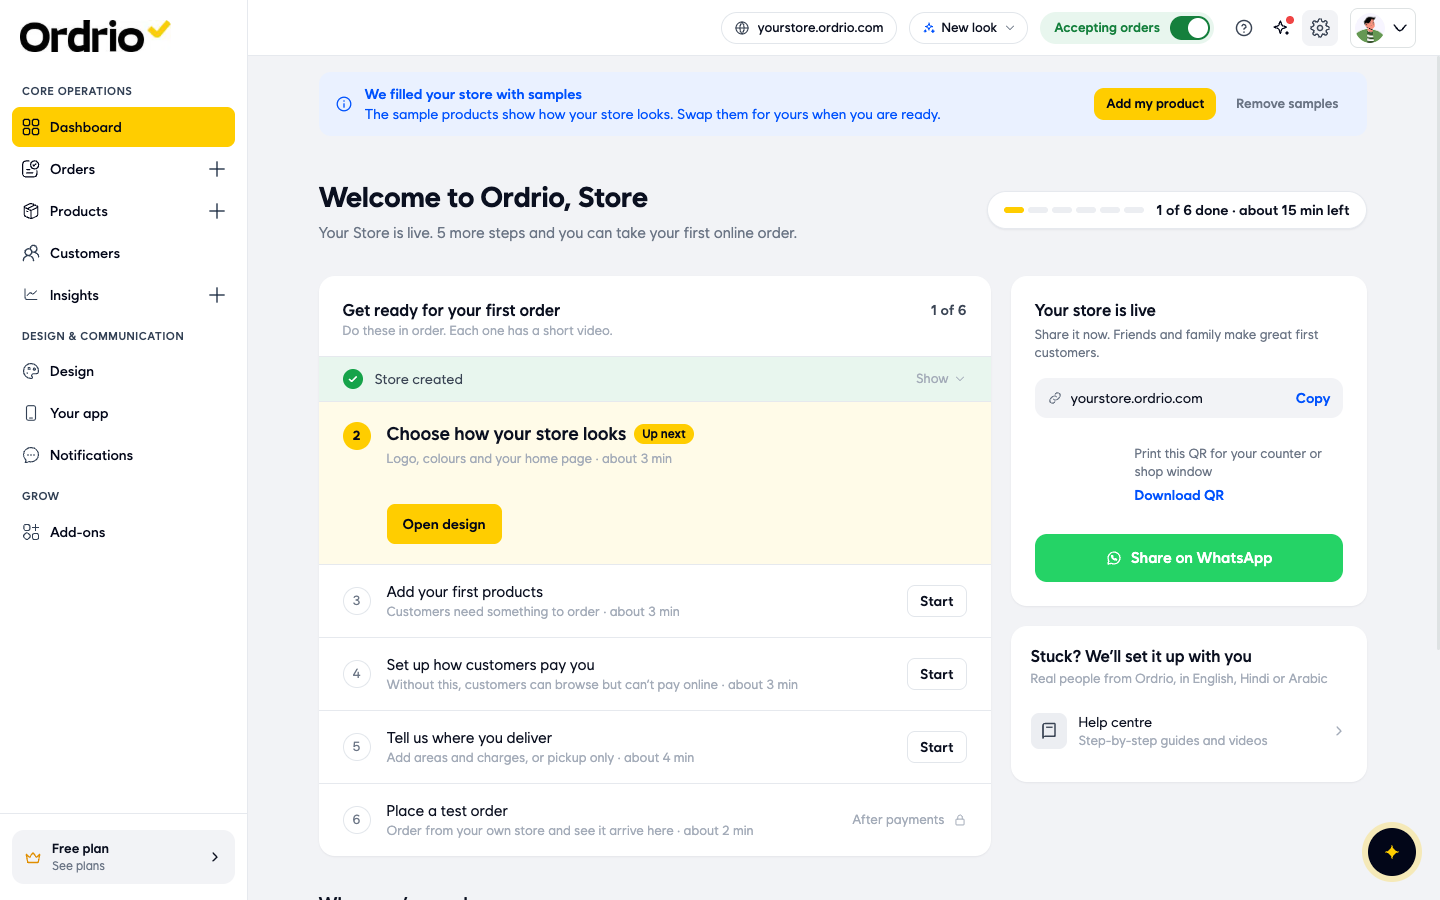
- Go back to Dashboard. Under Get ready for your first order, step 1 now reads Store created with a green tick, and the count shows 1 of 6. Step 2, Choose how your store looks, is marked Up next, with an Open design button.
Good to know
- Before you save your store details for the first time, step 1 under Get ready for your first order on the Dashboard reads Add your store details, with an Add store details button that opens this page. After you save, it changes to Store created.
- Nothing is saved until you click Save. This includes a new logo picked with Use this.
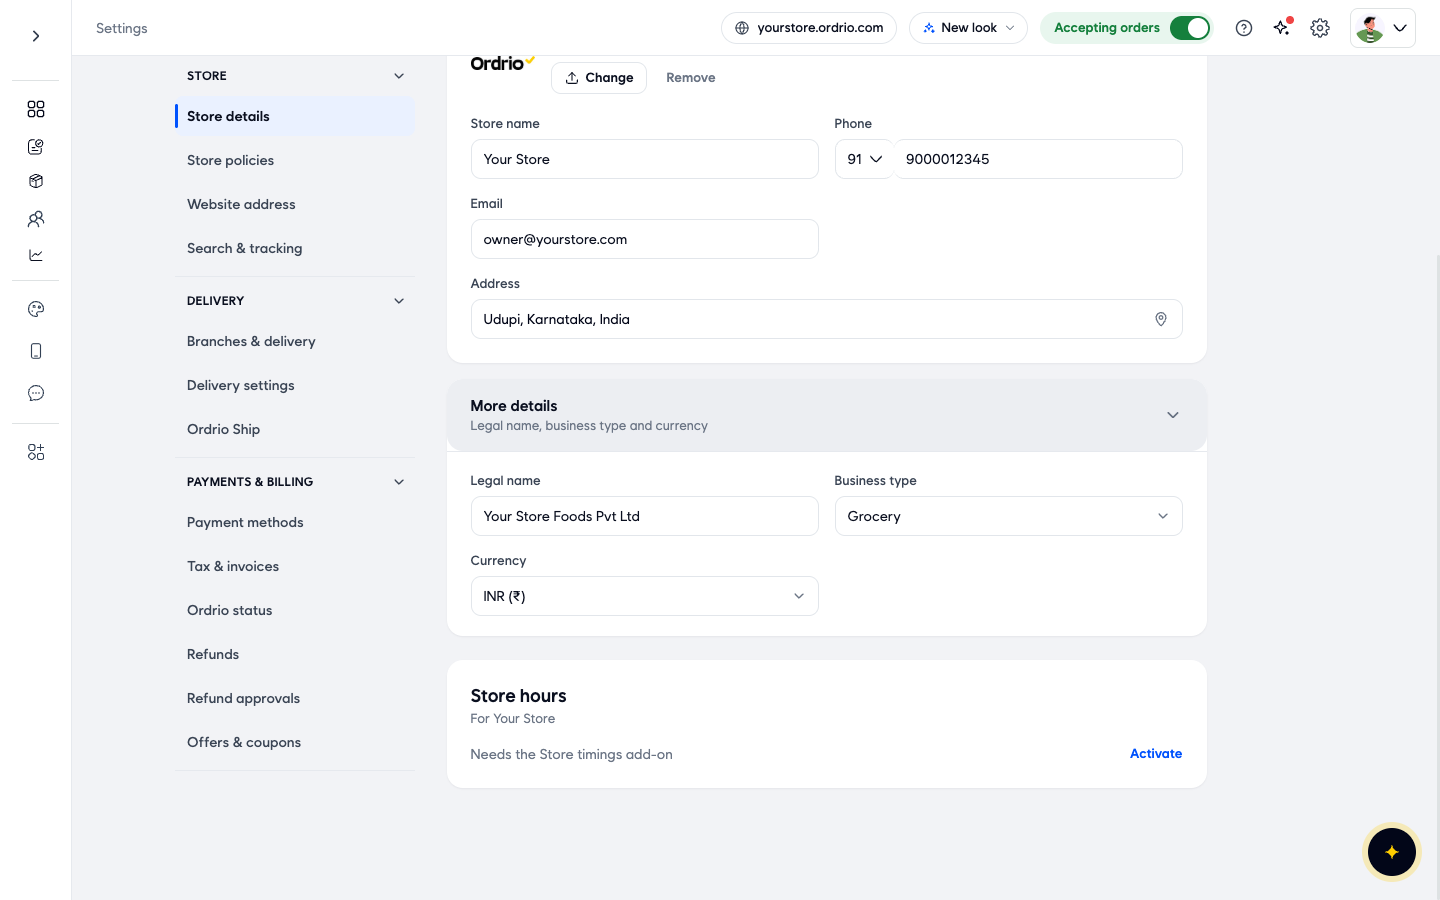
- Store hours is at the bottom of Store details. It needs the Store timings add-on. Click Activate to open it in Add-ons.
- The Choose a picture window shows the pictures in your Media library (Settings, then Files & data).
- Use a phone number and email you check every day. Customers use them to reach you.
Related
- Recommended setup order for new stores
- Accessing Ordrio for the first time
- What you need before getting started
Was this article helpful?